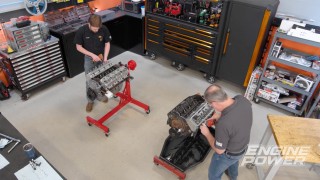
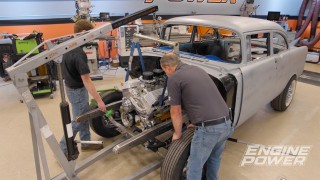
In This Episode
- 0:00 Introduction and Project Overview
- 0:46 Engine Block Preparation
- 2:25 Rotating Assembly Mockup and Clearance
- 5:03 Block Deburring and Modifications
- 7:34 Turbo Kit Planning and Vehicle Overview
- 10:06 Turbo Installation and Piping
- 13:46 Crankshaft Balancing
- 16:54 Painting and Coating
- 20:02 Final Assembly of the Engine
Video Transcript
[Frankie] You're
watching Powernation.
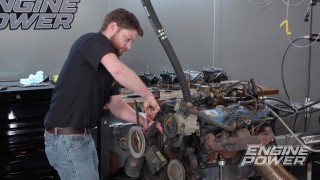
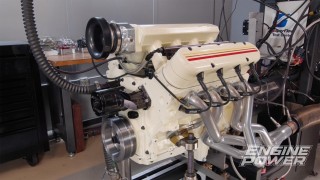
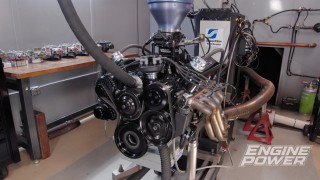
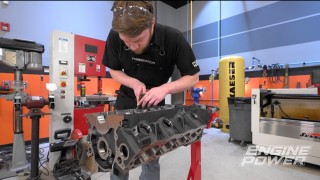
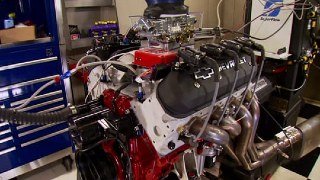
[Pat] Happening today on Engine Power it's a Gen-1 small block Chevy with a twist as we team up with Blacktop Speed Shop to build a turbocharged stroker for their latest project. [Frankie] We fab up a custom turbo kit, get it balanced, paint it, and kick off assembly. All on the way. So don't go anywhere. We'll be one step closer to dynoing. [Brian] We can't wait. [ Music ] [ compressed air hissing ] -Hello everyone and welcome to Engine Power. Today we've got a fun project going on. We got a request from our buddies down at Blacktop Speed Shop for a new powerplant for their project that's coming up. It's gonna be pretty cool and we'll get to that later. What we have here is a block from ATK for the foundation. This obviously is a small block Chevy. That's what they wanted. This comes to us fully machined. It's been bored and honed. The deck's set. The align hone's been done. It even has cam bearings and freeze plugs already in it. We're gonna turn this into a 383 stroker. Not only that, we're gonna put some artificial atmosphere to it. But that comes later. What are we doing for parts? Funny you should ask. -For this combo it's gonna be 385 cubic inches. We got a 4.040 bore and we're gonna pair that with our 3.750 inch stroke. Very common combination. Now the blocks are plenty strong enough for the power level we're looking for but we need to upgrade the rotating assembly to make this thing durable. So we have a set of forged rotating assembly components from Summit Racing Equipment. What we need to do is mockup some of these components so we can clearance the block because we are gonna have interference issues with the rod bolts and the edge of the block. We're gonna show you how to set that up, mark it out, and clearance it. To get ready for the crank we'll start with some mockup bearings in the number one and number five main journals. For now the rest are not required. We'll lube them with some regular engine oil and drop the crank in place. The caps can go on and they're torqued to spec so the crank can spin freely. [ torque wrench beeping ] -We'll put a piston and rod assembly in without the rings and get it tightened down. Then we'll rotate the engine to our interference point. Next we need to mark the exact position of where we need to grind and then do that for both sides. With a large radius carbide burr we'll remove just enough material so the rod bolt has a minimum of 60 thousandths clearance. We have done plenty of these. So we have good idea on how much to grind, but if this is your first time take it slow and take your time. It's much easier to remove material than to put it back in. It's perfectly fine if you have to mock it up several times. -Next we move on to our normal deburring process. Something we do to every engine we build. Smoothing out all the places where oil flows improves oiling while also making the block safer to work with by removing all of its sharp edges. On small block Chevys, along with the block, we also port the rear main cap since the oil pump is mounted there. Another operation we like to do is convert the press-in oil gallery plugs to threaded ones to increase serviceability. These are tapped to quarter inch NPT. These are easy because we don't have to drill out the holes. They are already the correct size for the tap. -Finally we go over the entire block with a carbide burr to smooth out the remainder of the rough edges. Remember to use light pressure and let the tool do the work. A hand file is also used near critical machine surfaces for more control and precision. What do you think this engine's gonna make? -This one? Not much. It's mostly plastic. Coming after this we get a first look at what this turbo powerplant is going in and build a custom hot side to spool up the spinny boy.
[ Music ]
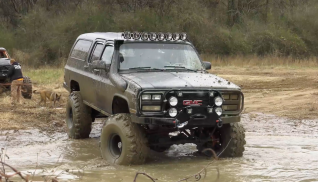
[Frankie] There's probably pretty good. Thanks for bringing this down. The idea is to try and build the turbo kit for this 383 around the vehicle. We're just gonna get the engine, heads, headers in and start building the hot side stuff. I think this is every thing we need. We haven't talked about what this is going in. Tell us a little bit about the project, what it is, and what it's gonna be when finished. [Brian] It's a 1996 GMT-400. A two door Tahoe. Originally four wheel drive vehicle converted to two wheel drive. We're building a '90s nostalgic build. That's what we're looking for. [Jason] We want to stay away from LS swaps too. Everybody does LS swaps. I like a Gen-1. We decided to go with a Gen-1 but wanted a turbo too. [Pat] You are wise beyond your years. We like the Gen-1 stuff. The vehicle being here is advantageous. Usually just build it for the dyno and then have to refabricate something when it goes in the vehicle. This is a prime opportunity to get it in, do it right the first time. -We also converted to a six speed manual from the automatic that was in it so we could get that stick shift feel with the turbo. We're all for it. Two tone interior, low stance, just right from the '90s. We're going back to the '90s. That's what we're looking for. -Gen-1 small block Chevy, that was out of production by the time your were born. That's a great architecture. -You're pretty close in there yourself cowboy. -I was after thE LS started. I'm not saying nothing. Thank you for bringing it down. We'll get it all set up and be one step closer to dynoing. -Appreciate IT guys. -To start our process we'll put our plastic mockup block in and figure it out from there. -Wish they were all this easy. -If they were all that light we'd be good. -Don't get all caught in there. What do you think this engine's gonna make? -This one, not much. It's mostly plastic. [ laugh track ]
-Where we gonna put the turbo? We've got some decision making to do. -I feel like it's gonna be here or here. Let me get it quick. Got front drive there. So we're gonna come around that. I think this side would be easier because of the downpipe. We can sneak it right past that header above the frame rail. We'll work in that direction until we run into any issues. To mount the turbo we're gonna try not to do as much welding on this car as we can. So we're gonna use the factory battery box mount. We had Brandon cut up this plate. We bent it to the right angle and this thing's gonna bolt in place and give us a decent point to mount our turbo at the right angle. Then we got a brace for it as well that we can use to help support it. For our turbo we have a 78-75 VS Racing from Summit Racing Equipment. This is the same exact turbo we ran on our 460 big block Ford, which that thing made decent power and a lot of torque and cubic inches. For this build it's gonna be sized pretty well. Then we have a little brace here to help stabilize it. It bolts to the inner fender well. That kinda tucks in here. [ Music ]
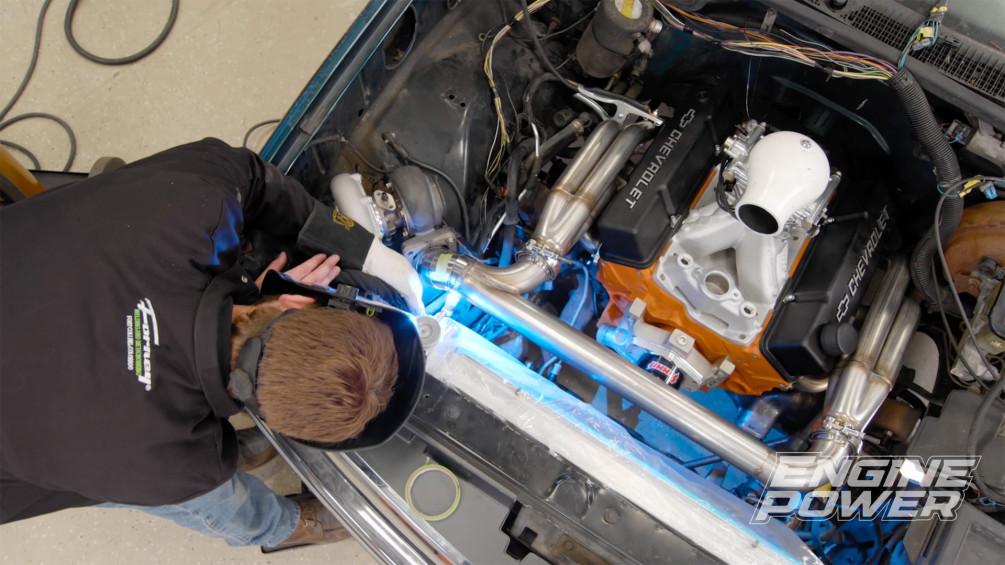
Like that. You see how bouncy it is right now. We'll get that bolt, stick it in, and it'll stiffen right up. -Now for the deceivingly difficult task of routing our pipes. It may seem straightforward but getting there will present some challenges. We are making this two and a half to three merge from scratch. Although it is time consuming it ensures a perfect fit. Everything is tacked together as we go because if we have to change or alter anything it will be easier to get apart. Obviously this is way more extensive than fabricating one for dyno use only but the time we take here will save us time down the road and we'll get an accurate measurement of power if we use this system specifically designed for it. -We're doing our best to make this a clean installation. So placement of everything is vital. [ Music ]
So this is the struggle with turbo kits and confined spaces. Don't forget we have a full accessory drive. That's why we went with this design. We're trying to get everything around that. Originally we were gonna connect our turbo to our pipes with a set of three inch mandrel bends but it's not enough space. So we have to ditch that idea. What we have instead is a set of pie cuts. We're gonna put that in there like that. We have all these tacked together and set. Then we just have a thin spacer ring that goes in with them to fill that gap. We'll get that tacked in. Then we can figure out where our waste gate needs to go. Our 60mm waste gate is positioned so it's easy to route the pipe with the exhaust. We mark a precise location and then fit the pipe to match the contour to ensure an easy weld. The V-band gets tacked to our piece and then the piece is tacked to our crossover. A final test fit confirms we got everything just right. [ Music ]
-Still on the way, we turn this rotating assembly to perfection in our crankshaft balancer. Then we splash on the color Blacktop Speed Shop chose to go in the turbo Tahoe.
[Pat] Frankie's got that hot side turbo setup looking great and he's still working on it. While that is going on I'm gonna balance the crank. We've got a special setup for this because this is a Gen-1 small block that's gonna make a little bit of power. That doesn't mean we can't get affordable high quality parts for it. We got some forged rotating assembly components from Summit Racing Equipment. We have a Pro SBC crankshaft. This is a 43-40 crankshaft that has a 3.750" stroke. It has .125 radius fillets on it so it's strong. It's gonna work great for our application. Also we have a high quality piston. This is Summit's Pro SBC piston setup. These are made of forged aluminum. They come in either 26-18 or 40-32 alloy depending on the application. These have a 1.5mm, 1.5mm, 3mm ring. It also comes with a support rail because the lower ring intrudes into the pin boss. So it needs support. We have a high quality set of wrist pins that come with it and wire locks. With that we also have Summit's Pro SBC connecting rod. This is an H-beam design with a .927" pin, six inch center to center length, and ARP 87-40 bolts in it. We also have Summit's bearings, which are an ACL performance bearing. Last but not least, a set of Summit Racing gas ported piston rings. All these things are weighed up. We got our bob weight card built on our CWT here. Also we have the bob weights made and on the crankshaft just to save time. So our bob weight is 1,776 grams. I got it set to go. We're gonna close that and give it a first spin to see what we're gonna have to do to the crank. Normally these cranks are set up to have a bob weight around this. So we'll probably have to remove material, but you never know until you spin it. Not too shabby here. On the back right in the middle of the counterweight we need about 85 grams off it. We set up our tolerance for eighth ounce inch. On the front very low. It says seven grams. That is going to change because the amount of material we have to remove from the back will affect the front. Because of the way this measures it takes an average of both stanchions. So when we get most of the material off that back that will probably increase the front a little bit. We can do this a couple of different ways. We can either drill a giant hole in it. On here we'd need a one inch hole that's 140 thousandths deep, or we can do it a cleaner way and take this, put it in the lathe, and remove material off that back counterweight and see how we can get it a little bit closer. So if we have to drill it it'll be one small hole instead of a giant one. So we'll get the bob weights off, get that back counterweight cut, and then respin it. We knew because we've balanced lots of cranks about how much it's gonna take off. At two hundred thousandths we're gonna finish this cut, get it back on the machine, and see where we're at. Now we wait. See, that's really nice. From the back we went from 85 grams down to 19 and it looks like it's in the exact same spot. Gonna pop a small hole in it. Get this thing done. We're ramping it up to 750 rpm because we're close. Had to take a little bit off the front of the crank in the lathe and pop a couple of holes in it with the drill. I think we are ready to rock 'n roll. We are balanced to tolerance. We are .119 ounce inch, just under a gram on the back. .83 grams on the front and .103 ounce inch. We are under our eighth ounce inch tolerance. So we are good. That being said I'm gonna get it out of here, get it cleaned up and polished up. Meanwhile Frankie has some cool stuff going. [Frankie] That's to MES we have our own paint booth that's easy to set up, take down, and fits perfectly in our shop. Here we go! [ Music ]
We're gonna start painting all the parts for our 383, and we like to do this before we get to assembly. That way everything is final cleaned and all modifications are done like this dash-10 oil drain we added to the oil pan. We're gonna be painting it in this MES 10 by 10 by 8 booth. The last time on our 318 it worked awesome. Brian and Jason absolutely love the 632 engine we did for Music City Trucks. They said give us that. So the theme on this engine's gonna be bright red with aluminum accents. So everything is gonna be either bright red or aluminum. We're gonna paint some stuff, leave some stuff natural, but we need to get the stuff we're painting into rust preventative coating first. Starting off we'll mix up some POR-15 Rust Preventative coating. To ensure the coating sprays evenly we need to reduce it down around five percent to get the right consistency. We start by spraying a couple of light coats to build adhesion, and then a few medium coats for an even coverage. The better the coating lays down the more even our color will appear and will ensure the ultimate corrosion resistance. -Once everything is dry we turn up the heat with the color Blacktop Speed Shop chose for this engine, POR-15's classic Ford red. With the red thoroughly mixed and reduced we'll head back into the MES booth and cover everything with a few layers of paint. This is a similar process. One medium coat to provide the initial layer and help with paint adhesion, and then a few heavy coats to ensure proper coverage and the right surface finish. This paint is designed to be brushed or sprayed. So it has great self-leveling properties and creates a very smooth and glossy finish. -Think your LS is special? It's not because up next we build a boost ready Gen-1 short block for big power.
[Pat] This is the last connecting rod. We're checking bearing clearances. Everything is coming out great. So hopefully this one will be in line. This one is right at 2-6. So we're between 2-3 and 2-6 for our rod bearing clearance. Frankie is just finishing up on the block side. [Frankie] For our main bearing clearances. Because this is a turbo build we're running boost we're definitely gonna stick to our minimum of one thousandths per inch of shaft. So we're between 2-3 and 2-5 on the mains, which is perfect. Everything's been final cleaned. All we need to do is get the caps off and we'll get the crank in and start putting this thing together. We used Hot Shot's Secrets Adrenaline assembly lube on all the mains to protect the engine from a dry start-up. Next we loosely install our two piece rear main seal adapter with half the seal offset. We'll tighten the fasteners after the crankshaft is in for proper alignment. [ Music ]
-The rest of the caps can go on in their corresponding positions and directions. Then seated into their register. [ Music ]
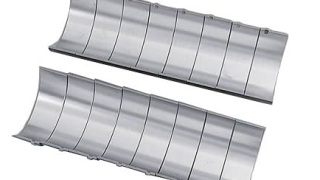
For our main fasteners we're gonna be using a set of ARP four bolt main small block Chevy main bolts. This is a complete kit that you get. We've got them all prepped now. These are made of 87-40 chromoly. So these are way stronger than the OE fasteners. Because it's a boosted application we're gonna want that increased yield strength. Help keep our caps clamped on. The way we prep these is we put their ARP Ultra Torque lube underneath the head of the bolt and then we put it on the threads as well. We keep the top of the washer and the bottom of the washer dry. Then slide it together like that. There's a chamfer on this washer and you want to make sure that faces up towards the head of the bolt. That last one is prepped. So we can start getting these in and torqued up. -We'll get the ARP bolts in and start them by hand, and then run them the rest of the way down with our battery powered impact. -It is critical that the bottom side of the washer and main cap be completely dry to prevent the washer from turning during tightening. If the washers are lubricated on both sides they act as a bearing, giving inconsistent clamp loads at the same torque setting and potentially damage the fastener or the block. ARP provides specific torque values with every bolt kit. So after snugging each fastener down they are torqued in sequence from the inside out to a final value of 70 pound feet. -Slick! With the bolts now in we'll put some more Hot Shot's Secret lube on our new Summit Racing Pro SBC hydraulic roller cam. The specs are 232 degrees duration at 50 thousandths on the intake and 242 degrees on the exhaust. The lobe separation angle is 110 degrees and both have 367 thousandths of lobe lift. With our 1.6 ratio rocker we plan on running it takes the net lift of 587 thousandths for both. This stick also has a step nose. So we'll install our stock cam thrust plate. -Our double row timing chain goes on next so we can get ready to degree the cam. Also we'll slide in the number one piston and rod assembly. We'll save the rest for when we're done. [ Music ]
A quick check of the numbers and our intake centerline comes in at 110 degrees, which is straight up. The cam gear bolts receive orange thread locker and are torqued to 25 pound feet. -Finally we'll toss in the rest of the rods and pistons. The rings have been gapped to 22 thousandths on the top ring and 24 thousandths for the second. Even with a standard tension oil ring this setup had relatively low friction. The ARP rod bolts have been checked for stretch and are final torqued to 64 pound feet. [ Music ] We have made a ton of progress today. This thing has slid together so nice and I believe we are well on our way to making some good power. Unfortunately today we have reached our stopping point. -Next time we're gonna get this thing wrapped up. I'm honestly excited not only for the turbocharged version of this engine but also the naturally aspirated version. When we're done we're probably gonna have $8,000 or $9,000 into this thing and it's gonna be able to hold 600 to 700 horsepower all day long on pump gas. I think it's gonna be a great goal. Next time we'll get it wrapped up and on the dyno. But for today I think we're doing good. -Make sure you check us out on our social media to see what's going because we always have a lot of cool stuff going.
Show Full Transcript
[Pat] Happening today on Engine Power it's a Gen-1 small block Chevy with a twist as we team up with Blacktop Speed Shop to build a turbocharged stroker for their latest project. [Frankie] We fab up a custom turbo kit, get it balanced, paint it, and kick off assembly. All on the way. So don't go anywhere. We'll be one step closer to dynoing. [Brian] We can't wait. [ Music ] [ compressed air hissing ] -Hello everyone and welcome to Engine Power. Today we've got a fun project going on. We got a request from our buddies down at Blacktop Speed Shop for a new powerplant for their project that's coming up. It's gonna be pretty cool and we'll get to that later. What we have here is a block from ATK for the foundation. This obviously is a small block Chevy. That's what they wanted. This comes to us fully machined. It's been bored and honed. The deck's set. The align hone's been done. It even has cam bearings and freeze plugs already in it. We're gonna turn this into a 383 stroker. Not only that, we're gonna put some artificial atmosphere to it. But that comes later. What are we doing for parts? Funny you should ask. -For this combo it's gonna be 385 cubic inches. We got a 4.040 bore and we're gonna pair that with our 3.750 inch stroke. Very common combination. Now the blocks are plenty strong enough for the power level we're looking for but we need to upgrade the rotating assembly to make this thing durable. So we have a set of forged rotating assembly components from Summit Racing Equipment. What we need to do is mockup some of these components so we can clearance the block because we are gonna have interference issues with the rod bolts and the edge of the block. We're gonna show you how to set that up, mark it out, and clearance it. To get ready for the crank we'll start with some mockup bearings in the number one and number five main journals. For now the rest are not required. We'll lube them with some regular engine oil and drop the crank in place. The caps can go on and they're torqued to spec so the crank can spin freely. [ torque wrench beeping ] -We'll put a piston and rod assembly in without the rings and get it tightened down. Then we'll rotate the engine to our interference point. Next we need to mark the exact position of where we need to grind and then do that for both sides. With a large radius carbide burr we'll remove just enough material so the rod bolt has a minimum of 60 thousandths clearance. We have done plenty of these. So we have good idea on how much to grind, but if this is your first time take it slow and take your time. It's much easier to remove material than to put it back in. It's perfectly fine if you have to mock it up several times. -Next we move on to our normal deburring process. Something we do to every engine we build. Smoothing out all the places where oil flows improves oiling while also making the block safer to work with by removing all of its sharp edges. On small block Chevys, along with the block, we also port the rear main cap since the oil pump is mounted there. Another operation we like to do is convert the press-in oil gallery plugs to threaded ones to increase serviceability. These are tapped to quarter inch NPT. These are easy because we don't have to drill out the holes. They are already the correct size for the tap. -Finally we go over the entire block with a carbide burr to smooth out the remainder of the rough edges. Remember to use light pressure and let the tool do the work. A hand file is also used near critical machine surfaces for more control and precision. What do you think this engine's gonna make? -This one? Not much. It's mostly plastic. Coming after this we get a first look at what this turbo powerplant is going in and build a custom hot side to spool up the spinny boy.
[ Music ]
[Frankie] There's probably pretty good. Thanks for bringing this down. The idea is to try and build the turbo kit for this 383 around the vehicle. We're just gonna get the engine, heads, headers in and start building the hot side stuff. I think this is every thing we need. We haven't talked about what this is going in. Tell us a little bit about the project, what it is, and what it's gonna be when finished. [Brian] It's a 1996 GMT-400. A two door Tahoe. Originally four wheel drive vehicle converted to two wheel drive. We're building a '90s nostalgic build. That's what we're looking for. [Jason] We want to stay away from LS swaps too. Everybody does LS swaps. I like a Gen-1. We decided to go with a Gen-1 but wanted a turbo too. [Pat] You are wise beyond your years. We like the Gen-1 stuff. The vehicle being here is advantageous. Usually just build it for the dyno and then have to refabricate something when it goes in the vehicle. This is a prime opportunity to get it in, do it right the first time. -We also converted to a six speed manual from the automatic that was in it so we could get that stick shift feel with the turbo. We're all for it. Two tone interior, low stance, just right from the '90s. We're going back to the '90s. That's what we're looking for. -Gen-1 small block Chevy, that was out of production by the time your were born. That's a great architecture. -You're pretty close in there yourself cowboy. -I was after thE LS started. I'm not saying nothing. Thank you for bringing it down. We'll get it all set up and be one step closer to dynoing. -Appreciate IT guys. -To start our process we'll put our plastic mockup block in and figure it out from there. -Wish they were all this easy. -If they were all that light we'd be good. -Don't get all caught in there. What do you think this engine's gonna make? -This one, not much. It's mostly plastic. [ laugh track ]
-Where we gonna put the turbo? We've got some decision making to do. -I feel like it's gonna be here or here. Let me get it quick. Got front drive there. So we're gonna come around that. I think this side would be easier because of the downpipe. We can sneak it right past that header above the frame rail. We'll work in that direction until we run into any issues. To mount the turbo we're gonna try not to do as much welding on this car as we can. So we're gonna use the factory battery box mount. We had Brandon cut up this plate. We bent it to the right angle and this thing's gonna bolt in place and give us a decent point to mount our turbo at the right angle. Then we got a brace for it as well that we can use to help support it. For our turbo we have a 78-75 VS Racing from Summit Racing Equipment. This is the same exact turbo we ran on our 460 big block Ford, which that thing made decent power and a lot of torque and cubic inches. For this build it's gonna be sized pretty well. Then we have a little brace here to help stabilize it. It bolts to the inner fender well. That kinda tucks in here. [ Music ]
Like that. You see how bouncy it is right now. We'll get that bolt, stick it in, and it'll stiffen right up. -Now for the deceivingly difficult task of routing our pipes. It may seem straightforward but getting there will present some challenges. We are making this two and a half to three merge from scratch. Although it is time consuming it ensures a perfect fit. Everything is tacked together as we go because if we have to change or alter anything it will be easier to get apart. Obviously this is way more extensive than fabricating one for dyno use only but the time we take here will save us time down the road and we'll get an accurate measurement of power if we use this system specifically designed for it. -We're doing our best to make this a clean installation. So placement of everything is vital. [ Music ]
So this is the struggle with turbo kits and confined spaces. Don't forget we have a full accessory drive. That's why we went with this design. We're trying to get everything around that. Originally we were gonna connect our turbo to our pipes with a set of three inch mandrel bends but it's not enough space. So we have to ditch that idea. What we have instead is a set of pie cuts. We're gonna put that in there like that. We have all these tacked together and set. Then we just have a thin spacer ring that goes in with them to fill that gap. We'll get that tacked in. Then we can figure out where our waste gate needs to go. Our 60mm waste gate is positioned so it's easy to route the pipe with the exhaust. We mark a precise location and then fit the pipe to match the contour to ensure an easy weld. The V-band gets tacked to our piece and then the piece is tacked to our crossover. A final test fit confirms we got everything just right. [ Music ]
-Still on the way, we turn this rotating assembly to perfection in our crankshaft balancer. Then we splash on the color Blacktop Speed Shop chose to go in the turbo Tahoe.
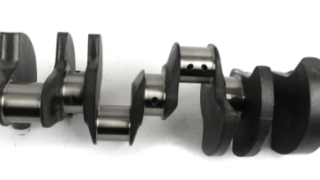
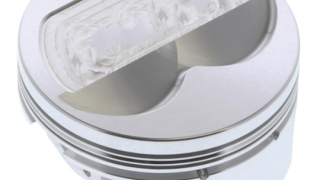
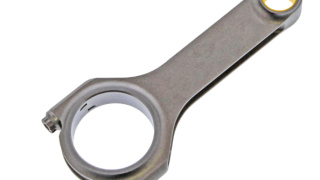
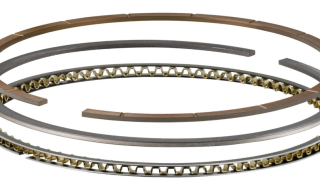
[Pat] Frankie's got that hot side turbo setup looking great and he's still working on it. While that is going on I'm gonna balance the crank. We've got a special setup for this because this is a Gen-1 small block that's gonna make a little bit of power. That doesn't mean we can't get affordable high quality parts for it. We got some forged rotating assembly components from Summit Racing Equipment. We have a Pro SBC crankshaft. This is a 43-40 crankshaft that has a 3.750" stroke. It has .125 radius fillets on it so it's strong. It's gonna work great for our application. Also we have a high quality piston. This is Summit's Pro SBC piston setup. These are made of forged aluminum. They come in either 26-18 or 40-32 alloy depending on the application. These have a 1.5mm, 1.5mm, 3mm ring. It also comes with a support rail because the lower ring intrudes into the pin boss. So it needs support. We have a high quality set of wrist pins that come with it and wire locks. With that we also have Summit's Pro SBC connecting rod. This is an H-beam design with a .927" pin, six inch center to center length, and ARP 87-40 bolts in it. We also have Summit's bearings, which are an ACL performance bearing. Last but not least, a set of Summit Racing gas ported piston rings. All these things are weighed up. We got our bob weight card built on our CWT here. Also we have the bob weights made and on the crankshaft just to save time. So our bob weight is 1,776 grams. I got it set to go. We're gonna close that and give it a first spin to see what we're gonna have to do to the crank. Normally these cranks are set up to have a bob weight around this. So we'll probably have to remove material, but you never know until you spin it. Not too shabby here. On the back right in the middle of the counterweight we need about 85 grams off it. We set up our tolerance for eighth ounce inch. On the front very low. It says seven grams. That is going to change because the amount of material we have to remove from the back will affect the front. Because of the way this measures it takes an average of both stanchions. So when we get most of the material off that back that will probably increase the front a little bit. We can do this a couple of different ways. We can either drill a giant hole in it. On here we'd need a one inch hole that's 140 thousandths deep, or we can do it a cleaner way and take this, put it in the lathe, and remove material off that back counterweight and see how we can get it a little bit closer. So if we have to drill it it'll be one small hole instead of a giant one. So we'll get the bob weights off, get that back counterweight cut, and then respin it. We knew because we've balanced lots of cranks about how much it's gonna take off. At two hundred thousandths we're gonna finish this cut, get it back on the machine, and see where we're at. Now we wait. See, that's really nice. From the back we went from 85 grams down to 19 and it looks like it's in the exact same spot. Gonna pop a small hole in it. Get this thing done. We're ramping it up to 750 rpm because we're close. Had to take a little bit off the front of the crank in the lathe and pop a couple of holes in it with the drill. I think we are ready to rock 'n roll. We are balanced to tolerance. We are .119 ounce inch, just under a gram on the back. .83 grams on the front and .103 ounce inch. We are under our eighth ounce inch tolerance. So we are good. That being said I'm gonna get it out of here, get it cleaned up and polished up. Meanwhile Frankie has some cool stuff going. [Frankie] That's to MES we have our own paint booth that's easy to set up, take down, and fits perfectly in our shop. Here we go! [ Music ]
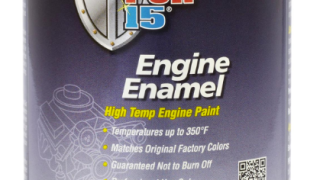
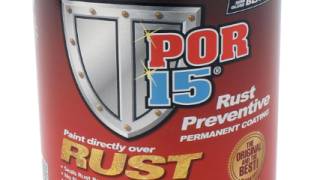
We're gonna start painting all the parts for our 383, and we like to do this before we get to assembly. That way everything is final cleaned and all modifications are done like this dash-10 oil drain we added to the oil pan. We're gonna be painting it in this MES 10 by 10 by 8 booth. The last time on our 318 it worked awesome. Brian and Jason absolutely love the 632 engine we did for Music City Trucks. They said give us that. So the theme on this engine's gonna be bright red with aluminum accents. So everything is gonna be either bright red or aluminum. We're gonna paint some stuff, leave some stuff natural, but we need to get the stuff we're painting into rust preventative coating first. Starting off we'll mix up some POR-15 Rust Preventative coating. To ensure the coating sprays evenly we need to reduce it down around five percent to get the right consistency. We start by spraying a couple of light coats to build adhesion, and then a few medium coats for an even coverage. The better the coating lays down the more even our color will appear and will ensure the ultimate corrosion resistance. -Once everything is dry we turn up the heat with the color Blacktop Speed Shop chose for this engine, POR-15's classic Ford red. With the red thoroughly mixed and reduced we'll head back into the MES booth and cover everything with a few layers of paint. This is a similar process. One medium coat to provide the initial layer and help with paint adhesion, and then a few heavy coats to ensure proper coverage and the right surface finish. This paint is designed to be brushed or sprayed. So it has great self-leveling properties and creates a very smooth and glossy finish. -Think your LS is special? It's not because up next we build a boost ready Gen-1 short block for big power.
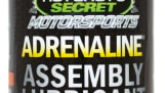
[Pat] This is the last connecting rod. We're checking bearing clearances. Everything is coming out great. So hopefully this one will be in line. This one is right at 2-6. So we're between 2-3 and 2-6 for our rod bearing clearance. Frankie is just finishing up on the block side. [Frankie] For our main bearing clearances. Because this is a turbo build we're running boost we're definitely gonna stick to our minimum of one thousandths per inch of shaft. So we're between 2-3 and 2-5 on the mains, which is perfect. Everything's been final cleaned. All we need to do is get the caps off and we'll get the crank in and start putting this thing together. We used Hot Shot's Secrets Adrenaline assembly lube on all the mains to protect the engine from a dry start-up. Next we loosely install our two piece rear main seal adapter with half the seal offset. We'll tighten the fasteners after the crankshaft is in for proper alignment. [ Music ]
-The rest of the caps can go on in their corresponding positions and directions. Then seated into their register. [ Music ]
For our main fasteners we're gonna be using a set of ARP four bolt main small block Chevy main bolts. This is a complete kit that you get. We've got them all prepped now. These are made of 87-40 chromoly. So these are way stronger than the OE fasteners. Because it's a boosted application we're gonna want that increased yield strength. Help keep our caps clamped on. The way we prep these is we put their ARP Ultra Torque lube underneath the head of the bolt and then we put it on the threads as well. We keep the top of the washer and the bottom of the washer dry. Then slide it together like that. There's a chamfer on this washer and you want to make sure that faces up towards the head of the bolt. That last one is prepped. So we can start getting these in and torqued up. -We'll get the ARP bolts in and start them by hand, and then run them the rest of the way down with our battery powered impact. -It is critical that the bottom side of the washer and main cap be completely dry to prevent the washer from turning during tightening. If the washers are lubricated on both sides they act as a bearing, giving inconsistent clamp loads at the same torque setting and potentially damage the fastener or the block. ARP provides specific torque values with every bolt kit. So after snugging each fastener down they are torqued in sequence from the inside out to a final value of 70 pound feet. -Slick! With the bolts now in we'll put some more Hot Shot's Secret lube on our new Summit Racing Pro SBC hydraulic roller cam. The specs are 232 degrees duration at 50 thousandths on the intake and 242 degrees on the exhaust. The lobe separation angle is 110 degrees and both have 367 thousandths of lobe lift. With our 1.6 ratio rocker we plan on running it takes the net lift of 587 thousandths for both. This stick also has a step nose. So we'll install our stock cam thrust plate. -Our double row timing chain goes on next so we can get ready to degree the cam. Also we'll slide in the number one piston and rod assembly. We'll save the rest for when we're done. [ Music ]
A quick check of the numbers and our intake centerline comes in at 110 degrees, which is straight up. The cam gear bolts receive orange thread locker and are torqued to 25 pound feet. -Finally we'll toss in the rest of the rods and pistons. The rings have been gapped to 22 thousandths on the top ring and 24 thousandths for the second. Even with a standard tension oil ring this setup had relatively low friction. The ARP rod bolts have been checked for stretch and are final torqued to 64 pound feet. [ Music ] We have made a ton of progress today. This thing has slid together so nice and I believe we are well on our way to making some good power. Unfortunately today we have reached our stopping point. -Next time we're gonna get this thing wrapped up. I'm honestly excited not only for the turbocharged version of this engine but also the naturally aspirated version. When we're done we're probably gonna have $8,000 or $9,000 into this thing and it's gonna be able to hold 600 to 700 horsepower all day long on pump gas. I think it's gonna be a great goal. Next time we'll get it wrapped up and on the dyno. But for today I think we're doing good. -Make sure you check us out on our social media to see what's going because we always have a lot of cool stuff going.
Engine Power Featured Projects
Engine Power Builds

Want more content like this?
Join the PowerNation Email NewsletterParts Used In This Episode

Mobile Environmental Solutions
Mobile Inflatable Paint Booth
ATK Performance Engines
350ci Bare Block