Video Transcript
You're watching Power Nation.
From a damaged Dodge
to a mighty Mopar
today we tear into our 318 to see how bad it's hurt and find out what really caused the failure.
Look at that roach.
We'll get it repaired and remedy our cheated Chrysler before putting it back on the dyno to see if it can finally live with its huge horsepower gain.
Look at that stuff right there.
Hey there everyone and welcome to Engine Power.
Boy, are we excited about this show.
We are bringing back our 318 project now. If you remember right,
this started out as a stock rig that we modified with aluminum heads, a cool billet cam, a dual plane intake, even if it's a beautiful paint job.
But
during our process of getting the initialdina numbers, we had a slight mechanic.
Problem.
Yeah, we were only 8 to 10 pools in on this thing and we saw an immediate drop in torque and oil pressure, so we stopped, shut it down,
cut apart the oil filter,
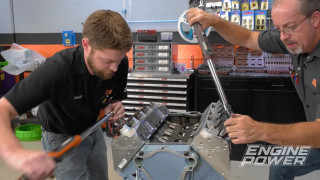
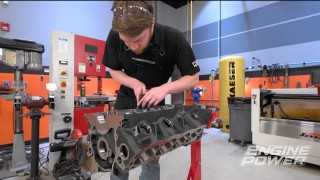
and found this inside. So there's been a lot of speculation on the internet about what went wrong. So today we're gonna tear it down. We're gonna figure out what happened,
figure out how to fix it,
and put it back together and get it back on the dyno.
All right,
well.
This gear is 100% intact.
For one thing,
everything is
looking like it should. There is a nice established gear mesh pattern on it.
We kind of knew this wasn't the culprit, but a visual inspection is always best. So we got that one confirmed, and now we can move on to the next one.
It's time to move on to the next most popular theory of why this engine had a problem.
When this engine was new from the factory, it came with core plugs pressed into the front oil galleries, and then the cam plate was on top of it.
What we
Done is we've removed those plugs and tapped them for tapered pipe plugs.
We do that for serviceability,
but we were very,
very careful not to intrude into any of the oil passages on this oiling system.
The way a 318 actually oils is it picks up from the pan,
goes through the pump,
goes out into the filter housing, and then back into the engine.
From there, it actually goes to the right side lifter bank, and that is the first thing that gets oil
from that lifter bank. It feeds the front floor.
4 mains
and goes from there to the rods and the cam which feeds the heads.
When it gets to the front of that right side lifter bank,
there is a small passageway that goes down to the front main,
goes up to the cam bearing as well,
and then goes across
to the left side lifter bank. If it blocked off oil to the front main and front cam bearing, this engine would not have lived the 30 or 40 minutes it was on the dyno.
It maybe would have lived 5
also.
The left side lifter bank would.
Have no oil and without pressurized oil, the lifters would not actually pump up and there's no way this engine would have made 420 horsepower on our initial runs.
What we're gonna do is we're gonna pull the very rear oil gallery plug, which is actually just goes into the crank case,
and then we're gonna pull the internal plug that is at the back of the left side lifter bank.
Stick 4 quarts of oil in the engine and a filter,
and then we're gonna prime the system
and look for oil flow coming out of there.
Yeah,
that is
absolutely full oil.
Yeah,
no, it is irrefutable proof that there is no obstruction anywhere in the oiling system.
After draining the mix of test oil we dumped in,
we're gonna drop the oil pan and get a quick look at the bottom end.
So none of the rods are
glued with heat or anything like that.
These ones have side clearance.
That one doesn't.
7, yes.
8 might be a little tight as well.
We know we need to disassemble the whole engine and everything in the top end looks in perfect shape with no issues.
Getting the cam out will reveal how much damage those bearings took during the failure and help us determine the cause.
Since the cam still turns easily, we don't expect to find any scoring or burn bearings here.
Oh, OK,
those look really good actually.
I was kind of expecting.
I was expecting that to have a bunch of shiitake in it.
OK, so this is the original oil pump from 1983.
We reused it because there's nothing wrong with it. It was perfect inside.
A little bit of stuff definitely went through this thing,
but there's no
large scoring, there's no chunks or anything like that.
Now that we are into the rotating assembly,
the pistons are in great shape,
but we are starting to find real bearing damage.
That's the winner for the worst one right there.
Yeah,
so this is a,
this is a spun bearing.
The material shed from these bearings is undoubtedly the source of all the shavings in the engine.
The crank thrust hasn't changed from 4000, so we know there's no issues there.
The main bearings look very similar to the rods though, with a fair amount of debris,
metal to metal contact from lack of lubrication, and some overheating.
00,
that one might be an issue. It's lost all its spread.
All right,
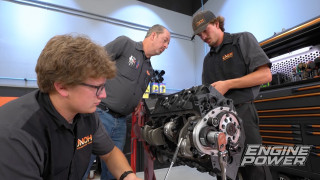
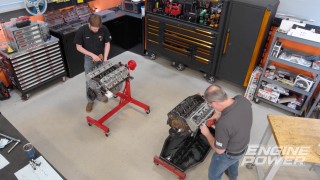
so now that everything is apart, we can really go through and assess all of the components in this engine.
And what we found is there's really no smoking gun. There's no mechanical failure, there's no failure of the oil pump,
there's no galleries blocked, there's no,
you know,
oil gallery plugs left out or anything like that.
What we do know is that the entire top end of the engine is good. Every single bearing shows a premature failure. So when you have it across the.
Entire system like that,
it really points us towards one cause,
and that is a classic case of oil starvation,
like Frankie said,
not from a restriction, but from the oiling system's capacity to keep up at this type of RPM and this power level.
This particular one,
there's nothing wrong with it, and the great news is we can fix it. There are all kinds of things that we can do to improve its quality and have it make power,
and we're doing that next.
In a moment for you,
but a few days for us,
we'll show you our strategy for keeping this 318 alive as we prep and repair its parts for reassembly.
OK,
so let's go over the plan for fixing our 318 and getting this thing back on the dyno.
We know our crank is wasted. We know a couple of our rods are wasted, so we need to replace them.
Thankfully, Summit Racing has a lot of this stuff in stock, so we have an Eagle
cast steel stock stroke crank, a little bit better in stock,
under $500 when we got it. So a great deal
and gonna be a perfect replacement. We also have a set. Of Summit Pro Mopar forged I-beam rods also just under $500 and already have a bushed and
and an ARP 8740716 bolt. So
upgrading at the same time.
We have new rod and main bearings and we're gonna change the cam bearings as well just because we're here we're gonna play it safe to fix our oiling issue. That's the big gorilla in the room, right? So we're gonna switch.
To
a Mylodon 8 quart pan from SummitRacing.
This is 8 quarts plus the filter,
so it has a lot more extra capacity, matching dipstick,
pickup tube,
and just to be safe,
we're gonna switch to a high volume unit,
get a little more extra flow. So we have a lot of work to do. We need to bounce the crank. We need to get the pistons off our old rods, and we need to clean everything very thoroughly to get all the debris out.
So let's get started.
All right, that's not too bad.
So we have our new crank in our balancer. Bob weights already made because we're able to use a lot of the old values. We still have them in the system.
We just had to account for our new connecting rod, which
is about 180 g lighter than the factory one. So we're gonna have to remove quite a bit of material here,
but to get that out, we're gonna have to do a little bit of work in the lathe and a little bit of drilling,
and that's gonna take a while. So I'm gonna get started on this, and Pat is gonna get the rest of the pistons off those old.
Connecting rods.
Our pistons are in excellent shape,
so we will be reusing them, but we have to get them off the press fit rods because we have a set of full floater rods as well.
These have to come off very accurately because that pin has to move through there freely.
So luckily we have a very nice fixture, this Goodson fixture we have in our press.
It actually supports the connecting rod inside of the piston so it doesn't put any force on the piston
to distort it. So we're going to get these in here and press them off very gently.
We have the proper size
mandual to go in there.
There it goes.
And that just finally goes through there and the pin drops freely into that.
We take this whole rig out,
wrist pin goes right back in the piston.
And it's totally free.
The rest are pressed off just as smooth, and the whole thing takes only a few minutes.
This way, they are all undamaged and ready to be mounted on their new floater rods.
So with the crank we were able to get it
uh dialed in on the lace we took 250,000 off the back counterweight we took 200,000 off the front
and then we're able to use the drill head on the machine to get it really fine tuned with
only one extra hole.
And
we've got this thing
way into our tolerance here, so we're at 0.122 on the back, 0.105 ounce inch on the front,
160 degrees apart from each other, so they're on opposite ends,
and that's gonna be plenty good. So this thing is ready to go. We're gonna get it off and we'll move on to the next step.
The next modification we're gonna do on our 318 is really more of a
future modification, but we're gonna do it now because we have the engine.
Apart
and that is add a crossover line from the main
oil feed to the left side lifter bank and we're gonna block off the left side lifter bank and make it independent.
We're actually gonna use our pipe plug in the
left side lifter bank. We're gonna tap that deeper and block off flow, and then we're gonna make a line
that goes from
the
main feed over to the left side lifter bank. We're gonna drill and tap,
put fittings in.
We're doing this now.
Because we were originally gonna tear this engine down when we switch it to a solid roller and do all these upgrades that we're doing,
you know, a better crank,
better rods, and oiling mods like this.
But since we're already here, we're gonna do it now and that'll save us time on the dyno later and we can just swap the cam and intake.
Once both holes are tapped for 18 inch NPT,
some dash 3 fittings, and this custom 3/16 hardline can make the connection.
OK,
so we have our
right plug,
same as before,
same depth, our left plug.
Way deeper so we can actually use this boroscope here so our right plug there fully uncovered so that feeds our front main and that is completely unblocked,
but our left side now because we're using our lifter crossover
oil hole is completely blocked.
By that plug,
so this reduces the flow and the amount of volume that has to travel through the right side to get to the left side.
Now typically this is only done with engines like this that turn over 7000 where RPM is up and oil flow is needed.
Typically this is something we do when we do a solid roller setup, but since it's apart, we're just going to do it now so we don't have to do it later.
Still to come,
our mended mopar goes back together with its upgrades as we power through
to the dyno.
OK, we have our block fully cleaned. All our parts are fully cleaned. We have our new main bearings torqued up in our block so we can start checking bearing clearances.
So I have a new crank here, we're gonna use
our micrometer
and we're gonna start with the rearmost journal.
We're gonna set it to
the journal size,
lock it down.
Then we're gonna use this
to set our dial bore gauge.
We can use this to take a direct oil clearance measurement at the block.
So this one is 27.
We'll go ahead and check the rest,
and they'll all fall between 2.7 and 2.8 as well.
The rods follow a similar procedure,
but the bolts must be measured for proper stretch.
Torquing them to 69 pound feet with ARP ultra torque lube yields a stretch which is less than 46 10,000.
Then a micrometer is used to zero a dial bore gauge,
and the gauge now gives a direct oil clearance measurement.
All rods fall between 24 and 27/10,000.
Now that all the clearances are checked, we will use a universal installation tool to pound in a new set of cam bearings with the oil holes in the proper alignment.
Finally, we can start getting our Dodge back together with new King bearings from Summit Racing being pressed into the block.
Adrenaline assembly lube coats them and a new rear main seal is set in place.
Our new Eagle cast steel crank is carefully dropped in,
and then the stock 0.2-inch main bolts are torqued from the inside out to 85 pound feet with high pressure lube, and the thrust is checked at 4000.
Our Summit promopar hydraulic roller cam goes back in,
which has specs at 50,000 lift of 224 degrees on the intake and 236 degrees on the exhaust.
Our carefully measured steel pipe plugs are threaded into their galleries and then covered with the factory thrust plate that gets torque to 28 pound feet.
This summit billet timing set goes back on in the same 2 degree retarded position,
is torque to 45 pound feet,
and then the number 1 rod and piston is installed to degree the cam and check its position.
It lands within a 25 degree of last time at 112 degrees.
The rest of the rod and piston assemblies are slid together with hotshot's secret lube,
making sure the orientation is correct for the cylinder position.
The wrist pins are retained with a single spiral lock that can be worked in by hand
or with a pocket screwdriver.
Once they're all together,
we can start punching them into the bores with a somewhat adjustable ring compressor set to our 3940 bore size.
The bolts are temporarily tightened with an impact until they're all in, and then we go through and torque each fastener to 69 pound feet and double-check its stretch value.
Our same timing cover that was cleaned is loosely installed so that the damper can be pressed on with a proper tool to help locate it, and then the stock bolts can be tightened down.
Along with our bigger capacity oil pan, one of the upgrades we're gonna be doing is a winded tray.
Uh, so these are primarily designed to bolt to the main cap, so you can get an install kit and it comes with studs. The problem with that is if you're gonna switch from a bolt to a stud in the mains,
you need to have the block of line hone.
And instead of having
mismatched fasteners in there, we just welded on some rails on each side here,
so it bolts right down,
got plenty of clearance on this stroke,
and it will work when we go to. A stroker later on.
Our new high volume melling oil pump is bolted in place and torqued to 35 pound feet,
and then the new Myloon pickup to pan clearance is 3/8 of an inch with our gasket.
Our TV goes on the edges before the pen is cinched down with its original bolts.
The Summit Racing hydraulic roller lifters have to go back on before the heads with some light lubrication,
followed by the 4040 by 27,000 thick MLS head gaskets.
The trick Flow 190 cc heads have been fully cleaned and go back on as well.
For our fasteners, we are reusing the same fasteners as before the ARP head bolt kit that we got for these heads.
So these are made from 8740 chrome molly.
They have a tensile strength around 180,000 PSI and ARP sends very specific instructions with them, not only to torque them,
but also to prep them. So we're gonna go over that really quickly here. The first thing we're gonna do is we're gonna clean the fastener thoroughly.
You can use brake cleaner or lacquer thinner, but we're gonna put it in a rag.
And we're gonna wipe underneath
the head of the bolt and then also the threads.
We're also going to do the same thing to the washer itself.
So when we prep these,
because our LA has head bolt holes that go into the water, this is a later block, so they do go into water. Some of them do, some of them don't, but this one does.
What we're gonna do is we're gonna use their ARP Ultra Torque lubricant.
We're gonna apply that underneath
the head of the bolt right here.
Doesn't need a ton, but
a good amount there.
We're gonna leave
the bottom side of the washer dry and we're gonna take our chamfer, and that's gonna go towards the head of the bolt
that makes sure that the washer clears the underhead radius that's rolled into the fastener and it gives it strength.
If you put it on backwards, it stresses the washer
in
the improper way and could potentially damage it.
We're gonna leave the bottom of the washer completely dry so it doesn't rotate on the cylinder head. We want that to stay still.
If it starts to rotate, it can turn into essentially a bearing and give you inaccurate clamp loads.
Then on the threads, we're gonna use ARP's thread sealer,
and then that one is ready to go.
This thing will be installed, and then we will go through and torque them in 3 equal steps to 100 pound feet.
These custom mint and 5160 pushrods slide back in followed by the Harlan Sharp 1.6 shaft rockers,
our new oil line,
and a flat oil filter adapter.
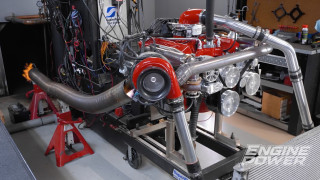
The rest of the engine is rebuilt just like before with all the pieces being reused and reinstalled as we get this engine ready for the real dyno session.
We'll get it all hooked up and get ready to make some horsepower.
Up next,
can our 318 finally keep up with the other smog era small box,
or does it crack under pressure a second time around?
All right, we have been hard at it. We are actually
30 poles in right now. We've actually changed the oil and cut the filter apart and got a clean bill of health on the engine.
Everything is doing exactly what it was meant to do.
This time,
uh, we actually were able to go through and do our timing loops. We were able to adjust fueling,
try a couple of different carburetors,
tried a couple of different spacers. So where we landed right now is at 34 degrees of timing.
We have a 950 carb on there that has 70 primary.
And 70 secondaries with dual power valves to a 93 octane pump gas, but
we've gone through the entire tuning process to basically get this thing as good as we can.
So we're going to make a poll from 22,500 to 6000 to show the power curve
on a street deal.
Again, this is not a race engine by any stretch of the imagination.
Full operating temp, we're at 170 degrees.
First pole, 2500,
6300 a second there.
It really nice on this car.
Very smooth, yeah,
so we got
445 horsepower, obviously right at 6000 still trending up,
still going up, and 406.6 pound feet peak right at, uh, 5100 there loading down there at the bottom, it's about 330 pound feet at 2500 out of a 3.
18. Yeah, that is really,
really nice and obviously power's still going up.
Let's get the rips up there.
We're going to go,
uh,
what do, what do you say we go
35,000?
Yeah,
and let's say 6600,
you know,
somewhere in there. I think it's going to be close.
6600. Well,
that sounds like a great number.
Yeah.
Oh,
we got 411 pound feet
and then we got 457.8 right there at the top.
I think that's at 6500 and then it kind of trends off.
If it's starting to come down, if it's not going up
in our minds, there's really not a lot,
there's not a lot of reason to keep turning it higher, right? No, because all you're gonna do is just ask for problems.
We're gonna give her the hero run.
If you're at a drag strip and you were running this thing, you have hot oil tap
before you run, you will cool the engine as much
as you can. And on the dyno.
It's really easy because we have a manual valve. So you can cool the engine down significantly and usually it'll pick up power.
All right,
we are sub 120.
So our oil is still at full temp, but our water is very cool relatively, so it's going to cool the chamber, cool the engine,
should make a little bit more.
Might have squeaked a couple more into her there. 465.
Look at that stuff right there. I'm gonna call it 417416.9,
but that's usually what we see is something like
8 to 10 horsepower jump there.
Like,
is that realistic?
Yeah, it is if you're, if you're racing. Yeah,
when you see people icing down their engines,
you see them icing down their intakes, you see them.
cold water through it
for street stuff,
you know, we usually don't
dyno at this temperature because for street stuff, it's not very realistic.
Yeah,
go ahead, yeah,
uh, but
it's cool to see what,
you know, it kind of shows you what the engine could do if it was at that temperature.
So,
all right,
so I mean,
all in all,
what did we learn in this whole 3:18 adventure thus far?
We learned that 3:18.
Need more oil, which is
you're right, when you take a stock oiling system on a small block Ford,
a small block Chevy,
stock pan,
stock pump, all the stuff, and run them in excess of 7000,
and they just laugh at it, right?
The fact is we tried to run it hard, we had a failure.
We've actually made our improvements, and now it just laughs at all the RPM, right?
And this thing.
You know,
effectively at this point, if you look at head flow and here comes,
here comes, I know what you're gonna say.
This is very similar to a 53 LS.
This is what a 5.3 would make with a,
you know, mild hydraulic roller the size.
If you had a head that was 300 CFM on a 5.3, it's going to make similar power.
So
I think this is right in the realm of where it should be.
Well, the engine doesn't know what.
Brand it is.
All an engine knows is design,
right?
This has some very,
very good points to it as far as of its construction.
Does it have some shortcomings if you want to do some very, very specific things like run it hard?
Yes,
but that is what hot rodding is all about the machining and you've got to put some better parts in it. But all in all, this is what I like to call
great success.
Show Full Transcript
From a damaged Dodge
to a mighty Mopar
today we tear into our 318 to see how bad it's hurt and find out what really caused the failure.
Look at that roach.
We'll get it repaired and remedy our cheated Chrysler before putting it back on the dyno to see if it can finally live with its huge horsepower gain.
Look at that stuff right there.
Hey there everyone and welcome to Engine Power.
Boy, are we excited about this show.
We are bringing back our 318 project now. If you remember right,
this started out as a stock rig that we modified with aluminum heads, a cool billet cam, a dual plane intake, even if it's a beautiful paint job.
But
during our process of getting the initialdina numbers, we had a slight mechanic.
Problem.
Yeah, we were only 8 to 10 pools in on this thing and we saw an immediate drop in torque and oil pressure, so we stopped, shut it down,
cut apart the oil filter,
and found this inside. So there's been a lot of speculation on the internet about what went wrong. So today we're gonna tear it down. We're gonna figure out what happened,
figure out how to fix it,
and put it back together and get it back on the dyno.
All right,
well.
This gear is 100% intact.
For one thing,
everything is
looking like it should. There is a nice established gear mesh pattern on it.
We kind of knew this wasn't the culprit, but a visual inspection is always best. So we got that one confirmed, and now we can move on to the next one.
It's time to move on to the next most popular theory of why this engine had a problem.
When this engine was new from the factory, it came with core plugs pressed into the front oil galleries, and then the cam plate was on top of it.
What we
Done is we've removed those plugs and tapped them for tapered pipe plugs.
We do that for serviceability,
but we were very,
very careful not to intrude into any of the oil passages on this oiling system.
The way a 318 actually oils is it picks up from the pan,
goes through the pump,
goes out into the filter housing, and then back into the engine.
From there, it actually goes to the right side lifter bank, and that is the first thing that gets oil
from that lifter bank. It feeds the front floor.
4 mains
and goes from there to the rods and the cam which feeds the heads.
When it gets to the front of that right side lifter bank,
there is a small passageway that goes down to the front main,
goes up to the cam bearing as well,
and then goes across
to the left side lifter bank. If it blocked off oil to the front main and front cam bearing, this engine would not have lived the 30 or 40 minutes it was on the dyno.
It maybe would have lived 5
also.
The left side lifter bank would.
Have no oil and without pressurized oil, the lifters would not actually pump up and there's no way this engine would have made 420 horsepower on our initial runs.
What we're gonna do is we're gonna pull the very rear oil gallery plug, which is actually just goes into the crank case,
and then we're gonna pull the internal plug that is at the back of the left side lifter bank.
Stick 4 quarts of oil in the engine and a filter,
and then we're gonna prime the system
and look for oil flow coming out of there.
Yeah,
that is
absolutely full oil.
Yeah,
no, it is irrefutable proof that there is no obstruction anywhere in the oiling system.
After draining the mix of test oil we dumped in,
we're gonna drop the oil pan and get a quick look at the bottom end.
So none of the rods are
glued with heat or anything like that.
These ones have side clearance.
That one doesn't.
7, yes.
8 might be a little tight as well.
We know we need to disassemble the whole engine and everything in the top end looks in perfect shape with no issues.
Getting the cam out will reveal how much damage those bearings took during the failure and help us determine the cause.
Since the cam still turns easily, we don't expect to find any scoring or burn bearings here.
Oh, OK,
those look really good actually.
I was kind of expecting.
I was expecting that to have a bunch of shiitake in it.
OK, so this is the original oil pump from 1983.
We reused it because there's nothing wrong with it. It was perfect inside.
A little bit of stuff definitely went through this thing,
but there's no
large scoring, there's no chunks or anything like that.
Now that we are into the rotating assembly,
the pistons are in great shape,
but we are starting to find real bearing damage.
That's the winner for the worst one right there.
Yeah,
so this is a,
this is a spun bearing.
The material shed from these bearings is undoubtedly the source of all the shavings in the engine.
The crank thrust hasn't changed from 4000, so we know there's no issues there.
The main bearings look very similar to the rods though, with a fair amount of debris,
metal to metal contact from lack of lubrication, and some overheating.
00,
that one might be an issue. It's lost all its spread.
All right,
so now that everything is apart, we can really go through and assess all of the components in this engine.
And what we found is there's really no smoking gun. There's no mechanical failure, there's no failure of the oil pump,
there's no galleries blocked, there's no,
you know,
oil gallery plugs left out or anything like that.
What we do know is that the entire top end of the engine is good. Every single bearing shows a premature failure. So when you have it across the.
Entire system like that,
it really points us towards one cause,
and that is a classic case of oil starvation,
like Frankie said,
not from a restriction, but from the oiling system's capacity to keep up at this type of RPM and this power level.
This particular one,
there's nothing wrong with it, and the great news is we can fix it. There are all kinds of things that we can do to improve its quality and have it make power,
and we're doing that next.
In a moment for you,
but a few days for us,
we'll show you our strategy for keeping this 318 alive as we prep and repair its parts for reassembly.
OK,
so let's go over the plan for fixing our 318 and getting this thing back on the dyno.
We know our crank is wasted. We know a couple of our rods are wasted, so we need to replace them.
Thankfully, Summit Racing has a lot of this stuff in stock, so we have an Eagle
cast steel stock stroke crank, a little bit better in stock,
under $500 when we got it. So a great deal
and gonna be a perfect replacement. We also have a set. Of Summit Pro Mopar forged I-beam rods also just under $500 and already have a bushed and
and an ARP 8740716 bolt. So
upgrading at the same time.
We have new rod and main bearings and we're gonna change the cam bearings as well just because we're here we're gonna play it safe to fix our oiling issue. That's the big gorilla in the room, right? So we're gonna switch.
To
a Mylodon 8 quart pan from SummitRacing.
This is 8 quarts plus the filter,
so it has a lot more extra capacity, matching dipstick,
pickup tube,
and just to be safe,
we're gonna switch to a high volume unit,
get a little more extra flow. So we have a lot of work to do. We need to bounce the crank. We need to get the pistons off our old rods, and we need to clean everything very thoroughly to get all the debris out.
So let's get started.
All right, that's not too bad.
So we have our new crank in our balancer. Bob weights already made because we're able to use a lot of the old values. We still have them in the system.
We just had to account for our new connecting rod, which
is about 180 g lighter than the factory one. So we're gonna have to remove quite a bit of material here,
but to get that out, we're gonna have to do a little bit of work in the lathe and a little bit of drilling,
and that's gonna take a while. So I'm gonna get started on this, and Pat is gonna get the rest of the pistons off those old.
Connecting rods.
Our pistons are in excellent shape,
so we will be reusing them, but we have to get them off the press fit rods because we have a set of full floater rods as well.
These have to come off very accurately because that pin has to move through there freely.
So luckily we have a very nice fixture, this Goodson fixture we have in our press.
It actually supports the connecting rod inside of the piston so it doesn't put any force on the piston
to distort it. So we're going to get these in here and press them off very gently.
We have the proper size
mandual to go in there.
There it goes.
And that just finally goes through there and the pin drops freely into that.
We take this whole rig out,
wrist pin goes right back in the piston.
And it's totally free.
The rest are pressed off just as smooth, and the whole thing takes only a few minutes.
This way, they are all undamaged and ready to be mounted on their new floater rods.
So with the crank we were able to get it
uh dialed in on the lace we took 250,000 off the back counterweight we took 200,000 off the front
and then we're able to use the drill head on the machine to get it really fine tuned with
only one extra hole.
And
we've got this thing
way into our tolerance here, so we're at 0.122 on the back, 0.105 ounce inch on the front,
160 degrees apart from each other, so they're on opposite ends,
and that's gonna be plenty good. So this thing is ready to go. We're gonna get it off and we'll move on to the next step.
The next modification we're gonna do on our 318 is really more of a
future modification, but we're gonna do it now because we have the engine.
Apart
and that is add a crossover line from the main
oil feed to the left side lifter bank and we're gonna block off the left side lifter bank and make it independent.
We're actually gonna use our pipe plug in the
left side lifter bank. We're gonna tap that deeper and block off flow, and then we're gonna make a line
that goes from
the
main feed over to the left side lifter bank. We're gonna drill and tap,
put fittings in.
We're doing this now.
Because we were originally gonna tear this engine down when we switch it to a solid roller and do all these upgrades that we're doing,
you know, a better crank,
better rods, and oiling mods like this.
But since we're already here, we're gonna do it now and that'll save us time on the dyno later and we can just swap the cam and intake.
Once both holes are tapped for 18 inch NPT,
some dash 3 fittings, and this custom 3/16 hardline can make the connection.
OK,
so we have our
right plug,
same as before,
same depth, our left plug.
Way deeper so we can actually use this boroscope here so our right plug there fully uncovered so that feeds our front main and that is completely unblocked,
but our left side now because we're using our lifter crossover
oil hole is completely blocked.
By that plug,
so this reduces the flow and the amount of volume that has to travel through the right side to get to the left side.
Now typically this is only done with engines like this that turn over 7000 where RPM is up and oil flow is needed.
Typically this is something we do when we do a solid roller setup, but since it's apart, we're just going to do it now so we don't have to do it later.
Still to come,
our mended mopar goes back together with its upgrades as we power through
to the dyno.
OK, we have our block fully cleaned. All our parts are fully cleaned. We have our new main bearings torqued up in our block so we can start checking bearing clearances.
So I have a new crank here, we're gonna use
our micrometer
and we're gonna start with the rearmost journal.
We're gonna set it to
the journal size,
lock it down.
Then we're gonna use this
to set our dial bore gauge.
We can use this to take a direct oil clearance measurement at the block.
So this one is 27.
We'll go ahead and check the rest,
and they'll all fall between 2.7 and 2.8 as well.
The rods follow a similar procedure,
but the bolts must be measured for proper stretch.
Torquing them to 69 pound feet with ARP ultra torque lube yields a stretch which is less than 46 10,000.
Then a micrometer is used to zero a dial bore gauge,
and the gauge now gives a direct oil clearance measurement.
All rods fall between 24 and 27/10,000.
Now that all the clearances are checked, we will use a universal installation tool to pound in a new set of cam bearings with the oil holes in the proper alignment.
Finally, we can start getting our Dodge back together with new King bearings from Summit Racing being pressed into the block.
Adrenaline assembly lube coats them and a new rear main seal is set in place.
Our new Eagle cast steel crank is carefully dropped in,
and then the stock 0.2-inch main bolts are torqued from the inside out to 85 pound feet with high pressure lube, and the thrust is checked at 4000.
Our Summit promopar hydraulic roller cam goes back in,
which has specs at 50,000 lift of 224 degrees on the intake and 236 degrees on the exhaust.
Our carefully measured steel pipe plugs are threaded into their galleries and then covered with the factory thrust plate that gets torque to 28 pound feet.
This summit billet timing set goes back on in the same 2 degree retarded position,
is torque to 45 pound feet,
and then the number 1 rod and piston is installed to degree the cam and check its position.
It lands within a 25 degree of last time at 112 degrees.
The rest of the rod and piston assemblies are slid together with hotshot's secret lube,
making sure the orientation is correct for the cylinder position.
The wrist pins are retained with a single spiral lock that can be worked in by hand
or with a pocket screwdriver.
Once they're all together,
we can start punching them into the bores with a somewhat adjustable ring compressor set to our 3940 bore size.
The bolts are temporarily tightened with an impact until they're all in, and then we go through and torque each fastener to 69 pound feet and double-check its stretch value.
Our same timing cover that was cleaned is loosely installed so that the damper can be pressed on with a proper tool to help locate it, and then the stock bolts can be tightened down.
Along with our bigger capacity oil pan, one of the upgrades we're gonna be doing is a winded tray.
Uh, so these are primarily designed to bolt to the main cap, so you can get an install kit and it comes with studs. The problem with that is if you're gonna switch from a bolt to a stud in the mains,
you need to have the block of line hone.
And instead of having
mismatched fasteners in there, we just welded on some rails on each side here,
so it bolts right down,
got plenty of clearance on this stroke,
and it will work when we go to. A stroker later on.
Our new high volume melling oil pump is bolted in place and torqued to 35 pound feet,
and then the new Myloon pickup to pan clearance is 3/8 of an inch with our gasket.
Our TV goes on the edges before the pen is cinched down with its original bolts.
The Summit Racing hydraulic roller lifters have to go back on before the heads with some light lubrication,
followed by the 4040 by 27,000 thick MLS head gaskets.
The trick Flow 190 cc heads have been fully cleaned and go back on as well.
For our fasteners, we are reusing the same fasteners as before the ARP head bolt kit that we got for these heads.
So these are made from 8740 chrome molly.
They have a tensile strength around 180,000 PSI and ARP sends very specific instructions with them, not only to torque them,
but also to prep them. So we're gonna go over that really quickly here. The first thing we're gonna do is we're gonna clean the fastener thoroughly.
You can use brake cleaner or lacquer thinner, but we're gonna put it in a rag.
And we're gonna wipe underneath
the head of the bolt and then also the threads.
We're also going to do the same thing to the washer itself.
So when we prep these,
because our LA has head bolt holes that go into the water, this is a later block, so they do go into water. Some of them do, some of them don't, but this one does.
What we're gonna do is we're gonna use their ARP Ultra Torque lubricant.
We're gonna apply that underneath
the head of the bolt right here.
Doesn't need a ton, but
a good amount there.
We're gonna leave
the bottom side of the washer dry and we're gonna take our chamfer, and that's gonna go towards the head of the bolt
that makes sure that the washer clears the underhead radius that's rolled into the fastener and it gives it strength.
If you put it on backwards, it stresses the washer
in
the improper way and could potentially damage it.
We're gonna leave the bottom of the washer completely dry so it doesn't rotate on the cylinder head. We want that to stay still.
If it starts to rotate, it can turn into essentially a bearing and give you inaccurate clamp loads.
Then on the threads, we're gonna use ARP's thread sealer,
and then that one is ready to go.
This thing will be installed, and then we will go through and torque them in 3 equal steps to 100 pound feet.
These custom mint and 5160 pushrods slide back in followed by the Harlan Sharp 1.6 shaft rockers,
our new oil line,
and a flat oil filter adapter.
The rest of the engine is rebuilt just like before with all the pieces being reused and reinstalled as we get this engine ready for the real dyno session.
We'll get it all hooked up and get ready to make some horsepower.
Up next,
can our 318 finally keep up with the other smog era small box,
or does it crack under pressure a second time around?
All right, we have been hard at it. We are actually
30 poles in right now. We've actually changed the oil and cut the filter apart and got a clean bill of health on the engine.
Everything is doing exactly what it was meant to do.
This time,
uh, we actually were able to go through and do our timing loops. We were able to adjust fueling,
try a couple of different carburetors,
tried a couple of different spacers. So where we landed right now is at 34 degrees of timing.
We have a 950 carb on there that has 70 primary.
And 70 secondaries with dual power valves to a 93 octane pump gas, but
we've gone through the entire tuning process to basically get this thing as good as we can.
So we're going to make a poll from 22,500 to 6000 to show the power curve
on a street deal.
Again, this is not a race engine by any stretch of the imagination.
Full operating temp, we're at 170 degrees.
First pole, 2500,
6300 a second there.
It really nice on this car.
Very smooth, yeah,
so we got
445 horsepower, obviously right at 6000 still trending up,
still going up, and 406.6 pound feet peak right at, uh, 5100 there loading down there at the bottom, it's about 330 pound feet at 2500 out of a 3.
18. Yeah, that is really,
really nice and obviously power's still going up.
Let's get the rips up there.
We're going to go,
uh,
what do, what do you say we go
35,000?
Yeah,
and let's say 6600,
you know,
somewhere in there. I think it's going to be close.
6600. Well,
that sounds like a great number.
Yeah.
Oh,
we got 411 pound feet
and then we got 457.8 right there at the top.
I think that's at 6500 and then it kind of trends off.
If it's starting to come down, if it's not going up
in our minds, there's really not a lot,
there's not a lot of reason to keep turning it higher, right? No, because all you're gonna do is just ask for problems.
We're gonna give her the hero run.
If you're at a drag strip and you were running this thing, you have hot oil tap
before you run, you will cool the engine as much
as you can. And on the dyno.
It's really easy because we have a manual valve. So you can cool the engine down significantly and usually it'll pick up power.
All right,
we are sub 120.
So our oil is still at full temp, but our water is very cool relatively, so it's going to cool the chamber, cool the engine,
should make a little bit more.
Might have squeaked a couple more into her there. 465.
Look at that stuff right there. I'm gonna call it 417416.9,
but that's usually what we see is something like
8 to 10 horsepower jump there.
Like,
is that realistic?
Yeah, it is if you're, if you're racing. Yeah,
when you see people icing down their engines,
you see them icing down their intakes, you see them.
cold water through it
for street stuff,
you know, we usually don't
dyno at this temperature because for street stuff, it's not very realistic.
Yeah,
go ahead, yeah,
uh, but
it's cool to see what,
you know, it kind of shows you what the engine could do if it was at that temperature.
So,
all right,
so I mean,
all in all,
what did we learn in this whole 3:18 adventure thus far?
We learned that 3:18.
Need more oil, which is
you're right, when you take a stock oiling system on a small block Ford,
a small block Chevy,
stock pan,
stock pump, all the stuff, and run them in excess of 7000,
and they just laugh at it, right?
The fact is we tried to run it hard, we had a failure.
We've actually made our improvements, and now it just laughs at all the RPM, right?
And this thing.
You know,
effectively at this point, if you look at head flow and here comes,
here comes, I know what you're gonna say.
This is very similar to a 53 LS.
This is what a 5.3 would make with a,
you know, mild hydraulic roller the size.
If you had a head that was 300 CFM on a 5.3, it's going to make similar power.
So
I think this is right in the realm of where it should be.
Well, the engine doesn't know what.
Brand it is.
All an engine knows is design,
right?
This has some very,
very good points to it as far as of its construction.
Does it have some shortcomings if you want to do some very, very specific things like run it hard?
Yes,
but that is what hot rodding is all about the machining and you've got to put some better parts in it. But all in all, this is what I like to call
great success.