In This Episode
- 0:01 Introduction and Overview
- 0:18 Setting Up the Inflatable Paint Booth
- 1:12 Painting the Engine
- 3:40 Installing New Forged Pistons
- 4:16 Assembling the Engine
- 9:20 Upgrading to Trick Flow PowerPort 190 Heads
- 11:00 Installing New Cylinder Heads
- 12:14 Installing Push Rods and Rocker Arms
- 13:14 Installing Intake Manifold and Accessories
- 14:02 Replacing the Alternator
- 15:35 Preparing for Dyno Testing
- 17:01 Discovering Issues During Dyno Testing
- 19:12 Identifying and Addressing the Problem
- 20:53 Conclusion and Future Plans
Video Transcript
[Pat] You're watching Powernation!
[ Music ]
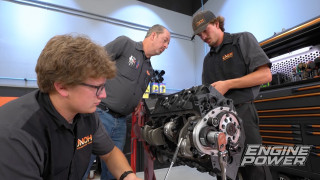
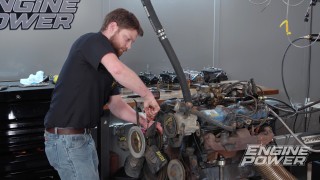
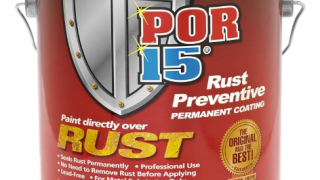
[Frankie] Welcome back to Engine Power, and today we have an action packed episode because we are going to be continuing on our 318 LA Mopar build. This is an engine that was straight from the junkyard and we are doing a high performance rebuild with it. You can check out all the prep work in part one but today we're going to be finishing this engine up. We're going to be putting it back together with our stock components and our upgraded components. We've got new pistons, hydraulic roller valve train, sweet high flowing induction, and we're going to be getting this thing on the dyno and running it to see how much it makes. But first we're going to be putting some new color on it. We're going to be painting this engine right here in our shop. [Pat] You heard Frankie. We're going to be painting it inside our shop in here using Mobile Environmental Solutions' portable inflatable paint booth system. These are great, and they come in a bunch of different sizes depending on what you're doing. These work by not letting any overspray or paint get anywhere else in the building. These are EPA compliant. They have a very high air exchange rate, and they are great for keeping things clean and dust free as you're painting. They're even used by the US military because of their durability and portability. So we're going to get this one set up real soon. Well that inflated in record time. This is a ten by ten by eight. Perfect for what we're doing. Like I said, you can get these things that are enormous. Big enough to do an entire semi and tractor trailer. So this one is perfect for what we're going to be doing. So we're going to roll our stuff in here and get the painting. -We're going to be painting not only the block, but some of the original parts and new parts to give this engine a two tone look. Now that everything is set up we can actually start spraying this thing. What we're going to be using is POR-15s engine enamel. We've used this on the last several engine builds. It looks great. It's extremely durable. But before we get to that, we actually need to coat everything first to protect it. So we're going to be using their gray rust preventive coating. This is not only going to protect from corrosion, but it's also going to give us a uniform base to put our color on top of. You can brush it or spray it. We're going to thin it out and spray it. That's probably pretty good. This coating needs to be stirred, not shaken. And once it's thoroughly mixed we'll use a calibrated scale to thin it out. We only needed to add four percent of their reducer to get the right consistency, and then we'll load it up in a spray gun. All the parts have been scuffed or sandblasted and prepped with PORs cleaner degreaser to remove any oily residue. [ spray gun hissing ] A few light coats followed by a few medium coats gives us good coverage on everything. [ Music ] Everything is cleaned. Our guns cleaned. So we're ready to start moving on to color, and for this combo we like the stock color but we want something a little bit different. So we're going to be mixing up a custom color using POR-15's engine enamel in Chrysler turquoise and in white. We're going to be going for like a minty green maybe, and it's going to go really well with all of our flat black accessories. After stirring both colors, we'll mix them with a two and a half to one ratio turquoise to white. I think that's pretty close. That's the original and that's our little bit lighter new color. Being that it is a little more humid today all the parts will get one medium coat followed by one heavy coat to get a smooth, glossy finish on all the surfaces. [ spray gun hissing ] -While Frankie finishes up painting I'll work on getting our new forged pistons on our press fit rod. This process is pretty simple but it takes a skilled hand and involves heating the small end of the rod to increase its size slightly. Then there's about five seconds to slide the wrist pin through the piston and rod to locate it properly before it cools and the interference fit returns.
We'll do all eight and let them cool off while we get ready for assembly. -Later on Engine Power our small block gets introduced to its high performance upgrades with more compression and modern roller valvetrain.
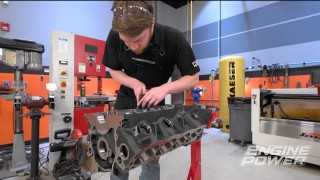
[Pat] We've already gone ahead and checked our oil clearances so we can start putting our 318 together. The factory crank that we balanced and polished can be set into new King bearings from Summit Racing, and the crank is protected with Hot Shots Secrets assembly lube. Each of the main caps are tapped into the registers in the proper location, and the factory bolts are run down with extreme pressure lube applied. After the thrust faces are aligned and the crank is pre-loaded forward, the bolts are torqued to 85 pound feet from the inside out. [ torque wrench beeping ] Very nice. Crank in place, checked at four thousands, and then our new hydraulic roller cam can be installed. [Frankie] This is a Pro Mopar billet retrofit cam from Summit Racing Equipment and has durations at 50 thousandths of 224 degrees on the intake and 236 degrees on the exhaust. The lobes are on a 112 degree lobe separation angle, and the lift at the valve with our rockers is 587 thousandths on the intake and exhaust. We tapped the front lifter galleys for pipe plugs for serviceability but ensured that they do not block off the oil feed galleries in the block. Will reuse the stock thrust plate, and the bolts are torqued to 18 pound feet with locking compound. This new Summit Racing billet timing set replaces the old sloppy one and the original fuel pump eccentric and cam bolt are temporarily installed. -We'll punch in the number one piston and rod assembly, which will allow us to set up a degree wheel to verify the intake center line of our camshaft. For this combo we're going to run the cam a little more retarded at 111.75 degrees on the intake center line, which is a quarter degree advanced. [ Music ] Then the cam bolt can be removed, thread locking compound applied, and then torqued to 40 pound feet. The rest of the rod and piston assemblies can be prepped by applying Hot Shots Secret assembly lube to the bearings and to the wrist pins. -The piston rings are a sixteenth, sixteenth, three-sixteenth set that are gapped at 21 thousandths on the top and 23 thousandths on the second. They are pre-lubed with break-in oil and the skirts are coated for extra protection. Each assembly can be installed into the block with a Summit adjustable ring compressor and a dead blow piston hammer. These little silicone booties protect the crank journals from the rod bolts during installation, and for now the rod caps can just be snug down with an impact. [ Music ]
Once all eight assemblies are in place the block can be flipped over and each rod bolt can be torqued to the stock spec of 45 pound feet. -This is the best way to visualize compression because from this angle you can really see that 4.9cc dome popping up above the deck. To start sealing this engine up the original timing cover with a new seal is bolted on next. Because the original damper was wasted, we got a new replacement unit and it is pressed on to center the timing cover before the bolts are tightened. [ Music ]
Were reusing the original oil pump and pickup because they're in great condition, but we did add 72 thousandths worth of shim to increase the bypass pressure. -The bolts are torqued to 35 pound feet, and then we can lay down some silicone on the front and back of the block to prep for the oil pan. Instead of using a cork gasket, we decided to cut up a one piece Magnum oil pan gasket to use the side pieces and join those with the front and rear seals that came in our timing cover kit. This gives us a fully rubberized seal and compression stops that the bolts can be tightened down to. We couldn't find one. So we made this oil adapter seal, and the factory oil filter housing is reinstalled and torqued to 75 pound feet. -To convert this engine to a hydraulic roller we are using these retrofit Summit Racing tie bar lifters specifically for small block Mopars. The link bar goes towards the block but has no interference and allows for proper pushrod movement. Still to come, we make this Mopar breathe with massive gains in airflow and shed some pounds as we transform it from crappie to scrappy.
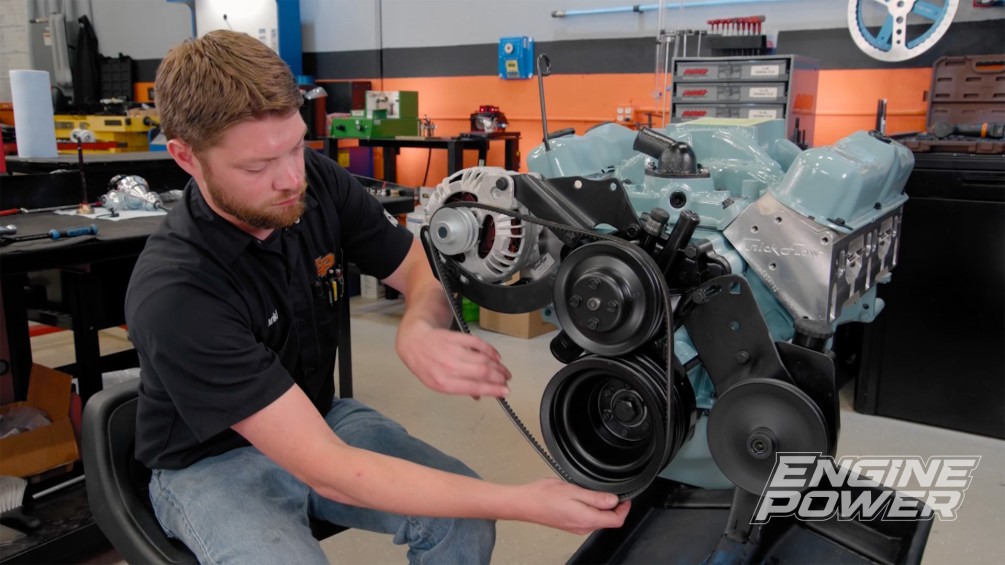
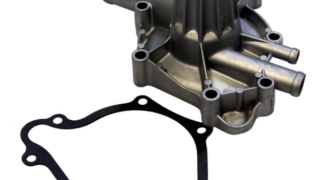
[Frankie] So you probably remember these guys. These are the original cast iron heads off of our 318. And quite frankly they're in good condition, but they are very restrictive for the power level we are looking for. So we're going to jump over the OE and we're going to go straight to the aftermarket because we're not here to mess around. We're here to make horsepower. So what we're going to be using is a set of Trick Flow PowerPort 190 heads for small block Mopar. One of the best off the shelf heads you can get for these things, and they are a huge upgrade over the original. So we're going from a 1.800, 1.500 valve arrangement to a 2.020 and a 1.570. These are a closed chamber head. So it'll work with our domed pistons. We had to do a slight eyebrow notch right here but that's not a big deal. You can do that at home with a grinder and some abrasive rolls if you're patient and careful. We still have a 60.5cc combustion chamber, which is eight smaller than our original. So that's going to help with compression. We have 190cc CNC ported intake port. So this thing flows 298 CFM at 600 lift on our flow bench, which we compared it to the original. This one flows 167 CFM at the same lift. For valve train we have a dual spring setup from Trick Flow set up at 155 pounds a seat, 395 pounds open, and as a huge bonus they are about 20 pounds lighter than the original. So we're going to save a ton of weight there. So it's definitely gonna make it easier to get them on. These heads fit down to a 3.830 and can be used on the LA or Magnum engines as long as you use the right rocker arms. With our 27 thousandths thick head gaskets, we have a measured static compression ratio of 11.43 to 1. [Pat] When we picked up our new cylinder heads we also ordered a set of new high performance head bolts, and they just come from TFS in a regular old white box. But when we opened it up, lo and behold, it has a set of ARP bolts in it. That just goes to show ARP is working with manufacturers to get the right bolt for the right application. In this case we're going to be using a head bolt. This is an 87-40 chromoly rolled thread fastener with six point head. Now these have 180,000 psi of tensile strength and also come with a hardened parallel ground and chamfered washer. It also comes with some ARP Ultra Torque Lube. Now that is specifically designed to work with their fastener to be accurate at all torque levels and have it be repeatable time and time again. Something that is very important is you use the torque value given with the fastener itself. Most of the time that is different from the OEM spec because the material is different and the clamp load will be different. So always use what ARP recommends. They engineer it for the application. So we're going to get these things bolted down. To properly prep the fasteners ARP Ultra Torque lubricant is applied under the head of the bolt but the bottom of the washer is left completely dry. Because some of the bolt holes in the block protrude into the cooling passages, a non-hardening sealer is used on the threads. Each bolt is started by hand, gently run down with an impact, and then the bolts are torqued from the inside out in sequence to a final value of 100 pound feet over three stages. -High pressure grease is applied to these push rods that were custom made for us by our buddies at Manton. They have a 6.6 inch effective length, a five-sixteenths cup for the rocker end, and are made from their series three 41-35 chromoly. Manton Pushrods has a super-fast turnaround time even for custom stuff like this, and they had these at our door in just a couple of days. To install the Harland Sharp rocker shafts the engine is turned over until one side has all the lifters, mostly on the base circle, and the rockers can be slid on as one unit with the adjusters backed off. Once the shaft and push rods are fully seated, the Trick Flow studs are tightened to 25 pound feet. -These rockers have a 1.6 ratio and once both sides are installed, lifter preload can be set at one half turn past zero lash in the engine's firing order. New intake gaskets are glued down and beads of RTV are laid down on the front and rear China walls. For this version we are using a Performer RPM Air Gap Dual Plane from Summit Racing that is specifically for LA engines, and it is held down with ARP bolts. The stock valve covers that have been shaved and color matched can go on next and luckily have no trouble clearing our aftermarket rockers. -This new Duralast water pump from last time has been painted matte black and can be reinstalled with the factory hardware. We'll be using the original accessories but all the brackets have been sandblasted and painted as well for a clean, sleek look. [ Music ]
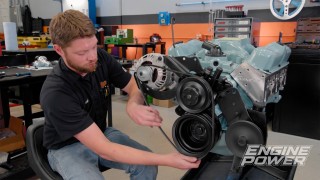
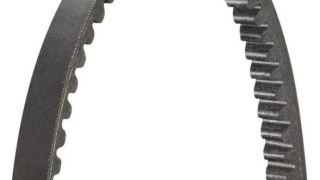
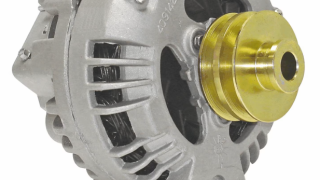
These aftermarket heads did move the alternator bracket out a little bit, but we were able to make some spacers to have the proper alignment. So we still have the alternator that came on this engine. And if you remember, it was not hooked up. And I think we found out why. If you listen closely, I don't know if you'll be able to hear it, but there is kind of like a slight growling underneath. That is one of the bearings prematurely failing. So it has a little bit of resistance. And since we came all this way we might as well just go ahead and replace it. So what we have is a Duralast alternator from our local AutoZone. So this is a remanufactured alternator. Because it's an older application, not as common. But the cool thing is that Duralast treats their remanufactured alternators just like they would their 100 percent brand new ones. These things, although they reuse some of the components that they have to like the case and stuff like that, they use 100 percent all new wear components. So things like the bearings, the brushes, and stuff like that, they replace those with 100 percent brand new components. That way this thing is going to last just as long as it did when it was brand new, and this is triple tested. So three times throughout the assembly process this thing gets tested to make sure that it's functioning properly. So that means when it gets to your vehicle or gets inside your engine bay you can put it on and you know it's going to work right out of the box. Well also pair that with a new Duralast 49 inch V-belt. Once the tension is set everything can be tightened down. [ Music ]
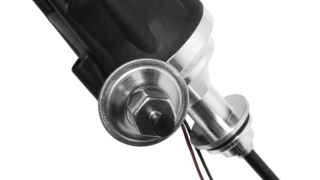
-Our 318 is rolled into the dyno cell, and then with five quarts of oil in the pan we can use an air powered drill to prime the system. [ drill humming ] Because of our billet camshaft, we are replacing the old oil pump drive with a new one with a bronze gear from Milodon. That's followed by a new locked out FiTech distributor, and we made a set of custom 45 degree ceramic boot wires for our Mopar. [ Music ]
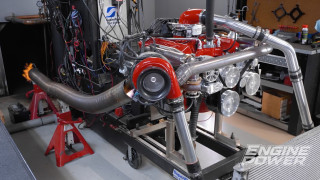
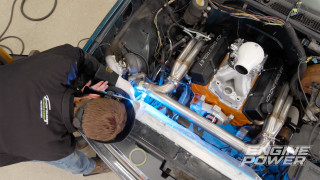
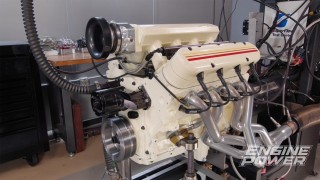
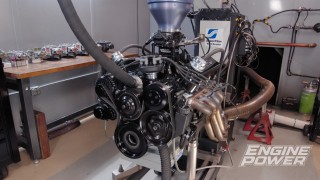
These headers are a dyno set that have a one and three quarter inch primary, and a three inch collector with two and a half inch extension tubes. To top everything off our sheet, our QFT 950 CFM Black Diamond carburetor is set into place to feed this mint green Mopar. -Coming up, our 318 heads to the torture chamber but we're in for a big surprise and big problems.
[Pat] Well we have some good news and some bad news, and we're going to go over both of them. First the good news. This thing runs spectacular. Got it fired up. Everything is great. It was making good power and everything was fine, but now the bad news. [Frankie] That's where things kind of took a turn for the worse. So we were making some preliminary runs. We weren't really even tuning on this thing yet. We were just trying to find where the engine peaked over for power. We're verifying everything, checking everything. And then in a very short amount of time this thing went from about 74, 73 psi of oil pressure to 60, and that is a major problem. That's something that because we're watching it on a dyno, because we're actively trying to test out this engine, we can closely monitor that and take note of it. Luckily it happened here on the dyno because if this was in a car you might not notice that. That was our first indicator of hey, something is going wrong, and there was actually another one as well that popped up. -This is a big one. It dropped torque. Now we closely monitor things like Frankie said. We are always looking to see if there's any problems. We always don't anticipate any problems but you're always looking if something is weird. When the engine drops torque during the run, and we can directly see that, we're not looking at the engine in the dyno room. Were actually looking at our screen monitoring several different things. Oil pressure, torque output, temperatures, EGT sometimes, and also O2s. So if anything goes awry, that is an immediate indicator to shut it off. -So we start going through our checklist. We want to start figuring out what's going wrong. So just to verify that the power issue is what we think it is we immediately go through the health of the top end of the engine. So we check all our valve train. Everything looks good. We do a leak down and compression test on the engine. Every cylinder test between 205 and 210 psi on crank compression and every cylinder had leak down numbers under 6 percent. So absolutely no problems there. That immediately points us to the bottom of the engine. So we drain the oil, cut open the filter, and that's when we find our major indicator of a problem here. This is the oil filter off the engine. And when you cut these open there will be some material in the media itself, but actually this was so bad that there's material sitting in the canister of the filter. If you see, that looks like you're mining for gold in there, which is not a good sign, but this is 100 percent bearing material. So we know that somewhere in the engine we have a bearing that is starting to eat itself, and what that means is that now every bearing in the engine is junk because all that trash has now gone through the engine. -And that's no problem. These things are engines, right? They have problems sometimes. You can verify everything and be as thorough as possible. As you see, we are very thorough. We document, we measure, we do everything that we can to make sure the engine has a good life, but unfortunately sometimes these things happen. This particular one, the engine was still running and it was making no audible noises, meaning there was no knock like it had a bad bearing, and it still had good oil pressure. But because we monitor oil pressure, we knew there was a problem. If this was any vehicle in the street or you were on a dragstrip this thing might not have made this big of indication and you might have ran it until it flushed all the parts out. Luckily we caught this in time. Nothing was hurt, but now we got to get in there and see what it takes to fix it. -Yeah but this is a dyno engine. This is for us to gather data for you guys and show you what parts do. And we were supposed to have this done today, but clearly that is not going to happen. So sadly we are going to have to table this engine for another day. We have other projects coming up that do have a time limit and a time schedule on them. So what we're going to do is we're going to take this engine. We're going to hold on to it. We're going to come back to this at a later period. We're going to tear this thing down and find out what happened. Show you what happened. Then we are going to figure out what we need to do to fix it. Then we're going to dyno it again. Then we can continue on with our multi stages of upgrades. So our 318 is hurt but it is not dead and not out of the count. -We are going to bring it back. This gives us an opportunity to do even more things to it. Not only to dyno it in its current configuration, but to make some upgrades. And if we're thinking about it we can make some nice upgrades as far as the oiling system, the induction system. Make this thing really pop. So, you're just gonna have to bear with us. These things happen and we are not disappointed. We see this as an opportunity. So thank you for watching and make sure you keep watching because this is coming back. We like Mopars. -Yeah, Mopars are great. Just need to get this one back up and going.
Show Full Transcript
[ Music ]
[Frankie] Welcome back to Engine Power, and today we have an action packed episode because we are going to be continuing on our 318 LA Mopar build. This is an engine that was straight from the junkyard and we are doing a high performance rebuild with it. You can check out all the prep work in part one but today we're going to be finishing this engine up. We're going to be putting it back together with our stock components and our upgraded components. We've got new pistons, hydraulic roller valve train, sweet high flowing induction, and we're going to be getting this thing on the dyno and running it to see how much it makes. But first we're going to be putting some new color on it. We're going to be painting this engine right here in our shop. [Pat] You heard Frankie. We're going to be painting it inside our shop in here using Mobile Environmental Solutions' portable inflatable paint booth system. These are great, and they come in a bunch of different sizes depending on what you're doing. These work by not letting any overspray or paint get anywhere else in the building. These are EPA compliant. They have a very high air exchange rate, and they are great for keeping things clean and dust free as you're painting. They're even used by the US military because of their durability and portability. So we're going to get this one set up real soon. Well that inflated in record time. This is a ten by ten by eight. Perfect for what we're doing. Like I said, you can get these things that are enormous. Big enough to do an entire semi and tractor trailer. So this one is perfect for what we're going to be doing. So we're going to roll our stuff in here and get the painting. -We're going to be painting not only the block, but some of the original parts and new parts to give this engine a two tone look. Now that everything is set up we can actually start spraying this thing. What we're going to be using is POR-15s engine enamel. We've used this on the last several engine builds. It looks great. It's extremely durable. But before we get to that, we actually need to coat everything first to protect it. So we're going to be using their gray rust preventive coating. This is not only going to protect from corrosion, but it's also going to give us a uniform base to put our color on top of. You can brush it or spray it. We're going to thin it out and spray it. That's probably pretty good. This coating needs to be stirred, not shaken. And once it's thoroughly mixed we'll use a calibrated scale to thin it out. We only needed to add four percent of their reducer to get the right consistency, and then we'll load it up in a spray gun. All the parts have been scuffed or sandblasted and prepped with PORs cleaner degreaser to remove any oily residue. [ spray gun hissing ] A few light coats followed by a few medium coats gives us good coverage on everything. [ Music ] Everything is cleaned. Our guns cleaned. So we're ready to start moving on to color, and for this combo we like the stock color but we want something a little bit different. So we're going to be mixing up a custom color using POR-15's engine enamel in Chrysler turquoise and in white. We're going to be going for like a minty green maybe, and it's going to go really well with all of our flat black accessories. After stirring both colors, we'll mix them with a two and a half to one ratio turquoise to white. I think that's pretty close. That's the original and that's our little bit lighter new color. Being that it is a little more humid today all the parts will get one medium coat followed by one heavy coat to get a smooth, glossy finish on all the surfaces. [ spray gun hissing ] -While Frankie finishes up painting I'll work on getting our new forged pistons on our press fit rod. This process is pretty simple but it takes a skilled hand and involves heating the small end of the rod to increase its size slightly. Then there's about five seconds to slide the wrist pin through the piston and rod to locate it properly before it cools and the interference fit returns.
We'll do all eight and let them cool off while we get ready for assembly. -Later on Engine Power our small block gets introduced to its high performance upgrades with more compression and modern roller valvetrain.
[Pat] We've already gone ahead and checked our oil clearances so we can start putting our 318 together. The factory crank that we balanced and polished can be set into new King bearings from Summit Racing, and the crank is protected with Hot Shots Secrets assembly lube. Each of the main caps are tapped into the registers in the proper location, and the factory bolts are run down with extreme pressure lube applied. After the thrust faces are aligned and the crank is pre-loaded forward, the bolts are torqued to 85 pound feet from the inside out. [ torque wrench beeping ] Very nice. Crank in place, checked at four thousands, and then our new hydraulic roller cam can be installed. [Frankie] This is a Pro Mopar billet retrofit cam from Summit Racing Equipment and has durations at 50 thousandths of 224 degrees on the intake and 236 degrees on the exhaust. The lobes are on a 112 degree lobe separation angle, and the lift at the valve with our rockers is 587 thousandths on the intake and exhaust. We tapped the front lifter galleys for pipe plugs for serviceability but ensured that they do not block off the oil feed galleries in the block. Will reuse the stock thrust plate, and the bolts are torqued to 18 pound feet with locking compound. This new Summit Racing billet timing set replaces the old sloppy one and the original fuel pump eccentric and cam bolt are temporarily installed. -We'll punch in the number one piston and rod assembly, which will allow us to set up a degree wheel to verify the intake center line of our camshaft. For this combo we're going to run the cam a little more retarded at 111.75 degrees on the intake center line, which is a quarter degree advanced. [ Music ] Then the cam bolt can be removed, thread locking compound applied, and then torqued to 40 pound feet. The rest of the rod and piston assemblies can be prepped by applying Hot Shots Secret assembly lube to the bearings and to the wrist pins. -The piston rings are a sixteenth, sixteenth, three-sixteenth set that are gapped at 21 thousandths on the top and 23 thousandths on the second. They are pre-lubed with break-in oil and the skirts are coated for extra protection. Each assembly can be installed into the block with a Summit adjustable ring compressor and a dead blow piston hammer. These little silicone booties protect the crank journals from the rod bolts during installation, and for now the rod caps can just be snug down with an impact. [ Music ]
Once all eight assemblies are in place the block can be flipped over and each rod bolt can be torqued to the stock spec of 45 pound feet. -This is the best way to visualize compression because from this angle you can really see that 4.9cc dome popping up above the deck. To start sealing this engine up the original timing cover with a new seal is bolted on next. Because the original damper was wasted, we got a new replacement unit and it is pressed on to center the timing cover before the bolts are tightened. [ Music ]
Were reusing the original oil pump and pickup because they're in great condition, but we did add 72 thousandths worth of shim to increase the bypass pressure. -The bolts are torqued to 35 pound feet, and then we can lay down some silicone on the front and back of the block to prep for the oil pan. Instead of using a cork gasket, we decided to cut up a one piece Magnum oil pan gasket to use the side pieces and join those with the front and rear seals that came in our timing cover kit. This gives us a fully rubberized seal and compression stops that the bolts can be tightened down to. We couldn't find one. So we made this oil adapter seal, and the factory oil filter housing is reinstalled and torqued to 75 pound feet. -To convert this engine to a hydraulic roller we are using these retrofit Summit Racing tie bar lifters specifically for small block Mopars. The link bar goes towards the block but has no interference and allows for proper pushrod movement. Still to come, we make this Mopar breathe with massive gains in airflow and shed some pounds as we transform it from crappie to scrappy.
[Frankie] So you probably remember these guys. These are the original cast iron heads off of our 318. And quite frankly they're in good condition, but they are very restrictive for the power level we are looking for. So we're going to jump over the OE and we're going to go straight to the aftermarket because we're not here to mess around. We're here to make horsepower. So what we're going to be using is a set of Trick Flow PowerPort 190 heads for small block Mopar. One of the best off the shelf heads you can get for these things, and they are a huge upgrade over the original. So we're going from a 1.800, 1.500 valve arrangement to a 2.020 and a 1.570. These are a closed chamber head. So it'll work with our domed pistons. We had to do a slight eyebrow notch right here but that's not a big deal. You can do that at home with a grinder and some abrasive rolls if you're patient and careful. We still have a 60.5cc combustion chamber, which is eight smaller than our original. So that's going to help with compression. We have 190cc CNC ported intake port. So this thing flows 298 CFM at 600 lift on our flow bench, which we compared it to the original. This one flows 167 CFM at the same lift. For valve train we have a dual spring setup from Trick Flow set up at 155 pounds a seat, 395 pounds open, and as a huge bonus they are about 20 pounds lighter than the original. So we're going to save a ton of weight there. So it's definitely gonna make it easier to get them on. These heads fit down to a 3.830 and can be used on the LA or Magnum engines as long as you use the right rocker arms. With our 27 thousandths thick head gaskets, we have a measured static compression ratio of 11.43 to 1. [Pat] When we picked up our new cylinder heads we also ordered a set of new high performance head bolts, and they just come from TFS in a regular old white box. But when we opened it up, lo and behold, it has a set of ARP bolts in it. That just goes to show ARP is working with manufacturers to get the right bolt for the right application. In this case we're going to be using a head bolt. This is an 87-40 chromoly rolled thread fastener with six point head. Now these have 180,000 psi of tensile strength and also come with a hardened parallel ground and chamfered washer. It also comes with some ARP Ultra Torque Lube. Now that is specifically designed to work with their fastener to be accurate at all torque levels and have it be repeatable time and time again. Something that is very important is you use the torque value given with the fastener itself. Most of the time that is different from the OEM spec because the material is different and the clamp load will be different. So always use what ARP recommends. They engineer it for the application. So we're going to get these things bolted down. To properly prep the fasteners ARP Ultra Torque lubricant is applied under the head of the bolt but the bottom of the washer is left completely dry. Because some of the bolt holes in the block protrude into the cooling passages, a non-hardening sealer is used on the threads. Each bolt is started by hand, gently run down with an impact, and then the bolts are torqued from the inside out in sequence to a final value of 100 pound feet over three stages. -High pressure grease is applied to these push rods that were custom made for us by our buddies at Manton. They have a 6.6 inch effective length, a five-sixteenths cup for the rocker end, and are made from their series three 41-35 chromoly. Manton Pushrods has a super-fast turnaround time even for custom stuff like this, and they had these at our door in just a couple of days. To install the Harland Sharp rocker shafts the engine is turned over until one side has all the lifters, mostly on the base circle, and the rockers can be slid on as one unit with the adjusters backed off. Once the shaft and push rods are fully seated, the Trick Flow studs are tightened to 25 pound feet. -These rockers have a 1.6 ratio and once both sides are installed, lifter preload can be set at one half turn past zero lash in the engine's firing order. New intake gaskets are glued down and beads of RTV are laid down on the front and rear China walls. For this version we are using a Performer RPM Air Gap Dual Plane from Summit Racing that is specifically for LA engines, and it is held down with ARP bolts. The stock valve covers that have been shaved and color matched can go on next and luckily have no trouble clearing our aftermarket rockers. -This new Duralast water pump from last time has been painted matte black and can be reinstalled with the factory hardware. We'll be using the original accessories but all the brackets have been sandblasted and painted as well for a clean, sleek look. [ Music ]
These aftermarket heads did move the alternator bracket out a little bit, but we were able to make some spacers to have the proper alignment. So we still have the alternator that came on this engine. And if you remember, it was not hooked up. And I think we found out why. If you listen closely, I don't know if you'll be able to hear it, but there is kind of like a slight growling underneath. That is one of the bearings prematurely failing. So it has a little bit of resistance. And since we came all this way we might as well just go ahead and replace it. So what we have is a Duralast alternator from our local AutoZone. So this is a remanufactured alternator. Because it's an older application, not as common. But the cool thing is that Duralast treats their remanufactured alternators just like they would their 100 percent brand new ones. These things, although they reuse some of the components that they have to like the case and stuff like that, they use 100 percent all new wear components. So things like the bearings, the brushes, and stuff like that, they replace those with 100 percent brand new components. That way this thing is going to last just as long as it did when it was brand new, and this is triple tested. So three times throughout the assembly process this thing gets tested to make sure that it's functioning properly. So that means when it gets to your vehicle or gets inside your engine bay you can put it on and you know it's going to work right out of the box. Well also pair that with a new Duralast 49 inch V-belt. Once the tension is set everything can be tightened down. [ Music ]
-Our 318 is rolled into the dyno cell, and then with five quarts of oil in the pan we can use an air powered drill to prime the system. [ drill humming ] Because of our billet camshaft, we are replacing the old oil pump drive with a new one with a bronze gear from Milodon. That's followed by a new locked out FiTech distributor, and we made a set of custom 45 degree ceramic boot wires for our Mopar. [ Music ]
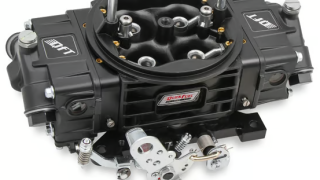
These headers are a dyno set that have a one and three quarter inch primary, and a three inch collector with two and a half inch extension tubes. To top everything off our sheet, our QFT 950 CFM Black Diamond carburetor is set into place to feed this mint green Mopar. -Coming up, our 318 heads to the torture chamber but we're in for a big surprise and big problems.
[Pat] Well we have some good news and some bad news, and we're going to go over both of them. First the good news. This thing runs spectacular. Got it fired up. Everything is great. It was making good power and everything was fine, but now the bad news. [Frankie] That's where things kind of took a turn for the worse. So we were making some preliminary runs. We weren't really even tuning on this thing yet. We were just trying to find where the engine peaked over for power. We're verifying everything, checking everything. And then in a very short amount of time this thing went from about 74, 73 psi of oil pressure to 60, and that is a major problem. That's something that because we're watching it on a dyno, because we're actively trying to test out this engine, we can closely monitor that and take note of it. Luckily it happened here on the dyno because if this was in a car you might not notice that. That was our first indicator of hey, something is going wrong, and there was actually another one as well that popped up. -This is a big one. It dropped torque. Now we closely monitor things like Frankie said. We are always looking to see if there's any problems. We always don't anticipate any problems but you're always looking if something is weird. When the engine drops torque during the run, and we can directly see that, we're not looking at the engine in the dyno room. Were actually looking at our screen monitoring several different things. Oil pressure, torque output, temperatures, EGT sometimes, and also O2s. So if anything goes awry, that is an immediate indicator to shut it off. -So we start going through our checklist. We want to start figuring out what's going wrong. So just to verify that the power issue is what we think it is we immediately go through the health of the top end of the engine. So we check all our valve train. Everything looks good. We do a leak down and compression test on the engine. Every cylinder test between 205 and 210 psi on crank compression and every cylinder had leak down numbers under 6 percent. So absolutely no problems there. That immediately points us to the bottom of the engine. So we drain the oil, cut open the filter, and that's when we find our major indicator of a problem here. This is the oil filter off the engine. And when you cut these open there will be some material in the media itself, but actually this was so bad that there's material sitting in the canister of the filter. If you see, that looks like you're mining for gold in there, which is not a good sign, but this is 100 percent bearing material. So we know that somewhere in the engine we have a bearing that is starting to eat itself, and what that means is that now every bearing in the engine is junk because all that trash has now gone through the engine. -And that's no problem. These things are engines, right? They have problems sometimes. You can verify everything and be as thorough as possible. As you see, we are very thorough. We document, we measure, we do everything that we can to make sure the engine has a good life, but unfortunately sometimes these things happen. This particular one, the engine was still running and it was making no audible noises, meaning there was no knock like it had a bad bearing, and it still had good oil pressure. But because we monitor oil pressure, we knew there was a problem. If this was any vehicle in the street or you were on a dragstrip this thing might not have made this big of indication and you might have ran it until it flushed all the parts out. Luckily we caught this in time. Nothing was hurt, but now we got to get in there and see what it takes to fix it. -Yeah but this is a dyno engine. This is for us to gather data for you guys and show you what parts do. And we were supposed to have this done today, but clearly that is not going to happen. So sadly we are going to have to table this engine for another day. We have other projects coming up that do have a time limit and a time schedule on them. So what we're going to do is we're going to take this engine. We're going to hold on to it. We're going to come back to this at a later period. We're going to tear this thing down and find out what happened. Show you what happened. Then we are going to figure out what we need to do to fix it. Then we're going to dyno it again. Then we can continue on with our multi stages of upgrades. So our 318 is hurt but it is not dead and not out of the count. -We are going to bring it back. This gives us an opportunity to do even more things to it. Not only to dyno it in its current configuration, but to make some upgrades. And if we're thinking about it we can make some nice upgrades as far as the oiling system, the induction system. Make this thing really pop. So, you're just gonna have to bear with us. These things happen and we are not disappointed. We see this as an opportunity. So thank you for watching and make sure you keep watching because this is coming back. We like Mopars. -Yeah, Mopars are great. Just need to get this one back up and going.
Engine Power Featured Projects
Engine Power Builds




Want more content like this?
Join the PowerNation Email NewsletterParts Used In This Episode

Mobile Environmental Solutions
Mobile Inflatable Paint Booth
Summit Racing
Summit Racing Billet Steel Timing Chain & Gear Set for Small Block Mopar
Summit Racing
Trick Flow PowerPort 190 Cylinder Heads for Small Block Mopar
UEM Pistons and Rings
ICON Forged Piston Kit