In This Episode
- 0:01 Introduction and Overview
- 1:21 Initial Setup and Challenges
- 2:10 Engine Disassembly and Upgrades
- 6:00 Piston and Cylinder Preparation
- 7:02 Rod and Crankshaft Upgrades
- 8:01 Main Caps and Bolts Installation
- 9:01 Camshaft and Valvetrain Installation
- 10:38 Oil Pump and Rear Cover Installation
- 11:30 Head Gaskets and Springs Installation
- 12:30 Intake Manifold and EFI System Installation
- 14:00 Naturally Aspirated Dyno Run
- 17:05 Brake Upgrades and Crank Sensor Replacement
- 19:12 Turbocharged Dyno Run
Video Transcript
[Frankie] You're watching Powernation.
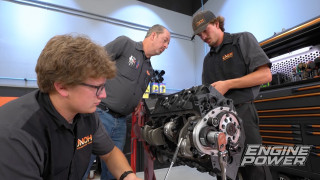
[Frankie] Today on Engine Power we bring back our junkyard 5.3-Liter for some serious upgrades. [Pat] Forged pistons, more cam, and swap ready components let us turn up the boost for big block power levels. [ Music ]
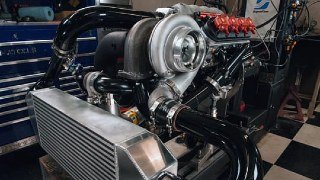
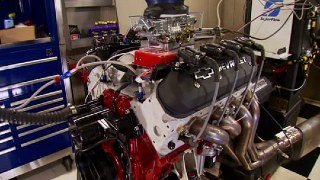
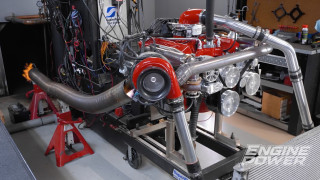
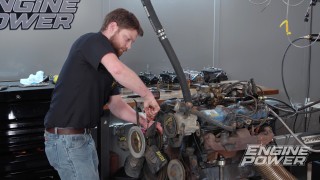
Hey everyone, welcome to Engine Power. As you've probably figured out by now we are not in our shop. We are out here where we corral all of that horsepower we build in the engine stable. Now these are engines that are complete and awaiting homes, hopefully in the future, but there's also engines here looking for some improvement and we have one of those today but it's back there where the skinny host is. [Frankie] Yeah, what we have is our junkyard 5.3-Liter LS with a turbocharger. This is a cool engine that we brought in to show you guys exactly what it takes to put a turbo on one of these engines. It made pretty respectable power. But since then, as you can see, it's been shoved back here in the corner. It's been neglected, it's been rejected. We've had parts stolen off it. We're missing a bunch of stuff but today we want to bring this thing back. We have a few cool upgrades to make some more power with it and we're going to make it look way better to get it ready for that infamous turbo LS swap. But we have to get it out of here. So we're going to do that and you can check out how we got this engine and how much power it made with the current setup. We picked up this 2009 five three LMG from a local salvage yard and before we just started throwing parts at it we ran a few checks and dyno'ed the engine naturally aspirated in its stock form as a baseline. It made a respectable 353 horsepower and 370 pound feet. With everything looking good we invested a little elbow grease into cleaning it up. [Pat] The turbo install consisted of a Summit Racing hot side kit that came with a right side cast exhaust manifold, a GT-7875 turbo, and twin 44 millimeter waste gates. And then it went back on the dyno to make a solid 512 horsepower and 524 pound feet of torque. -For the upgrades we have planned today we are going to have to tear this engine all the way down to the block. So let's get after it. -Where do these go? -In the trash over there. [ Music ]
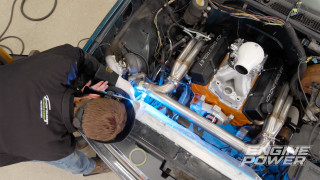
[ torch hissing ] [Pat] We're going to try and attempt to get some of these exhaust bolts out without breaking them. The first one on the last iteration of this engine snapped immediately off but we're going to see if we can sneak them out. I'm gonna be using some Deep Creep from Seafoam. What I really like about the Deep Creep is that it is a penetrating oil and this is what it is actually made to do. This is actually made to lubricate, loosen, and more importantly, get in to help free up some stock bolts. Now this one maybe a little bit more challenging for it but we're going to give her a shot and see what it comes out. Putting a little heat in this thing so I can get some wicking action on this but Deep Creep works good for everything. Not only for getting bolts loose but for rust protection. Deep Creep comes out in a nice foam. Has a nice straw. So it keeps in the same place where it's supposed to be. It really works good in most applications where you just need to get in there, break up some rust, and get things loose like a good penetrating oil should. So we're going to see how it works. -Oh mine came out really easy. I don't know what the big deal is. [ Music ]
-Oh, no way. That one actually turns. What about the one next to it? -Deep Creep for the win. -Nice job Seafoam. [ Music ]
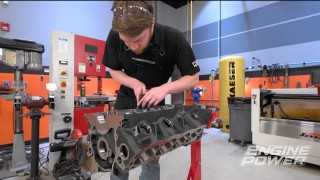
If you remember we said we're going to put some cool parts on this engine. Well it all starts with a brand new set of pistons. Now this engine was completely stock. Stock everything and that means it had a hypereutectic piston in it, which did perform admirably at our power level. But we want to push this thing a little bit harder. So we need some pistons that are going to take the abuse. So we called up our friends at UEM and we got a set of forged icon pistons for it. Now they have a bunch of different applications no matter what you're working on. Plus they have a lot for LS. Our particular one we chose this piston. 40-32 for the alloy that's in it. It has a 3cc valve relief. It has a 1.5mm, 1.5mm, 3mm ring pack with a coated skirt. Also, we got these in 30 over because the engine had not been apart before but we didn't know if we had to address any problems with the cylinders. It turns out it's okay but we have to get that out to 30 thousandths oversized on the final bore. So we got it in our Sunnen SV-15 and we're going to rough them out, finish them up, and get them ready for these slugs. We'll rough the cylinder out to size with a set up 150 grit diamond abrasives letting the machine dwell as needed to keep the cylinder straight. Then with the base of our surface profile set we'll use a set of 600 grit abrasives to follow up for the plateau finish. This will allow our boosted engine to seal properly and still have a finish better than factory. -Next up we lay stuff in, seal stuff up, and torque stuff down as our upgrades come together.
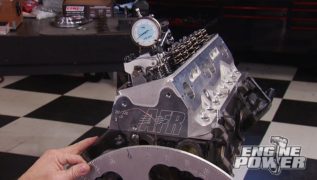
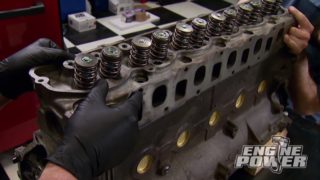
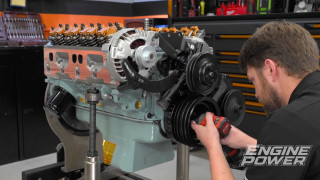
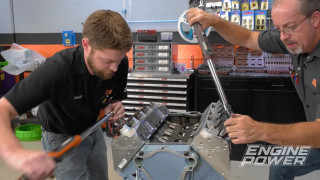
[Frankie] All right, has this thing cleaned up or what? We have gotten our five-three fully cleaned after it was in the hone. We even threw on a nice, easy black paint job. What we're doing now is we are gapping our rings. This is our new set that came with our UEM pistons. For these we are gapping these for a little bit more boost than last time. We're shooting for a higher power number. So the top ring we're going to set at 21 thousandths, and then the second ring we're going to set at 23 thousandths. When we get done setting each ring we're going to carefully deburr it with our India stone and then we'll check our gap in the block making sure we have a light but even drag on the feeler gauge at the size we want. For this engine we are going to be reusing the factory rods because these are the Gen-4 rods. These are a powdered metal crack cap design. Something we did have to do is resize the small ends. Just had to open them up about two thousandths for our 945 pins. And the other big modification we're going to be doing is upgrading the rod bolts because these come with a factory torque to yield GM rod bolt, which works fine in the OE intended purpose. But bad thing about being torque to yield is we can only reuse it about two or three times max. So we're going to be replacing it with a full set of ARP rod bolts. This is a rod bolt kit they make specifically for the LS, and the big advantage is that it is not only stronger. It's 180,000 psi of tensile strength. It also is a reusable fastener. So we can un-torque it and torque it as many times as we want. And as a bonus, they designed it to have a little bit more thread engagement as well. So this is a drop in replacement for the OE bolt. What we're going to do is prep it properly so we can get the accurate clamp load that we need. So to prep these we are going to apply ARP's Ultra Torque Fastener Assembly lubricant. It's not necessarily designed to be the absolute slickest material. It's actually designed to have a consistent amount of friction. That way every time you torque the fastener you get the same amount of clamp no matter what. And then we'll slide them right into our rods. Now, generally when you're replacing rod bolts you have to resize the big end of the rod. But we have done this several times. Just replace the rods measuring everything very carefully and haven't had any issues. So we're going to check these and make sure we have proper and adequate bearing clearance and then we should be good. These bolts come with specific instructions so we can torque them to 45 pound feet to get the proper bolt stretch of 55 to 60 ten thousandths of an inch. Then with a dial bore gauge zeroed to the matching rod journal we can check our vertical oil clearance, and they all fall between 19 and 21 ten thousandths. [Pat] Because the bearings look so good we are going to reuse all of them, and the factory crank that was rebalanced with our new piston goes in to start the reassembly process. Each of the main caps are gently tapped down to get them seated and ready for fasteners. All right, with our mains in it's time to stick in the main bolts. That actually opens up an interesting subject about bolts and fasteners themselves and the different types and how they apply clamp load in your engine. And that is the subject of today's Summit Tech Tip. Really quick we're going to talk about a couple of different types of fasteners by definition and function. We're going to talk about first one we've all heard of, torque to yield. What happens when you torque the fastener? It will actually extend itself. It will lengthen and it will go past its what's called yield point. That means the bolt is permanently deformed but it is done under clamp load. But when you remove the load, the bolt does not return to its original shape. So it does not have any elasticity to use again. So that is one use only thing. Now we're going to talk about what something called torque to angle. This fastener is reusable, meaning when that load is released the fastener returns back to its original length and it still has its elasticity. So it can be used over and over again. Kind of what we're used to on normal fasteners. Keep in mind both of the sequences of how these are tightened look pretty much the same. They both get a base torque setting like 10 or 15 pound feet, and then they both go to a certain angle and that's what achieves clamp load. LS main fasteners are torque to angle. So these are dropped in with some engine oil for lubrication before they are all torqued to a base setting of 15 pound feet. Then the inners are tightened an additional 80 degrees and the outers are tightened an additional 51 degrees. The small side bolts get silicone under their heads to prevent leaks and are torqued to 18 pound feet. -We are swapping the stock bump stick for a Summit Racing LS truck swap cam that has durations at 50 thousanths lift of 218 degrees on the intake and 227 on the exhaust. The lobes are set on a 112 degree LSA and lift at the valve is 522 thousandths on the intake and 524 thousandths on the exhaust. Factory cam retaining plate is reinstalled with lube and orange thread locker on the bolts that are torque to 24 pound feet. -The factory tensioner assembly is reinstalled in the same manner, and the new cam uses a three bolt configuration instead of the stock one bolt. So we are trading up to a Summit single roller billet timing set with a multiple keyway lower gear. To degree the camshaft the number one piston is installed for real, and then our custom made wheel is set up on the crank. We are going to run the cam three degrees advanced at 109. -Then the remaining stock rods and icon pistons can be assembled with Hot Shots Assembly lube. The new wire locks are followed by the previously gapped rings and lighter assembly lube. Each set is carefully pressed into the block in the correct orientation using a Summit Racing adjustable ring compressor. Then each rod bolt is torqued to 45 pound feet and checked for the proper stretch again. -We already disassembled, ported, cleaned and put an 82 thousandths shim under the return spring of the stock oil pump so it can slide back on next. Once the bolts are in one and a half thousandths thick shims are used to center the gears before torquing the housing in place. The stock windage tray drops back on and the stock hardware is torqued to 25 pound feet, followed by this FiTech oil pump pickup that matches our new pan. It is also torqued in place with thread locker. In the back the new replacement oil barbell is carefully pressed in, and then the rear cover with a new seal can be slid on, scored to the decks, and tightened down. -The front cover also got a new seal. And once all the bolts are in, this plastic sleeve centers the cover so it can be cinched tight. Small beads of RTV seal the mating surfaces, and then this new FiTech six quart swap oil pan can drop on. And we have already added a new oil drain bung to the side for our turbo. With the engine flipped over a set of stock non-AFM LS3 lifters with new standard trays can slide in and they are torqued in place to 120 pound inches. -These replacement MLS style head gaskets follow and have a 3.880 bore and a 50 thousandths compressed thickness, which sets our static compression ratio at a safe 9.78 to 1. The 799 casting heads have been cleaned, valve jobs lapped, and the springs upgraded with a complete Summit Racing LS dual spring kit that is set up for 140 pounds of seat pressure and 340 pounds at open. A set of ARP head bolts are replacing the stock torque to yield ones for their reusability and increased clamp strength. The 11 millimeter bolts are torqued to 80 pound feet, and the eight millimeter ones are torqued to 28 pound feet. Coming up, our 5.3 is back on the dyno with its new parts and we're gonna dyno it n/a. N/A all the way? -N/A all the way baby!
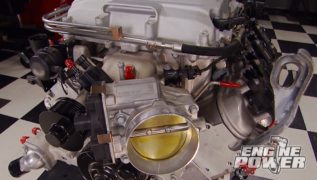
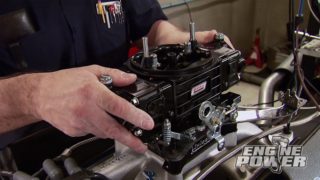
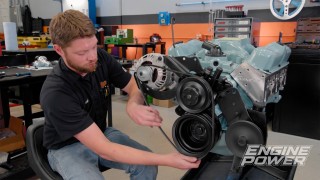
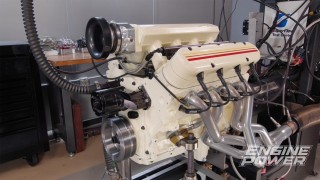
[Pat] All right, the old junkyard 5-3 is looking pretty good. We're going to get our valley plate on. This is a different one that came off it. This thing has displacement on demand and we are going to eliminate that. This is actually a factory one that has that deleted. So we have O-rings that go over our holes, plugs them up, and that effectively disables the system. [Frankie] Once the cover is tightened down with the stock hardware the painted original damper can be pressed back on to seal up the front end. One of the other major upgrades we'll be doing is installing a Summit Racing roller trunnion upgrade kit in a stock rocker bodies to increase their travel and longevity. After pressing out the old bearings with the tool, the new shaft and bearings are pressed into the rocker body and snap rings are installed to retain. -Once they are all done the valvetrain can go back in using the stock push rods and rocker stands. The upgraded rockers are installed on each cylinder at tdc compression stroke in the firing order, and the factory hardware is torque to 24 pound feet. With everything lubricated, new FiTech valve covers will seal up the crankcase. -Okay, this is where we start to splurge on our little 5-3 and we're really upgrading it from that junkyard status we had before. So this is our new induction package and this is actually a FiTech nitro port thousand horsepower EFI system. So this comes with their new cast aluminum cathedral port short intake manifold. We have 102 millimeter fully loaded throttle body. So we're gonna get a little more airflow out of that. And this is all fully assembled, fully O-ringed. So we can literally just drop it right on. Now this is going to be paired with their ultimate LS ECU and EFI system. It also has a full wiring harness, transmission control. It has a very nice learn function with bank to bank learning. We are going to be pairing that with a set of their Go-Spark coils as well on top of our valve covers. These are the really cool ones that have the blue LED to them, which is also great for a diagnostic. Plus, it does look way cooler. -All right, 5.3 redo, reboot. What are we going to call it? It's the predecessor to the new turbo stuff that we're doing with it. So what we're going to is we got it running. Runs great, everything fired up. We're going to make our naturally aspirated run. This is going to be pretty interesting because the intake manifold has about a six inch shorter runner. [Frankie] Well we've changed a few things right. So we have a little bit less static compression. Yeah we have about 20 more degrees of intake duration on the camshaft. And we have a shorter height and shorter runner on the intake manifold. So basically this is a verification for the engine so that we know what we picked up and also make sure everything's working the way it's supposed to before we start putting boost on it. We've already made a couple of runs and got this thing tuned in. We're at 13.1 target AFR and we are at 28 degrees of total timing. So we're going to make a hit. -All right, we are ready to rock and roll here. All right hold on to something. Here we go. [ engine idling ] I love how smooth this thing is. -2,500, over 300 pound feet right there. [ engine revving ]
-Smooth as glass baby. -I don't know who ported and shimmed that oil pump but I saw 98 psi of oil pressure. -It's got a whole bunch of oil pressure. -That is solid, 414.4 horsepower. Looks like right at 6,500. We may have to stretch that out a little bit. And 359.6 pound feet at 5,300. So that's pretty solid. AFRs look good, tracking perfectly on 13-1. I think it looks great. Let's just make another run and turn it higher. -What do you think, 7,000? -It looks like it's going to peak over by then. -I think it's going to be great. Here we go. [ engine revving ]
-419.1 horsepower. Looks like I would call that peak probably right at 6,700 and picked up a little bit of torque too, 362.4. It's getting some oil temp in it. - Get some oil temp in it. Get a little heat in her. Before the engine made 350 something. -Like 353 I think. So yeah that's great. Go ahead and shut it down. Time to put the snail on it. -It's time to put the pressurization to it. So away we go. -When we come back n/a goes away and because this engine is a whole lot fresher it's time to turn up the pressure.
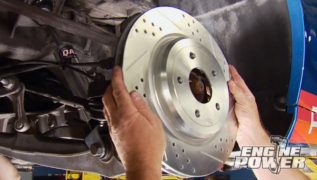
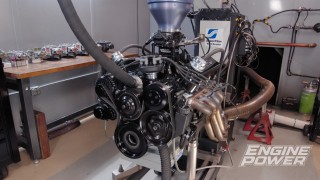
[Frankie] Building a massive amount of horsepower is always extremely fun but when you start putting that in your project that's when you need to start thinking about brakes and a great kit that you can get is the USR slotted brake kit from EBC Brakes. This is a complete kit. It comes with a set of their fully coated rotors. These have a Geomet coating for rust prevention. They also have their multi slot design which keeps pad wear even, keeps the brakes silent, and gives a place for that brake dust to go so you have consistent braking. Speaking of pad wear, we also like using their Redstuff pads because these are specifically formulated for street use. So this is a complete kit that'll get you way, way ahead of a stock or OE level brakes. So next time you're making a bunch of power and sticking it in a project make sure you get an EBC brake kit to go with it. So when we originally tried to dyno this engine with the turbo we were having some weird issues where it was breaking up when we started to get it under load. And what we actually figured out was that the issue is our stock crank sensor. We diagnosed it and this is the original crank sensor that came in the engine from the junkyard and it is giving us some intermittent issues in and is faulty. So what we're going to do is replace it with a brand new one from Duralast. We got this from our local AutoZone. And the reason we're using this over like an OE crank sensor is because they actually designed these to be as good or better than the OE sensors as far as form, fit and function. So what that means is they're not just copying the original design. They're actually going through and making sure that if there's any potential defects they're fixing those before it ends up in your vehicle and is giving you problems. So we have a brand new one. We're going to put this one in. It's going to solve all our issues. So we picked it up basically 60 naturally aspirated. We now have our dual Summit 44 millimeter waste gates filled with like basically 11 psi springs. We bumped the RPM range up just a little bit to 3,000 or 7,000 just because we don't want this thing baking down. [Pat] We are on pump gas. -Yes, that is a key factor. As with most of our turbo builds, we are on 93 octane pump gas. [Pat] Who knows how good it is, right? So we're just going to see how it runs and go from there. What it is, is what it is. -Let's see what it'll do. -I can't watch. No, it's going to be good. -And there goes the torque. -And that goes the boost! -Let her make a little bit. 12 psi. [ engine revving ]
Let's see here. We got 646 pound feet right at 4,000 rpm and 660.7 horsepower right at 6,200. We did hit our peak right there at 12 psi. Then right around, let's call it 6,000 and up It starts to taper off down in the high tens. So that's why that power starts to. You see it start to come off on the curve. For what we're doing that is spectacular right. For parts that were put in it, very very cheap, Very very easy. Made great power naturally aspirated. I mean, that's really, really nice. -See if it does it again. -I think it's gonna do it again. -It should. It didn't care at all. [ engine revving ]
It made 646 for torque and it made 661.8. So this thing is just eating it repeatable. I mean that's a beautiful graph. Makes great torque, great power. I think on the street what more would you want? -I think this is great. Could we do more with it? I mean we can because look at the opportunities. We've done this on other engines right. Like okay, now what would be the next best thing? Well, we could probably upgrade the heads, right? We could make more boost. We are not going to take that chance. The last thing we want to do is blow the damn thing. -I mean, with the inconsistency of pump gas this is a good safe measure. Time to shut her down. -Great success!
Show Full Transcript
[Frankie] Today on Engine Power we bring back our junkyard 5.3-Liter for some serious upgrades. [Pat] Forged pistons, more cam, and swap ready components let us turn up the boost for big block power levels. [ Music ]
Hey everyone, welcome to Engine Power. As you've probably figured out by now we are not in our shop. We are out here where we corral all of that horsepower we build in the engine stable. Now these are engines that are complete and awaiting homes, hopefully in the future, but there's also engines here looking for some improvement and we have one of those today but it's back there where the skinny host is. [Frankie] Yeah, what we have is our junkyard 5.3-Liter LS with a turbocharger. This is a cool engine that we brought in to show you guys exactly what it takes to put a turbo on one of these engines. It made pretty respectable power. But since then, as you can see, it's been shoved back here in the corner. It's been neglected, it's been rejected. We've had parts stolen off it. We're missing a bunch of stuff but today we want to bring this thing back. We have a few cool upgrades to make some more power with it and we're going to make it look way better to get it ready for that infamous turbo LS swap. But we have to get it out of here. So we're going to do that and you can check out how we got this engine and how much power it made with the current setup. We picked up this 2009 five three LMG from a local salvage yard and before we just started throwing parts at it we ran a few checks and dyno'ed the engine naturally aspirated in its stock form as a baseline. It made a respectable 353 horsepower and 370 pound feet. With everything looking good we invested a little elbow grease into cleaning it up. [Pat] The turbo install consisted of a Summit Racing hot side kit that came with a right side cast exhaust manifold, a GT-7875 turbo, and twin 44 millimeter waste gates. And then it went back on the dyno to make a solid 512 horsepower and 524 pound feet of torque. -For the upgrades we have planned today we are going to have to tear this engine all the way down to the block. So let's get after it. -Where do these go? -In the trash over there. [ Music ]
[ torch hissing ] [Pat] We're going to try and attempt to get some of these exhaust bolts out without breaking them. The first one on the last iteration of this engine snapped immediately off but we're going to see if we can sneak them out. I'm gonna be using some Deep Creep from Seafoam. What I really like about the Deep Creep is that it is a penetrating oil and this is what it is actually made to do. This is actually made to lubricate, loosen, and more importantly, get in to help free up some stock bolts. Now this one maybe a little bit more challenging for it but we're going to give her a shot and see what it comes out. Putting a little heat in this thing so I can get some wicking action on this but Deep Creep works good for everything. Not only for getting bolts loose but for rust protection. Deep Creep comes out in a nice foam. Has a nice straw. So it keeps in the same place where it's supposed to be. It really works good in most applications where you just need to get in there, break up some rust, and get things loose like a good penetrating oil should. So we're going to see how it works. -Oh mine came out really easy. I don't know what the big deal is. [ Music ]
-Oh, no way. That one actually turns. What about the one next to it? -Deep Creep for the win. -Nice job Seafoam. [ Music ]
If you remember we said we're going to put some cool parts on this engine. Well it all starts with a brand new set of pistons. Now this engine was completely stock. Stock everything and that means it had a hypereutectic piston in it, which did perform admirably at our power level. But we want to push this thing a little bit harder. So we need some pistons that are going to take the abuse. So we called up our friends at UEM and we got a set of forged icon pistons for it. Now they have a bunch of different applications no matter what you're working on. Plus they have a lot for LS. Our particular one we chose this piston. 40-32 for the alloy that's in it. It has a 3cc valve relief. It has a 1.5mm, 1.5mm, 3mm ring pack with a coated skirt. Also, we got these in 30 over because the engine had not been apart before but we didn't know if we had to address any problems with the cylinders. It turns out it's okay but we have to get that out to 30 thousandths oversized on the final bore. So we got it in our Sunnen SV-15 and we're going to rough them out, finish them up, and get them ready for these slugs. We'll rough the cylinder out to size with a set up 150 grit diamond abrasives letting the machine dwell as needed to keep the cylinder straight. Then with the base of our surface profile set we'll use a set of 600 grit abrasives to follow up for the plateau finish. This will allow our boosted engine to seal properly and still have a finish better than factory. -Next up we lay stuff in, seal stuff up, and torque stuff down as our upgrades come together.
[Frankie] All right, has this thing cleaned up or what? We have gotten our five-three fully cleaned after it was in the hone. We even threw on a nice, easy black paint job. What we're doing now is we are gapping our rings. This is our new set that came with our UEM pistons. For these we are gapping these for a little bit more boost than last time. We're shooting for a higher power number. So the top ring we're going to set at 21 thousandths, and then the second ring we're going to set at 23 thousandths. When we get done setting each ring we're going to carefully deburr it with our India stone and then we'll check our gap in the block making sure we have a light but even drag on the feeler gauge at the size we want. For this engine we are going to be reusing the factory rods because these are the Gen-4 rods. These are a powdered metal crack cap design. Something we did have to do is resize the small ends. Just had to open them up about two thousandths for our 945 pins. And the other big modification we're going to be doing is upgrading the rod bolts because these come with a factory torque to yield GM rod bolt, which works fine in the OE intended purpose. But bad thing about being torque to yield is we can only reuse it about two or three times max. So we're going to be replacing it with a full set of ARP rod bolts. This is a rod bolt kit they make specifically for the LS, and the big advantage is that it is not only stronger. It's 180,000 psi of tensile strength. It also is a reusable fastener. So we can un-torque it and torque it as many times as we want. And as a bonus, they designed it to have a little bit more thread engagement as well. So this is a drop in replacement for the OE bolt. What we're going to do is prep it properly so we can get the accurate clamp load that we need. So to prep these we are going to apply ARP's Ultra Torque Fastener Assembly lubricant. It's not necessarily designed to be the absolute slickest material. It's actually designed to have a consistent amount of friction. That way every time you torque the fastener you get the same amount of clamp no matter what. And then we'll slide them right into our rods. Now, generally when you're replacing rod bolts you have to resize the big end of the rod. But we have done this several times. Just replace the rods measuring everything very carefully and haven't had any issues. So we're going to check these and make sure we have proper and adequate bearing clearance and then we should be good. These bolts come with specific instructions so we can torque them to 45 pound feet to get the proper bolt stretch of 55 to 60 ten thousandths of an inch. Then with a dial bore gauge zeroed to the matching rod journal we can check our vertical oil clearance, and they all fall between 19 and 21 ten thousandths. [Pat] Because the bearings look so good we are going to reuse all of them, and the factory crank that was rebalanced with our new piston goes in to start the reassembly process. Each of the main caps are gently tapped down to get them seated and ready for fasteners. All right, with our mains in it's time to stick in the main bolts. That actually opens up an interesting subject about bolts and fasteners themselves and the different types and how they apply clamp load in your engine. And that is the subject of today's Summit Tech Tip. Really quick we're going to talk about a couple of different types of fasteners by definition and function. We're going to talk about first one we've all heard of, torque to yield. What happens when you torque the fastener? It will actually extend itself. It will lengthen and it will go past its what's called yield point. That means the bolt is permanently deformed but it is done under clamp load. But when you remove the load, the bolt does not return to its original shape. So it does not have any elasticity to use again. So that is one use only thing. Now we're going to talk about what something called torque to angle. This fastener is reusable, meaning when that load is released the fastener returns back to its original length and it still has its elasticity. So it can be used over and over again. Kind of what we're used to on normal fasteners. Keep in mind both of the sequences of how these are tightened look pretty much the same. They both get a base torque setting like 10 or 15 pound feet, and then they both go to a certain angle and that's what achieves clamp load. LS main fasteners are torque to angle. So these are dropped in with some engine oil for lubrication before they are all torqued to a base setting of 15 pound feet. Then the inners are tightened an additional 80 degrees and the outers are tightened an additional 51 degrees. The small side bolts get silicone under their heads to prevent leaks and are torqued to 18 pound feet. -We are swapping the stock bump stick for a Summit Racing LS truck swap cam that has durations at 50 thousanths lift of 218 degrees on the intake and 227 on the exhaust. The lobes are set on a 112 degree LSA and lift at the valve is 522 thousandths on the intake and 524 thousandths on the exhaust. Factory cam retaining plate is reinstalled with lube and orange thread locker on the bolts that are torque to 24 pound feet. -The factory tensioner assembly is reinstalled in the same manner, and the new cam uses a three bolt configuration instead of the stock one bolt. So we are trading up to a Summit single roller billet timing set with a multiple keyway lower gear. To degree the camshaft the number one piston is installed for real, and then our custom made wheel is set up on the crank. We are going to run the cam three degrees advanced at 109. -Then the remaining stock rods and icon pistons can be assembled with Hot Shots Assembly lube. The new wire locks are followed by the previously gapped rings and lighter assembly lube. Each set is carefully pressed into the block in the correct orientation using a Summit Racing adjustable ring compressor. Then each rod bolt is torqued to 45 pound feet and checked for the proper stretch again. -We already disassembled, ported, cleaned and put an 82 thousandths shim under the return spring of the stock oil pump so it can slide back on next. Once the bolts are in one and a half thousandths thick shims are used to center the gears before torquing the housing in place. The stock windage tray drops back on and the stock hardware is torqued to 25 pound feet, followed by this FiTech oil pump pickup that matches our new pan. It is also torqued in place with thread locker. In the back the new replacement oil barbell is carefully pressed in, and then the rear cover with a new seal can be slid on, scored to the decks, and tightened down. -The front cover also got a new seal. And once all the bolts are in, this plastic sleeve centers the cover so it can be cinched tight. Small beads of RTV seal the mating surfaces, and then this new FiTech six quart swap oil pan can drop on. And we have already added a new oil drain bung to the side for our turbo. With the engine flipped over a set of stock non-AFM LS3 lifters with new standard trays can slide in and they are torqued in place to 120 pound inches. -These replacement MLS style head gaskets follow and have a 3.880 bore and a 50 thousandths compressed thickness, which sets our static compression ratio at a safe 9.78 to 1. The 799 casting heads have been cleaned, valve jobs lapped, and the springs upgraded with a complete Summit Racing LS dual spring kit that is set up for 140 pounds of seat pressure and 340 pounds at open. A set of ARP head bolts are replacing the stock torque to yield ones for their reusability and increased clamp strength. The 11 millimeter bolts are torqued to 80 pound feet, and the eight millimeter ones are torqued to 28 pound feet. Coming up, our 5.3 is back on the dyno with its new parts and we're gonna dyno it n/a. N/A all the way? -N/A all the way baby!
[Pat] All right, the old junkyard 5-3 is looking pretty good. We're going to get our valley plate on. This is a different one that came off it. This thing has displacement on demand and we are going to eliminate that. This is actually a factory one that has that deleted. So we have O-rings that go over our holes, plugs them up, and that effectively disables the system. [Frankie] Once the cover is tightened down with the stock hardware the painted original damper can be pressed back on to seal up the front end. One of the other major upgrades we'll be doing is installing a Summit Racing roller trunnion upgrade kit in a stock rocker bodies to increase their travel and longevity. After pressing out the old bearings with the tool, the new shaft and bearings are pressed into the rocker body and snap rings are installed to retain. -Once they are all done the valvetrain can go back in using the stock push rods and rocker stands. The upgraded rockers are installed on each cylinder at tdc compression stroke in the firing order, and the factory hardware is torque to 24 pound feet. With everything lubricated, new FiTech valve covers will seal up the crankcase. -Okay, this is where we start to splurge on our little 5-3 and we're really upgrading it from that junkyard status we had before. So this is our new induction package and this is actually a FiTech nitro port thousand horsepower EFI system. So this comes with their new cast aluminum cathedral port short intake manifold. We have 102 millimeter fully loaded throttle body. So we're gonna get a little more airflow out of that. And this is all fully assembled, fully O-ringed. So we can literally just drop it right on. Now this is going to be paired with their ultimate LS ECU and EFI system. It also has a full wiring harness, transmission control. It has a very nice learn function with bank to bank learning. We are going to be pairing that with a set of their Go-Spark coils as well on top of our valve covers. These are the really cool ones that have the blue LED to them, which is also great for a diagnostic. Plus, it does look way cooler. -All right, 5.3 redo, reboot. What are we going to call it? It's the predecessor to the new turbo stuff that we're doing with it. So what we're going to is we got it running. Runs great, everything fired up. We're going to make our naturally aspirated run. This is going to be pretty interesting because the intake manifold has about a six inch shorter runner. [Frankie] Well we've changed a few things right. So we have a little bit less static compression. Yeah we have about 20 more degrees of intake duration on the camshaft. And we have a shorter height and shorter runner on the intake manifold. So basically this is a verification for the engine so that we know what we picked up and also make sure everything's working the way it's supposed to before we start putting boost on it. We've already made a couple of runs and got this thing tuned in. We're at 13.1 target AFR and we are at 28 degrees of total timing. So we're going to make a hit. -All right, we are ready to rock and roll here. All right hold on to something. Here we go. [ engine idling ] I love how smooth this thing is. -2,500, over 300 pound feet right there. [ engine revving ]
-Smooth as glass baby. -I don't know who ported and shimmed that oil pump but I saw 98 psi of oil pressure. -It's got a whole bunch of oil pressure. -That is solid, 414.4 horsepower. Looks like right at 6,500. We may have to stretch that out a little bit. And 359.6 pound feet at 5,300. So that's pretty solid. AFRs look good, tracking perfectly on 13-1. I think it looks great. Let's just make another run and turn it higher. -What do you think, 7,000? -It looks like it's going to peak over by then. -I think it's going to be great. Here we go. [ engine revving ]
-419.1 horsepower. Looks like I would call that peak probably right at 6,700 and picked up a little bit of torque too, 362.4. It's getting some oil temp in it. - Get some oil temp in it. Get a little heat in her. Before the engine made 350 something. -Like 353 I think. So yeah that's great. Go ahead and shut it down. Time to put the snail on it. -It's time to put the pressurization to it. So away we go. -When we come back n/a goes away and because this engine is a whole lot fresher it's time to turn up the pressure.
[Frankie] Building a massive amount of horsepower is always extremely fun but when you start putting that in your project that's when you need to start thinking about brakes and a great kit that you can get is the USR slotted brake kit from EBC Brakes. This is a complete kit. It comes with a set of their fully coated rotors. These have a Geomet coating for rust prevention. They also have their multi slot design which keeps pad wear even, keeps the brakes silent, and gives a place for that brake dust to go so you have consistent braking. Speaking of pad wear, we also like using their Redstuff pads because these are specifically formulated for street use. So this is a complete kit that'll get you way, way ahead of a stock or OE level brakes. So next time you're making a bunch of power and sticking it in a project make sure you get an EBC brake kit to go with it. So when we originally tried to dyno this engine with the turbo we were having some weird issues where it was breaking up when we started to get it under load. And what we actually figured out was that the issue is our stock crank sensor. We diagnosed it and this is the original crank sensor that came in the engine from the junkyard and it is giving us some intermittent issues in and is faulty. So what we're going to do is replace it with a brand new one from Duralast. We got this from our local AutoZone. And the reason we're using this over like an OE crank sensor is because they actually designed these to be as good or better than the OE sensors as far as form, fit and function. So what that means is they're not just copying the original design. They're actually going through and making sure that if there's any potential defects they're fixing those before it ends up in your vehicle and is giving you problems. So we have a brand new one. We're going to put this one in. It's going to solve all our issues. So we picked it up basically 60 naturally aspirated. We now have our dual Summit 44 millimeter waste gates filled with like basically 11 psi springs. We bumped the RPM range up just a little bit to 3,000 or 7,000 just because we don't want this thing baking down. [Pat] We are on pump gas. -Yes, that is a key factor. As with most of our turbo builds, we are on 93 octane pump gas. [Pat] Who knows how good it is, right? So we're just going to see how it runs and go from there. What it is, is what it is. -Let's see what it'll do. -I can't watch. No, it's going to be good. -And there goes the torque. -And that goes the boost! -Let her make a little bit. 12 psi. [ engine revving ]
Let's see here. We got 646 pound feet right at 4,000 rpm and 660.7 horsepower right at 6,200. We did hit our peak right there at 12 psi. Then right around, let's call it 6,000 and up It starts to taper off down in the high tens. So that's why that power starts to. You see it start to come off on the curve. For what we're doing that is spectacular right. For parts that were put in it, very very cheap, Very very easy. Made great power naturally aspirated. I mean, that's really, really nice. -See if it does it again. -I think it's gonna do it again. -It should. It didn't care at all. [ engine revving ]
It made 646 for torque and it made 661.8. So this thing is just eating it repeatable. I mean that's a beautiful graph. Makes great torque, great power. I think on the street what more would you want? -I think this is great. Could we do more with it? I mean we can because look at the opportunities. We've done this on other engines right. Like okay, now what would be the next best thing? Well, we could probably upgrade the heads, right? We could make more boost. We are not going to take that chance. The last thing we want to do is blow the damn thing. -I mean, with the inconsistency of pump gas this is a good safe measure. Time to shut her down. -Great success!