In This Episode
- 0:01 Introduction and Overview
- 1:25 Detailed Upgrade Plans
- 3:11 Engine History and Previous Builds
- 5:12 Disassembly Process
- 7:17 Block Modifications and Preparation
- 11:41 Rotating Assembly and Component Upgrades
- 15:04 Crankshaft Balancing and Honing the Block
- 18:00 Cast vs. Forged Crankshafts Discussion
- 19:00 Final Assembly Preparation and Painting
Video Transcript
[Frankie] You're watching Powernation!
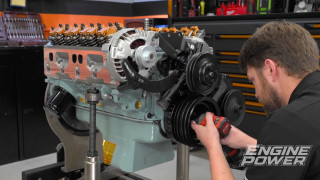
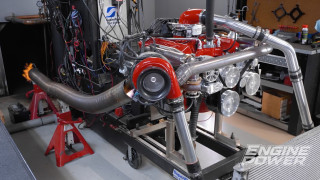
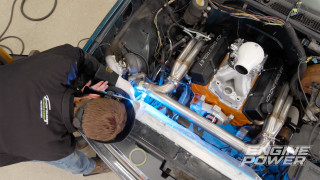
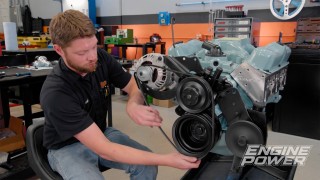
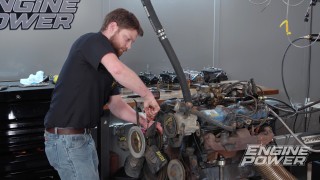
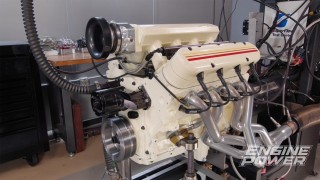
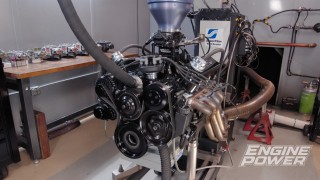
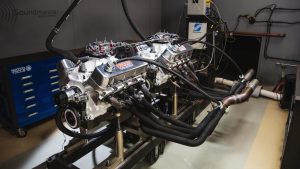
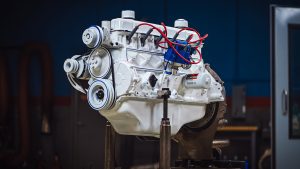
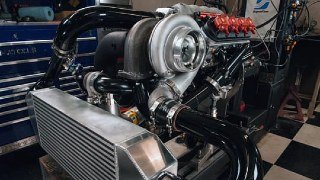
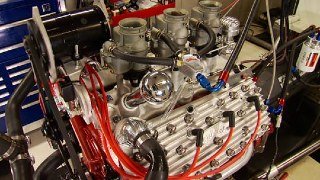
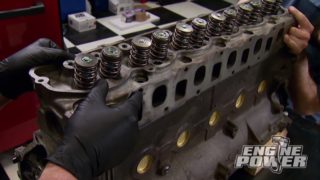
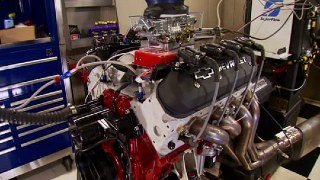
[Pat] In this episode of Engine Power the king is back. Our Ford 300 returns for a round of serious upgrades as we get ready to push this engine for even more power. [Frankie] Today we are going to go over our plans for upgrades. Do some serious modifications to our engine block. Get it honed for our new setup and give it a facelift as we prep this inline six for a big power dyno session. [ Music ] [Pat] Hey everyone and welcome to Engine Power. Today we are bringing back not only one of our favorites but by the views one of your favorite projects that we've done. This is our turbocharged Ford 300 inline six. Now we did this a while ago and it made large power turbocharged, and now we are gonna bring it back for some upgrades. Now we did inadvertently drive the cost up of every 300 in the country. [Frankie] Sorry, not sorry, but this version we're probably gonna do it again. This is going to be what we consider the ultimate 300 build. This is a dream build. Throw the kitchen sink at it. All the best parts that the industry has created since our last version are going in this build and it is going to be a killer. So we have laid out some of what we're gonna be using just to show you some highlights. Starting out we have this beauty. This is a Pro Max Performance c-n-c ported cylinder head. They did a hand ported version for our last iteration and quickly after created this c-n-c ported version. This is one of the very first ones fully c-n-c ported intake and exhaust and a little bit of work done to the chamber, some increase in flow, stainless back cut intake valves. We're gonna show you more of this later but very excited to run this. That is gonna be paired with a beautiful stick of billet. This is a custom built custom ground hydraulic roller cam from Comp Cams. They've actually had the specs to build these for years. We reached out and had them build us a very special one with LS hydraulic roller lobes and we got a set of their lifters to pair with it. To make the engine more durable for the amount of boost we're gonna be throwing at it we also reached out to Molnar Technologies. Got a set of their forged H-beam connecting rods and those are gonna pair with a set of DSS Racing forged pistons. These were specifically made custom for a Ford 300 application for us but they will quickly become a shelf stock version soon. [Pat] Also we went wild on the induction side. We have an Offenhauser C-series that we sent off to our friends at Wilson Manifolds. They have converted this one to sequential port fuel injection and also done some work in the plenum and the runners for us. Also we picked up this absolutely gorgeous stainless steel exhaust header from our friends at Stainless Headers Manufacturing. Now this puts the T-4 flange exactly where we want the turbo for our application. [Frankie] And like Pat said we're gonna switch this engine to sequential port injection and we're also gonna switch it to sequential coil near plug ignition. So all of that will be controlled by a Holley HP e-c-u. Like our slant six we will have to build a custom harness and we will build a custom mount for some Holley EFI Smart Coils. We are extremely excited for this build and we cannot wait to get started. [Pat] But if you are not one of the over four million people who have seen this build check all this out. This engine started out a little different than most. Not as an automotive engine but a steady state power plant mounted to an industrial sewage sprayer. It was originally run on compressed natural gas but after getting it on a dyno cart, making a few checks, and converting it to gasoline we were able to make a baseline dyno pull yielding 88 horsepower and 217 pound feet. For some cheap and easy fun a few upgrades were installed in stages on the stock power plant including an exhaust header, upgraded ignition system, roller rockers, and a four barrel intake. Combined these immediately jumped the power up to 169 horsepower and 280 pound feet of torque. [Frankie] In the next version we got serious and planned a full performance rebuild. The block was torque plate honed for a set of forged DSS Racing big block FE pistons. ARP rod bolts were installed in the stock rods. It received a custom ground hydraulic flat tappet cam. Pro Max Performance provided a ported late model cylinder head. The engine was dressed up with some fresh white paint and it was finished off with an Offenhauser CSeries intake and the same long tube header. Naturally aspirated the engine made 270 horsepower and 338 pound feet, which was a huge improvement for a relatively affordable build. [Pat] Then the real fun started as we fabricated up a custom turbo system for our 300 and added in a Turbonetics Silvia 72-68 turbocharger, a Holley XFlow throttle body e-f-i system, and a programmable boost reference distributor. At 13.2 p-s-i of boost the engine was a beast making 522 horsepower and 597 pound feet of torque on 93 octane gas. Even though this engine's been waiting in the wings we always knew it would be back for more. [Frankie] To get this newest version rolling we are going to cruise through the disassembly process as we take our 300 down to the bare block for our upgrades. After removing the turbo system, accessories, and the intake and exhaust manifolds the valvetrain is pulled to remove the cylinder head and inspect the cylinders after the abuse this engine has been through. [Pat] Continuing on we can remove the oil pan, timing cover, and cam shaft before flipping the engine over to remove the rotating assembly. All the rod bearings look spectacular on their way out, and the condition of the pistons is also an excellent indicator on how well the engine was holding up to 522 horsepower. Finally the main caps are taken off and the crankshaft removed to round out the disassembly. [Frankie] Up next, we knock out our block modifications getting it ready for a hydraulic roller conversion, porting the oiling system, and trying something that's never been done before.
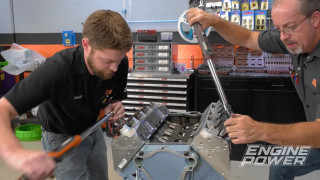
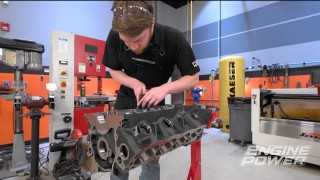
[Frankie] Okay, you are probably wondering why I'm standing here grinding on our 300. Let me explain. We told you we're gonna be converting this engine to a hydraulic roller cam and the lifters we're gonna be using are just a standard set of big block Ford 429-460 385-Series Comp Cams retro fit hydraulic roller lifters. They have the correct diameter, the correct oil band height, and the tie bar spacing is correct for the application. The big thing that kinda becomes an issue and the reason most people don't do this very often is the tie bar interferes with this bolt boss for the lifter cover. So what we have to do is we actually have to grind that down until it clears. So we've already got this one done. We took about two hundred thousandths of an inch off of it and you can see once we get it lined up the tie bar just skates by. Once it's in it's really now a big deal. The lifters sit low enough. We have enough travel for the lift on our cam but we have to make sure that it can clear on its way in and out. We have this one done. We have five more to do and then we're gonna go through and do our normal process of deburring the block, porting the oil passageways and all that before it goes into the cleaner for the first time. The easiest way to grind down these bolts bosses is with a large grinding disc and some paper towels to protect the critical areas of the block. Before starting we did tap the threads of each all the way to the bottom to provide the most thread engagement possible once the material is removed. When we get close a flap disc on an air grinder gives us a nice looking finish and allows us to sneak up on the amount needed to make the lifters clear. Each one is test fit with a lifter pair to ensure clearance. With all six done we can move on to our next block modification, porting the oil passageways. [Pat] We always do this on every engine build since it doesn't take much time and can significantly improve oil flow throughout the engine. We use a variety of carbide bits to go through and round off any sharp edges in the oiling system like this inlet to the oil filter housing. Then we will go through and deburr any sharp edges on the entire engine using a hand file around the mains and a carbide bit on the rest of the engine to make it work with and to reduce the chance of stress cracking. Once all of our grinding is complete we can load up the block into our JRI jet washer to clean out any of the oil and debris. [Pat] With our fully deburred block out of the cleaner and looking good it's time to move on to our next operation. You might notice we have our torque plate all bolted and that would normally mean we're going right to the hone and get it sized up but we are gonna be doing something a little bit different. Back in the day to reinforce stock casting blocks to make them live at higher power levels you would fill the block with grout. What that would do is fill the block from the bottom up basically all the way to the bottom of the water pump hole and that would encase the cylinder and reinforce it so it doesn't flex around and break. Doing that always takes the block out of street driving service because what happens is no coolant is going through the block. Still going through the cylinder head but the block becomes very, very hot, thins out the oil, and a bunch of bad things happen. We are going to keep it in street use because we are gonna be doing the actual inverse of filling it from the bottom up. We are gonna be filling it and reinforcing the deck surface. Sound a little bit confusing? Let us explain. [Frankie] The thought process here is we want to actually add structure to the top inch or inch and a quarter of the block and leave the bottom open for coolant to flow so like Pat said we can leave this block in street use. We're doing that for three reasons. One, we want to keep it in street use and allow coolant to flow. Two, we want to add thickness to the deck surface itself to help improve head gasket sealing under high boost applications like this one. And three, most of the pressure from combustion happens in the first inch or so of the cylinder. We've actually done some simplified calculations on this and you can see that at the boost level we think we're gonna be running and the cylinder pressure we think we're gonna have even by three quarter of an inch or an inch down most of that pressure is pretty much gone. So we're gonna be filling it with some Moroso engine block filler that we got from Summit Racing Equipment. This is specifically designed to do this and it has the same thermal expansion rate as cast iron. So it will shrink and grow with the block. Now fair warning, we have never actually done this. We've never seen anything about anyone doing it this way on this particular block. It's relatively common in the import world for them to pack the coolant passages with salt or sugar and then pour three quarter inch of epoxy on the top on open deck engines where there's no structural support for the top cylinders. But an application like this we honestly have not tried it. [Pat] So what Frankie says is we're all gonna learn together. When filling a block the first step is to make sure the block is level in both directions. Then we will mix two cups of water into one bottle and shake it thoroughly to fully mix it. You want the filler to be runny enough to easily flow and self-level but the less water you are able to put in the stronger it will be when it dries. [Frankie] In order to help the filler flow and to ensure no air bubbles get trapped in it we will use an air hammer with a blunt tip on the side of the block to vibrate it. When we are happy with the level about an inch and a half below the deck we can use water to clean up any mess just like tile grout and double check the level of the block before letting it sit to cure. [Pat] Coming up, we show you the ultimate rotating assembly for a Ford 300 and get our block honed for our big boost setup.
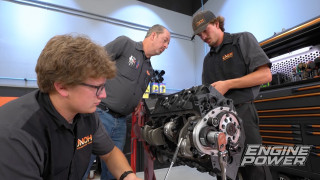
[Pat] With our block over there percolating it's time to now concentrate on our new rotating assembly. If you remember the last time we had this thing running in turbo fashion we used the donor components out of the stock engine, and that included a cast, yes a cast, crankshaft. Also we used the stock connecting rod out of the 300 which is 6-209 long, 975 pressed pin. What we did improve on is the piston. We put a forged piston in it from DSS. This is for a stock bore 390 FE Ford. Worked great. This thing basically made 100 pound feet per cylinder and everything looked great. So you know at that level these parts will work great but we are doing this as an R-and-D engine so you can take all this data and build an engine at any level you want and you know what parts are gonna work for it. Speaking of new parts because we are going to step up the performance we are gonna step up the parts for this thing. [Frankie] And it all starts with a unicorn. If you are not a Ford 300 fan you probably don't know what this is but if you are you know what you're looking at. This is a factory forged crank for the Ford 300 platform. These were very rare. They were only made in the late '60s and early '70s and used in industrial applications mostly and they are extremely hard to find, like a needle in a haystack hard to find. But after our last version we actually saw one pop up on the internet and immediately snatched it up. This is dimensionally the same as our cast crank but being a forging it is much, much stronger which we really want that insurance for our bigger power level we're gonna be shooting for. We have also stepped it up on the connecting rods. After our last Ford 300 Molnar actually started making an H-beam forging for the Ford inline six platforms and for our application we're actually gonna be using the 240 version of that rod. It has a bushed 9-12 small end, 6-800 center to center length, and the big end is the correct size for our 2-123 rod journal. These also are upgraded with an ARP 2,000 cap screw. So these were specifically designed for boost applications like ours and that 6-800 length is gonna let us run a trick piston. [Pat] Speaking of trick pistons they don't get much tricker than this for this application because they are custom designed for it. This is a DSS Racing 3-FX Series forged piston for this. It's made out of 26-18 and it has the correct valve location and valve angle for the 300. They have their patented X-groove on the skirt with an anti-friction coating. They also have the dish for the correct compression ratio that we're looking for. Also they have a thermal barrier coating on them. They have a 1.2, 1.2, 3 millimeter ring pack with a steel top ring for that high heat on the boost and also an extremely heavy duty wrist pin. All said and done this is gonna be great for our application. We're really excited to get this thing together but the first thing we have to do is balance the crank. Inlines are one of our favorite ones to do. [Frankie] Unless you have to carry them up a hill. [Pat] That's why he's here. [Frankie] That's okay, I get it! Since inline six crankshafts have journals that are evenly spaced 120 degrees apart the mass of the rods and pistons are offset by each other. So no bob wights are required for balancing. That's pretty good, especially for something this old. .680-ounce inch on the left and .762- ounce inch on the right. They are together but it shouldn't take much to correct that. So we'll get after it. We will make all of our adjustments with an angle grinder to remove mass from the counterweight and finish it off with a flap disc to have a clean, smooth finish. We only have to remove weight in a few areas on the crankshaft to pretty soon have it dialed in for our street application. That we will 100 percent take. .055-ounce inch on the rear, .071-ounce inch on the front. 173 degrees apart from each other. Well within our tolerance. Very, very good for this inline six that's gonna turn relatively low r-p-m. So get this off and get it cleaned up. [Pat] With our block solidified it's in the hone and we're getting it roughed out. Now we've already put our 150 grit diamond abrasive through it and got it almost to size. We are going to change up our surface finish in the cylinder on this one a bit because of its application. So with everything where it's supposed to be for size we're gonna change out to our 600s and get her finished up. After changing out our Sunnen diamond abrasive to the 600 grit set, five finish strokes in each cylinder at lower speed and load will set the proper surface texture for this application. After cleaning the bores just like final assembly we can measure our surface finish with our trace boss software from Total Seal. That is exactly what we were looking for on this. This particular application has a different cylinder finish than say a naturally aspirated one. We're having the valley of the actual groove or scratch in the bore at a deeper level, which this one is 77 on our meter. Our load bearing surface of the cylinder RK is in the 40 range. So we are spot on for our application. [Frankie] Stay tuned because up next we dive head first into our inline six build and redo its classic look.
[Pat] Cast crank! [Frankie] Forged crank! [Pat] Cast crank! [Frankie] Forged crank! [Pat] Which one is better? [Frankie] Which one do you need? [Pat] That is the subject of today's Summit Tech Tip. [Frankie] You've heard us throw around the terms cast and forged quite a bit on the show but we get a lot of questions about it. So we wanted to talk about the differences with some examples from our 300. [Pat] First we're gonna talk about a cast crank shaft. Molten material is poured into molds and then gotten into a general shape and machined from there. You can usually tell a cast piece like the crankshaft by its narrow parting line. Now cast iron is great. It is affordable because it is cheaper to manufacture but it will only take so much abuse from a performance standpoint. They're great for most applications but when you want to make the big power that's where forged comes in. [Frankie] The way they make a forging is they actually heat the material until it is semi-malleable and then they press it or pound it into a set of dies to get the general shape that they want. Then from there once it's cooled they pull it out and fully machine it just like a cast crank. The benefit is because it has a much denser material it has a better grain structure and is usually heat treated better. These can hold quite a bit more power. The way they're usually identified is a wide parting line here that forms when the material is pressed into shape. These are a bit more expensive but for a high performance application like this one they are almost a must. [Pat] Both cast and forged cranks have their pros and cons but we have proven in previous builds that you can make big power with either one. [Frankie] If you have any questions about which one will be right for your build or your power level you can talk to the experts at Summit Racing Equipment. They'll help you pick the right one. With all of our parts final cleaned we are gonna jump into the assembly process and the first step is to measure our vertical oil clearance on the main bearings. The main caps are installed with a new set of ten thousandths undersized bearings and are torqued in place just like final assembly. We can set our SPI micrometer to the rear most main journal size and then zero out the dial bore gauge to that measurement. Our dial bore gauge then gives us a direct oil clearance measurement inside the bearings and they all come out between 23 and 25 ten thousandths. [Pat] The same process is repeated on the connecting rods using our ARP rod vice. First the ARP 2,000 rod bolts are torqued to 85 pound feet and checked for the proper amount of bolt stretch at 60 to 64 ten thousandths. Then the micrometer is set to the corresponding rod journal size and used to zero out the dial bore gauge so it can be used to measure the oil clearance from that crank throw. The process is repeated for all six and they land between 20 and 22 ten thousandths. [Frankie] We have gone through and set all the clearances on our 300 and we know we don't have to do any more machine work. So we've got everything final cleaned and before we start clicking it together what we're gonna do is paint it. We're gonna be using POR-15s engine enamel in gloss white. We love the way this engine looked before but some of our paint got pretty beat up on the installation process and in the jet washer. So we want to revitalize it. Give it that nice, clean look. So we got everything final cleaned and in the paint booth taped up ready to go. First we're going to be hitting it with their Rust Preventative Coating. This is gonna give us an even base color and protect all the bare metal surfaces from corrosion in the future. Then we will come back with their white engine enamel. The reason we love using this stuff is because it lays down super smooth and super glossy, and it has a finish that's gonna last a long time. It's super resistant to oils, greases, fuel. Even things like brake cleaner it holds up extremely well. [Pat] After thoroughly mixing, not shaking, the POR-15 Rust Preventative we can pour it right into the paint gun since it does not need to be thinned out to be sprayed. We will lay down a few coats of the gray coating in order to get an even and full coverage across all the parts before letting it flash off while we prep out white paint. [Frankie] A light first coat is used to help get good adhesion and full coverage followed by a few medium coats to give everything a consistent, glossy, and beautiful look. We have got everything out of the paint booth, untaped, and it's pretty well cured. We have made some serious progress today. We've got a lot of modifications done and we're looking in good shape to get this thing together. [Pat] Unfortunately we have slim run out of time for this session. So the next time we pick this up we're gonna be sticking all of our cool parts in it. We're gonna see how much power we can pick up on our Ford 300. [Frankie] If you want to see more about this build or any of its previous versions you can always check it out on Powernation TV.
Show Full Transcript
[Pat] In this episode of Engine Power the king is back. Our Ford 300 returns for a round of serious upgrades as we get ready to push this engine for even more power. [Frankie] Today we are going to go over our plans for upgrades. Do some serious modifications to our engine block. Get it honed for our new setup and give it a facelift as we prep this inline six for a big power dyno session. [ Music ] [Pat] Hey everyone and welcome to Engine Power. Today we are bringing back not only one of our favorites but by the views one of your favorite projects that we've done. This is our turbocharged Ford 300 inline six. Now we did this a while ago and it made large power turbocharged, and now we are gonna bring it back for some upgrades. Now we did inadvertently drive the cost up of every 300 in the country. [Frankie] Sorry, not sorry, but this version we're probably gonna do it again. This is going to be what we consider the ultimate 300 build. This is a dream build. Throw the kitchen sink at it. All the best parts that the industry has created since our last version are going in this build and it is going to be a killer. So we have laid out some of what we're gonna be using just to show you some highlights. Starting out we have this beauty. This is a Pro Max Performance c-n-c ported cylinder head. They did a hand ported version for our last iteration and quickly after created this c-n-c ported version. This is one of the very first ones fully c-n-c ported intake and exhaust and a little bit of work done to the chamber, some increase in flow, stainless back cut intake valves. We're gonna show you more of this later but very excited to run this. That is gonna be paired with a beautiful stick of billet. This is a custom built custom ground hydraulic roller cam from Comp Cams. They've actually had the specs to build these for years. We reached out and had them build us a very special one with LS hydraulic roller lobes and we got a set of their lifters to pair with it. To make the engine more durable for the amount of boost we're gonna be throwing at it we also reached out to Molnar Technologies. Got a set of their forged H-beam connecting rods and those are gonna pair with a set of DSS Racing forged pistons. These were specifically made custom for a Ford 300 application for us but they will quickly become a shelf stock version soon. [Pat] Also we went wild on the induction side. We have an Offenhauser C-series that we sent off to our friends at Wilson Manifolds. They have converted this one to sequential port fuel injection and also done some work in the plenum and the runners for us. Also we picked up this absolutely gorgeous stainless steel exhaust header from our friends at Stainless Headers Manufacturing. Now this puts the T-4 flange exactly where we want the turbo for our application. [Frankie] And like Pat said we're gonna switch this engine to sequential port injection and we're also gonna switch it to sequential coil near plug ignition. So all of that will be controlled by a Holley HP e-c-u. Like our slant six we will have to build a custom harness and we will build a custom mount for some Holley EFI Smart Coils. We are extremely excited for this build and we cannot wait to get started. [Pat] But if you are not one of the over four million people who have seen this build check all this out. This engine started out a little different than most. Not as an automotive engine but a steady state power plant mounted to an industrial sewage sprayer. It was originally run on compressed natural gas but after getting it on a dyno cart, making a few checks, and converting it to gasoline we were able to make a baseline dyno pull yielding 88 horsepower and 217 pound feet. For some cheap and easy fun a few upgrades were installed in stages on the stock power plant including an exhaust header, upgraded ignition system, roller rockers, and a four barrel intake. Combined these immediately jumped the power up to 169 horsepower and 280 pound feet of torque. [Frankie] In the next version we got serious and planned a full performance rebuild. The block was torque plate honed for a set of forged DSS Racing big block FE pistons. ARP rod bolts were installed in the stock rods. It received a custom ground hydraulic flat tappet cam. Pro Max Performance provided a ported late model cylinder head. The engine was dressed up with some fresh white paint and it was finished off with an Offenhauser CSeries intake and the same long tube header. Naturally aspirated the engine made 270 horsepower and 338 pound feet, which was a huge improvement for a relatively affordable build. [Pat] Then the real fun started as we fabricated up a custom turbo system for our 300 and added in a Turbonetics Silvia 72-68 turbocharger, a Holley XFlow throttle body e-f-i system, and a programmable boost reference distributor. At 13.2 p-s-i of boost the engine was a beast making 522 horsepower and 597 pound feet of torque on 93 octane gas. Even though this engine's been waiting in the wings we always knew it would be back for more. [Frankie] To get this newest version rolling we are going to cruise through the disassembly process as we take our 300 down to the bare block for our upgrades. After removing the turbo system, accessories, and the intake and exhaust manifolds the valvetrain is pulled to remove the cylinder head and inspect the cylinders after the abuse this engine has been through. [Pat] Continuing on we can remove the oil pan, timing cover, and cam shaft before flipping the engine over to remove the rotating assembly. All the rod bearings look spectacular on their way out, and the condition of the pistons is also an excellent indicator on how well the engine was holding up to 522 horsepower. Finally the main caps are taken off and the crankshaft removed to round out the disassembly. [Frankie] Up next, we knock out our block modifications getting it ready for a hydraulic roller conversion, porting the oiling system, and trying something that's never been done before.
[Frankie] Okay, you are probably wondering why I'm standing here grinding on our 300. Let me explain. We told you we're gonna be converting this engine to a hydraulic roller cam and the lifters we're gonna be using are just a standard set of big block Ford 429-460 385-Series Comp Cams retro fit hydraulic roller lifters. They have the correct diameter, the correct oil band height, and the tie bar spacing is correct for the application. The big thing that kinda becomes an issue and the reason most people don't do this very often is the tie bar interferes with this bolt boss for the lifter cover. So what we have to do is we actually have to grind that down until it clears. So we've already got this one done. We took about two hundred thousandths of an inch off of it and you can see once we get it lined up the tie bar just skates by. Once it's in it's really now a big deal. The lifters sit low enough. We have enough travel for the lift on our cam but we have to make sure that it can clear on its way in and out. We have this one done. We have five more to do and then we're gonna go through and do our normal process of deburring the block, porting the oil passageways and all that before it goes into the cleaner for the first time. The easiest way to grind down these bolts bosses is with a large grinding disc and some paper towels to protect the critical areas of the block. Before starting we did tap the threads of each all the way to the bottom to provide the most thread engagement possible once the material is removed. When we get close a flap disc on an air grinder gives us a nice looking finish and allows us to sneak up on the amount needed to make the lifters clear. Each one is test fit with a lifter pair to ensure clearance. With all six done we can move on to our next block modification, porting the oil passageways. [Pat] We always do this on every engine build since it doesn't take much time and can significantly improve oil flow throughout the engine. We use a variety of carbide bits to go through and round off any sharp edges in the oiling system like this inlet to the oil filter housing. Then we will go through and deburr any sharp edges on the entire engine using a hand file around the mains and a carbide bit on the rest of the engine to make it work with and to reduce the chance of stress cracking. Once all of our grinding is complete we can load up the block into our JRI jet washer to clean out any of the oil and debris. [Pat] With our fully deburred block out of the cleaner and looking good it's time to move on to our next operation. You might notice we have our torque plate all bolted and that would normally mean we're going right to the hone and get it sized up but we are gonna be doing something a little bit different. Back in the day to reinforce stock casting blocks to make them live at higher power levels you would fill the block with grout. What that would do is fill the block from the bottom up basically all the way to the bottom of the water pump hole and that would encase the cylinder and reinforce it so it doesn't flex around and break. Doing that always takes the block out of street driving service because what happens is no coolant is going through the block. Still going through the cylinder head but the block becomes very, very hot, thins out the oil, and a bunch of bad things happen. We are going to keep it in street use because we are gonna be doing the actual inverse of filling it from the bottom up. We are gonna be filling it and reinforcing the deck surface. Sound a little bit confusing? Let us explain. [Frankie] The thought process here is we want to actually add structure to the top inch or inch and a quarter of the block and leave the bottom open for coolant to flow so like Pat said we can leave this block in street use. We're doing that for three reasons. One, we want to keep it in street use and allow coolant to flow. Two, we want to add thickness to the deck surface itself to help improve head gasket sealing under high boost applications like this one. And three, most of the pressure from combustion happens in the first inch or so of the cylinder. We've actually done some simplified calculations on this and you can see that at the boost level we think we're gonna be running and the cylinder pressure we think we're gonna have even by three quarter of an inch or an inch down most of that pressure is pretty much gone. So we're gonna be filling it with some Moroso engine block filler that we got from Summit Racing Equipment. This is specifically designed to do this and it has the same thermal expansion rate as cast iron. So it will shrink and grow with the block. Now fair warning, we have never actually done this. We've never seen anything about anyone doing it this way on this particular block. It's relatively common in the import world for them to pack the coolant passages with salt or sugar and then pour three quarter inch of epoxy on the top on open deck engines where there's no structural support for the top cylinders. But an application like this we honestly have not tried it. [Pat] So what Frankie says is we're all gonna learn together. When filling a block the first step is to make sure the block is level in both directions. Then we will mix two cups of water into one bottle and shake it thoroughly to fully mix it. You want the filler to be runny enough to easily flow and self-level but the less water you are able to put in the stronger it will be when it dries. [Frankie] In order to help the filler flow and to ensure no air bubbles get trapped in it we will use an air hammer with a blunt tip on the side of the block to vibrate it. When we are happy with the level about an inch and a half below the deck we can use water to clean up any mess just like tile grout and double check the level of the block before letting it sit to cure. [Pat] Coming up, we show you the ultimate rotating assembly for a Ford 300 and get our block honed for our big boost setup.
[Pat] With our block over there percolating it's time to now concentrate on our new rotating assembly. If you remember the last time we had this thing running in turbo fashion we used the donor components out of the stock engine, and that included a cast, yes a cast, crankshaft. Also we used the stock connecting rod out of the 300 which is 6-209 long, 975 pressed pin. What we did improve on is the piston. We put a forged piston in it from DSS. This is for a stock bore 390 FE Ford. Worked great. This thing basically made 100 pound feet per cylinder and everything looked great. So you know at that level these parts will work great but we are doing this as an R-and-D engine so you can take all this data and build an engine at any level you want and you know what parts are gonna work for it. Speaking of new parts because we are going to step up the performance we are gonna step up the parts for this thing. [Frankie] And it all starts with a unicorn. If you are not a Ford 300 fan you probably don't know what this is but if you are you know what you're looking at. This is a factory forged crank for the Ford 300 platform. These were very rare. They were only made in the late '60s and early '70s and used in industrial applications mostly and they are extremely hard to find, like a needle in a haystack hard to find. But after our last version we actually saw one pop up on the internet and immediately snatched it up. This is dimensionally the same as our cast crank but being a forging it is much, much stronger which we really want that insurance for our bigger power level we're gonna be shooting for. We have also stepped it up on the connecting rods. After our last Ford 300 Molnar actually started making an H-beam forging for the Ford inline six platforms and for our application we're actually gonna be using the 240 version of that rod. It has a bushed 9-12 small end, 6-800 center to center length, and the big end is the correct size for our 2-123 rod journal. These also are upgraded with an ARP 2,000 cap screw. So these were specifically designed for boost applications like ours and that 6-800 length is gonna let us run a trick piston. [Pat] Speaking of trick pistons they don't get much tricker than this for this application because they are custom designed for it. This is a DSS Racing 3-FX Series forged piston for this. It's made out of 26-18 and it has the correct valve location and valve angle for the 300. They have their patented X-groove on the skirt with an anti-friction coating. They also have the dish for the correct compression ratio that we're looking for. Also they have a thermal barrier coating on them. They have a 1.2, 1.2, 3 millimeter ring pack with a steel top ring for that high heat on the boost and also an extremely heavy duty wrist pin. All said and done this is gonna be great for our application. We're really excited to get this thing together but the first thing we have to do is balance the crank. Inlines are one of our favorite ones to do. [Frankie] Unless you have to carry them up a hill. [Pat] That's why he's here. [Frankie] That's okay, I get it! Since inline six crankshafts have journals that are evenly spaced 120 degrees apart the mass of the rods and pistons are offset by each other. So no bob wights are required for balancing. That's pretty good, especially for something this old. .680-ounce inch on the left and .762- ounce inch on the right. They are together but it shouldn't take much to correct that. So we'll get after it. We will make all of our adjustments with an angle grinder to remove mass from the counterweight and finish it off with a flap disc to have a clean, smooth finish. We only have to remove weight in a few areas on the crankshaft to pretty soon have it dialed in for our street application. That we will 100 percent take. .055-ounce inch on the rear, .071-ounce inch on the front. 173 degrees apart from each other. Well within our tolerance. Very, very good for this inline six that's gonna turn relatively low r-p-m. So get this off and get it cleaned up. [Pat] With our block solidified it's in the hone and we're getting it roughed out. Now we've already put our 150 grit diamond abrasive through it and got it almost to size. We are going to change up our surface finish in the cylinder on this one a bit because of its application. So with everything where it's supposed to be for size we're gonna change out to our 600s and get her finished up. After changing out our Sunnen diamond abrasive to the 600 grit set, five finish strokes in each cylinder at lower speed and load will set the proper surface texture for this application. After cleaning the bores just like final assembly we can measure our surface finish with our trace boss software from Total Seal. That is exactly what we were looking for on this. This particular application has a different cylinder finish than say a naturally aspirated one. We're having the valley of the actual groove or scratch in the bore at a deeper level, which this one is 77 on our meter. Our load bearing surface of the cylinder RK is in the 40 range. So we are spot on for our application. [Frankie] Stay tuned because up next we dive head first into our inline six build and redo its classic look.
[Pat] Cast crank! [Frankie] Forged crank! [Pat] Cast crank! [Frankie] Forged crank! [Pat] Which one is better? [Frankie] Which one do you need? [Pat] That is the subject of today's Summit Tech Tip. [Frankie] You've heard us throw around the terms cast and forged quite a bit on the show but we get a lot of questions about it. So we wanted to talk about the differences with some examples from our 300. [Pat] First we're gonna talk about a cast crank shaft. Molten material is poured into molds and then gotten into a general shape and machined from there. You can usually tell a cast piece like the crankshaft by its narrow parting line. Now cast iron is great. It is affordable because it is cheaper to manufacture but it will only take so much abuse from a performance standpoint. They're great for most applications but when you want to make the big power that's where forged comes in. [Frankie] The way they make a forging is they actually heat the material until it is semi-malleable and then they press it or pound it into a set of dies to get the general shape that they want. Then from there once it's cooled they pull it out and fully machine it just like a cast crank. The benefit is because it has a much denser material it has a better grain structure and is usually heat treated better. These can hold quite a bit more power. The way they're usually identified is a wide parting line here that forms when the material is pressed into shape. These are a bit more expensive but for a high performance application like this one they are almost a must. [Pat] Both cast and forged cranks have their pros and cons but we have proven in previous builds that you can make big power with either one. [Frankie] If you have any questions about which one will be right for your build or your power level you can talk to the experts at Summit Racing Equipment. They'll help you pick the right one. With all of our parts final cleaned we are gonna jump into the assembly process and the first step is to measure our vertical oil clearance on the main bearings. The main caps are installed with a new set of ten thousandths undersized bearings and are torqued in place just like final assembly. We can set our SPI micrometer to the rear most main journal size and then zero out the dial bore gauge to that measurement. Our dial bore gauge then gives us a direct oil clearance measurement inside the bearings and they all come out between 23 and 25 ten thousandths. [Pat] The same process is repeated on the connecting rods using our ARP rod vice. First the ARP 2,000 rod bolts are torqued to 85 pound feet and checked for the proper amount of bolt stretch at 60 to 64 ten thousandths. Then the micrometer is set to the corresponding rod journal size and used to zero out the dial bore gauge so it can be used to measure the oil clearance from that crank throw. The process is repeated for all six and they land between 20 and 22 ten thousandths. [Frankie] We have gone through and set all the clearances on our 300 and we know we don't have to do any more machine work. So we've got everything final cleaned and before we start clicking it together what we're gonna do is paint it. We're gonna be using POR-15s engine enamel in gloss white. We love the way this engine looked before but some of our paint got pretty beat up on the installation process and in the jet washer. So we want to revitalize it. Give it that nice, clean look. So we got everything final cleaned and in the paint booth taped up ready to go. First we're going to be hitting it with their Rust Preventative Coating. This is gonna give us an even base color and protect all the bare metal surfaces from corrosion in the future. Then we will come back with their white engine enamel. The reason we love using this stuff is because it lays down super smooth and super glossy, and it has a finish that's gonna last a long time. It's super resistant to oils, greases, fuel. Even things like brake cleaner it holds up extremely well. [Pat] After thoroughly mixing, not shaking, the POR-15 Rust Preventative we can pour it right into the paint gun since it does not need to be thinned out to be sprayed. We will lay down a few coats of the gray coating in order to get an even and full coverage across all the parts before letting it flash off while we prep out white paint. [Frankie] A light first coat is used to help get good adhesion and full coverage followed by a few medium coats to give everything a consistent, glossy, and beautiful look. We have got everything out of the paint booth, untaped, and it's pretty well cured. We have made some serious progress today. We've got a lot of modifications done and we're looking in good shape to get this thing together. [Pat] Unfortunately we have slim run out of time for this session. So the next time we pick this up we're gonna be sticking all of our cool parts in it. We're gonna see how much power we can pick up on our Ford 300. [Frankie] If you want to see more about this build or any of its previous versions you can always check it out on Powernation TV.
Engine Power Featured Projects
Engine Power Builds






Want more content like this?
Join the PowerNation Email NewsletterParts Used In This Episode


Comp Cams
COMP Cams Custom Grind Camshaft
Comp Cams
COMP Cams Retro-Fit Hydraulic Roller Lifter Pair for Ford FE
DSS Racing
DSS 3FX Series Inline Forged Piston Set
Molnar Rods
Molnar 240 Ford Inline 6 H-Beam Connecting Rods
Offenhauser
Offenhauser Ford L6 Intake Manifold
ProMaxx Performance
Promaxx CNC Ported Cylinder Heads
Stainless Headers MFG
Ford 300 Inline 6 Turbo Header
Sunnen Products Company
Sunnen SV-15 Honing Machine
WILSON MANIFOLDS
Intake EFI Conversion