In This Episode
- 0:01 Introduction to Engine Power and the W-series build
- 1:50 Overview of the W-series engine and its components
- 6:26 Block preparation: Deburring and porting oil passageways
- 10:57 Setting bearing clearances for the aluminum block
- 14:06 Balancing the Scat forged crankshaft
- 17:11 Assembly of the engine: Installing crankshaft, cam, and pistons
Video Transcript
[Frankie] You're watching Powernation!
[Pat] Today on Engine Power we are building a high tech aftermarket version of Chevrolet's o-g big block, an all aluminum W-series. [Frankie] Conventional is out the window with big cubic inches, high flowing induction, and state of the art injection to make new school pump gas power. What the hell is that then? [Pat] That's my bad! [ Music ]
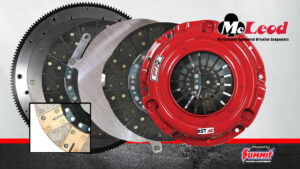
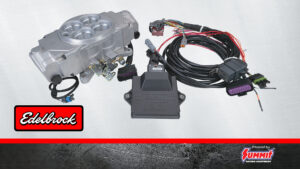
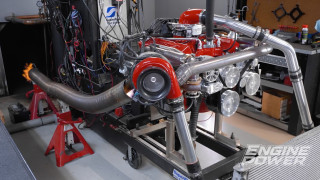
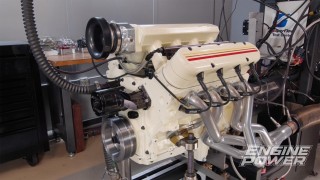
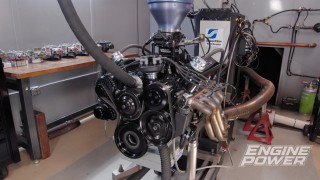
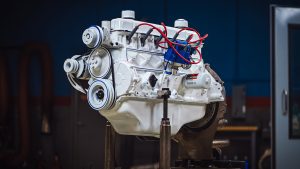
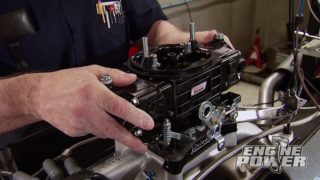
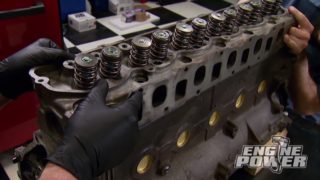
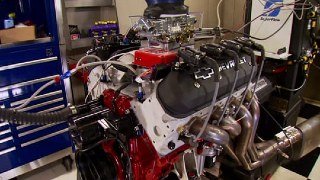
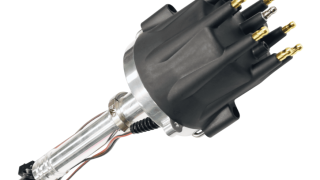
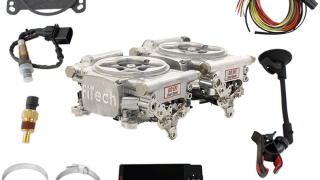
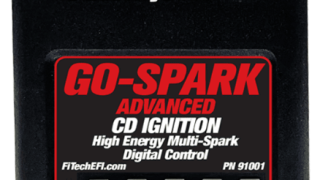
Hello everyone and welcome to Engine Power. Today we have a very exciting show planned because quite frankly we've been wanting to build one of these for a while. We do a lot of engines here both modern and nostalgia. Maybe vintage if you will. So why not combine the two? Today we're gonna be building up one of Chevrolet's W-series engines. What is that you might ask? Well this is basically Chevy's first version of the big block Chevy. This is an engine that was produced from 1958 to around 1965 and ran in cars and trucks and even some racing applications up to 427 cubic inch. What makes it unique is the configuration of the deck. The deck is not 90 degrees. It is not nine degrees or perpendicular with the top of the piston. It is actually at a 16 degree cant, and that 16 degree cant creates a combustion chamber. The combustion chamber is actually on the top right here. Trying to find one of these to build is quite the challenge because if you get a stock one it is going to require a ton of machine work when you get it done. So we decided why not go full aftermarket with it and build something big, and runs great, and makes big power on pump gas. So we contacted Bill Mitchell Products and picked up one of their all aluminum W-series engines. This engine has been designed to be very parts friendly. Original 409 stuff is hard to get. So they have gone the extra mile and redesigned this to work with conventional big block Chevy parts. So the part sourcing and the parts availability and options to build are almost endless. These engines are set up to accept a 4-310 final bore like the original 409s but that will not be big enough for what we are doing. So we went ahead and sent this block over to our favorite machine shop here in Nashville, Shacklett Automotive, and they punched this block out so we can finish hone it at 4-500. Also they went in and redid the relief on the top. Now that is a relatively complicated operation but is nothing for Shacklett. They are awesome. To get the cubic inches we want we also want to go big on the crank shaft. We went to Scat and picked up a forged 43-40 crank in four inch stroke. So combined with our four inch stroke and our 4-500 bore that puts us at 509 cubic inches. Literally 100 cubic inches bigger than the stock 409. That sounds like a lot of cool stuff and it's very high tech but we're just getting started. [Frankie] A lot of the cool parts we have laid out for you guys because we want to show you what this build's gonna look like and what it's gonna entail. Moving on from the crankshaft we also have a set of Scat forged H-beam rods. These are 6-135 in length. They use the big block Chevy 990 pin. These have ARP fasteners to them. So this is great upgrade over a stock rod. To go with that we have a really cool piece. This is a RaceTec 40-32 forged piston. This is specific for the 409 and for our bore size. This is a 4-500 bore piston and you can tell by the top of it, it has a very large crown on it. This is 78cc of effective dome. It has this interesting angle here and that's to match the deck angle of the engine. This has a more modern 1.5, 1.5, 3 millimeter ring pack. It has a 1-460 compression height and is a very trick piston. They even put our name in the bottom of it. A huge thank you to RaceTec for making these for this engine because this is a key part of the build. Another very important part is the cylinder head but we have reached out to Summit Racing and got an Edelbrock 409 Performer RPM casting. This is a big upgrade over the oem's. And we sent it out to the 409 experts at Lamar Walden Automotive. What they have done is performed a CNC porting service that they offer on this cylinder, and this steps up the flow about 70 cfm over the untouched casting and is hand finished by Rob Walden over there. This is very nice work. They also step up the valve sizes to a 2-200 intake and a 1-720 exhaust. This head is set up with a dual hydraulic roller spring. So that will match our valvetrain, and this is gonna be huge for making good, respectable pump gas power with this engine. To actuate those larger valves we had to go to Comp Cams. We had them build us a custom billet hydraulic roller camshaft. This thing is super trick as well because this uses a big block Chevy journal, spacing, and lobes but the lobe arrangement is actually changed to fit the 409 heads. We've also paired that with a set of their LS link bar hydraulic roller lifters, a set of 1.7 Pro Magnum rocker arms, and a billet adjustable nine keyway timing set. For the rest of the induction we are going to be doing something on the nostalgic side. That is using Edelbrock's dual quad intake manifold. Lamar Walden Automotive has also gone through and hand ported this. We are going to be topping it with that modern touch Pat was talking about. This is FiTech's Go-EFI dual quad setup. This gives us dual 41-50 EFI throttle bodies. It's all a self contained unit. So we can bolt it on, wire it up, and go. We're gonna pair that with one of their distributors and their Go-Spark cdi ignition box. We also have a lot of cool accessory items we're gonna show you as we go like these vintage valve covers, ARP fasteners, the whole shebang. We have done our homework on this to try and build the best W-series that we can for the application. This is gonna be really cool because we haven't done a big inch W-series like this before. We think we got the parts together to make very, very good power on pump gas. So what we're gonna do is get some stuff setup and then we will start prepping this engine for assembly. Up next, we dive head first into our 509 build with some block prep.
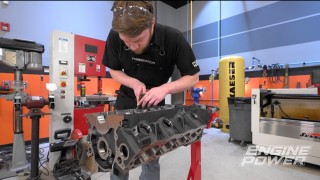
[Frankie] The first thing we are gonna do on our 509 W-series build is prep the block. What do we mean when we're talking about prepping the block? We're usually talking about deburring the block and porting the oil passageways. So what we're gonna do is go a little more in depth in that in today's Summit Racing Tech Tip. You've seen us do this before but we wanted to take a deeper dive into it on this engine. So when we're talking about deburring usually we're talking about the sharp edges the block has from the casting and machining process. Usually all over there will be sharp edges on the deck surfaces. There will be casting flash leftover from the o-e, and what we want to do is go through and break those sharp edges and very gently round them because sharp edges not only can create stress risers but it does make the block a lot easier to work with during the assembly process. We're also usually talking about porting the oil passageways. When we're doing that what we're talking about is when the block is machined they drill holes for the casting so the oil can flow the rest of the engine, but usually when they do that it leaves a sharp edge. Sharp edges create turbulence and restrict oil flow. So we want to go through and round off those sharp edges. Give them a nice, smooth radius for the oil to transition. What are we using to do this? There are a few specialized tools but honestly this is general hand tool stuff. You can get all this from Summit Racing Equipment. The first one is a set of carbide burrs. We have two sets here. These are a six inch long shank and we have some for ferrous metals like cast iron or steel and we have some for non-ferrous like aluminum like we're gonna be using on this block. After that we are gonna use a cartridge roll or sandpaper roll to smooth it out. So this is actually a port and polishing kit you can get from Summit Racing Equipment. It has a bunch of different sizes and grits of abrasive. This will give us that nice, smooth finish that we're looking for. For some of the more sensitive areas of the block we'll use a set of hand files, a small, not very coarse file. For grinders you have a couple different options. You have corded, you have cordless. We have air and we even have an air pencil here. This is really nice for doing the small areas of the block like the passageways that feed the mains directly. You also want to have some safety equipment because you're gonna be throwing a lot of pieces of metal out. So we usually have an apron on of some sort. Definitely safety glasses. A headlamp makes it nice when you're trying to get into tight spots. Then proper hearing protection because this process usually takes a couple of hours, especially if you're starting with something like a stock block that needs a lot of work. You're gonna be holding that grinder next to your head and you want to protect your hearing. On this block they've done a great job from Bill Mitchell of deburring it. There's actually not that much to deburr on this one. Just a few areas of the block that have been machined. A little bit around the mains, and then we will move on to porting the oil passageways. So let's start out. We'll show you what we do around the mains and we'll move on from there. We always use a hand file around the mains because even though it's tempting to get after it with a burr we do not want to risk slipping off and putting a mark in the main cap register or in the main saddle area. We are only breaking the sharp edge here. Not trying to introduce a bevel or change the shape. Then we can move on to porting the passageways by the oil filter housing picking up a non-ferrous carbide to roughly shape the radius we are trying to create. This is where you have to be careful on aluminum because the non-ferrous burrs remove a lot of material quickly and if you're not careful it can go from that looks pretty good to oh I messed that up in a hurry. We'll use a ferrous carbide for a more precise adjustment and then follow it up with a cartridge roll abrasive to take out any imperfections and give it a smooth finish. We will repeat this process everywhere we can get to, following the path of the oil from the filter all the way to the mains. Here we will carefully use our air pencil to just break the sharp edge and remove any burrs leftover from the drilling process. With that we have our block fully deburred and the next thing we're gonna do is put it in the cleaner because we want to make sure we don't have any of these metal shavings out of here. We actually didn't have a ton to do because Bill Mitchell did a great job. We just went through, touched a few areas, ported the oil passageways, and now we can move on. [Pat] Next up, we get to checkin' so we don't go wreckin' all of our brand new parts in our 509 build.
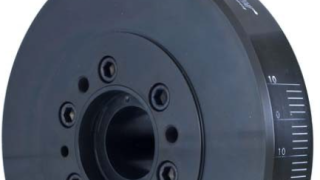
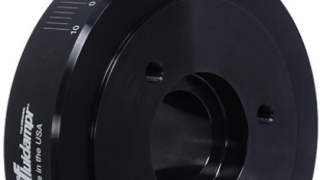
[Pat] Our Bill Mitchell block is looking great after its grinding and deburring session. We have ran it through the jet cleaner and cooled it back down to ambient temp for the next step, which we are going to be setting bearing clearances. Because this block is made of aluminum it will expand at a different rate per temperature change, different than an iron one will. So we are going to adjust our bearing clearances accordingly. Normally we set a minimum oil clearance of one thousandths of clearance per inch of shaft diameter. We are going to reduce that to around a half a thousandths per inch of shaft diameter. So we'll put our minimum around 13 to 14 ten thousandths and have clearances that range all the way up to about two thousandths. So what we're gonna do is get some bearings in here, measure up our crank, and see what we have. [Frankie] We have everything prepped in order to measure our bearing clearances. We like doing this before we do a lot of machine work. That way if something needs to be adjusted we have the opportunity to do it before we start getting parts final cleaned. So we're gonna assemble everything dry but the exact same we would during final assembly. I thought you cleaned this block? [Pat] I did! [Frankie] What the hell is that then? [Pat] That's my bad. [Frankie] Oh jeez! With a doughnutless block we can carefully press the upper main bearings into the block and install the main caps starting with the back three to fit our dial bore gauge. The caps are tapped down into the register before the studs are screwed in hand tight and the washers and nuts are fastened down snug with ARP Ultra Torque Lube. All of the main fasteners are torqued to 110 pound feet from the inside out. Then we can set our micrometer to one journal's size and use it to zero out our Sunnen dial bore gauge. Then we can use it to take a direct oil clearance measurement inside the bearings on the matching main and they all fall between 15 and 17 ten thousandths. [Pat] With our main bearing clearances all tuned up it's time to move on to setting the clearance on the rod bearings. It's pretty easy. We're gonna get our King bearings put into our Scat rods and get them checked. What's important is the bolt that goes in. The Scat rod uses an ARP bolt. ARP is one of the premiere manufacturers of rod bolts and they do a great job and have a lot of different ones for different applications. Their standard one is made out of 87-40 chromoly. This particular one in our Scat rod is made out of ARP 2,000. That is a steel alloy that has very similar characteristics to the 87-40 but it is able to be heat treated to up to 220,000 psi of tensile strength. That's important because rod bolt is one of the most stressed fasteners in the engine. The rod has to take about 7,000 pounds of force trying to throw that rod and piston assembly out into orbit at 6,000 rpm. So it's very very critical. With all that said what we're gonna do is get our bearings and our rods torqued up and get them checked. For the rods we can install a coated set of King bearings into the freshly cleaned rods taking note of the upper and lower orientations. The rod caps are installed and the bolts are snugged down with ARP Ultra Torque Lube before being torqued to 90 pound feet to achieve the proper bolt stretch of between 57 and 62 ten thousandths. Unlike the block we are sticking to our usual one thousandths per inch of shaft spec. So after setting the micrometer and dial bore gauge to the matching rod journal size we can measure our vertical oil clearance. The entire process is repeated on each rod and they all come out between 22 and 27 ten thousandths. [Frankie] With all of our clearances set the next thing we're gonna do is balance our Scat forged crankshaft here in our CWT Industries Multi-Bal 5500. Now originally this is intended to be an internally balanced crankshaft but when we did our initial spin with the internally balanced setup what we found is the counterweights actually don't have enough mass to counteract the rod and piston assemblies because we have such a large piston because of the W-series application. Our bob weight is around 2,356 grams. So a little over five pounds, and our piston weighs about 900 grams with the piston and pin, which is more than the rod itself. So a very unique application and there's really two ways you could remedy this. The first, if this was a high rpm extended use race engine what you would do is add heavy metal to the front and rear counterweights and this would add mass to the counterweight but it needs about 400 grams on the front and the rear. So you'd have a lot of metal, a lot of money, and a lot of time into the crankshaft to make it work. Because this is simply a hot rod street engine an easier and simpler solution is to make the engine externally balanced. So we have installed a fluid damper external balanced hub on the front. We have the flywheel that's gonna go with this crankshaft with an external weight mounted on the rear. This converts the engine to external balance and helps the counterweights counteract that mass from the rod and piston a little better. So we're gonna do a first spin and see how much closer we are. Our first external balanced spin shows that we have knocked the imbalance down to under 90 grams on each side, which is way closer. It has also moved the heaviest part to the counterweight side. So we will start by removing a large chunk from the easily accessible and interchangeable flywheel counterweight. To tackle the front we get a bit more radical and we'll take a cutoff wheel to cut a large piece off the edge of the counterweight. This is an effective way to remove a large amount of mass in this spot and allows us to perform all the balancing without weakening the counterweights with large holes. After a few passes at grinding we can easily bring the imbalance down within our tolerance. We are well within our tolerances and the tolerance set by Iso for this weight of crankshaft. So we're at 132 degrees separation. .132 ounce inch on the left, .165 on the right, but if we look at the force on the center of the crank it's minimized down to .125 ounce inch. So we're well within our tolerance there. We're gonna save that as our last spin and should be good to go. We're gonna get this off. Get it polished up to clean up the journals a little bit and then we'll be moving on to assembly. [Pat] Coming up, tedious piston install.
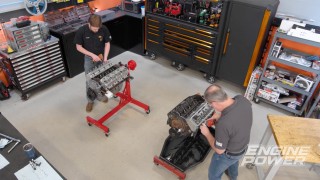
[Frankie] We are on to assembly. We already got our bearings in there with some Hot Shot's Secret assembly lube on them. We're gonna drop in our four inch stroke Scat crank and get going. [Pat] Once the crank is in the rear main cap is installed first with the rear main seal offset to prevent leaks. The remaining caps are dropped in place with lube as well and are gently seated into the registers with a soft hammer. The half inch main studs are started by hand and then barely snugged down with our Milwaukee impact. [Frankie] After the splayed outer bolts are run in and the washers and nuts are screwed down with ARP lube each of the fasteners can be torqued to 110 pound feet from the inside out. Since this block has dowelled main caps the front faces do not need to be aligned during this process. [Pat] Our super custom billet cam gets installed cause we've already pressed in some coated cam bearings from Summit Racing. We had this bump stick ground with QXI hydraulic roller lobes and the intake duration at 50 thousandths lift is 237 while the exhaust is at 255 degrees. They are set on a 114 degree lobe separation angle and have the correct lobe locations to match the cylinder head's valve arrangement. Valve lift with our 1.7-ratio rockers is 672 thousandths on the intake and 678 thousandths on the exhaust. [Frankie] With the big block Chevy cam journal size and big block Chevy cam spacing the BMP block is set up for a big block Chevy timing set but we're using a nine keyway billet adjustable piece from Comp Cams. We'll temporarily tighten it down for now until we can verify the cam's position, and to do that we need to install the number one piston and rod assembly. Once we have set up our degree wheel we can set our intake center line for this hot rod street application to 107 degrees, which is seven degrees advanced. [Pat] Now we can assemble the rest of the Scat 6.135 long H-beam rods and the RaceTec 4.500 bore pistons. Hot Shot's Secret assembly lube is applied in the small end, the piston, and on the pin before sliding them together in the correct orientation and then snapping in the wire locks with a pocket screwdriver. Once they are all put together and checked the Total Seal rings can be installed on each. These are a 1.5, 1.5, 3 millimeter set to match the pistons and we gapped them to 25 thousandths on the top and 28 thousandths on the second. They are installed with a Goodson ring expander in the correct orientation and then they are coated in Total Seal assembly lube. [Frankie] Installing the piston assemblies on a W-series is very tricky compared to a conventional engine since we can't use a piston ring compressor with the offset decks. You have to manually compress each ring against the counterbore as the piston drops in making sure they all stay in their grooves and don't get caught on the top of the bore. [ Music ]
[Pat] The most challenging part of this whole build is doing this right here. [Frankie] Just gotta manually compress the rings as they go in and make sure they don't roll over. [Pat] Shacklett did a nice job on that top relief. [Frankie] Once you get all the rings past that angle it goes very smooth. [Pat] That's hard as all get out to cut right. Being patient and careful is a must but once the piston rings are past the bore chamfer the piston is pushed down just like normal with the rod bolts being temporarily tightened down until we finish the process. Once all eight assemblies are installed we can flip the block over and torque each rod bolt to 85 pound feet to achieve the proper stretch again, which is between 55 and 62 ten thousandths of an inch. [Frankie] Alright, feel good. Bottom end is torqued up. [Pat] But we have smooth ran out of time for right. Next time you see this the rest of it is going together and getting ran on the dyno. [Frankie] I cannot wait but if you want to see more cool builds like this make sure you check out the rest of the stuff we do here on Engine Power.
Show Full Transcript
[Pat] Today on Engine Power we are building a high tech aftermarket version of Chevrolet's o-g big block, an all aluminum W-series. [Frankie] Conventional is out the window with big cubic inches, high flowing induction, and state of the art injection to make new school pump gas power. What the hell is that then? [Pat] That's my bad! [ Music ]
Hello everyone and welcome to Engine Power. Today we have a very exciting show planned because quite frankly we've been wanting to build one of these for a while. We do a lot of engines here both modern and nostalgia. Maybe vintage if you will. So why not combine the two? Today we're gonna be building up one of Chevrolet's W-series engines. What is that you might ask? Well this is basically Chevy's first version of the big block Chevy. This is an engine that was produced from 1958 to around 1965 and ran in cars and trucks and even some racing applications up to 427 cubic inch. What makes it unique is the configuration of the deck. The deck is not 90 degrees. It is not nine degrees or perpendicular with the top of the piston. It is actually at a 16 degree cant, and that 16 degree cant creates a combustion chamber. The combustion chamber is actually on the top right here. Trying to find one of these to build is quite the challenge because if you get a stock one it is going to require a ton of machine work when you get it done. So we decided why not go full aftermarket with it and build something big, and runs great, and makes big power on pump gas. So we contacted Bill Mitchell Products and picked up one of their all aluminum W-series engines. This engine has been designed to be very parts friendly. Original 409 stuff is hard to get. So they have gone the extra mile and redesigned this to work with conventional big block Chevy parts. So the part sourcing and the parts availability and options to build are almost endless. These engines are set up to accept a 4-310 final bore like the original 409s but that will not be big enough for what we are doing. So we went ahead and sent this block over to our favorite machine shop here in Nashville, Shacklett Automotive, and they punched this block out so we can finish hone it at 4-500. Also they went in and redid the relief on the top. Now that is a relatively complicated operation but is nothing for Shacklett. They are awesome. To get the cubic inches we want we also want to go big on the crank shaft. We went to Scat and picked up a forged 43-40 crank in four inch stroke. So combined with our four inch stroke and our 4-500 bore that puts us at 509 cubic inches. Literally 100 cubic inches bigger than the stock 409. That sounds like a lot of cool stuff and it's very high tech but we're just getting started. [Frankie] A lot of the cool parts we have laid out for you guys because we want to show you what this build's gonna look like and what it's gonna entail. Moving on from the crankshaft we also have a set of Scat forged H-beam rods. These are 6-135 in length. They use the big block Chevy 990 pin. These have ARP fasteners to them. So this is great upgrade over a stock rod. To go with that we have a really cool piece. This is a RaceTec 40-32 forged piston. This is specific for the 409 and for our bore size. This is a 4-500 bore piston and you can tell by the top of it, it has a very large crown on it. This is 78cc of effective dome. It has this interesting angle here and that's to match the deck angle of the engine. This has a more modern 1.5, 1.5, 3 millimeter ring pack. It has a 1-460 compression height and is a very trick piston. They even put our name in the bottom of it. A huge thank you to RaceTec for making these for this engine because this is a key part of the build. Another very important part is the cylinder head but we have reached out to Summit Racing and got an Edelbrock 409 Performer RPM casting. This is a big upgrade over the oem's. And we sent it out to the 409 experts at Lamar Walden Automotive. What they have done is performed a CNC porting service that they offer on this cylinder, and this steps up the flow about 70 cfm over the untouched casting and is hand finished by Rob Walden over there. This is very nice work. They also step up the valve sizes to a 2-200 intake and a 1-720 exhaust. This head is set up with a dual hydraulic roller spring. So that will match our valvetrain, and this is gonna be huge for making good, respectable pump gas power with this engine. To actuate those larger valves we had to go to Comp Cams. We had them build us a custom billet hydraulic roller camshaft. This thing is super trick as well because this uses a big block Chevy journal, spacing, and lobes but the lobe arrangement is actually changed to fit the 409 heads. We've also paired that with a set of their LS link bar hydraulic roller lifters, a set of 1.7 Pro Magnum rocker arms, and a billet adjustable nine keyway timing set. For the rest of the induction we are going to be doing something on the nostalgic side. That is using Edelbrock's dual quad intake manifold. Lamar Walden Automotive has also gone through and hand ported this. We are going to be topping it with that modern touch Pat was talking about. This is FiTech's Go-EFI dual quad setup. This gives us dual 41-50 EFI throttle bodies. It's all a self contained unit. So we can bolt it on, wire it up, and go. We're gonna pair that with one of their distributors and their Go-Spark cdi ignition box. We also have a lot of cool accessory items we're gonna show you as we go like these vintage valve covers, ARP fasteners, the whole shebang. We have done our homework on this to try and build the best W-series that we can for the application. This is gonna be really cool because we haven't done a big inch W-series like this before. We think we got the parts together to make very, very good power on pump gas. So what we're gonna do is get some stuff setup and then we will start prepping this engine for assembly. Up next, we dive head first into our 509 build with some block prep.
[Frankie] The first thing we are gonna do on our 509 W-series build is prep the block. What do we mean when we're talking about prepping the block? We're usually talking about deburring the block and porting the oil passageways. So what we're gonna do is go a little more in depth in that in today's Summit Racing Tech Tip. You've seen us do this before but we wanted to take a deeper dive into it on this engine. So when we're talking about deburring usually we're talking about the sharp edges the block has from the casting and machining process. Usually all over there will be sharp edges on the deck surfaces. There will be casting flash leftover from the o-e, and what we want to do is go through and break those sharp edges and very gently round them because sharp edges not only can create stress risers but it does make the block a lot easier to work with during the assembly process. We're also usually talking about porting the oil passageways. When we're doing that what we're talking about is when the block is machined they drill holes for the casting so the oil can flow the rest of the engine, but usually when they do that it leaves a sharp edge. Sharp edges create turbulence and restrict oil flow. So we want to go through and round off those sharp edges. Give them a nice, smooth radius for the oil to transition. What are we using to do this? There are a few specialized tools but honestly this is general hand tool stuff. You can get all this from Summit Racing Equipment. The first one is a set of carbide burrs. We have two sets here. These are a six inch long shank and we have some for ferrous metals like cast iron or steel and we have some for non-ferrous like aluminum like we're gonna be using on this block. After that we are gonna use a cartridge roll or sandpaper roll to smooth it out. So this is actually a port and polishing kit you can get from Summit Racing Equipment. It has a bunch of different sizes and grits of abrasive. This will give us that nice, smooth finish that we're looking for. For some of the more sensitive areas of the block we'll use a set of hand files, a small, not very coarse file. For grinders you have a couple different options. You have corded, you have cordless. We have air and we even have an air pencil here. This is really nice for doing the small areas of the block like the passageways that feed the mains directly. You also want to have some safety equipment because you're gonna be throwing a lot of pieces of metal out. So we usually have an apron on of some sort. Definitely safety glasses. A headlamp makes it nice when you're trying to get into tight spots. Then proper hearing protection because this process usually takes a couple of hours, especially if you're starting with something like a stock block that needs a lot of work. You're gonna be holding that grinder next to your head and you want to protect your hearing. On this block they've done a great job from Bill Mitchell of deburring it. There's actually not that much to deburr on this one. Just a few areas of the block that have been machined. A little bit around the mains, and then we will move on to porting the oil passageways. So let's start out. We'll show you what we do around the mains and we'll move on from there. We always use a hand file around the mains because even though it's tempting to get after it with a burr we do not want to risk slipping off and putting a mark in the main cap register or in the main saddle area. We are only breaking the sharp edge here. Not trying to introduce a bevel or change the shape. Then we can move on to porting the passageways by the oil filter housing picking up a non-ferrous carbide to roughly shape the radius we are trying to create. This is where you have to be careful on aluminum because the non-ferrous burrs remove a lot of material quickly and if you're not careful it can go from that looks pretty good to oh I messed that up in a hurry. We'll use a ferrous carbide for a more precise adjustment and then follow it up with a cartridge roll abrasive to take out any imperfections and give it a smooth finish. We will repeat this process everywhere we can get to, following the path of the oil from the filter all the way to the mains. Here we will carefully use our air pencil to just break the sharp edge and remove any burrs leftover from the drilling process. With that we have our block fully deburred and the next thing we're gonna do is put it in the cleaner because we want to make sure we don't have any of these metal shavings out of here. We actually didn't have a ton to do because Bill Mitchell did a great job. We just went through, touched a few areas, ported the oil passageways, and now we can move on. [Pat] Next up, we get to checkin' so we don't go wreckin' all of our brand new parts in our 509 build.
[Pat] Our Bill Mitchell block is looking great after its grinding and deburring session. We have ran it through the jet cleaner and cooled it back down to ambient temp for the next step, which we are going to be setting bearing clearances. Because this block is made of aluminum it will expand at a different rate per temperature change, different than an iron one will. So we are going to adjust our bearing clearances accordingly. Normally we set a minimum oil clearance of one thousandths of clearance per inch of shaft diameter. We are going to reduce that to around a half a thousandths per inch of shaft diameter. So we'll put our minimum around 13 to 14 ten thousandths and have clearances that range all the way up to about two thousandths. So what we're gonna do is get some bearings in here, measure up our crank, and see what we have. [Frankie] We have everything prepped in order to measure our bearing clearances. We like doing this before we do a lot of machine work. That way if something needs to be adjusted we have the opportunity to do it before we start getting parts final cleaned. So we're gonna assemble everything dry but the exact same we would during final assembly. I thought you cleaned this block? [Pat] I did! [Frankie] What the hell is that then? [Pat] That's my bad. [Frankie] Oh jeez! With a doughnutless block we can carefully press the upper main bearings into the block and install the main caps starting with the back three to fit our dial bore gauge. The caps are tapped down into the register before the studs are screwed in hand tight and the washers and nuts are fastened down snug with ARP Ultra Torque Lube. All of the main fasteners are torqued to 110 pound feet from the inside out. Then we can set our micrometer to one journal's size and use it to zero out our Sunnen dial bore gauge. Then we can use it to take a direct oil clearance measurement inside the bearings on the matching main and they all fall between 15 and 17 ten thousandths. [Pat] With our main bearing clearances all tuned up it's time to move on to setting the clearance on the rod bearings. It's pretty easy. We're gonna get our King bearings put into our Scat rods and get them checked. What's important is the bolt that goes in. The Scat rod uses an ARP bolt. ARP is one of the premiere manufacturers of rod bolts and they do a great job and have a lot of different ones for different applications. Their standard one is made out of 87-40 chromoly. This particular one in our Scat rod is made out of ARP 2,000. That is a steel alloy that has very similar characteristics to the 87-40 but it is able to be heat treated to up to 220,000 psi of tensile strength. That's important because rod bolt is one of the most stressed fasteners in the engine. The rod has to take about 7,000 pounds of force trying to throw that rod and piston assembly out into orbit at 6,000 rpm. So it's very very critical. With all that said what we're gonna do is get our bearings and our rods torqued up and get them checked. For the rods we can install a coated set of King bearings into the freshly cleaned rods taking note of the upper and lower orientations. The rod caps are installed and the bolts are snugged down with ARP Ultra Torque Lube before being torqued to 90 pound feet to achieve the proper bolt stretch of between 57 and 62 ten thousandths. Unlike the block we are sticking to our usual one thousandths per inch of shaft spec. So after setting the micrometer and dial bore gauge to the matching rod journal size we can measure our vertical oil clearance. The entire process is repeated on each rod and they all come out between 22 and 27 ten thousandths. [Frankie] With all of our clearances set the next thing we're gonna do is balance our Scat forged crankshaft here in our CWT Industries Multi-Bal 5500. Now originally this is intended to be an internally balanced crankshaft but when we did our initial spin with the internally balanced setup what we found is the counterweights actually don't have enough mass to counteract the rod and piston assemblies because we have such a large piston because of the W-series application. Our bob weight is around 2,356 grams. So a little over five pounds, and our piston weighs about 900 grams with the piston and pin, which is more than the rod itself. So a very unique application and there's really two ways you could remedy this. The first, if this was a high rpm extended use race engine what you would do is add heavy metal to the front and rear counterweights and this would add mass to the counterweight but it needs about 400 grams on the front and the rear. So you'd have a lot of metal, a lot of money, and a lot of time into the crankshaft to make it work. Because this is simply a hot rod street engine an easier and simpler solution is to make the engine externally balanced. So we have installed a fluid damper external balanced hub on the front. We have the flywheel that's gonna go with this crankshaft with an external weight mounted on the rear. This converts the engine to external balance and helps the counterweights counteract that mass from the rod and piston a little better. So we're gonna do a first spin and see how much closer we are. Our first external balanced spin shows that we have knocked the imbalance down to under 90 grams on each side, which is way closer. It has also moved the heaviest part to the counterweight side. So we will start by removing a large chunk from the easily accessible and interchangeable flywheel counterweight. To tackle the front we get a bit more radical and we'll take a cutoff wheel to cut a large piece off the edge of the counterweight. This is an effective way to remove a large amount of mass in this spot and allows us to perform all the balancing without weakening the counterweights with large holes. After a few passes at grinding we can easily bring the imbalance down within our tolerance. We are well within our tolerances and the tolerance set by Iso for this weight of crankshaft. So we're at 132 degrees separation. .132 ounce inch on the left, .165 on the right, but if we look at the force on the center of the crank it's minimized down to .125 ounce inch. So we're well within our tolerance there. We're gonna save that as our last spin and should be good to go. We're gonna get this off. Get it polished up to clean up the journals a little bit and then we'll be moving on to assembly. [Pat] Coming up, tedious piston install.
[Frankie] We are on to assembly. We already got our bearings in there with some Hot Shot's Secret assembly lube on them. We're gonna drop in our four inch stroke Scat crank and get going. [Pat] Once the crank is in the rear main cap is installed first with the rear main seal offset to prevent leaks. The remaining caps are dropped in place with lube as well and are gently seated into the registers with a soft hammer. The half inch main studs are started by hand and then barely snugged down with our Milwaukee impact. [Frankie] After the splayed outer bolts are run in and the washers and nuts are screwed down with ARP lube each of the fasteners can be torqued to 110 pound feet from the inside out. Since this block has dowelled main caps the front faces do not need to be aligned during this process. [Pat] Our super custom billet cam gets installed cause we've already pressed in some coated cam bearings from Summit Racing. We had this bump stick ground with QXI hydraulic roller lobes and the intake duration at 50 thousandths lift is 237 while the exhaust is at 255 degrees. They are set on a 114 degree lobe separation angle and have the correct lobe locations to match the cylinder head's valve arrangement. Valve lift with our 1.7-ratio rockers is 672 thousandths on the intake and 678 thousandths on the exhaust. [Frankie] With the big block Chevy cam journal size and big block Chevy cam spacing the BMP block is set up for a big block Chevy timing set but we're using a nine keyway billet adjustable piece from Comp Cams. We'll temporarily tighten it down for now until we can verify the cam's position, and to do that we need to install the number one piston and rod assembly. Once we have set up our degree wheel we can set our intake center line for this hot rod street application to 107 degrees, which is seven degrees advanced. [Pat] Now we can assemble the rest of the Scat 6.135 long H-beam rods and the RaceTec 4.500 bore pistons. Hot Shot's Secret assembly lube is applied in the small end, the piston, and on the pin before sliding them together in the correct orientation and then snapping in the wire locks with a pocket screwdriver. Once they are all put together and checked the Total Seal rings can be installed on each. These are a 1.5, 1.5, 3 millimeter set to match the pistons and we gapped them to 25 thousandths on the top and 28 thousandths on the second. They are installed with a Goodson ring expander in the correct orientation and then they are coated in Total Seal assembly lube. [Frankie] Installing the piston assemblies on a W-series is very tricky compared to a conventional engine since we can't use a piston ring compressor with the offset decks. You have to manually compress each ring against the counterbore as the piston drops in making sure they all stay in their grooves and don't get caught on the top of the bore. [ Music ]
[Pat] The most challenging part of this whole build is doing this right here. [Frankie] Just gotta manually compress the rings as they go in and make sure they don't roll over. [Pat] Shacklett did a nice job on that top relief. [Frankie] Once you get all the rings past that angle it goes very smooth. [Pat] That's hard as all get out to cut right. Being patient and careful is a must but once the piston rings are past the bore chamfer the piston is pushed down just like normal with the rod bolts being temporarily tightened down until we finish the process. Once all eight assemblies are installed we can flip the block over and torque each rod bolt to 85 pound feet to achieve the proper stretch again, which is between 55 and 62 ten thousandths of an inch. [Frankie] Alright, feel good. Bottom end is torqued up. [Pat] But we have smooth ran out of time for right. Next time you see this the rest of it is going together and getting ran on the dyno. [Frankie] I cannot wait but if you want to see more cool builds like this make sure you check out the rest of the stuff we do here on Engine Power.
Engine Power Featured Projects
Engine Power Builds



Want more content like this?
Join the PowerNation Email NewsletterParts Used In This Episode



Bill Mitchell Products
Aluminum W-Series Engine Block Chevy 409
Comp Cams
COMP Keyway Adjustable Billet Timing Set
Comp Cams
Custom Billet Hydraulic Roller Camshaft
CWT Industries
Multi-Bal 5500
Edelbrock
COMP Cams Evolution Retro-Fit Hydraulic Roller Lifters
Edelbrock
Edelbrock Performer RPM Dual-Quad Large Port Intake Manifold
Goodson Shop Supplies
Piston Ring Expander
Lamar Walden Automotive Inc.
Cylinder Head & Intake Manifold Porting
RaceTec
AutoTec Chevy 348/409 Forged Piston Set
RaceTec
SCAT Big Block Chevy 454 Crankshaft
RaceTec
SCAT Chevy Big Block Premium Pro Sport 4340 Forged H-Beam Connecting Rods
Shacklett Automotive Machine
Engine Hone & Bore