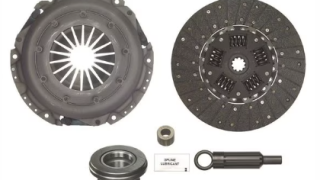
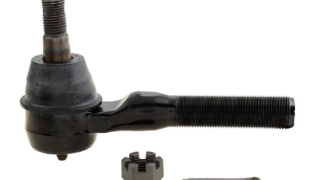
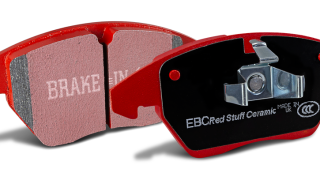
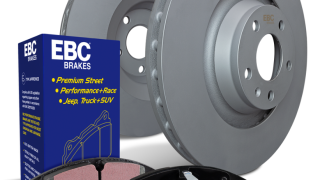
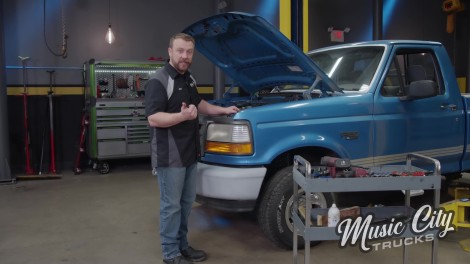
Music City Trucks Featured Projects

Music City Trucks Builds

Parts Used In This Episode

Episode Transcript

(Marc)>> You're watching Powernation!

(Joel)>> Today we've got an all new project, a 1994 Ford F-150. One of the most popular trucks ever made. This ole girl's in dire need of some t-l-c but luckily we've got a truckload full of parts that are gonna help get us home.

(Eric)>> We're gonna get down and dirty, and back to basics with this o-b-s Ford to turn it back into a reliable daily driver. [ Music ]

(Joel)>> Nothing cooler than an old pickup, am I right? [ Music ]

(Eric)>> Underneath all this dirt there's probably a pretty good truck. Got a little bit of play there. Other than that things are looking pretty good so far for this old Ford. Now you might be wondering what this thing's doing here because it doesn't seem all that special. It's a base model truck with a plain 300, a five speed, and it's four wheel drive. It's also a single cab short bed, which is pretty cool because a lot of guys now days who grew up with these trucks are building them in a lot of different ways. This is also a part of the coveted Ford FSeries, which is the best selling line of trucks in the last 40 years. It's definitely one of the better trucks that Ford has ever made.

(Joel)>> For as popular as these trucks were they did have their own set of Achilles heels. One of those was the clutch, and this truck is no exception. Seems like it's having trouble engaging and staying engaged. So we're gonna drop the transfer case and the transmission and see what's going on in there.

(Eric)>> Not quite as much room under here as the last one.

(Joel)>> Already miss working on the Dodge, and I can't believe I'm saying that.

(Eric)>> This time we're getting ahead of it. We're actually gonna make sure everything's drained before we try and pull the transmission.

(Joel)>> Well we're five seconds into work and I already made a mess.

(Eric)>> Looks like the inside of this transmission might be a mess based on the magnet on the back of this drain plug.

(Joel)>> Nope! [ Music ] Nope! Sometimes you can use a larger size wrench as a breaker or as a cheater on the back side of your socket wrench. Even that doesn't seem to be working. So I'm gonna go cry into a pillow for a minute. Honestly right now I'm a little dead inside. I'll give it one more try. There we go! [ ratchet clicking ] [ Music ]

(Joel)>> Uh, double wrench, uh, uh! [ Music ]

(Eric)>> At least this one's not as rusty as the last one.

(Joel)>> Ain't much better though.

(Eric)>> At least this thing's old enough to be mostly mechanical. Not a whole lot of electrical stuff to disconnect. She's definitely loose.

(Joel)>> Grab the momentum 5,000. [ hammer banging metal ]

(Joel)>> Patent pending.

(Eric)>> We're off the input shaft.

(Joel)>> That clutch has never been changed.

(Eric)> Pretty impressive, 125,000 miles on the factory clutch.

(Joel)>> She had a good run!

(Eric)>> Find the one piece of gravel on the floor.

(Joel)>> Everything's in our way.

(Eric)>> Now that we've got all of our old parts out we're gonna go ahead and do a little bit of side by side comparison with the brand new Duralast parts that we got from the AutoZone Pro website. We're gonna start here with the flywheel. As you can see we've got some hot spotting around the inside, which tells us that this thing has been overheated a little bit. You can also feel some ridges in a couple of spots around the inside and the outside, which means that the friction disc has been digging in there a bit. Moving over to the pressure plate we've got kinda the same thing. You can see some hot spots around the edges and on the surface itself here. Just a little bit of blue through there. We've got a little bit of a ridge on here just like with the flywheel. So safe to say this has probably not been replaced. Moving on to the friction disc, or the clutch disc itself, you can see that we've got a ton of dust buildup in here. All that dust is just gonna cause slippage as it sits in there. One thing that Duralast is really good about is re-engineering weak points like that on their replacement parts. Looking at this new clutch compared to the old one you've got these pads on the friction surface that are gonna help eject the dust out through these slots and help with heat control to prevent hot spotting. You can also see instead of having individual plates between the discs here it's got one solid piece, which is gonna help it hold up even better over time. On top of that these springs are a little bit sturdier than the old ones. Moving on to the last piece of the clutch system we've got our throw out bearings. On our old throw out bearing we have an exposed spring that's covering all kinds of rust and buildup, and that's never good. So we're swapping it out with our new one that has a boot over it to prevent that from happening. Now clearly this is gonna be a huge upgrade over the stuff that we pulled out. So I'm gonna go get this dropped in the transmission. Then we'll get the clutch kit put on the back of the engine and get everything put back together.

(Joel)>> Coming up, we chew into some salty old brakes and help steer this Ford in the right direction.

(Eric)>> Lot of dirt!

(Joel)>> Guys one of the biggest mistakes we can make as a commuter is assuming that because the brakes on our daily driver are working means that they are also in working order. As you can see on this truck, that may not necessarily be the case. We took this thing out for a few test drives and we had no reason to think that there was any issues with the brakes, but as you can tell from all this corrosion these things need to be addressed. We found this truck in one of the rust belt states, which as many of you guys know they use a lot of salt up there, which is probably why this thing has so much excess corrosion. Problem with that is it causes a lot more wear and tear on your components because it kinda softens the metal. So take this truck as a prime example of why it's good to go ahead and zip your wheels off once in a while and physically inspect your brakes just to make sure they're in working order. Before we get these swapped out I do have to remove this locking hub assembly, and as luck would have it all these screws are completely rusted out. So I'm just gonna drill them bad boys out. Now you don't have to drill all the way through the screws themselves. I'm just using this three-eighths drill bit to pop off the heads of the screws so I can get the hub cap off. [ drill humming ] [ Music ] Yep! We've been using EBC brakes out of this shop for a really long time, and many of you at home may associate them with a lot of high performance applications including drifting, auto cross, off road, etcetera, but I bet you didn't know that they also offer an entire line of o-e style replacement components for your daily driver, kinda like this blue oval up here. Now this particular set we have is the Ultimax rotor with the Geomet style coating, and that is gonna significantly cut down on all the corrosion. We've already mentioned all the issues up north in the rust belt, but down here in the south of what we call the sweat belt all the humidity can cause us just as much headache. [ Music ] Now we also opted for the EBC RedStuff brake pads, and these have a little bit of a break-in coating on them, and what that's gonna do is evenly wear them in nice and slow on your rotors. So within the first 500 miles you're not gonna have any squeaks, and all the vibration and noise is gonna go away and it's gonna last a whole lot longer. [ Music ]

[ hammer tapping metal ]

(Joel)>> Beauti-mus.

(Eric)>> Now that Joel's got the brakes taken care of it's time to move inward and check out our steering components. I hoped on my phone, got on the AutoZone Pro app, and ordered some new steering components from Duralast. Driving this thing in here it definitely had a little bit of play in the steering, which is pretty normal for an old truck like this. After further inspection we noticed that the boots on the tie rod ends have some cracking and they're starting to split open, which can allow some moisture to get in there and cause rust even with all the grease that's in there. Always a good idea to check it out just to be safe. Now let's get this stuff out of here. I always like to start by getting all the cotter pins out of the way first just in case you've got to deal with one that's a little bit more stubborn than expected. [ Music ] I'm not fighting you all day. [ drill humming ] [ hammer banging metal ]

(Eric)>> That's a lot of dirt. This pickle fork is actually for an air hammer. I have a regular hammer and I think that'll work just fine. See, easy! [ Music ] Starting at the pitman arm. [ Music ] Oh yeah, slides in nice and smooth. Grab on! We're just gonna get everything hand tight. On these particular Fords when you're replacing steering linkage it can be a little difficult with it up in the air to try and see how straight your tires are sitting just because that twin I-beam drops so much when you get all the pressure off of it. Before I can tighten the clamps down I need to adjust them so that the bolts are sitting on top of the split in the adjustor sleeve cause that's what's actually gonna apply the proper type of pressure to close that up and keep these things in place. These collars are really tight on the sleeve. Open them up. I usually just use a pair of pliers. You might need to get a little bit more creative if they're super tight. All we're looking to do is adjust this around so that the opening of the collar sits in the same place as the opening on the sleeve. Then we'll finish tightening those up later once they're back on the ground and we make our adjustments. All we've got left to do here before we drop this thing back down and get a closer pre-set on our alignment is get these tie rod ends greased up. You don't want to over do it because you can actually burst them or break the seals. With all that done I'm gonna go ahead and clear everything out from underneath, get this back on the ground, and get our alignment set. Up next, under the hood and into the bay to repair some recurring troubles with o-b-s Fords.

(Joel)>> No matter where your loyalty lies it's hard to argue that the Ford 4.9-liter inline six isn't one of the greatest engines ever made, especially when it comes to serviceability and durability. Of course that's only if you keep up on the maintenance.

(Eric)>> Like Joel said, it is inarguable that the Ford 300 has a place among all the great truck engines that have ever been made, but only if you take care of them. That's what we're gonna be taking care of here right now is some problems that we have found under the hood. A couple of things that just come with routine maintenance and a couple of things that were just known issues for these trucks. [ Music ]

(Joel)>> A little crusty!

(Eric)>> I don't think these have been out for a while. I'm gonna go ahead and take this winch controller out of here because I don't think a 3,000 pound winch is doing this thing a whole lot of good, especially not mounted on the bumper. I really hope that nobody ever tried to use that.

(Joel)>> I notice it's only mounted with two bolts too. I think that winch would probably rip off the bumper long before it pulls this thing out of a mud pit. Overall looks like our plug wires are in pretty shape, but since we're in this deep might as well go ahead and swap them out as well.

(Eric)>> Don't be throwing stuff, that's my thing!

(Joel)>> Did your signature move on you. Plugs aren't fowled but they've got some corrosion. Definitely been a minute since they've been changed.

(Eric)>> Might not be a bad idea to replace this one.

(Joel)>> I was looking at this Eric. It'd be fun to pull this thing out of here and put it in a '55 to '56 Ford F-100, like one of those old trucks.

(Eric)> Oh yeah. I think it might be fun in a uni-body too.

(Joel)>> But then what would we put in this?

(Eric)>> I have a couple of ideas.

(Joel)>> Oh god! Well guys we had ourselves another rust belt casualty of war. What happened was I went to go pop off the distributor cap and the little screws holding it on were so rusted out they just broke in half. Then while trying to extract those screws I ended up breaking the housing right on the distributor. So we went ahead and swapped out the entire distributor assembly all together, which is not necessarily a bad thing since we're already this far into it. One thing you want to make note of before pulling your distributor is the position of your rotor. In this case it was sitting on the number four cylinder. So of course the distributor has to go back into that same position. If not your firing is not gonna be right and your engine's gonna fire erratically. For you guys at home that are taking notes the firing order on one of these old inline sixes is one-five-three-six-two-four. If you do forget to check your rotor position before pulling the distributor what you can do is spin your engine over until it's at top dead center. Then you'll set your rotor on the number one piston.

(Eric)>> Now that we're moving on to reassembly I've got all of our new belt drive components here on the cart. I'm gonna explain a little bit about why we're replacing all of this, starting with the alternator. These trucks were prone to overcharging issues, which could cause a bunch of problems in the electrical system and burn out the plugs that go into the alternator itself. This one's been replaced before. So it's probably had that remedy, but it wasn't charging fully when we pulled this truck in, which could be in part due to the fact that the battery was seven years old and wouldn't really hold a charge anyways. If you've got a bad battery that's gonna burn out your alternator even quicker. So we're replacing that just to be safe. Next we've got our belt tensioner, and it's always a good idea to replace this if you've got the opportunity because the springs inside can wear out and lead to inefficiency in your belt drive and possible belt slippage. Plus this one I went ahead and took the pulley off just to check it out and we have quite a bit of play in there. That would be a problem not too far down the road. Next we've got our power steering pump. This thing was making a ton of noise when we pulled this truck in here, and Fords of this era are just notorious for power steering pump issues anyways. This one, now that we've got the pulley off, it barely moves at all. Now the new one spins nice and easy. That's what it's supposed to do. So we're gonna go ahead, get this stuff installed, and then should quiet things down and get everything working quite a bit better. All in all could have been worse.

(Joel)>> I think we've had worse.

(Eric)>> I know I've had worse experiences with 30 year old Fords.

(Joel)>> You know what I do like about Ford trucks? All the heritage involved with it. It seems like whoever buys a Ford truck he only did it because his daddy owned a Ford truck, and his daddy owned a Ford truck, and then his daddy owned a Ford truck.

(Eric)>> Just kinda runs on down the line. Just too stubborn to admit that a Chevy is better.

(Joel)>> Coming up, we raise the rizz, max fresh this old Ford, whatever that means. She's smiling right back at us.

(Eric)>> Up to this point we have done a ton of work under the hood and underneath this '94 F-150 getting it caught up on maintenance and fixing some stuff we found along the way. Now that it's ready to get back on the road running and riding good we've got to make it look good with a quick, easy visual overhaul.

(Joel)>> And it does appear that at some point someone did at least try to make this truck a little bit better. Looks like they sprayed on a little bit of a rattle can overhaul on the front and rear bumpers, and we have a little bit of oxidation on the grille, headlight bezels, and the headlights. So we're just gonna go ahead and swap all the stuff out with a nice kit that we got from the guys at Summit Racing.

(Eric)>> Squeaky! [ drill humming ] [ Music ]

(Joel)>> What the Ford? [ Music ]

(Eric)>> Okay!

(Joel)>> Take a break. Pull a bumper off. [ Music ]

(Eric)>> Where we going?

(Joel)>> Dumpster. Now we're gonna be swapping out both headlights for a brand new set, and depending on what year, make, and model you're running these things can get really expensive. Luckily for you guys at home that may be on more of a budget there are some solutions. You can get yourself a headlight restoration kit like the one we got from Summit Racing. This kit comes with all the pads you're gonna need to get this job done. I'm gonna start off with 500 grit and work our way up to 800, then 3,000, and then the rubber pad and soft compound. Ideally you want to use a variable speed drill so that you can control a little bit and you don't want to dig in too deep, and it could also warp it. We're just shaving off that top layer of oxidation. You can feel it get nice and soft, but it looks like it's still got some shiny spots. So we're gonna keep going a little farther. [ Music ] Looks like we got most of our nasty yellowness off of here. So we're gonna go ahead and step it up to 800 grit. [ Music ] The 800 grit isn't necessarily removing any of the oxidation any more. It's just trying to sand out all the 500 grit scratches. Since the 800 isn't quite as abrasive you can go a little bit faster on your drill. [ drill humming ] [ Music ]

(Joel)>> Our last step is the pad and the compound, and you do not need a whole lot of this. You want just enough to give it a little bit of abrasion but also allow that pad to glide across the headlight. As you're doing this the compound is gonna give the headlight a little bit of a haziness. So you just keep going until all of that haziness is gone. Looks like we're just about there. I think I'm gonna call that good. Let's peel this tape off and do a side by side. Yep, I like that a whole lot better. One last step you can do once you get everything polished out is go ahead and hit it with a couple of coats of clear and that'll keep it from oxidizing down the road. [ Music ]

(Eric)>> Are you able to get the clips in on your side?

(Joel)>> Gotta hold your tongue on the side of your mouth just right while you're trying to put it on.

(Eric)>> Starting to sound like one of my old bosses. He always used to tell me if something wasn't working if he'd come over and get to work he'd tell me I wasn't holding my mount right. [ Music ] Things are about to get a little bumpery.

(Joel)>> You're just full of jokes today. [ Music ]

I could get used to this. I think I might look for a position in management.

(Joel)>> Managing your saddle sores. [ Music ]

(Eric)>> It's just about summertime. We ought to grill. [ Music ] Lovely sound! Big difference!

(Joel)>> She's smiling right back at us. For no more work than we did today this thing shaped up to be a nice little rig.

(Eric)>> Brakes, steering, whole bunch of work under the hood, nice facelift. I'd say we could probably drive this thing just about anywhere now.

(Joel)>> The best part is it still has plenty of future growth potential.

(Eric)>> Speaking of that it reminds me of another truck I've see before and it's giving me some big ideas for its future.

(Joel)>> What are you thinking?

(Eric)>> Much bigger picture.
Show Full Transcript