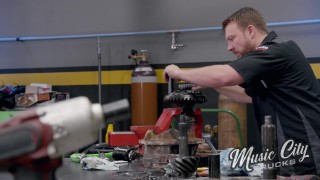
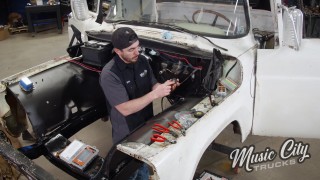
More Clint Black's F100 Episodes

Music City Trucks Featured Projects

Music City Trucks Builds

Parts Used In This Episode

Summit Racing
MagnaFlow Hot Rod Kit
The Outlaw Garage
Classic Radio & Speakers

Episode Transcript

(Marc)>> You're watching Powernation!

(Eric)>> Today is finally the day we show our shop nothing but the taillights as we quit killing time and get this old truck back on the road.

(Joel)>> This thing's been through hell and high water, and we have absolutely no time left to kill. Will we make our deadline and have this thing ready for Clint's tour? Even I can't answer that. Stay tuned and find out on Music City Trucks. [ Music ] Nothing cooler than an old pickup, am I right? [ Music ]

(Eric)>> Underneath all this dirt there's probably a pretty good truck. [ Music ] Our journey kicked off with us hauling Clint Black's 1960 Ford F-100 back to the shop. Needless to say, this truck needed a lot of work. Rust-cicles, oh my god!

(Joel)>> That is straight water! Add that to the list. The engine had more water than the swimming pool on the Titanic. So we had to swap it out with a junkyard rescue that just needed a little love and a fresh coat of Ford Blue paint.

(Eric)>> Electrical tape and zip ties, pretty much all that held this truck together.

(Joel)>> Electrical tape and zip ties built America buddy.

(Eric)>> The worst part of this fubar'ed F-100 might have been that old truck bed. Just looking at it you might as well go and get a tetanus shot. We had to completely gut it, drop in the new floor, and we replaced all the wiring. You good up front?

(Joel)>> Yes sir!

(Eric)>> I'll feel better once we hear it run though.

(Joel)>> As soon as we heard that engine fire we knew we were in the home stretch. However, that last ten percent is usually what takes up 90 percent of your time. Our to-do list has been getting shorter but the days have been getting longer, and we've still got a whole lot of stuff we need to button up before this thing goes back to Clint.

(Eric)>> This old girl behind me might have her face on now but she still needs some eyes. So we went to our friends over at Holley and picked up a set of their Retrobright LED Headlights. Now these headlights aren't like other l-e-d replacements out on the market. These are specifically designed to look just like your original sealed beams. So you still get that old school style but you get the convenience of modern l-e-d headlights that are gonna provide a safer driving experience. Because these lights are l-e-d they are gonna last a lot longer than your standard halogens. To show the difference between these new headlights and our old, sealed beams we're gonna do a little bit of side by side testing. I've got a spare battery here and a couple of test leads. We're gonna kill the lights and show you just how much of a difference these really make. That is much better. Up first we're gonna test the old light. Unfortunately this is the high beam on our old headlights. It's not very bright. Don't get me wrong, I love sealed beam headlights. They look great and they work awesome, but the light output just isn't there. Now to really see the difference we're gonna fire up this light from Holley. [ Music ] Now that is a nice, bright headlight. It also has a much better beam spread so you'll be able to see more of the road. Now for the high beam. Definitely don't leave those on when someone's coming at you. Now it's pretty clear that this is an obvious choice for an upgrade on any old car or truck, especially if you want to keep that old school look. But now that you've seen why we're using them it's time to get them put in.

(Joel)>> It's these subtle changes that can really elevate your build though.

(Eric)>> Not to mention with these it's actually gonna make it a lot easier and safer to drive this thing at night. While I was putting all of this together I went ahead and punched a couple of holes in the back of our headlight buckets. That way it's easier to route all that wiring. That hole's big enough we can run the socket right through here so we're not trying to cram a whole bunch of wire inside the bucket with the lights. I think one of the best things about these Holley lights is that it really works for any kind of build.

(Joel)>> It almost looks like crystal on the front lenses. Real sharp looking.

(Eric)>> I'm grounded.

(Joel)>> That's not in that great of a place either.

(Eric)>> The outside prongs were a little splayed out. That is a really bad spot for that.

(Joel)>> Who put those there? Some jack wagon.

(Eric)>> Guy's kind of a #@$%! [ drill humming ] [ Music ]

(Eric)>> Well all that's left is to see how they look. Joel hit it! Woo, look at that! Oh man!

(Joel)>> Up next, we're the headliners of this show and we control the music. [ MCT theme music playing ]

(Joel)>> The next thing that we're gonna be addressing is something that's kinda been bugging me ever since this truck came in here, and that would be this droopy headliner. Any of you guys at home that have ever cruised around in a decades old vehicle are probably familiar with this problem. So what are the solutions? You could buy a reproduction and replace it yourself, or you could take it to your local upholstery shop and have them fix it. Problem with both of those is that it costs money. In all honesty, for less than a hundred bucks and a couple of hours of your time you could actually fix this yourself. I am mildly impressed at how good a shape this stainless trim is in. Hope I like this good when I'm 60 years old. Now these are made out of a corrugated cardboard. So you've got to be really careful pulling this out so it doesn't break in the middle or break any chunks off. I'm stuck. Boy it's a bad time for Eric to take his coffee break. Surgical precision! We've got Clint's old headliner spread out across our workbench and I was pleasantly surprised to find that everything is still in really good shape. The next thing to do is slowly pull off all this old cloth. We're gonna take our time here because we're gonna try and preserve as much of this material as possible. I'm not trying to dig in here really deep into the cardboard. I'm just letting this little scraper just glide across the surface so that it separates it. It's actually working pretty good. Edges are done. So we're ready to flip this thing over and get it from the other side. As far as material goes you could go vinyl, or leather, crocodile skin, whatever strikes your fancy. We got all our stray buggers sucked up with the shop vac and our surface is nice and clean. The next thing to do is lay down our layer of fabric here. Once it's centered we can start gluing from the center out. I got these little rubber tipped clips here that's gonna hold it in place in the center. If you don't have these you could actually use a clothes pin. Now we're gonna be using a professional quality contact adhesive because it's easy to spray out of the spray gun. It's a little bit more expensive but you want this stuff to last. If you don't have a gun or an air compressor run down to your local hardware store, grab you a paint brush. Use the Bob Ross technique of painting some happy little bushes. Works just as good as well. [ Music ] [ spray gun hissing ] [ Music ]

(Joel)>> Gotta let that sit about five or ten minutes. Now we're gonna do this in sections. Once this glue is set up we'll go ahead and set it down and spread it. Then fold it back over. Glue, spread, glue, all the way down to the end. Then we'll come back over, do this side, and by the time it's said and done everything should be nice and tight. I got this little rollie tool here that's gonna help push out all the wrinkles as well and just form the glue to the fabric. Alright, next thing to do is fold all these edges over, glue them down, and then we'll clean up all this excess and call this thing done.

(Eric)>> This thing looks good.

(Joel)>> A lot better than what it did. A little tricky.

(Eric)>> How'd you get this thing out of here by yourself?

(Joel)>> You would know if you weren't on your coffee break.

(Eric)>> Pop it in there. [ Music ]

(Joel)>> Them Ford boys on the assembly line got these on in about two minutes.

(Eric)>> Good for them! I will not be doing that.

(Joel)>> She's in buddy!

(Eric)>> That looks real good. It's the weirdest things in this truck that have been in good shape. One of the upgrades we decided we're gonna make on this truck is to add a radio because we can't really give back a country music star his truck without having some way to listen to music in it. A lot of these old trucks, including this one didn't come with radios from the factory. So we called up our buddies down at the Outlaw Garage and he sent us this classic style radio kit along with some high quality speakers. Installing a radio in something that's never had one in it before in my opinion is actually easier than trying to add an aftermarket radio to something that had one from the factory. So we're just gonna start by resting the knobs up against the dash. Get you a tape measure. We're gonna measure from the glovebox. We've got about three and an eighth, and this hole right here, that is also about three and an eighth. With everything measured out we're gonna go ahead and make a mark right under where our knobs are gonna go through. Punch a couple of holes. Our next step is to cut the hole for the rest of the radio to go through. Now that the corners are marked we can take the faceplate the rest of the way off and use it to verify. [ saw buzzing ]

(Eric)>> Now we can come back with a carbide bit, clean up the corners, and do a test fit. [ MCT theme music playing ] [ Music ]

(Eric)>> Coming up, we pipe in more than just good music and sweeten the sound of our inline six.

(Eric)>> I went ahead and got our radio test fitted and installed. So it's time to move on with getting our speakers put in. We're gonna start by taking our speaker and setting it upside down on our door panel. I want to make sure it's situated in the center of the panel. We've got these flanges here where the screws go, and we're gonna use those as measuring points to make sure all four corners are even from the edges. We've got two and a half there, and two and a half there. We're good! With our speaker centered we're ready to start marking. We're gonna mark all the way around the entire perimeter of this speaker. Thankfully these six by nines are a pretty big oval. So it's not too hard to finish out these markings. Now with that completely marked out we're gonna measure the flange width on the speaker itself so that we can make another mark around the inside where we're actually gonna cut. Looks like this flange on the speaker is about a half inch all the way around. So we're gonna make a bunch of half inch deep marks inside of this original oval. We're gonna play a quick game of connect the dots. Then we can get to cutting. We're gonna do just like we did on the dash. Punch a hole, take our body saw, and cut this out. It doesn't have to be clamped super tight in the vice cause we're not putting a whole load of pressure on it. It just needs to be able to hold it in place. This is the back side of the panel, but it'll still give you an idea. It's gonna cover up any imperfection just fine. For now I'm gonna get these edges cleaned up a little bit, round them out a little bit more. We'll get the panel back in the truck, drill a couple of holes, get the speakers in. With the speaker mounted in the door panel it's time to drop it in and see how it fits. The door panel's a little heavier now. I'm only gonna put a couple of screws in because I will have to take this back off when I wire it up. If I do say so myself that doesn't look half bad for an install of brand new parts into an old truck. Once that's finished up and the radio is wired we've just got a few more little things to button up and this truck's ready to roll for the first time in 30 years.

(Joel)>> One of the last hurdles we need to tackle on Clint's old truck before it hits the open road is the exhaust system. For some of you guys at home that subject matter is the bane of your existence. For others like me we mildly enjoy it because it gives you a chance to show your creative side, and it can be as simple or as custom as you like. When this truck first rolled in here it had a single inch and seven-eighths pipe that ran right along this frame rail and then it kicked out right in front of the driver's side tire, which I can only assume was some sort of makeshift repair some farm boy made back in the day because technically this truck would have had from the factory a pipe that came straight off the manifold down to this front crossmember, make a 90 all the way, and then another 90 straight out the passenger's side. Some of you might be thinking, that seems a little complicated. Why didn't Ford just pull of the manifold and go straight out the driver's side? There actually is a reason for it. Most standard passenger vehicles will spend 68 percent of their time on the road with only one occupant in the vehicle. In a way Ford was a little ahead of their time in limiting that exposure of exhaust fumes to the dude sitting in the driver's seat. Our plan of attack is to route Clint's exhaust system close to how it was from the factory because quite frankly if it was good enough for Ford it's good enough for me. Now as I mentioned before this exhaust system was inch and seven-eighths from the factory. We're gonna go ahead and increase that to two and a half using this universal kit that we found at Summit Racing. Bigger pipe diameter means less restriction. Therefore better air flow and better performance. I know by no stretch is this thing a powerhouse. At best this thing's pushing about 60-70 horsepower. But somewhere down the line Clint gets a wild hair and he wants to put a power adder on this thing like a turbo, you'd have an exhaust system that supports it. Any time you're doing this there is something that I like to call the rule of thumb, which means you want at least a thumb's width gap between your exhaust system or your frame, driveline, anything like that. Routing my exhaust just got to make sure it's not gonna run into the axle. Looks like we've got a straight shot out the back. I think we can make that work. Sometimes when I'm looking at it aesthetically wise I'd like for the pipe to run parallel with the frame rails. Performance wise it's not gonna make a difference but be a little bit more aesthetically pleasing. [ Music ] All that's left to do now is kinda tack everything together. Then we'll do our final welding, set our hangers. Then we'll have pretty much exhausted all our efforts to getting this truck done. [ welder crackling ] [ Music ]

Up next, we check all the boxes and race to a photo finish with no time left to kill.

(Eric)>> You finally finish all the work that's gonna get your old truck back on the road, but that doesn't mean that you're done. Just because the work's finished doesn't mean you can just go out and drive it. You need to do a pre-trip inspection. That involves checking everything that you touched. We just finished up underneath with checking all of our brake line fittings, engine and transmission mounting bolts, and suspension components, and one thing that we like to do around here is mark all of our suspension bolts with a paint marker or something similar so that if anything backs out on that first drive it's easy to identify when you get back. Just because you've checked everything underneath doesn't mean you're done.

(Joel)>> That's right. You're gonna want to check all your fluids, coolant, fuel, oil, brake fluid, tranny fluid, gear oil, all the good stuff. Last up check all your electronics, headlights, taillights, brake lights, turn signals. Don't forget to try out that fancy new radio. Gotta have some tunes cranked while you're cruising around on your maiden voyage. Eric let's give it a shot. Headlights, brights, oh yeah, those work. Left turn signal, right turn signal, I'll check the brake lights. We've got taillights. Go ahead and give me some brake lights. Left turn signal, right turn signal. I think we're in business! [ Music ] And we're off! Like a herd of turtles.

Fixed it!

(Eric)>> God I hope that's on camera.

(Joel)>> Been a long time coming man.

(Eric)>> For Clint asking us to just make this truck drive we sure did put a lot of work into it. I think we made something to be proud of.

(Joel)>> Feels good after all those late nights of working on this old truck, especially when you put your heart and soul into a project. Feels good to finally get it out on the road.

(Eric)>> For just a good around town cruiser it's perfect for hitting back roads with the windows down on a nice day like this. You couldn't ask for something better.

(Joel)>> I think it's safe to say ole Clint's gonna be pretty happy with how it turned out. Did he say where he was gonna meet us?

(Eric)>> I think we're meeting him right out in front of the Opry.

(Joel)>> Can't think of a better spot to meet a country music legend to give his truck back to him. Probably gonna take a while to get there going 45 miles an hour. [ Music ]

Well guys we're here at the Grand Ole Opry to give Clint Black his 1960 Ford F-100 back.

(Eric)>> With this thing finally done it's time for him to take it back so he can get out on the road on tour. The man himself.

(Clint)>> It's the big day!

(Eric)>> Yes sir!

(Joel)>> As you can tell the outside looks pretty much the same.

(Clint)>> It's a beast! Look at that!

(Joel)>> By far the biggest transformation is underneath the hood. What do you say we start there?

(Clint)>> It looks the same to me! That's when you have to cut to the shot of what it looked like because it is not the same. Where'd my Coke can go?

(Joel)>> We've got it hanging up on the wall in the studio.

(Clint)>> In memorium, the can!

(Eric)>> What we've got here is a slightly newer model. This is from a 1963 truck. We found this to keep it period correct. That way you still get that same experience while you're driving it.

(Clint)>> 1991 it gave its last gasp.

(Eric)>> It's gonna ride like an old truck but it's gonna do it a lot better than it did before.

(Clint)>> Which was not at all.

(Eric)>> I think that about covers it under the hood. It's about time to show him the back.

(Joel)>> You can see here we fixed all that rust and gave you a nice, new bed wood floor. Since you are Clint Black we decided to go with black walnut for the wood.

(Clint)>> I would have lost a bet on whether you guys could pull this off in time. I would have thought this was years, or at least several months of work.

(Joel)>> We've got a couple more surprises for you. If you want to hop in that cab and climb up into that drivers seat.

(Eric)>> That seat should feel nice.

(Clint)>> Feels just like the old days.

(Eric)>> You'll notice we went ahead and refinished your dash here. All the gauges have been redone.

(Clint)>> It looks fantastic.

(Eric)>> On the glovebox there we went ahead and pulled the script off your first album and painted that right on there so you'll never forget where this thing came from.

(Clint)>> That's excellent.

(Joel)>> Eric did that by hand and some masking tape. Nice subtle touch for you.

(Clint)>> Completely attached to its past.

(Joel)>> The crown jewel of the inside is something that you mentioned. We went ahead and put a radio back in the truck.

(Clint)>> I didn't even remember we talked about that.

(Joel)>> We've had a lot of fun working on this, and we hope it brings you just as much enjoyment.

(Clint)>> I've got to get back on the road, but not before I crank this baby up.

(Eric)>> Just a quick one, two, and then hold that throttle. She'll fire right up.

(Joel)>> There she is!

(Clint)>> That's a great sound! Wish me luck!

(Eric)>> There you go.

(Joel)>> They grow up so fast don't they?

(Eric)>> You know that was our ride back to the shop right?

(Joel)>> I'll call us a cab!
Show Full Transcript