Engine Power Featured Projects
Engine Power Builds
Want more content like this?
Join the PowerNation Email NewsletterParts Used In This Episode
ARP
Bolts & Studs
ARP
Digital Stretch Gauge
ARP
Fasteners
ARP
Ultra-Torque Fastener Assembly Lubricant
Comp Cams
Camshaft
Dupli-Color
Ceramic Primer
Goodson Shop Supplies
Rod Heater
Matco Tools
MATCO Tools are the Official Tool Supplier to PowerNation
MSC
Profilometer
ProMaxx Performance
Cylinder Heads
School of Automotive Machinists
Custom Torque Plate
Sunnen Products Company
SV-15 Hone Machine
The Industrial Depot
Tools, Hardware, Shop Supplies
Video Transcript
(Pat)>> You're watching Powernation.
(Frankie)>> We give our Ford 300 more compression, a ported head, and a bigger cam.
(Pat)>> Then we give it full throttle. [ engine revving ] [ MUSIC ]
(Pat)>> Hey everyone, thanks for tuning in. Welcome to Engine Power. If you remember recently we took our Ford 300 cubic inch inline six cylinder and added some simple bolt on parts, and showed some rear horsepower gains. Well we had an overwhelmingly positive response to that, and more importantly we heard from you the viewer on what you would like to see next. So we decided to go through and do a full tilt build on it, which will include a bump in compression, a ported cylinder head, a bigger, badder cam shaft, and even later on a serious power adder.
(Frankie)>> The nice part about this build is that these are mostly off the shelf parts that are readily available. We are adding some custom touches but that's just the nature of hot rodding. We're gonna show you how with a little creativity and some proper planning you can make big power gains out of something a little unconventional. [ MUSIC ] [ drill buzzing ] [ MUSIC ]
(Frankie)>> Must be some of that lifelong coolant.
(Pat)>> Look at that! That is not oil, that is coolant. I don't even know what that is.
(Frankie)>> It looks like a nest but it's really packed in there. Yeah see.
(Pat)>> It's all wound around the impeller.
(Frankie)>> Definitely been there for a long, long time.
(Pat)>> That's probably limiting horsepower. You know what that was? Probably someone they were working on it left a rag in it.
(Frankie)>> That makes sense, stuff in the neck or something.
(Pat)>> Ah, that's exactly what it was. Someone had stuff a shop rag. Someone had put that in the neck when they were working on it. [ MUSIC ] A perfect tool for every job. [ MUSIC ]
(Frankie)>> Not too bad.
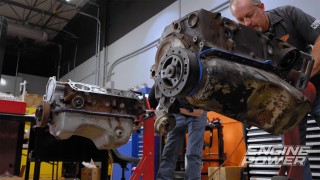
(Pat)>> Clean! Are you kidding, that's nice. That's not horrible. Silicone and cork right? Okay so this engine has been apart before. Something this old it's not surprising that it's been apart one, two, five times.
(Frankie)>> Especially for what it was used for, being serviced probably not uncommon. [ MUSIC ]
(Pat)>> Oh, it's sealed down. [ MUSIC ] Had a little oil on one cylinder, not bad. So what do you think the over/under is on this thing being stock bore?
(Frankie)>> Not very good.
(Pat)>> Well it's been apart but it is stock bore. Okay I'll buy that for a dollar. What were these stock for compression? I think this was 8 to 1.
(Frankie)>> It was something low like that.
(Pat)>> So that will definitely need to be improved on.
(Frankie)>> Very nice, very nice! The lifters are in pretty good condition with no signs of damage.
(Pat)>> The nice thing about industrial application. An automotive one has a fiber gear in there, and these are typically in good shape. This is always like my favorite part, to see how good or bad the bearings are. [ MUSIC ] Yeah baby, that looks very nice. Wow, no that's beautiful. [ MUSIC ] Look at that. That's the original Ford piston, made in the USA. [ MUSIC ] See something cool on these. See that hole? That's a pressurized squirter. It keeps it cool.
(Frankie)>> That's cool. [ MUSIC ] Woo, so nice! You know after a nuclear war there'll be two things left on Earth.
(Frankie)>> Cockroaches.
(Pat)>> And 300 Fords. [ MUSIC ]
(Frankie)>> The main bearings look just as good as the rod bearings.
(Pat)>> This is in fact one of the nicest used engines we've torn down in a long time, and we're just gonna make it better.
(Frankie)>> Up next, we make room for bigger badder pistons and then we balance the rotating assembly.
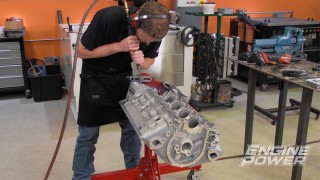
(Pat)>> We are continuing on the full build of our Ford 300 cubic inch inline six cylinder, and we have it strapped into the Sunnen SV-15 hone to make the cylinders round and true. On this particular application we wanted to put a better quality piston in it because it is going to see some serious abuse naturally aspirated and possibly boosted. So we wanted to put a forged piston in it. We could have a piston made but it would take a lot of time, and we found out that you can put something in it that is off the shelf that will work. The finished bore size on this particular forged piston is four inch, 50 thousandths. Now if that sounds familiar that is the stock bore size of a 390 Ford FE. That's right, that's what this piston was designed for. Incidentally the wrist pin size of 975 is the same as our six cylinder's, but more importantly the compression height is what the key is. It is 1-7-76. Now combined with our 6-2-0-9 rod out of our stock six cylinder that will put the piston roughly 32 thousandths below the deck. Now all that being said we have to get the pistons to fit in this block and that's gonna take a lot of material out. So let's get started. First off we are going to change the mat that catches debris in the hone. Next we're topping off the oil level with some fresh Sunnen honing oil. Engine blocks retain some of the honing oil. So you occasionally need to replace it. We're using a low viscosity low sulphur formula, and Sunnen has a wide variety of lubricants depending on the application. Finally a new fiber mat drops into place. [ MUSIC ] Since we have to take a total of 50 thousandths out of the bore we'll rough that material out with the 220 grit diamond abrasive. The SV-15 has a feature that will detect taper in the bore and automatically dwell to correct that spot. Periodically we'll stop to check the bore size with a dial bore gauge. We have our Ford roughed out to within four thousandths of final bore size. So now it's time to install the torque plate to finish it up. This was custom built for us by our friends down in Texas, Sam Tech. It was built off a head gasket blueprint. So we know it's correct. It's time to get it on and do a little honing. [ MUSIC ] The new cylinder head will be fastened down with high quality ARP studs. So we'll use those same studs to bolt down our torque plate. ARP makes it easy with tons of engine specific fastener kits, including this one for the 300. ARP Ultra Torque assembly lube is applied and the studs are torqued to 80 pound feet. Always dress your abrasives prior to each round of honing to keep them clean. This stage takes the bore within two-ten thousandths of its final size. For finish honing we're using an 800 grit diamond abrasive. Once we're done we'll clean the bores and check the cylinder finish with our profilometer that we picked up from MSC Industrial. The sapphire stylus moves slowly over the surface measuring the peaks and valleys of the cylinder in millionths of an inch. Bore finish is critical for proper piston ring sealing. So we follow the ring manufacturer's specification to get it right.
(Frankie)>> The stock crankshaft is in superb condition. So we gave it a quick polish and checked it with a mic for size. Next we'll load the block in the jet washer for final cleaning. This block is in pretty good shape. So we'll only need to run the machine at 150 degrees for about 30 minutes. [ MUSIC ] The paint will stick a little bit better.
(Pat)>> There'll be a little bit of stuff in there. Normal stuff, brushes down the oil gallery and all that.
(Frankie)>> Sweet!
(Pat)>> Good hustle! [ grinder buzzing ]
(Frankie)>> Pat wanted to keep his hands clean so he could have a mid-morning snack. I guess that leaves me to do the dirty work. [ grinder buzzing ]
(Pat)>> Up next, we torque down a free flowing cylinder head and fire up the dyno.
(Pat)>> We are almost ready to stick our Ford 300 six banger back together, but before we do that we are going to do a little bit of component balancing. We are going to make sure all of our pistons and rods weigh the same. We have already gone ahead and pressed in new ARP rod bolts and resized the housing back to standard bore. Next we are going to weigh the rods, both on the small end and the big end and find the lightest one, and then grind to match it. The balance pad on that makes it easy. First we'll weigh the small end of each rod and write down the result. Once we find the weight of the lightest rod we'll remove material from the other rods to match it. In our case that weight is 192 grams. We'll use our belt sander. Go slowly and check your results often. It's easy to take too much material off and then you'll have to start all over again. [ grinder buzzing ]
(Pat)>> The same procedure is repeated on the big end of the rod. [ grinder buzzing ]
(Pat)>> Our final weight on that end is 541 grams. We'll check the weights of every piston assembly and they are spot on at 707 grams. To install the piston assemblies on the rods we'll fire up our Goodson rod heater. By heating the small end of the rod it expands allowing the wrist pin to be installed without pressing. This is something that requires precise setup and plenty of experience. If you heat the rod too much it can weaken it enough to cause catastrophic engine failure. If you heat the rod too little the rod won't expand enough to slide the wrist pin in. It only takes about 15 seconds to get the rod up to temp, and then you have about five seconds to install the wrist pin before the metal begins to contract.
(Frankie)>> New main bearings drop into the freshly cleaned block and one of the main caps is torqued to spec. Using a dial bore gauge we'll check the vertical oil clearance. The mains come out between 22 and 25 ten thousandths across the board. Permatex Ultra Slick lubricates the bearings and the crankshaft goes into place. [ MUSIC ]
(Pat)>> Alright question. Why do you not turn the crank over until everything is torqued?
(Frankie)>> When the mains aren't torqued they're not actually round, cause when you torque the main cap down it actually distorts the bore and makes it round. So if you turn it when it's not torqued you can actually scuff the bearings.
(Pat)>> Very good!
(Frankie)>> The final torque value for the mains is 80 pound feet.
(Pat)>> The cam shaft is a custom grind from Comp Cams. Duration at 50 thousandths lift is 230 degrees on the intake and 236 degrees on the exhaust on 110 degrees of lobe separation angle. Lift at the valve is 523 on both sides.
(Frankie)>> Perfect! [ MUSIC ]
(Pat)>> We ordered a set of Total Seal piston rings through Summit Racing Equipment. They're a file fit design for our 4-0-50 final bore size. We set the ring gaps at 28 thousandths as per Total Seal's recommendation for our application. The rings are deburred with a fine grit stone. This is crucial for proper installation and protects both the piston and bore from damage.
(Frankie)>> The rod bearing clearance is checked with a dial bore gauge, and it comes in between 21 and 23 ten thousandths. After the number one piston is installed we can degree the cam. Our setup is non-adjustable but comes in at 104 degrees of intake center line, which is six degrees advanced. With everything checking out great the rest of the piston assemblies can go in. These are DSS pistons forged from 26-18 alloy. They have one-sixteenth, one-sixteenth, three-sixteenth ring lands and have a 5cc dish.
(Pat)>> The rings in this thing felt pretty good. What do you think it turns over like?
(Frankie)>> It felt pretty nice when I turned it over. I'm gonna guess 20.
(Pat)>> 20 exactly?
(Frankie)>> 20 exactly, just turn it over. That's my guess.
(Pat)>> What does a 350 Chevy with a standard ring turn over at?
(Frankie)>> A lot more than 20. Isn't like 40?
(Pat)>> It's in the 40's right? [ MUSIC ] Once you get her moving.
(Frankie)>> Keeping me in suspense, come on!
(Pat)>> It's hanging between 19 and 20.
(Frankie)>> That's a good guess.
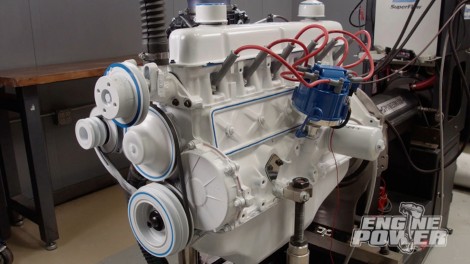
(Pat)>> We achieved the correct rod bolt stretch by checking it with ARP's digital stretch gauge. The end result is six thousandths stretch at 55 pound feet of torque. The rest of the short block assembly is straight forward, installing the timing cover, balancer, new oil pump and pickup, and the original oil pan. ARP fasteners are used throughout. The new hydraulic flat tappet lifter receive break-in lube on their mating surfaces. Lube is provided with the cam. The biggest change we are making to this engine concerns the cylinder head. We could have gone ahead and freshened the old one, and that would have been okay, but we wanted to do something a little more on the hot rod side. So we sourced a brand new casting for it. This is off a late model fuel injected 300 and it has a couple of different features. One being the combustion chamber shape. It is heart shaped and it has better flow characteristics and is better for combustion efficiency. We have also gone ahead and put larger valves in it. We have a 1-940 intake and a 1-600 exhaust. They're both swirl polished stainless. Now that will flow better also because the head has been mildly ported and surfaced down to set our combustion chamber volume to 73cc. With our combined combination that will raise our compression ratio from 8 to 1 stock to 9.95 to 1, and that will be a big increase, and I think that will make a lot more power. All this work was done by Pro Max cylinder heads down in Alabama, and by the way it looks I think it's gonna run great. [ MUSIC ] The cylinder head is torqued in three stages to 40, 60, and finally 80 pound feet of torque. [ torque wrench clicking ]
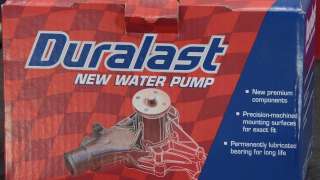
(Pat)>> We wanted a rock solid dependable water pump for our six cylinder power plant. We chose a new unit from Duralast. It is an o-e quality component with proper fit and long life. It features a heavy duty unitized bearing, pressed on hub, and a precision machined housing. The pump is factory tested to ensure it meets or exceeds factory specs. It comes with a new gasket, and is a perfect fit on the 300.
(Frankie)>> Alright, we wanted to pay homage to the Ford 300's industrial roots and give it some vintage hot rod flare. After applying a coat of Dupli-Color ceramic primer. I'm out!
(Pat)>> So am I.
(Frankie)>> We laid down VHT gloss white high temp engine enamel. It handles temperatures up to 550 degrees Fahrenheit. Plus it's chemical resistant. After the paint dries we'll assemble the rest of the engine and see what this thing can make. Up next, 300 cubic inches of naturally aspirated power.
(Pat)>> I think it really liked that!
(Frankie)>> Our Ford 300 inline six is all hooked up.
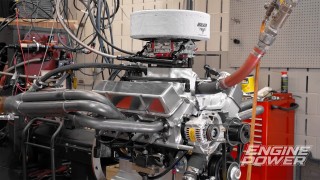
(Pat)>> And it's ready for dyno testing. [ engine starting ]
(Pat)>> Alright our cam's all broke in. The oil's been changed. We're at 30 degrees of timing on pump gas. Are you ready?
(Frankie)>> I'm excited. I want to see what this thing's gonna make.
(Pat)>> I have no idea what this is gonna do on this first yank. So let's give her the go here. [ engine revving ]
(Pat)>> Alright first one out of the box, 263.6 horsepower at 4,700, 335 pound feet of torque at 3,100.
(Frankie)>> That's a big jump.
(Pat)>> First thing before we do anything. Fuel's in kind of an okay range. We're on the brake specifics 42 to 47, 49. Go put some timing in it. Go put four degrees of timing in it. I know it's a big jump but we're gonna see what this thing does. So go put some timing in it. [ engine revving ]
(Pat)>> Okay it liked that. 270, 337 pound feet of torque. Oil pressure is still going up. Let's put timing in it until it stops making power. So we'll put two more degrees in it right now. We'll jump it right up. That's got a heart shaped chamber. It's a little bit different than that standard chamber on a 300, and it's for a fuel injection deal. So it's a little bit different shape. It's got the bigger valve. We are treading in all new water right now. [ engine revving ]
(Pat)>> I think it really like that. That smoothed her right out.
(Frankie)>> 338!
(Pat)>> 338, look how flat the torque is, 270 horsepower. This is really sensitive to timing, which a lot of engines are. Depending on the combustion chamber shape, how the air goes through the cylinder because this is a contra flow head instead of a cross flow head. There's a whole bunch of different stuff that happens in the combustion chamber on the in and out side. Okay mister engine builder what do you want to change.
(Frankie)>> I don't know if we're gonna get any more out of it on timing. I kinda want to throw a spacer on it and see what that does. See if that helps torque out.
(Pat)>> I would agree with that. Let's put another inch of spacer in it. I like the way you think.
(Frankie)>> By replacing the one inch spacer with a two inch model we're increasing plenum volume. This is a common tuning method that can increase performance but you'll never know until you give it a try. [ engine revving ]
(Pat)>> I don't think it hurt it. It still sounds good though. Actually it literally didn't care.
(Frankie)>> Didn't do anything.
(Pat)>> It was within a half-pound feet of torque and within three-tenths of a horsepower. In its long but not strong industrial setup the Ford made 88 horsepower and 217 pound feet of torque. Once we made several upgrades, including a new manifold and carb, it produced 169.5 horsepower and 280 pound feet of torque. Today's upgrades included forged flat top pistons, spicier cam, and a mildly modified cylinder head yielding 270 horsepower and 338 pound feet of torque. An increase of 100.5 horsepower and 58 pound feet of torque over our previous round of upgrades.
(Frankie)>> Compared to the base line dyno results it's a massive increase of 182 horsepower and 121 pound feet of torque. The next time you see this engine it's getting a turbo. For more information on anything you've seen today visit Powernation TV dot com. [ engine revving ] [ MUSIC ]
Show Full Transcript
(Frankie)>> We give our Ford 300 more compression, a ported head, and a bigger cam.
(Pat)>> Then we give it full throttle. [ engine revving ] [ MUSIC ]
(Pat)>> Hey everyone, thanks for tuning in. Welcome to Engine Power. If you remember recently we took our Ford 300 cubic inch inline six cylinder and added some simple bolt on parts, and showed some rear horsepower gains. Well we had an overwhelmingly positive response to that, and more importantly we heard from you the viewer on what you would like to see next. So we decided to go through and do a full tilt build on it, which will include a bump in compression, a ported cylinder head, a bigger, badder cam shaft, and even later on a serious power adder.
(Frankie)>> The nice part about this build is that these are mostly off the shelf parts that are readily available. We are adding some custom touches but that's just the nature of hot rodding. We're gonna show you how with a little creativity and some proper planning you can make big power gains out of something a little unconventional. [ MUSIC ] [ drill buzzing ] [ MUSIC ]
(Frankie)>> Must be some of that lifelong coolant.
(Pat)>> Look at that! That is not oil, that is coolant. I don't even know what that is.
(Frankie)>> It looks like a nest but it's really packed in there. Yeah see.
(Pat)>> It's all wound around the impeller.
(Frankie)>> Definitely been there for a long, long time.
(Pat)>> That's probably limiting horsepower. You know what that was? Probably someone they were working on it left a rag in it.
(Frankie)>> That makes sense, stuff in the neck or something.
(Pat)>> Ah, that's exactly what it was. Someone had stuff a shop rag. Someone had put that in the neck when they were working on it. [ MUSIC ] A perfect tool for every job. [ MUSIC ]
(Frankie)>> Not too bad.
(Pat)>> Clean! Are you kidding, that's nice. That's not horrible. Silicone and cork right? Okay so this engine has been apart before. Something this old it's not surprising that it's been apart one, two, five times.
(Frankie)>> Especially for what it was used for, being serviced probably not uncommon. [ MUSIC ]
(Pat)>> Oh, it's sealed down. [ MUSIC ] Had a little oil on one cylinder, not bad. So what do you think the over/under is on this thing being stock bore?
(Frankie)>> Not very good.
(Pat)>> Well it's been apart but it is stock bore. Okay I'll buy that for a dollar. What were these stock for compression? I think this was 8 to 1.
(Frankie)>> It was something low like that.
(Pat)>> So that will definitely need to be improved on.
(Frankie)>> Very nice, very nice! The lifters are in pretty good condition with no signs of damage.
(Pat)>> The nice thing about industrial application. An automotive one has a fiber gear in there, and these are typically in good shape. This is always like my favorite part, to see how good or bad the bearings are. [ MUSIC ] Yeah baby, that looks very nice. Wow, no that's beautiful. [ MUSIC ] Look at that. That's the original Ford piston, made in the USA. [ MUSIC ] See something cool on these. See that hole? That's a pressurized squirter. It keeps it cool.
(Frankie)>> That's cool. [ MUSIC ] Woo, so nice! You know after a nuclear war there'll be two things left on Earth.
(Frankie)>> Cockroaches.
(Pat)>> And 300 Fords. [ MUSIC ]
(Frankie)>> The main bearings look just as good as the rod bearings.
(Pat)>> This is in fact one of the nicest used engines we've torn down in a long time, and we're just gonna make it better.
(Frankie)>> Up next, we make room for bigger badder pistons and then we balance the rotating assembly.
(Pat)>> We are continuing on the full build of our Ford 300 cubic inch inline six cylinder, and we have it strapped into the Sunnen SV-15 hone to make the cylinders round and true. On this particular application we wanted to put a better quality piston in it because it is going to see some serious abuse naturally aspirated and possibly boosted. So we wanted to put a forged piston in it. We could have a piston made but it would take a lot of time, and we found out that you can put something in it that is off the shelf that will work. The finished bore size on this particular forged piston is four inch, 50 thousandths. Now if that sounds familiar that is the stock bore size of a 390 Ford FE. That's right, that's what this piston was designed for. Incidentally the wrist pin size of 975 is the same as our six cylinder's, but more importantly the compression height is what the key is. It is 1-7-76. Now combined with our 6-2-0-9 rod out of our stock six cylinder that will put the piston roughly 32 thousandths below the deck. Now all that being said we have to get the pistons to fit in this block and that's gonna take a lot of material out. So let's get started. First off we are going to change the mat that catches debris in the hone. Next we're topping off the oil level with some fresh Sunnen honing oil. Engine blocks retain some of the honing oil. So you occasionally need to replace it. We're using a low viscosity low sulphur formula, and Sunnen has a wide variety of lubricants depending on the application. Finally a new fiber mat drops into place. [ MUSIC ] Since we have to take a total of 50 thousandths out of the bore we'll rough that material out with the 220 grit diamond abrasive. The SV-15 has a feature that will detect taper in the bore and automatically dwell to correct that spot. Periodically we'll stop to check the bore size with a dial bore gauge. We have our Ford roughed out to within four thousandths of final bore size. So now it's time to install the torque plate to finish it up. This was custom built for us by our friends down in Texas, Sam Tech. It was built off a head gasket blueprint. So we know it's correct. It's time to get it on and do a little honing. [ MUSIC ] The new cylinder head will be fastened down with high quality ARP studs. So we'll use those same studs to bolt down our torque plate. ARP makes it easy with tons of engine specific fastener kits, including this one for the 300. ARP Ultra Torque assembly lube is applied and the studs are torqued to 80 pound feet. Always dress your abrasives prior to each round of honing to keep them clean. This stage takes the bore within two-ten thousandths of its final size. For finish honing we're using an 800 grit diamond abrasive. Once we're done we'll clean the bores and check the cylinder finish with our profilometer that we picked up from MSC Industrial. The sapphire stylus moves slowly over the surface measuring the peaks and valleys of the cylinder in millionths of an inch. Bore finish is critical for proper piston ring sealing. So we follow the ring manufacturer's specification to get it right.
(Frankie)>> The stock crankshaft is in superb condition. So we gave it a quick polish and checked it with a mic for size. Next we'll load the block in the jet washer for final cleaning. This block is in pretty good shape. So we'll only need to run the machine at 150 degrees for about 30 minutes. [ MUSIC ] The paint will stick a little bit better.
(Pat)>> There'll be a little bit of stuff in there. Normal stuff, brushes down the oil gallery and all that.
(Frankie)>> Sweet!
(Pat)>> Good hustle! [ grinder buzzing ]
(Frankie)>> Pat wanted to keep his hands clean so he could have a mid-morning snack. I guess that leaves me to do the dirty work. [ grinder buzzing ]
(Pat)>> Up next, we torque down a free flowing cylinder head and fire up the dyno.
(Pat)>> We are almost ready to stick our Ford 300 six banger back together, but before we do that we are going to do a little bit of component balancing. We are going to make sure all of our pistons and rods weigh the same. We have already gone ahead and pressed in new ARP rod bolts and resized the housing back to standard bore. Next we are going to weigh the rods, both on the small end and the big end and find the lightest one, and then grind to match it. The balance pad on that makes it easy. First we'll weigh the small end of each rod and write down the result. Once we find the weight of the lightest rod we'll remove material from the other rods to match it. In our case that weight is 192 grams. We'll use our belt sander. Go slowly and check your results often. It's easy to take too much material off and then you'll have to start all over again. [ grinder buzzing ]
(Pat)>> The same procedure is repeated on the big end of the rod. [ grinder buzzing ]
(Pat)>> Our final weight on that end is 541 grams. We'll check the weights of every piston assembly and they are spot on at 707 grams. To install the piston assemblies on the rods we'll fire up our Goodson rod heater. By heating the small end of the rod it expands allowing the wrist pin to be installed without pressing. This is something that requires precise setup and plenty of experience. If you heat the rod too much it can weaken it enough to cause catastrophic engine failure. If you heat the rod too little the rod won't expand enough to slide the wrist pin in. It only takes about 15 seconds to get the rod up to temp, and then you have about five seconds to install the wrist pin before the metal begins to contract.
(Frankie)>> New main bearings drop into the freshly cleaned block and one of the main caps is torqued to spec. Using a dial bore gauge we'll check the vertical oil clearance. The mains come out between 22 and 25 ten thousandths across the board. Permatex Ultra Slick lubricates the bearings and the crankshaft goes into place. [ MUSIC ]
(Pat)>> Alright question. Why do you not turn the crank over until everything is torqued?
(Frankie)>> When the mains aren't torqued they're not actually round, cause when you torque the main cap down it actually distorts the bore and makes it round. So if you turn it when it's not torqued you can actually scuff the bearings.
(Pat)>> Very good!
(Frankie)>> The final torque value for the mains is 80 pound feet.
(Pat)>> The cam shaft is a custom grind from Comp Cams. Duration at 50 thousandths lift is 230 degrees on the intake and 236 degrees on the exhaust on 110 degrees of lobe separation angle. Lift at the valve is 523 on both sides.
(Frankie)>> Perfect! [ MUSIC ]
(Pat)>> We ordered a set of Total Seal piston rings through Summit Racing Equipment. They're a file fit design for our 4-0-50 final bore size. We set the ring gaps at 28 thousandths as per Total Seal's recommendation for our application. The rings are deburred with a fine grit stone. This is crucial for proper installation and protects both the piston and bore from damage.
(Frankie)>> The rod bearing clearance is checked with a dial bore gauge, and it comes in between 21 and 23 ten thousandths. After the number one piston is installed we can degree the cam. Our setup is non-adjustable but comes in at 104 degrees of intake center line, which is six degrees advanced. With everything checking out great the rest of the piston assemblies can go in. These are DSS pistons forged from 26-18 alloy. They have one-sixteenth, one-sixteenth, three-sixteenth ring lands and have a 5cc dish.
(Pat)>> The rings in this thing felt pretty good. What do you think it turns over like?
(Frankie)>> It felt pretty nice when I turned it over. I'm gonna guess 20.
(Pat)>> 20 exactly?
(Frankie)>> 20 exactly, just turn it over. That's my guess.
(Pat)>> What does a 350 Chevy with a standard ring turn over at?
(Frankie)>> A lot more than 20. Isn't like 40?
(Pat)>> It's in the 40's right? [ MUSIC ] Once you get her moving.
(Frankie)>> Keeping me in suspense, come on!
(Pat)>> It's hanging between 19 and 20.
(Frankie)>> That's a good guess.
(Pat)>> We achieved the correct rod bolt stretch by checking it with ARP's digital stretch gauge. The end result is six thousandths stretch at 55 pound feet of torque. The rest of the short block assembly is straight forward, installing the timing cover, balancer, new oil pump and pickup, and the original oil pan. ARP fasteners are used throughout. The new hydraulic flat tappet lifter receive break-in lube on their mating surfaces. Lube is provided with the cam. The biggest change we are making to this engine concerns the cylinder head. We could have gone ahead and freshened the old one, and that would have been okay, but we wanted to do something a little more on the hot rod side. So we sourced a brand new casting for it. This is off a late model fuel injected 300 and it has a couple of different features. One being the combustion chamber shape. It is heart shaped and it has better flow characteristics and is better for combustion efficiency. We have also gone ahead and put larger valves in it. We have a 1-940 intake and a 1-600 exhaust. They're both swirl polished stainless. Now that will flow better also because the head has been mildly ported and surfaced down to set our combustion chamber volume to 73cc. With our combined combination that will raise our compression ratio from 8 to 1 stock to 9.95 to 1, and that will be a big increase, and I think that will make a lot more power. All this work was done by Pro Max cylinder heads down in Alabama, and by the way it looks I think it's gonna run great. [ MUSIC ] The cylinder head is torqued in three stages to 40, 60, and finally 80 pound feet of torque. [ torque wrench clicking ]
(Pat)>> We wanted a rock solid dependable water pump for our six cylinder power plant. We chose a new unit from Duralast. It is an o-e quality component with proper fit and long life. It features a heavy duty unitized bearing, pressed on hub, and a precision machined housing. The pump is factory tested to ensure it meets or exceeds factory specs. It comes with a new gasket, and is a perfect fit on the 300.
(Frankie)>> Alright, we wanted to pay homage to the Ford 300's industrial roots and give it some vintage hot rod flare. After applying a coat of Dupli-Color ceramic primer. I'm out!
(Pat)>> So am I.
(Frankie)>> We laid down VHT gloss white high temp engine enamel. It handles temperatures up to 550 degrees Fahrenheit. Plus it's chemical resistant. After the paint dries we'll assemble the rest of the engine and see what this thing can make. Up next, 300 cubic inches of naturally aspirated power.
(Pat)>> I think it really liked that!
(Frankie)>> Our Ford 300 inline six is all hooked up.
(Pat)>> And it's ready for dyno testing. [ engine starting ]
(Pat)>> Alright our cam's all broke in. The oil's been changed. We're at 30 degrees of timing on pump gas. Are you ready?
(Frankie)>> I'm excited. I want to see what this thing's gonna make.
(Pat)>> I have no idea what this is gonna do on this first yank. So let's give her the go here. [ engine revving ]
(Pat)>> Alright first one out of the box, 263.6 horsepower at 4,700, 335 pound feet of torque at 3,100.
(Frankie)>> That's a big jump.
(Pat)>> First thing before we do anything. Fuel's in kind of an okay range. We're on the brake specifics 42 to 47, 49. Go put some timing in it. Go put four degrees of timing in it. I know it's a big jump but we're gonna see what this thing does. So go put some timing in it. [ engine revving ]
(Pat)>> Okay it liked that. 270, 337 pound feet of torque. Oil pressure is still going up. Let's put timing in it until it stops making power. So we'll put two more degrees in it right now. We'll jump it right up. That's got a heart shaped chamber. It's a little bit different than that standard chamber on a 300, and it's for a fuel injection deal. So it's a little bit different shape. It's got the bigger valve. We are treading in all new water right now. [ engine revving ]
(Pat)>> I think it really like that. That smoothed her right out.
(Frankie)>> 338!
(Pat)>> 338, look how flat the torque is, 270 horsepower. This is really sensitive to timing, which a lot of engines are. Depending on the combustion chamber shape, how the air goes through the cylinder because this is a contra flow head instead of a cross flow head. There's a whole bunch of different stuff that happens in the combustion chamber on the in and out side. Okay mister engine builder what do you want to change.
(Frankie)>> I don't know if we're gonna get any more out of it on timing. I kinda want to throw a spacer on it and see what that does. See if that helps torque out.
(Pat)>> I would agree with that. Let's put another inch of spacer in it. I like the way you think.
(Frankie)>> By replacing the one inch spacer with a two inch model we're increasing plenum volume. This is a common tuning method that can increase performance but you'll never know until you give it a try. [ engine revving ]
(Pat)>> I don't think it hurt it. It still sounds good though. Actually it literally didn't care.
(Frankie)>> Didn't do anything.
(Pat)>> It was within a half-pound feet of torque and within three-tenths of a horsepower. In its long but not strong industrial setup the Ford made 88 horsepower and 217 pound feet of torque. Once we made several upgrades, including a new manifold and carb, it produced 169.5 horsepower and 280 pound feet of torque. Today's upgrades included forged flat top pistons, spicier cam, and a mildly modified cylinder head yielding 270 horsepower and 338 pound feet of torque. An increase of 100.5 horsepower and 58 pound feet of torque over our previous round of upgrades.
(Frankie)>> Compared to the base line dyno results it's a massive increase of 182 horsepower and 121 pound feet of torque. The next time you see this engine it's getting a turbo. For more information on anything you've seen today visit Powernation TV dot com. [ engine revving ] [ MUSIC ]