
Video Transcript
[Tommy] You're watching Powernation!
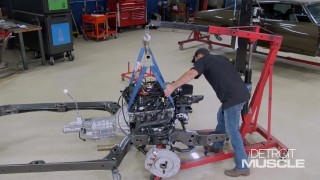
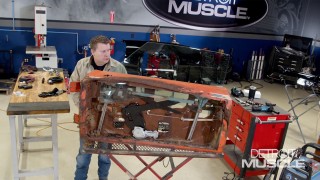
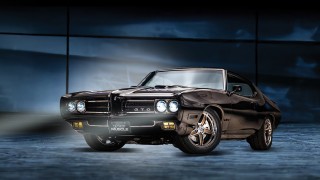
(Joel)>> Today on Detroit Muscle we're laying down the law starting with judgement day for an old GTO door. We'll slice into some classic crusty sheet metal to show you how to make way for modern power windows. Then it's out with the old and in with the bold as we freshen up the rear seat and drop in a new carpet and some thrones worthy of this king of the street. We also go under the hood of a classy lady. Pristine piece of Detroit muscle wrapped in two tons of rolling royalty. [ Music ] [ engine revving ] [ Music ] [Joel] Back in 1969 you could get a lot of cool options on a Pontiac GTO. Hurst dual gate shifter, tilt column, air conditioning, all kinds of stuff. However our car was a little bit more bare bones than that but we still want a few modern twists. So we're gonna be adding some power windows. If you've ever considered doing this swap on your project but you're worried about the complications involved Tommy's got a few tricks up his sleeve to show you that this may not be as difficult as you think. [Narrator} Warning! The following is for demonstration purposes only. You don't need to remove your door skin to install power windows. No GTO Judges were harmed in the making of this video. Viewer impression is advised. [Tommy] You know converting your old car to some modern conveniences is pretty much the sweet spot, and that's one of the things we're gonna be doing on our GTO. This car that we have came out with manual windows. We're wanting to convert it over to the electric. We found a company called New Relics that offers quite a few options out there for different makes and models. So we picked up a kit and have started to install them into our car. I've got an old door here that I picked up from my buddy Mr. Bill Stovall off of one of his old Judges. What we're gonna do with this thing is cut this outer skin off so that you guys can see how easy this swap can be. [ saw buzzing ] [Tommy] Fixed it! [ Music ]
Dang, that thing's crunchy. We'll probably need to reattach that. First order of business is gonna be removing the regulator. Normally with them things they have three, maybe four bolts that hold them in place or even some cars have rivets and they'll have to be drilled out. We'll just zip those bolts out and then we can take this out of this thing. We can slide that down. This little track here. Take it out from the top. Yep, it comes out that way. Just remembered something that I did. This is where it can be a little bit difficult. It's a good idea when you're putting these in that you get them all started first. Got some of that dad knowledge. Pop preached that to me. Now we're gonna take our wiring harness and plug it into the motor. So we'll put this little pigtail on here. Might should have plugged that in before right now. Might have been a little easier to line up. Then grab your black lead and red lead. Using your brown and your blue wires here put on the little jumper wires. It's what we need to do to actuate that motor so that we can rotate that arm down a bit. All I'm gonna use to do this is one of our little batteries. Just hold it in place. [ Music ]
One thing that's kinda neat is this hole and this hole are designed so when you bolt the glass in it gives you access to the little nut. So that's why I have this pivot two points here located at that point. That's where you would be putting this thing. Then this piece slides into place. Now we need to drop that glass in. Now we'll bump that back up. Woo, the other up. Wiring connections are super simple. You've got a blue and a brown. They go out here on number one. Then when it comes to your red and blacks your red goes to number two and the black to number three. And then we've got to juice this thing up. Using that little battery we're just gonna plug this thing into there. Then hook up your little knob here and the window should work. [ Music ]
That's pretty sweet. [Joel] Up next, it's all backseats and build sheets as things get steamy with our GTO.
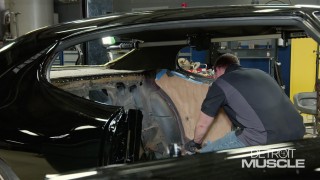
[Tommy] We've got a little bit of some labor we're gonna have to do to install those new seat covers for the rear. These original ones aren't terrible but they're old and the threads in them are starting to pop. You can tell from whenever you get on it you can literally hear the threads starting to break. [ Music ] Awesome! [ Music ] Part of the build sheet. That's pretty cool. [ Music ]
I'm gonna have to compare that to the rest of that thing. Alrighty, fun begins! [ Music ]
Part of the material we're needing. [ Music ]
Yes sir! [ Music ]
Sitting here looking at this thing you can tell how nice that seat frame actually is. Right up that thing's still in nice, clean bare metal and have hardly any corrosion on it at all. [ Music ] We got a couple of seat covers here, which aren't original style. They've got a bit more flare to them. Now it's time to fasten this little dude down and to do that we're gonna use these things called hog rings. Now it does require a special little tool. You take them and put them in the pliers and then you crimp it down and that rolls around your cord and your springs essentially onto the seat. Now the way I prefer to do this is you hook it into the seat cover first. Once you get it in there you can pull it down around the spring and then crimp it. My great grandmother worked for Chrysler in Detroit and they got busy and was zipping these things through there and she ran her three fingers through the sewing machine. So I'm like what did you do? She said, I just stopped the machine and pulled the thread out. I'm like freaking out still but she was just like yeah, wasn't no big deal. That lady was awesome. [ Music ]
And yeah, looks pretty good. You want to see a nice, tight stretched cover and you don't want to see any folds or nothing like that. We do have a little bit of some indentations and wrinkles from it being in that box for as long as it has. These normally will come out over time if you just let it heat cycle out in the sun but if you want to speed up that process all you need is a steamer. [ steam hissing ] [Tommy] What this does is softens up that vinyl and lets it be a bit more pliable. It may take a few times. Rub it across there and mash it around. Message it almost if you will. [ Music ]
Real nice Clark, real nice! [ Music ] Wouldn't think, yeah that's warm. That'll work. Throw it down there like you just don't care. [Joel] Coming up, it's through the door and under the hood of a custom car we show.
[Joel] You know guys there's no denying that the perfect blend of classic styling and modern performance can really elevate a build. Nobody knows that more than our buddy Chris Ryan who recently stopped by to showcase his 1956 Lincoln Continental Mark II that he aptly named The Scarlet Lady. If you like what you're about to see head on over to Powernation TV to check out the full version as well as much, much more. [ Music ]
[ engine revving ] [ Music ]
[ engine revving ] [ Music ] ♪ Take me to the river. ♪ ♪ Let my soul bathe. ♪ ♪ I plead to the rushing water, ♪ ♪ wash sins away! ♪ [ Music ] ♪ The time has come for judgement, ♪ ♪ be not afraid. ♪ ♪ The water is here to heal us and break ♪ ♪ these chains away. ♪ [ Music ] [Narrator] Powernation under the hood is brought to you by Summit Racing Equipment. [Tommy] Success can be defined in many ways and forms. When it comes to car building candy and chrome will take you straight to the top. Chris my friend you have brought in one pretty little lady. [Chris] Hey Tommy, good to see ya! [Tommy] Man this ride you have here is gorgeous man. How are ya buddy? [Chris] I'm doing well. Good to see ya. Great to be here! [Tommy] So I want you to tell me a little about this thing. [Chris] This is a '56 Continental Mark II. It's one of Ford's excesses if you will. These were like $10 grand in '56, which was stupid amount of money. That's like $110, $120 grand today. [Tommy] They didn't really make a whole lot of these did they? [Chris] Two years it ran. They made three thousand of them. These were a special car in '56 and '57. You had to be somebody to own one of these. Elvis had one, Frank Sinatra had one. [Tommy] So with this car customs is really what got me in the automotive industry because it was the rolling pieces of sculptures of art in a way. When you were building this one have you got any hate mail because of the connoisseur of this car? [Chris] I'm sure somebody from Ford, some Ford lover in the day that loved the original Mark II is upset because we cut, tweaked, and moved things. Ford did a lot of stuff right in '56 and '57. I didn't want to change the look of the Mark II. I just wanted to accentuate it and change things I thought we could have made better 70 years ago. I'm sure some original guy is looking at this going oh my! [Tommy] I see some of the stuff you cut up but some of it is factory. Like the wheelbase from the cowl to the centerline of the front axle. The bottom of that fender is 20 inches long and normally a '55 Ford is about 10 inches. [Chris] You realize how long this is when you start block sanding. [Tommy] I don't want to think about it. [Chris] It's still a Lincoln. It's still a lot of car, and there's a lot of sheet metal and a lot of square inches to cover to get this car done. But yes, this fender's huge. [Tommy] The length of that hood is crazy. So sitting in it looking across that or down that. [Chris] It's cool though! You feel like you're somebody when you're sitting in a Mark II going down the road in this thing. It's a great car to drive. It's a comfortable, at the time, big dollar cruiser you know. [Tommy] Looking at the top on this thing I'm confused. Is it actually chopped? I think it was more bulbous at the top. [Chris] We took two inches out and sunk it down this way. The back glass was laid over and sunk in the trunk. The front windshield we had a guy, I think Chicago Glass Guy, Brian Harding, he cut the glass and it took several pieces of glass to cut it and it's not cheap. [Tommy] We're gonna need another one. [Chris] The roundness of this glass makes it difficult to cut the glass. Flat glass is a lot easier to cut but we cracked several pieces trying to get the glass the right shape. Then we did that and decided the top was still just a little too tall. I don't know if it's the correct technical term but I call it the hat of the car. This distance right here between the top of the windshield. It was still wide here. It looked too fat, portions were off. So we took three quarters of an inch out of the top here as well. [Tommy] Taillights, it's missing something too. Isn't there supposed to be the Continental iconic spare tire thing back here? [Chris] You sound like an original guy now. [Tommy] I'm just saying. I like this better. [Chris] I wanted this car to emulate what somebody like Barris, Windfield, Bill Hines. The custom icons or pioneers of our industry, I wanted to emulate what they were doing back in the day. A good friend of mine, Jack Walker, told me if you can walk from the front of the car to the back of the car and you look at the car and your eyes don't stop you got it right. So when I was walking to the back of this car and I hit this big round hump here. Because Ford did a lot of stuff right but they screwed it up there cause they had to put a spare tire in the car there. So to make the car flow better we took that wheel well hump off, got rid of it, and now the back end just flows much nicer to the ground. [Tommy] This thing has that leaning forward looking fast sitting still stance to it. [Chris] We've taken a smorgasbord of parts whether they be Ford, Chrysler, GM and smushed them all together but that's what custom guys did in the day. That's a '60 Chrysler dash. That's actually electroluminescent. It doesn't have lights in it. It actually glows. '64-'65 T-bird seats. We used a lot of the T-bird seats cause we can take the back of them and that's stock. We can smooth them up and paint them body color and get the chrome plated. [Tommy] I really like also how there's not really any knobs or switches and all that kind of stuff. Now it's just very minimal and clean. We need to see what's under the hood man. [Chris] Let's get it. [Tommy] Wow, it's even sparkly under here brother. [Chris] We've got to finish the whole car and I'm big about not seeing things. Sometimes it's not just the parts you put on it. It's covering stuff up like batteries, and brake boosters, and radiators. You don't see any of that under here. That's not quite a stock motor. [Tommy] That's a late model Coyote right? [Chris] It's a Ford Racing Coyote. 480 horsepower. Sometimes what makes a car good looking is what you don't see. That sounds way too simple but making a car clean and not seeing everything makes it better looking in my mind. That's my opinion but what do I know? [Tommy] I agree with it. Engine bays a lot of times are ugly. It's just so much going on. You can't put ugly with any kinda description on this thing. [Chris] I appreciate it, I do. [Tommy] I want to say thank you for bringing it in here and letting us look at, going over it with us. And also the other side of it is you basically have planted seeds in other people in a matter of giving them ability to dream of creating and trying hard and showing off what you can do. [Chris] Thank you Tommy. I appreciate it very much. [Tommy] Yeah buddy. [Joel] Up next, We get fired up and poke around until everything is sitting pretty.
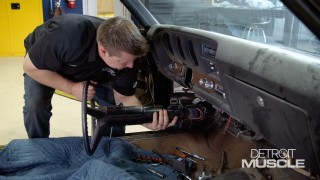
[Joel] Well I pretty much got the carpet set in place where it's gonna stay. So the next thing I'm gonna do is locate and punch out our holes for our seatbelts and our seat brackets. Now if you've never done this before you're gonna be half tempted to grab a drill and a bit and just drill straight through the carpet. I'm gonna encourage you not to do that because what can happen is the fibers of the carpet will latch into that drill bit and it'll actually start to unravel the whole thing. Instead grab you angle pick, straight pick, and a butane torch. Trust me! Start by going underneath. Go straight through the factory bolt hole until I can feel it punching through the carpet a little bit. Make me a little mark here about right there ish. Gonna punch straight through here. There we go, down into that hole. Now that I know for sure that that hole is right there gonna grab our straight pick and our butane torch. You can also use a little propane torch. Gonna heat this little bad boy up. It doesn't need to be glowing cherry red or anything. Just get it good and hot to where it's gonna punch straight through the carpet fibers and the insulation. [ Music ]
Just need to swap them out one pick for another. Straight through! Now this heated pick is also gonna singe the ends of those carpet fibers. So when you go to bolt it in that bolt doesn't unravel the fibers either. Look at that, nice straight hole all the way down. So far on this build we've been able to maintain the style and elegance that a GTO is known for but with a few modern twists. We're gonna continue that tradition by adding in a Cruiser Collection Pro Series set of seats that we got from the guys at TMI. This set is specific to a GTO but if you're building something a little more crazy or off the wall in your garage they do offer universal kits as well. I'm gonna go ahead and slap these brackets together and then we'll do a test fit. I don't know if you guys know this or not but back in '73 GM introduced what they call the swivel bucket seats. You can get them in most A-bodies like a Monte Carlo, Chevelle, El Camino. Those things were really cool. What you could do. You'd be sitting in the driver's seat, pull a little lever, swivel the whole seat, and then you could get in and out of the car. [ Music ]
Get one of these in the car. [ Music ]
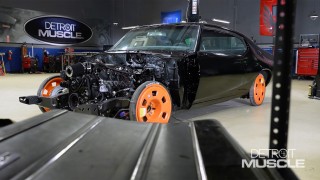
Like a go kart in here. There we go. [ Music ] [ Joel making engine noises ] [ Music ] Yep that'll work. Our '69 GTO is starting to live up to its name and stand on business. This murdered out ride is the definition of a sinister build with slick black vinyl, custom stitching, and a five-speed gracing the floorboard. Project Henchman is dangerously close to being finished and becoming America's most wanted piece of Detroit muscle.
Show Full Transcript
(Joel)>> Today on Detroit Muscle we're laying down the law starting with judgement day for an old GTO door. We'll slice into some classic crusty sheet metal to show you how to make way for modern power windows. Then it's out with the old and in with the bold as we freshen up the rear seat and drop in a new carpet and some thrones worthy of this king of the street. We also go under the hood of a classy lady. Pristine piece of Detroit muscle wrapped in two tons of rolling royalty. [ Music ] [ engine revving ] [ Music ] [Joel] Back in 1969 you could get a lot of cool options on a Pontiac GTO. Hurst dual gate shifter, tilt column, air conditioning, all kinds of stuff. However our car was a little bit more bare bones than that but we still want a few modern twists. So we're gonna be adding some power windows. If you've ever considered doing this swap on your project but you're worried about the complications involved Tommy's got a few tricks up his sleeve to show you that this may not be as difficult as you think. [Narrator} Warning! The following is for demonstration purposes only. You don't need to remove your door skin to install power windows. No GTO Judges were harmed in the making of this video. Viewer impression is advised. [Tommy] You know converting your old car to some modern conveniences is pretty much the sweet spot, and that's one of the things we're gonna be doing on our GTO. This car that we have came out with manual windows. We're wanting to convert it over to the electric. We found a company called New Relics that offers quite a few options out there for different makes and models. So we picked up a kit and have started to install them into our car. I've got an old door here that I picked up from my buddy Mr. Bill Stovall off of one of his old Judges. What we're gonna do with this thing is cut this outer skin off so that you guys can see how easy this swap can be. [ saw buzzing ] [Tommy] Fixed it! [ Music ]
Dang, that thing's crunchy. We'll probably need to reattach that. First order of business is gonna be removing the regulator. Normally with them things they have three, maybe four bolts that hold them in place or even some cars have rivets and they'll have to be drilled out. We'll just zip those bolts out and then we can take this out of this thing. We can slide that down. This little track here. Take it out from the top. Yep, it comes out that way. Just remembered something that I did. This is where it can be a little bit difficult. It's a good idea when you're putting these in that you get them all started first. Got some of that dad knowledge. Pop preached that to me. Now we're gonna take our wiring harness and plug it into the motor. So we'll put this little pigtail on here. Might should have plugged that in before right now. Might have been a little easier to line up. Then grab your black lead and red lead. Using your brown and your blue wires here put on the little jumper wires. It's what we need to do to actuate that motor so that we can rotate that arm down a bit. All I'm gonna use to do this is one of our little batteries. Just hold it in place. [ Music ]
One thing that's kinda neat is this hole and this hole are designed so when you bolt the glass in it gives you access to the little nut. So that's why I have this pivot two points here located at that point. That's where you would be putting this thing. Then this piece slides into place. Now we need to drop that glass in. Now we'll bump that back up. Woo, the other up. Wiring connections are super simple. You've got a blue and a brown. They go out here on number one. Then when it comes to your red and blacks your red goes to number two and the black to number three. And then we've got to juice this thing up. Using that little battery we're just gonna plug this thing into there. Then hook up your little knob here and the window should work. [ Music ]
That's pretty sweet. [Joel] Up next, it's all backseats and build sheets as things get steamy with our GTO.
[Tommy] We've got a little bit of some labor we're gonna have to do to install those new seat covers for the rear. These original ones aren't terrible but they're old and the threads in them are starting to pop. You can tell from whenever you get on it you can literally hear the threads starting to break. [ Music ] Awesome! [ Music ] Part of the build sheet. That's pretty cool. [ Music ]
I'm gonna have to compare that to the rest of that thing. Alrighty, fun begins! [ Music ]
Part of the material we're needing. [ Music ]
Yes sir! [ Music ]
Sitting here looking at this thing you can tell how nice that seat frame actually is. Right up that thing's still in nice, clean bare metal and have hardly any corrosion on it at all. [ Music ] We got a couple of seat covers here, which aren't original style. They've got a bit more flare to them. Now it's time to fasten this little dude down and to do that we're gonna use these things called hog rings. Now it does require a special little tool. You take them and put them in the pliers and then you crimp it down and that rolls around your cord and your springs essentially onto the seat. Now the way I prefer to do this is you hook it into the seat cover first. Once you get it in there you can pull it down around the spring and then crimp it. My great grandmother worked for Chrysler in Detroit and they got busy and was zipping these things through there and she ran her three fingers through the sewing machine. So I'm like what did you do? She said, I just stopped the machine and pulled the thread out. I'm like freaking out still but she was just like yeah, wasn't no big deal. That lady was awesome. [ Music ]
And yeah, looks pretty good. You want to see a nice, tight stretched cover and you don't want to see any folds or nothing like that. We do have a little bit of some indentations and wrinkles from it being in that box for as long as it has. These normally will come out over time if you just let it heat cycle out in the sun but if you want to speed up that process all you need is a steamer. [ steam hissing ] [Tommy] What this does is softens up that vinyl and lets it be a bit more pliable. It may take a few times. Rub it across there and mash it around. Message it almost if you will. [ Music ]
Real nice Clark, real nice! [ Music ] Wouldn't think, yeah that's warm. That'll work. Throw it down there like you just don't care. [Joel] Coming up, it's through the door and under the hood of a custom car we show.
[Joel] You know guys there's no denying that the perfect blend of classic styling and modern performance can really elevate a build. Nobody knows that more than our buddy Chris Ryan who recently stopped by to showcase his 1956 Lincoln Continental Mark II that he aptly named The Scarlet Lady. If you like what you're about to see head on over to Powernation TV to check out the full version as well as much, much more. [ Music ]
[ engine revving ] [ Music ]
[ engine revving ] [ Music ] ♪ Take me to the river. ♪ ♪ Let my soul bathe. ♪ ♪ I plead to the rushing water, ♪ ♪ wash sins away! ♪ [ Music ] ♪ The time has come for judgement, ♪ ♪ be not afraid. ♪ ♪ The water is here to heal us and break ♪ ♪ these chains away. ♪ [ Music ] [Narrator] Powernation under the hood is brought to you by Summit Racing Equipment. [Tommy] Success can be defined in many ways and forms. When it comes to car building candy and chrome will take you straight to the top. Chris my friend you have brought in one pretty little lady. [Chris] Hey Tommy, good to see ya! [Tommy] Man this ride you have here is gorgeous man. How are ya buddy? [Chris] I'm doing well. Good to see ya. Great to be here! [Tommy] So I want you to tell me a little about this thing. [Chris] This is a '56 Continental Mark II. It's one of Ford's excesses if you will. These were like $10 grand in '56, which was stupid amount of money. That's like $110, $120 grand today. [Tommy] They didn't really make a whole lot of these did they? [Chris] Two years it ran. They made three thousand of them. These were a special car in '56 and '57. You had to be somebody to own one of these. Elvis had one, Frank Sinatra had one. [Tommy] So with this car customs is really what got me in the automotive industry because it was the rolling pieces of sculptures of art in a way. When you were building this one have you got any hate mail because of the connoisseur of this car? [Chris] I'm sure somebody from Ford, some Ford lover in the day that loved the original Mark II is upset because we cut, tweaked, and moved things. Ford did a lot of stuff right in '56 and '57. I didn't want to change the look of the Mark II. I just wanted to accentuate it and change things I thought we could have made better 70 years ago. I'm sure some original guy is looking at this going oh my! [Tommy] I see some of the stuff you cut up but some of it is factory. Like the wheelbase from the cowl to the centerline of the front axle. The bottom of that fender is 20 inches long and normally a '55 Ford is about 10 inches. [Chris] You realize how long this is when you start block sanding. [Tommy] I don't want to think about it. [Chris] It's still a Lincoln. It's still a lot of car, and there's a lot of sheet metal and a lot of square inches to cover to get this car done. But yes, this fender's huge. [Tommy] The length of that hood is crazy. So sitting in it looking across that or down that. [Chris] It's cool though! You feel like you're somebody when you're sitting in a Mark II going down the road in this thing. It's a great car to drive. It's a comfortable, at the time, big dollar cruiser you know. [Tommy] Looking at the top on this thing I'm confused. Is it actually chopped? I think it was more bulbous at the top. [Chris] We took two inches out and sunk it down this way. The back glass was laid over and sunk in the trunk. The front windshield we had a guy, I think Chicago Glass Guy, Brian Harding, he cut the glass and it took several pieces of glass to cut it and it's not cheap. [Tommy] We're gonna need another one. [Chris] The roundness of this glass makes it difficult to cut the glass. Flat glass is a lot easier to cut but we cracked several pieces trying to get the glass the right shape. Then we did that and decided the top was still just a little too tall. I don't know if it's the correct technical term but I call it the hat of the car. This distance right here between the top of the windshield. It was still wide here. It looked too fat, portions were off. So we took three quarters of an inch out of the top here as well. [Tommy] Taillights, it's missing something too. Isn't there supposed to be the Continental iconic spare tire thing back here? [Chris] You sound like an original guy now. [Tommy] I'm just saying. I like this better. [Chris] I wanted this car to emulate what somebody like Barris, Windfield, Bill Hines. The custom icons or pioneers of our industry, I wanted to emulate what they were doing back in the day. A good friend of mine, Jack Walker, told me if you can walk from the front of the car to the back of the car and you look at the car and your eyes don't stop you got it right. So when I was walking to the back of this car and I hit this big round hump here. Because Ford did a lot of stuff right but they screwed it up there cause they had to put a spare tire in the car there. So to make the car flow better we took that wheel well hump off, got rid of it, and now the back end just flows much nicer to the ground. [Tommy] This thing has that leaning forward looking fast sitting still stance to it. [Chris] We've taken a smorgasbord of parts whether they be Ford, Chrysler, GM and smushed them all together but that's what custom guys did in the day. That's a '60 Chrysler dash. That's actually electroluminescent. It doesn't have lights in it. It actually glows. '64-'65 T-bird seats. We used a lot of the T-bird seats cause we can take the back of them and that's stock. We can smooth them up and paint them body color and get the chrome plated. [Tommy] I really like also how there's not really any knobs or switches and all that kind of stuff. Now it's just very minimal and clean. We need to see what's under the hood man. [Chris] Let's get it. [Tommy] Wow, it's even sparkly under here brother. [Chris] We've got to finish the whole car and I'm big about not seeing things. Sometimes it's not just the parts you put on it. It's covering stuff up like batteries, and brake boosters, and radiators. You don't see any of that under here. That's not quite a stock motor. [Tommy] That's a late model Coyote right? [Chris] It's a Ford Racing Coyote. 480 horsepower. Sometimes what makes a car good looking is what you don't see. That sounds way too simple but making a car clean and not seeing everything makes it better looking in my mind. That's my opinion but what do I know? [Tommy] I agree with it. Engine bays a lot of times are ugly. It's just so much going on. You can't put ugly with any kinda description on this thing. [Chris] I appreciate it, I do. [Tommy] I want to say thank you for bringing it in here and letting us look at, going over it with us. And also the other side of it is you basically have planted seeds in other people in a matter of giving them ability to dream of creating and trying hard and showing off what you can do. [Chris] Thank you Tommy. I appreciate it very much. [Tommy] Yeah buddy. [Joel] Up next, We get fired up and poke around until everything is sitting pretty.
[Joel] Well I pretty much got the carpet set in place where it's gonna stay. So the next thing I'm gonna do is locate and punch out our holes for our seatbelts and our seat brackets. Now if you've never done this before you're gonna be half tempted to grab a drill and a bit and just drill straight through the carpet. I'm gonna encourage you not to do that because what can happen is the fibers of the carpet will latch into that drill bit and it'll actually start to unravel the whole thing. Instead grab you angle pick, straight pick, and a butane torch. Trust me! Start by going underneath. Go straight through the factory bolt hole until I can feel it punching through the carpet a little bit. Make me a little mark here about right there ish. Gonna punch straight through here. There we go, down into that hole. Now that I know for sure that that hole is right there gonna grab our straight pick and our butane torch. You can also use a little propane torch. Gonna heat this little bad boy up. It doesn't need to be glowing cherry red or anything. Just get it good and hot to where it's gonna punch straight through the carpet fibers and the insulation. [ Music ]
Just need to swap them out one pick for another. Straight through! Now this heated pick is also gonna singe the ends of those carpet fibers. So when you go to bolt it in that bolt doesn't unravel the fibers either. Look at that, nice straight hole all the way down. So far on this build we've been able to maintain the style and elegance that a GTO is known for but with a few modern twists. We're gonna continue that tradition by adding in a Cruiser Collection Pro Series set of seats that we got from the guys at TMI. This set is specific to a GTO but if you're building something a little more crazy or off the wall in your garage they do offer universal kits as well. I'm gonna go ahead and slap these brackets together and then we'll do a test fit. I don't know if you guys know this or not but back in '73 GM introduced what they call the swivel bucket seats. You can get them in most A-bodies like a Monte Carlo, Chevelle, El Camino. Those things were really cool. What you could do. You'd be sitting in the driver's seat, pull a little lever, swivel the whole seat, and then you could get in and out of the car. [ Music ]
Get one of these in the car. [ Music ]
Like a go kart in here. There we go. [ Music ] [ Joel making engine noises ] [ Music ] Yep that'll work. Our '69 GTO is starting to live up to its name and stand on business. This murdered out ride is the definition of a sinister build with slick black vinyl, custom stitching, and a five-speed gracing the floorboard. Project Henchman is dangerously close to being finished and becoming America's most wanted piece of Detroit muscle.