
Video Transcript
[Joel] You're watching Powernation!
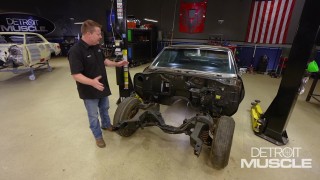
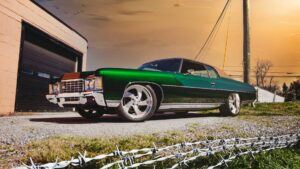
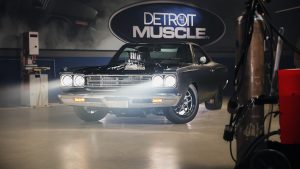
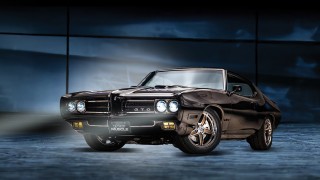
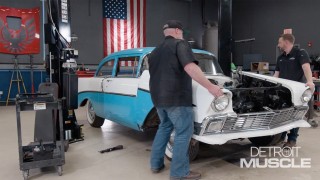
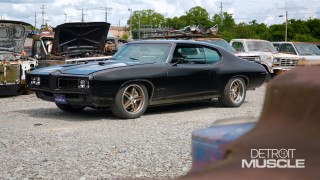
[Joel] You know good looks will only get you so far in life. Eventually you're gonna need a little bit of personality and that is the subject matter for today. We're gonna be bolting on some horsepower, some shiny jewelry, and maybe straighten things up a bit. [Tommy] I do believe my friend back there just gave a little subtle jab. That's all good cause he's kinda right. Today that's exactly what we're gonna be doing to this GTO. So you guys just sit back and enjoy the ride. [ Music ] [ engine revving ] [ Music ] [Joel] Stance, finish, wheel selection. These are three primary pillars that will make or break the personality on your next project but there's also a fourth contributing factor that a lot of people don't even think about. That would be the selection of your exhaust system. When it comes to that subject matter if you're having trouble deciding which direction to go there's only three things you need to consider. PSI, and no I don't mean pounds per square inch. We're talking performance, sound, installation. Now on the performance side of things you've gotta realize that the engine is just like the lungs in your body. The better it breathes the better it performs. So if you're pushing a lot of horsepower and compression underneath the hood all that pressure's gotta go somewhere. A good high flow high performance exhaust is gonna be your best friend. And then there's sound. We've got two of our signature builds in house. A 1971 Caprice that we christened as Fat Stack and then we've got our 1969 Plymouth RoadRunner that we call RoadBurner. That name speaks for itself. RoadBurner is a loud, angry, aggressive looking muscle car and it's got an exhaust system that compliments it to a "T". When we fire this thing up it sounds like you're getting punched in the chest. [ engine revving ] [ Music ]
[Joel] And then there's Fat Stack. Smooth, classy, elegant much like its exhaust. Doesn't rattle your brain while you're going down the road. [ engine revving ] [ Music ]
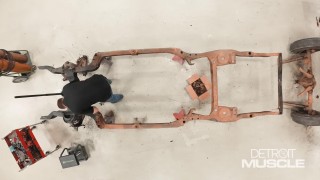
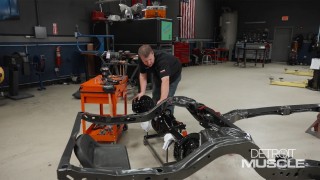
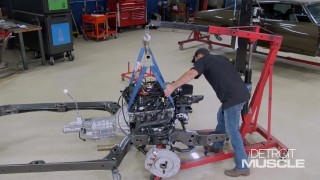
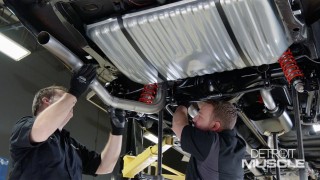
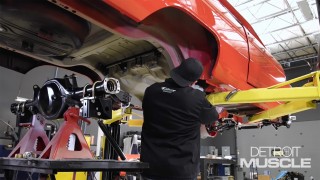
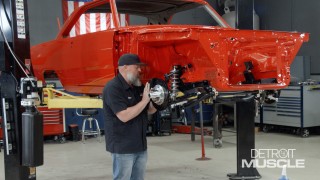
[Joel] And then finally there's installation. Between these two cars we had to weld, cut, and grind the entire system on both of them. So the process was a little more complicated and required some specialty tools. But with our Pontiac GTO we want these to be a little bit more streamlined, easier, and user friendly. It's gonna check all these boxes of performance, sound, and installation, all of those line up with the personality that we're looking for in our '69 GTO. Speaking of installation I'm gonna go round up Tommy and we're gonna get this thing off the ground. [Tommy] Whenever you're working on your project one task that can sho enough eat up a whole bunch of time and that is fabbing up your exhaust. Now whenever you're working with something like we are and you're doing an LS swap that can actually multiply the factor a bit. Luckily Holley and Flowmaster offers a kit that can make exhaust a whole lot smoother. What we've decided to do is go this route for a lot of reasons. One is time. Two is also for that Flowmaster sound. With Holley they offer exhaust manifolds that bolt right to the heads and they have a mid-pipe, and this exhaust system should simplify things quite dramatically. However you guys know how we are. We complicate things a little bit more and a little bit more. You remember back we put a nine inch Ford and also a coilover rear suspension. So we may end up having to fabricate some of these tailpipes but we'll just have to wait and see. [ drill humming ] [Joel] As Tom mentioned this is a borderline factory replacement setup. So we're using all the factory mounting holes for our hangers. Makes it a little bit more efficient. [ Music ]
Another thing I like about this setup is you don't need a big, expensive, fancy welder to put this in. It's got all the clamps and hardware you need. Really it's basic hand tools and a weekend with a buddy and have yourself a new exhaust system. [ saw buzzing ] [ Music ] [Joel] Oh, you said don't scratch the paint! You clocked that about perfect for me. [ Music ]
[Tommy] I'd almost nail that dude. [ Music ] Put your clamp on it? [Joel] Yep. I'm looking right at it but you still make me question it. [Tommy] Not gonna lie, I did it too. That's why I said it. [ Music ] [ metal clanging ] [ Music ] [Tommy] Yeah, that's nice! [Joel] Like it? [Tommy] Makes me feel better, not gonna lie. There's a lot more clearance back there than I thought it was gonna have. [Joel] Coming up, we engage our core and get straight to the point. That's pretty close right there.
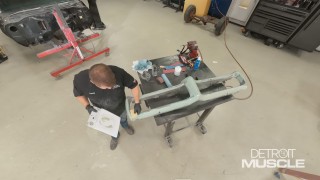
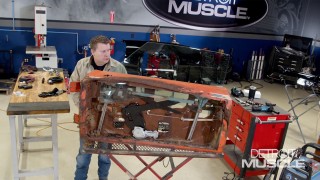
[Joel] Well we're just about ready to slap some sheet metal on the front of our GTO here, and the first piece of that puzzle is gonna be our core support. You don't want to go just slapping this thing on here all willy nilly because if it's sitting in there caddy wompus the rest of your body panels are gonna be sitting in there caddy wompus. You need to make sure that this thing is perfectly straight, level, and parallel to the rest of the car. Now to do this you're gonna need a specialty tool known as a tram gauge. A tram gauge is a vehicle body alignment tool that uses adjustable rods with pointed ends to verify if the distance between two reference points matches your specifications. They are a lot more precise than your standard tape measure, and I'll run you through how to use it here in a sec but there are a couple more measurements we need to make first. The first thing we want to do is make sure the top of our core support is parallel with its mounting surface on the frame. So we're gonna use our digital angle finder here. Check our angle here. About 3.2 degrees. Top of the frame about point five. So we need to take our ratchet strap and pull this core support over just a smidgeon. That's pretty close right there. Looks like our measurements are within a half a degree of one another. So we're ready to move on to the next step. Now the next thing we need to find is a consistent mounting point for the first rod in our tram gauge. There's a few holes for us to choose from but this one right here is about the o-d as the rod and that's gonna help keep it centered. So let's make sure it's centered. Seeing about two and a quarter, three and three quarter. [ Music ] Two and a quarter. Three and three quarter. Okay, we're in business. So we got our tram gauge here. Basically how this little guy works is it's sitting at about 41 and three-eighths on the side measurer here. I'll just slide her out. Moves in and out like so. Set it into our first adjustment hole. We're gonna drop the other point into the fender bolt hole on the firewall. [ Music ] We're sitting level on our bubble. We're about 69 and 15/16ths on our measurement. Got everything locked in our sliders. So let's see how close we are on the other side. On this side I didn't move our adjustments at all. We're still sitting at 69 and 15/16ths. Our bubble is still level. So we're all squared up. [ Music ] With everything lined up we're good to go ahead and tighten our core support bushings. [ drill humming ] [Joel] Now if your numbers were off when you go to hang your sheet metal you'll definitely know it because you're gonna be seeing some pretty consistent gaps across the board. [ drill humming ] [Joel] That looks good. Now everything kinda rolled a little bit when we tightened those bolts but we know we're straight corner to corner. So once we start hanging some fenders the gaps on this thing are gonna look pretty sweet. Up next, we go under the hood and take a closer look at a legend.
[Joel] Oh yeah, now we're talking. Guys we get to build some pretty cool cars out of the Detroit Muscle shop and a little while back we had some friends stop by with a very unique one of a kind ride of their own for a new segment we're calling Powernation Under The Hood. If you like what you see we're gonna be doing a whole lot more of these, and you can check out the full version of this one on our website at Powernation TV. [ Music ]
[ engine revving ] [ Music ] [ engine rumbling ] [ Music ]
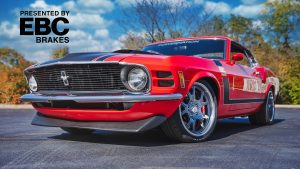
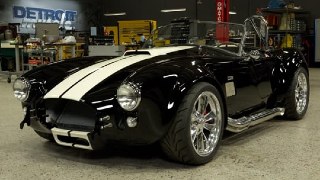
[Narrator] Powernation Under The Hood is brought to you by Grundy Collectible Automobile Insurance. [Tommy] Have you ever had a moment that stopped you in your tracks? You know what I'm talking about. You think a celebrity just passed you by. I like what I'm looking at and I'm talking about the car here guys. [Preston] How are you? [Cody] Good to see you. [Tommy] Man y'all brought in a peach today. [Preston] This is Outlaw. This is our prototype vin number one of a 25 car run series we're gonna build. [Tommy] This thing is impressive. I know it has that Eleanor flare to it. Seeing that car in that movie back in the day it made an impression on me. I'm not really a Mustang guys but that moment I could be a Mustang man for sure. [Cody] That's what we figured. If we're gonna build an Eleanor let's build something that's not what everybody else has done. That's why we went with Brittany blue. Ton of customization. The thing's right hand drive. We put a glass roof in it that we patent designed. [Preston] We didn't go with the Eleanor side scoops. We actually went with the '68 KR Shelby side scoops. We created our own deck lid and rear end caps, and we also did the same thing with the hood. We ended up running a steel hood so we could make it fit the way we wanted it to. [Cody] If you could see what we built here our intention was Rolls Royce fit and finish. [Tommy] You guys did a heck of a job on that. The lines are tight, smooth. [Cody] We figured if you're gonna have your name on something it's gotta be right or don't do it at all. [Tommy] There's some truth to that. I like the back piece of this thing. [Preston] What we ended up doing was we took a T-bird tonneau cover. [Tommy] What year of T-bird? [Preston] It's the late '60s. You could actually take that out and you still have your fold down rear seat in the back. [Tommy] Is there a seat below that? [Preston] Fold down underneath it yeah. Keeping with the old school interior with the old school door panels and the stainless those look like window crank knobs but they're actually power windows. We didn't want to modernize it so much to have buttons but we wanted to keep that old school. [Cody] So you just pull them up and you pull them down with the switches and the windows go up and down. [Tommy] That's fine until you get somebody in there that doesn't know and they put that old man handle on it. You're like whoa! [Cody] They are billets. It'd take a lot of pressure to do it. [Tommy] Can I sit in it? [Cody] Absolutely. [Tommy] This is gonna feel odd. I know I'm a little bit fuller than you guys are. I guess that's what I'll say. [Cody] It is a tilt column. If you want to bring the steering wheel up you can. [Tommy] Yeah that's a little smaller. Not gonna lie it feels kinda weird. [ Music ]
Power shifting this dude's gonna be a little different. [Cody] Being such a custom car like this we ended up doing the GT-500 font in the 2013 font and then the MB stands for Mustang Brothers. It's also those little things where you don't see it as first but as you're walking around the car you're like oh wow. Here's that, here's that, and that's what we wanted to achieve. [Tommy] That's one thing I really like about the car is sometimes guys go into a custom mindset and they basically screw up what the car is supposed to look like. You're just supposed to elevate it in a way, compliment the build, not make it something it's really not. You guys knocked it out of the park. You've refined it for sure. Gotta ask, what's up under the hood? [Preston] I'll show you. We took an engine out of 2012 GT-500. It's a 5.4 supercharged with a six speed and we dumped it on in there. [Tommy] I'm not gonna lie to you fellas. Looking on this side and not seeing a steering shaft is kinda odd. [Preston] No brake booster. [Tommy] For a second I thought maybe it's on the inside of the header. Idiot, it's on the other side of the car. It's got a lot more room in there than I thought it would. [Preston] We did the shock tower delete. So we actually cut the shock towers out. We welded in the cradle and it gave us a lot more leg room here. On any Coyote platform you've got your alternator issue that's close. So we're able to get rid of all those issues and really open it up inside here. [Tommy] I was looking at the line here on the top of the fender and the windshield. That's not factory right? [Preston] So we had to do that to put that windshield in there. This whole operation here was a month in itself to do. A lot of guys when they do it you end up with a huge gap. You could stick your finger in between here. [Tommy] Was it filled with trim? Is that what it was from the factory? [Cody] The original window trim would have came wrapped around here. Now we actually had to add all the steel up here and then add up to the fender up here. We make all of our lines out of steel. It's all welded up. This way this car will always look like this years down the road. [Tommy] Flush mounted glass is one of them things that people see it today in every car, vehicle, or truck out there and they just take it for granted. It's hard to comprehend how much time it actually takes. [Cody] You basically have to make the body fit the window itself. There's only one company that makes front and rear windows for a seven-eight car and we really had to make the body itself fit the glass. [Tommy] It comes pretty close. What's individually your most favorite thing about this car? [Preston] That it's finished! I think the best thing about this build was working with my brother. [Tommy] You need to give him a hug for that. [Cody] We had a dream and you wonder how it can become a reality, and then you work with a great group of guys like we did. Then to see it done there's really no better feeling that you can tell than that itself. Seeing a dream come true. [Tommy] Coming up, be sure to slow your roll before installing some shiny new wheels.
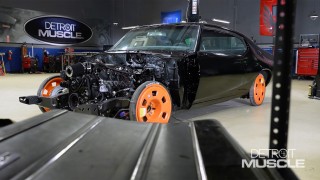
[Tommy] Today's a pretty exciting day for us because our wheels have shown up. That's one component that can definitely set the tone or personality of your ride. A few of you guys out there I'm sure are hoping that we're installing a set of rallyes or something like that and it's something 15 inch but that's not the case. However I do want to show you what we got. We picked up a set from Schott. Now these things are custom tailored for our application. Man are they a good looking piece. Unwrapping this is kinda like Christmas. That's no lie. If you'll notice that's a pretty wide set of wheels back there. It's easy to see that this thing has some significant size to it. It's an 18 by 10. And yeah, it is gonna fit up here in this wheel well of this old Pontiac. With Schott they have several different styles and several different makes, and you can also customize your finishes. With ours we have a polished hoop with a polished face and then we've used their titanium color here on the insides and across the lips. Whenever you're ordering a set of wheels, at least for me, it's a pretty nerve wracking situation because I think about this is a lot of money that you're gonna spend and if you measure wrong you may be buying something that you can't use. So I thought I'd slow down a minute, show you guys how I got to this point. So it may be some information if you're looking to buy a set of wheels. Maybe it'll help calm your nerves a little bit. There's a lot of terms and phrases that go along whenever you're gonna be ordering a set of wheels. The first and foremost easiest one is the diameter. Our wheel is an 18. However it is not from the actual outside of the lip to the outside of the other side because if you notice with ours it measures 19 and five-eights. They don't make a wheel that size. What it actually is is this surface right there on each side. Stretch your tape across there you'll see it measures 18. Another thing that you're gonna need to know is your wheel width. Oftentimes guys think it's from the outside to the outside and that's really not the case. It's actually where the tire beads on the wheel. If we measure ours the overall width is about 10 and seven-eighths but the actual width of the wheel is a 10 inch. Two more terms that you'll run into is offset and backspacing. What that is the offset is where the wheel is set off into the hoop here. Then your backspacing is the measurement between the surface where your hub or the brake rotor is to the back of the wheel. An easy way to measure that is you'll need a straight edge for your backspacing. Simply lay this thing across there and then you use your tape measure to measure down to that face. That tells us with ours we have a five and a half inch backspacing. Whenever it comes to your offset you would measure from that surface to the top of this toolbox. We have a five and a half inch offset. Knowing this information is crucial whenever you're trying to dial in the fit of your wheels to your car. Another thing you want to keep in mind is the rear can articulate, meaning it can go up on one side and down on the other. Kinda like whenever you're pulling into a parking lot. That means that the wheel will tip in or out. So having that extra clearance keeps them from scrubbing on each side of this. Plus if you buy them big, fancy wheels you don't want to scratch them all up or chew them up and damage what you worked hard to achieve. Also you want to keep in mind that everything is order. Like your rotor is in place because sometimes those can be an eighth or a quarter inch thick. If you dial all your metrics in next thing you know it's a little too far one way. It could have been that you didn't have everything in place to make sure it was right. So let's see if our measurements were dialed in. I sure hope so. What that wheel looks like against that black car. Looks pretty sweet! Woo wee! Now if the rest of the car was put together. It's a big day!
Show Full Transcript
[Joel] You know good looks will only get you so far in life. Eventually you're gonna need a little bit of personality and that is the subject matter for today. We're gonna be bolting on some horsepower, some shiny jewelry, and maybe straighten things up a bit. [Tommy] I do believe my friend back there just gave a little subtle jab. That's all good cause he's kinda right. Today that's exactly what we're gonna be doing to this GTO. So you guys just sit back and enjoy the ride. [ Music ] [ engine revving ] [ Music ] [Joel] Stance, finish, wheel selection. These are three primary pillars that will make or break the personality on your next project but there's also a fourth contributing factor that a lot of people don't even think about. That would be the selection of your exhaust system. When it comes to that subject matter if you're having trouble deciding which direction to go there's only three things you need to consider. PSI, and no I don't mean pounds per square inch. We're talking performance, sound, installation. Now on the performance side of things you've gotta realize that the engine is just like the lungs in your body. The better it breathes the better it performs. So if you're pushing a lot of horsepower and compression underneath the hood all that pressure's gotta go somewhere. A good high flow high performance exhaust is gonna be your best friend. And then there's sound. We've got two of our signature builds in house. A 1971 Caprice that we christened as Fat Stack and then we've got our 1969 Plymouth RoadRunner that we call RoadBurner. That name speaks for itself. RoadBurner is a loud, angry, aggressive looking muscle car and it's got an exhaust system that compliments it to a "T". When we fire this thing up it sounds like you're getting punched in the chest. [ engine revving ] [ Music ]
[Joel] And then there's Fat Stack. Smooth, classy, elegant much like its exhaust. Doesn't rattle your brain while you're going down the road. [ engine revving ] [ Music ]
[Joel] And then finally there's installation. Between these two cars we had to weld, cut, and grind the entire system on both of them. So the process was a little more complicated and required some specialty tools. But with our Pontiac GTO we want these to be a little bit more streamlined, easier, and user friendly. It's gonna check all these boxes of performance, sound, and installation, all of those line up with the personality that we're looking for in our '69 GTO. Speaking of installation I'm gonna go round up Tommy and we're gonna get this thing off the ground. [Tommy] Whenever you're working on your project one task that can sho enough eat up a whole bunch of time and that is fabbing up your exhaust. Now whenever you're working with something like we are and you're doing an LS swap that can actually multiply the factor a bit. Luckily Holley and Flowmaster offers a kit that can make exhaust a whole lot smoother. What we've decided to do is go this route for a lot of reasons. One is time. Two is also for that Flowmaster sound. With Holley they offer exhaust manifolds that bolt right to the heads and they have a mid-pipe, and this exhaust system should simplify things quite dramatically. However you guys know how we are. We complicate things a little bit more and a little bit more. You remember back we put a nine inch Ford and also a coilover rear suspension. So we may end up having to fabricate some of these tailpipes but we'll just have to wait and see. [ drill humming ] [Joel] As Tom mentioned this is a borderline factory replacement setup. So we're using all the factory mounting holes for our hangers. Makes it a little bit more efficient. [ Music ]
Another thing I like about this setup is you don't need a big, expensive, fancy welder to put this in. It's got all the clamps and hardware you need. Really it's basic hand tools and a weekend with a buddy and have yourself a new exhaust system. [ saw buzzing ] [ Music ] [Joel] Oh, you said don't scratch the paint! You clocked that about perfect for me. [ Music ]
[Tommy] I'd almost nail that dude. [ Music ] Put your clamp on it? [Joel] Yep. I'm looking right at it but you still make me question it. [Tommy] Not gonna lie, I did it too. That's why I said it. [ Music ] [ metal clanging ] [ Music ] [Tommy] Yeah, that's nice! [Joel] Like it? [Tommy] Makes me feel better, not gonna lie. There's a lot more clearance back there than I thought it was gonna have. [Joel] Coming up, we engage our core and get straight to the point. That's pretty close right there.
[Joel] Well we're just about ready to slap some sheet metal on the front of our GTO here, and the first piece of that puzzle is gonna be our core support. You don't want to go just slapping this thing on here all willy nilly because if it's sitting in there caddy wompus the rest of your body panels are gonna be sitting in there caddy wompus. You need to make sure that this thing is perfectly straight, level, and parallel to the rest of the car. Now to do this you're gonna need a specialty tool known as a tram gauge. A tram gauge is a vehicle body alignment tool that uses adjustable rods with pointed ends to verify if the distance between two reference points matches your specifications. They are a lot more precise than your standard tape measure, and I'll run you through how to use it here in a sec but there are a couple more measurements we need to make first. The first thing we want to do is make sure the top of our core support is parallel with its mounting surface on the frame. So we're gonna use our digital angle finder here. Check our angle here. About 3.2 degrees. Top of the frame about point five. So we need to take our ratchet strap and pull this core support over just a smidgeon. That's pretty close right there. Looks like our measurements are within a half a degree of one another. So we're ready to move on to the next step. Now the next thing we need to find is a consistent mounting point for the first rod in our tram gauge. There's a few holes for us to choose from but this one right here is about the o-d as the rod and that's gonna help keep it centered. So let's make sure it's centered. Seeing about two and a quarter, three and three quarter. [ Music ] Two and a quarter. Three and three quarter. Okay, we're in business. So we got our tram gauge here. Basically how this little guy works is it's sitting at about 41 and three-eighths on the side measurer here. I'll just slide her out. Moves in and out like so. Set it into our first adjustment hole. We're gonna drop the other point into the fender bolt hole on the firewall. [ Music ] We're sitting level on our bubble. We're about 69 and 15/16ths on our measurement. Got everything locked in our sliders. So let's see how close we are on the other side. On this side I didn't move our adjustments at all. We're still sitting at 69 and 15/16ths. Our bubble is still level. So we're all squared up. [ Music ] With everything lined up we're good to go ahead and tighten our core support bushings. [ drill humming ] [Joel] Now if your numbers were off when you go to hang your sheet metal you'll definitely know it because you're gonna be seeing some pretty consistent gaps across the board. [ drill humming ] [Joel] That looks good. Now everything kinda rolled a little bit when we tightened those bolts but we know we're straight corner to corner. So once we start hanging some fenders the gaps on this thing are gonna look pretty sweet. Up next, we go under the hood and take a closer look at a legend.
[Joel] Oh yeah, now we're talking. Guys we get to build some pretty cool cars out of the Detroit Muscle shop and a little while back we had some friends stop by with a very unique one of a kind ride of their own for a new segment we're calling Powernation Under The Hood. If you like what you see we're gonna be doing a whole lot more of these, and you can check out the full version of this one on our website at Powernation TV. [ Music ]
[ engine revving ] [ Music ] [ engine rumbling ] [ Music ]
[Narrator] Powernation Under The Hood is brought to you by Grundy Collectible Automobile Insurance. [Tommy] Have you ever had a moment that stopped you in your tracks? You know what I'm talking about. You think a celebrity just passed you by. I like what I'm looking at and I'm talking about the car here guys. [Preston] How are you? [Cody] Good to see you. [Tommy] Man y'all brought in a peach today. [Preston] This is Outlaw. This is our prototype vin number one of a 25 car run series we're gonna build. [Tommy] This thing is impressive. I know it has that Eleanor flare to it. Seeing that car in that movie back in the day it made an impression on me. I'm not really a Mustang guys but that moment I could be a Mustang man for sure. [Cody] That's what we figured. If we're gonna build an Eleanor let's build something that's not what everybody else has done. That's why we went with Brittany blue. Ton of customization. The thing's right hand drive. We put a glass roof in it that we patent designed. [Preston] We didn't go with the Eleanor side scoops. We actually went with the '68 KR Shelby side scoops. We created our own deck lid and rear end caps, and we also did the same thing with the hood. We ended up running a steel hood so we could make it fit the way we wanted it to. [Cody] If you could see what we built here our intention was Rolls Royce fit and finish. [Tommy] You guys did a heck of a job on that. The lines are tight, smooth. [Cody] We figured if you're gonna have your name on something it's gotta be right or don't do it at all. [Tommy] There's some truth to that. I like the back piece of this thing. [Preston] What we ended up doing was we took a T-bird tonneau cover. [Tommy] What year of T-bird? [Preston] It's the late '60s. You could actually take that out and you still have your fold down rear seat in the back. [Tommy] Is there a seat below that? [Preston] Fold down underneath it yeah. Keeping with the old school interior with the old school door panels and the stainless those look like window crank knobs but they're actually power windows. We didn't want to modernize it so much to have buttons but we wanted to keep that old school. [Cody] So you just pull them up and you pull them down with the switches and the windows go up and down. [Tommy] That's fine until you get somebody in there that doesn't know and they put that old man handle on it. You're like whoa! [Cody] They are billets. It'd take a lot of pressure to do it. [Tommy] Can I sit in it? [Cody] Absolutely. [Tommy] This is gonna feel odd. I know I'm a little bit fuller than you guys are. I guess that's what I'll say. [Cody] It is a tilt column. If you want to bring the steering wheel up you can. [Tommy] Yeah that's a little smaller. Not gonna lie it feels kinda weird. [ Music ]
Power shifting this dude's gonna be a little different. [Cody] Being such a custom car like this we ended up doing the GT-500 font in the 2013 font and then the MB stands for Mustang Brothers. It's also those little things where you don't see it as first but as you're walking around the car you're like oh wow. Here's that, here's that, and that's what we wanted to achieve. [Tommy] That's one thing I really like about the car is sometimes guys go into a custom mindset and they basically screw up what the car is supposed to look like. You're just supposed to elevate it in a way, compliment the build, not make it something it's really not. You guys knocked it out of the park. You've refined it for sure. Gotta ask, what's up under the hood? [Preston] I'll show you. We took an engine out of 2012 GT-500. It's a 5.4 supercharged with a six speed and we dumped it on in there. [Tommy] I'm not gonna lie to you fellas. Looking on this side and not seeing a steering shaft is kinda odd. [Preston] No brake booster. [Tommy] For a second I thought maybe it's on the inside of the header. Idiot, it's on the other side of the car. It's got a lot more room in there than I thought it would. [Preston] We did the shock tower delete. So we actually cut the shock towers out. We welded in the cradle and it gave us a lot more leg room here. On any Coyote platform you've got your alternator issue that's close. So we're able to get rid of all those issues and really open it up inside here. [Tommy] I was looking at the line here on the top of the fender and the windshield. That's not factory right? [Preston] So we had to do that to put that windshield in there. This whole operation here was a month in itself to do. A lot of guys when they do it you end up with a huge gap. You could stick your finger in between here. [Tommy] Was it filled with trim? Is that what it was from the factory? [Cody] The original window trim would have came wrapped around here. Now we actually had to add all the steel up here and then add up to the fender up here. We make all of our lines out of steel. It's all welded up. This way this car will always look like this years down the road. [Tommy] Flush mounted glass is one of them things that people see it today in every car, vehicle, or truck out there and they just take it for granted. It's hard to comprehend how much time it actually takes. [Cody] You basically have to make the body fit the window itself. There's only one company that makes front and rear windows for a seven-eight car and we really had to make the body itself fit the glass. [Tommy] It comes pretty close. What's individually your most favorite thing about this car? [Preston] That it's finished! I think the best thing about this build was working with my brother. [Tommy] You need to give him a hug for that. [Cody] We had a dream and you wonder how it can become a reality, and then you work with a great group of guys like we did. Then to see it done there's really no better feeling that you can tell than that itself. Seeing a dream come true. [Tommy] Coming up, be sure to slow your roll before installing some shiny new wheels.
[Tommy] Today's a pretty exciting day for us because our wheels have shown up. That's one component that can definitely set the tone or personality of your ride. A few of you guys out there I'm sure are hoping that we're installing a set of rallyes or something like that and it's something 15 inch but that's not the case. However I do want to show you what we got. We picked up a set from Schott. Now these things are custom tailored for our application. Man are they a good looking piece. Unwrapping this is kinda like Christmas. That's no lie. If you'll notice that's a pretty wide set of wheels back there. It's easy to see that this thing has some significant size to it. It's an 18 by 10. And yeah, it is gonna fit up here in this wheel well of this old Pontiac. With Schott they have several different styles and several different makes, and you can also customize your finishes. With ours we have a polished hoop with a polished face and then we've used their titanium color here on the insides and across the lips. Whenever you're ordering a set of wheels, at least for me, it's a pretty nerve wracking situation because I think about this is a lot of money that you're gonna spend and if you measure wrong you may be buying something that you can't use. So I thought I'd slow down a minute, show you guys how I got to this point. So it may be some information if you're looking to buy a set of wheels. Maybe it'll help calm your nerves a little bit. There's a lot of terms and phrases that go along whenever you're gonna be ordering a set of wheels. The first and foremost easiest one is the diameter. Our wheel is an 18. However it is not from the actual outside of the lip to the outside of the other side because if you notice with ours it measures 19 and five-eights. They don't make a wheel that size. What it actually is is this surface right there on each side. Stretch your tape across there you'll see it measures 18. Another thing that you're gonna need to know is your wheel width. Oftentimes guys think it's from the outside to the outside and that's really not the case. It's actually where the tire beads on the wheel. If we measure ours the overall width is about 10 and seven-eighths but the actual width of the wheel is a 10 inch. Two more terms that you'll run into is offset and backspacing. What that is the offset is where the wheel is set off into the hoop here. Then your backspacing is the measurement between the surface where your hub or the brake rotor is to the back of the wheel. An easy way to measure that is you'll need a straight edge for your backspacing. Simply lay this thing across there and then you use your tape measure to measure down to that face. That tells us with ours we have a five and a half inch backspacing. Whenever it comes to your offset you would measure from that surface to the top of this toolbox. We have a five and a half inch offset. Knowing this information is crucial whenever you're trying to dial in the fit of your wheels to your car. Another thing you want to keep in mind is the rear can articulate, meaning it can go up on one side and down on the other. Kinda like whenever you're pulling into a parking lot. That means that the wheel will tip in or out. So having that extra clearance keeps them from scrubbing on each side of this. Plus if you buy them big, fancy wheels you don't want to scratch them all up or chew them up and damage what you worked hard to achieve. Also you want to keep in mind that everything is order. Like your rotor is in place because sometimes those can be an eighth or a quarter inch thick. If you dial all your metrics in next thing you know it's a little too far one way. It could have been that you didn't have everything in place to make sure it was right. So let's see if our measurements were dialed in. I sure hope so. What that wheel looks like against that black car. Looks pretty sweet! Woo wee! Now if the rest of the car was put together. It's a big day!