
In This Episode
- 0:01 Introduction to the video and the '69 G-T-O project
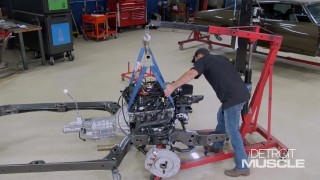
- 1:04 Installing a 5-speed transmission and hydraulic clutch
- 4:04 Bleeding the hydraulic clutch system
- 6:45 Removing and replacing the dash pad and windshield
- 11:05 Preparing and painting the dash
- 17:00 Swapping out the heater core
- 19:23 Finalizing the dash installation
Video Transcript
[Joel] You're watching Powernation.
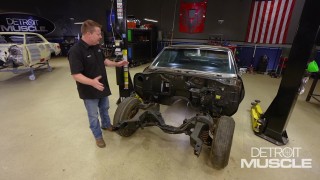
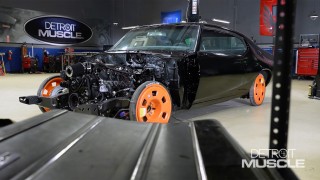
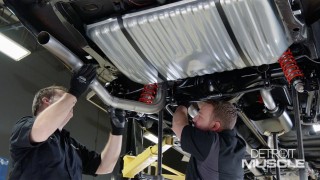
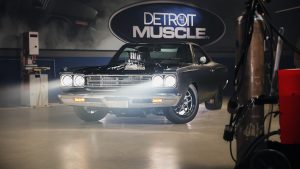
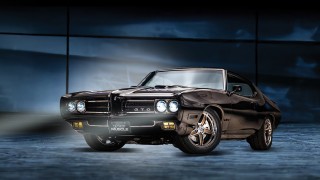
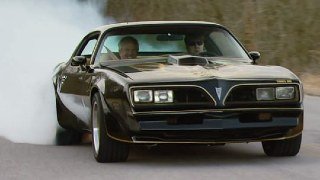
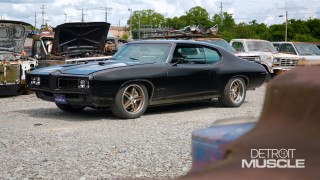
[Tommy] Well the sign on the wall says it all if you're curious about what we're gonna be working on. Plus we've got that black '69 GTO that we're gonna be tinkering on. The task at hand for today is gonna be some restoration, rejuvenation, and even a simple repair. All in the efforts of building one cool ride. [ Music ] [ engine revving ] [ Music ] [ tires squealing ] [Tommy] When our GTO rolled off the assembly line this old thing was quite a peach, and it came with quite a few options. However it's got one that if we were buying this thing we would have clicked a total different box. What we wanted would have to be a four speed. Having the thrill of a manual shift, y'all know what I'm talking about. The ability to dump the clutch, run through the gears. Well that'll definitely put a smile on your face. This thing now's gonna have 5-speed in it and we need to make it work. It's gonna take a few components and a bit of work but it's gonna be all worth it in the end. Now we're gonna have to do quite a bit of disassembly. We're gonna be adding that third pedal over here. Sitting here looking at this thing. That's good that piece come off. It's one of them situations that when you get home at the end of the day and the wife asks, how'd your day go? You're supposed to say oh, it's great! It went wonderful! [ Music ]
Now we've gotta get this metal bracket. [ Music ] Now we need to install our hydraulic clutch assembly that we got from American Powertrain. We're gonna have to remove this bolt to slide out our brake pedal. What we wound up doing is ordering a standard set of replacement pedals to put in here. We're only gonna be using the brake pedal of course. The first thing we've gotta do is zip this thing out. So we've got to make a little noise. [ Music ] I like to put a little bit of dielectric grease on these things as good measure to keep them from squeaking. This is actually pretty simple. May not have had to take that bracket out. Remember you don't want to cinch that thing down crazy cause if you do you'll bind up your brake pedal. We don't want that. Easy enough. [ drill humming ] [ Music ] Push that one out. [ Music ] Oh yeah, way better! So far I'm putting it in the right way. Hopefully this goes smooth as butter. Look at that. Heck yeah! The next thing that we're needing to do is find our location for our reservoir. Now a lot of times people get ahead of themselves and just slap this thing on the firewall and move forward. Problem with that is you can run into some interference problems cause you don't want to screw and glue a bunch of stuff to your firewall and then later having to move things around. All we've got to do is slap this thing into place. Don't have to have all the bolts and brackets hooked up. Really only gonna mark one of these right now cause I can't get in there because this thing's in the way. Let's get that off so we can dial it in to perfection. Can't back up now. [ Music ]
Using this method of putting a screw in you probably could've put it up there and marked it and been fine on both sides. I like doing it this way cause it gives you an opportunity to mount it. Make sure that it's not sitting off to one side or the other. If you were to mark both holes and you were off just a little bit y'all know what that means, more modifying. [ Music ] Torque that to correct spec. Heck yeah, not too shabby! Once everything's the point where it's gonna live now you've gotta bleed the system. The way I'm gonna do this is a little bit odd than what most people would do. I'm gonna put a vacuum source up here and then I'm gonna draw fluid out of this cup where our hose is gonna be submerged into instead of trying to bleed it by pumping the pedal a bunch of times. This way is actually a little bit easier. You've gotta make sure that the bleeder is open. Even more so make sure you've got the right wrench. Need to put quite a bit of brake fluid in here. It's a lot easier to put it in here now. We can pour some of that back in there if we wind up not using it. Now this little vacuum kit that we've got has a tube that you can put on the cap and onto your reservoir. There will be some fluid get in here and as you start letting the air you'll see the bubbles come through there. Put a couple of connections here. Then put this into the hose like that. Now get to pumping. What you want to keep an eye out for is to see any air bubbles come out up here into that clear hose. You'll end up doing it a couple of times and don't really see anything probably in pretty good shape. I think we're getting close. Now if I only had a paper towel. We don't have any more bubbles coming out of here. So we can go ahead and remove this. Put your finger over this hole. Now you can take your little hose out of the big container down here and tighten up your bleeder screw. Now let's plug this dude into the bottom of our reservoir. Let's see if we've got a pedal. You should feel some resistance on this thing. Plus you should be able to hear the actuation of your pressure plate. Oh yeah, that thing's good to go. That's her. Up next, we unglue and unscrew the glass and dash of our '69 GTO.
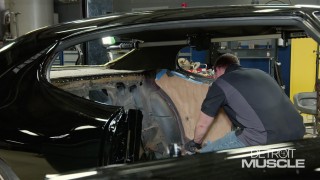
[Tommy] With our clutch hydraulics completed now we're gonna take care of a few other procedures on this old car. I'm here to tell you that this thing is suffering from a serious condition. What I refer to as the ioughta disease. While we've got that steering column out we oughta go ahead and remove our dash pad. This thing's all busted up and it needs to be replaced. While that thing's out we oughta go ahead and freshen up this steel dash because it's faded from the sun. To do that properly we oughta go ahead and remove the windshield because it's scratched up. Once the windshield's out we oughta go ahead and take care of these little studs that are missing on both sides that's broke off that hold the trim clips on. I sure hope this patient survives. Also with this there's a few things that you should keep in mind and that's your safety. I know a lot of people don't like talking about it because it's all boring just keep this stuff in mind and it may save you a quick trip to the ER. Use you a pair of gloves because this thing has been known to pull through the windshield, and then you've got glass and sharp edges everywhere. Trust me, I've been there. Also you need a pair of safety glasses cause that stuff, whenever it breaks it splinters and goes everywhere. This is cheap insurance to help keep some of it out. The process with this thing we're gonna use a very primitive tool. What oftentimes people refer to as a pull knife. Just take that blade, kinda shove it up under the glass, wiggle it around a little. You don't want to put a crazy amount of pressure on it but you do need some. Also be a little cautious because if that blade was to break and your arm was to come out that you don't get stitches on the back side of your elbow from hitting something sharp. Luckily for us we're really not trying to save this piece of glass. We can get a replacement one. So if we do bust it it's not that big of a deal. There's that half. I'm a little light headed. With it cut all the way around this thing should lift out relatively easy. To push on it you don't want to use your fingers. Use the entire part of your hand. Apply some gentle pressure to it. That stuff is still sticky but you'll notice that starts to tear apart. [ Music ]
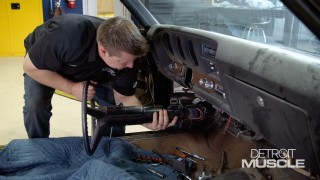
Believe it or not guys I've never taken a dash pad off a '69 GTO. There is screws and stuff or nuts usually on the back side up through here. So we'll have to pull all this out. Now up in this area I don't really know because there's a bunch of gauges and stuff in the way. Can't be all that complicated. We're just gonna keep removing stuff. I don't know if it looks as awkward as it feels right now but if eels pretty weird. This is some of that screwing that's too easy to do with a tool and too hard to do without. Let's see here. [ Music ]
Like a glove. That's a plus. [ Music ] That dude's tight. [ Music ]
[ ratchet clicking ] [ Music ]
I don't want to break nothing. I'm tired of monkeying with this thing too. That don't come out. Blooming sense fellars. [ Music ]
This is gonna be a huge undertaking. 100 percent. Coming up, we're laying down a whole lot of paint and we walk you through some simple upgrades.
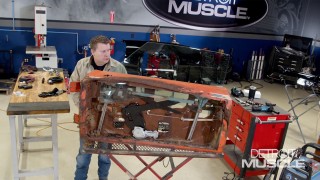
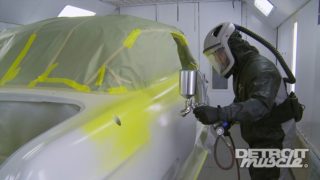
[Tommy] With the dash pad out of the way now we really need to prepare for some painting. So I want to clean this really, really well, scrub it down. Then we'll probably still have some fish eyes but I'm hoping we don't. Now to scratch this thing up I'm using a little red scuff pad. You don't have to get crazy with it. I'm just trying to knock off the shine. Once I get this done I will come back and clean it once again with an air blower, and I will also come in with a wire brush and dig out a bunch of this rusty stuff in the trench where the windshield goes. Once we get that we can tape this thing down and paint her up. [ compressed air hissing ] [Tommy] Now I'm going to apply some rust converter to treat our corrosion. [ Music ] Kinda one of those quick and dirty, you too can paint your dash at home. [ Music ]
[ paper crackling ] [ Music ] [ spray gun hissing ] [ Music ] [Tommy] Well our dash top turned out pretty nice but it needs to sit back there and dry so that we can move on. I'm gonna get busy taking out the rest of our dash pieces here and getting them cleaned up. We picked up a new unit from ABC Moparts. They offer components to fit many makes and models. So if you're looking for a hard to find piece you may give these guys a shout. You want to be extremely careful with this stuff. It's old and kinda delicate. I don't know if you guys know this or not but I've got to remove my headlight switch from here, and with a headlight switch you always had the headlight knob. To remove one of these is you pull the headlights all the way on, push the button on the back, and then the knob comes off. Perfect example of making sure something else that doesn't need to come off first before you go to pulling. You'd never guess you have to remove all the hardware. Maybe coming, oh yeah! Just need to wiggle it. [ Music ]
We have all of our pieces cleaned up and we're ready to start moving on toward the next details before we start all of the assembly. A lot of times on your dashes you'll run into having some silver accents around a lot of the bezels, and knobs, and so on. Our little GTO is a perfect example of that. A lot of folks oftentimes use some silver permanent markers and take them and draw around here, but what you can run into is as you're applying it whenever you have to reset and try again it seems like you're wiping off some that you just put on and you're almost chasing your tail. There's another way that you can do this and you don't need any special tools. You just really need some paint, a flat surface, some masking tape, and a steady hand. You want to make sure that your surface that you think is flat is actually flat. So a quick rub of your hand. Put it on your edge. Pull it tight. [ Music ] What you'll want to do is take your paint and spray it onto the surface. What we're simulating is almost like a printing press. Once that paint's wet you'll take this piece and mash it and then lift it up. With that as long as this surface is flat it will transfer on here and you're in good shape. Remember this is only gonna be as deep as the paint that you spray. So let's go ahead and get started. You want the paper to be nice and wet. With silver of course that stuff will start moving around on you. Another note, I think you get the highest with silver paint. We should be feeling pretty nice after this. [ Music ] See, check that out. That look nice? I've been asked before how in the world I figured out some of these ways to do some stuff like this and I tell them, whenever you're building cars on a budget sometimes you have to figure out ways to rejuvenate old parts because you don't have money to buy the new ones. [Joel] Up next, we root out the core of our disabled dash and head to the finish line.
[Joel] Tommy's still got a few things to finish up on the dash. While he does that I'm gonna go ahead and swap out our heater core for this new one that we got from Duralast. There's a pretty good chance that's the original heater core that was still in the car because it's that old brass/copper style. With our firewall and our heater box and everything disassembled right now this is the time to do it because it's gonna take five minutes and a couple screws to get this thing swapped out. [ Music ]
[ ratchet clicking ] [ Music ]
[Joel] Bad boy don't want to come off of there. Granted it has been on here since 1969. Just about got her whooped though. [ Music ] [ ratchet clicking ] [ Music ]
There we go! Here's our old one. Sure enough we've got some corrosion around the tube as well a little hairline crack. As luck would have it as soon as we fired this thing up this would have been pouring coolant all over the floorboard. So go ahead and get this swapped out. Better to be safe than sorry. [ Music ]
Our new heater core is installed. Looks like we are ready to throw this thing back up in here, seal everything up, and call it a win. [ Music ]
Stay! [ Music ] Now that I've got that installed I'm gonna help Tommy finish slapping our components into our new dash so we can finally drop it into our '69 GTO. [ Music ]
[Tommy] Man, you're in a hurry. [Joel] I'll let you lead. [Tommy] You've got those studs in there. It basically slides right in there. Make sure you don't have any wires that are hitting anything. [Joel] Got two studs in the car too. [Tommy] One's bigger than the other one. [Joel] When's the last time you got tangled up in the floorboard of a GTO? [Tommy] Never with another man. I saved the screws so that we wouldn't lose them and guess what? They're m-i-a, yay! [Joel] Them boys on the GM assembly line had this down to a science I'm sure. [Tommy] Quick question. With all that in place can you plug up all the radio connections over there or do we need to pull it back out? [Joel] I think we can make it happen. At least my skinny arms will make it through there. That's more of a dig on me than it is on you. [ ratchet clicking ] [ Music ] [Tommy] Let me get you the lid. [ Music ]
Well we made some pretty decent progress for the day but we didn't get nearly as far as we was hoping. The dash looks pretty spectacular and we've still got work to do from what I mentioned. I want to get the windshield in. I've got to repair that T-stud so I can put the clip on, put the trim on, but also I've got to get this thing clean so we can get it back in. So all this stuff is just gonna have to hold off until another day. Hope you guys like what you saw and we've still got a whole lot more to come. [ Music ]
Show Full Transcript
[Tommy] Well the sign on the wall says it all if you're curious about what we're gonna be working on. Plus we've got that black '69 GTO that we're gonna be tinkering on. The task at hand for today is gonna be some restoration, rejuvenation, and even a simple repair. All in the efforts of building one cool ride. [ Music ] [ engine revving ] [ Music ] [ tires squealing ] [Tommy] When our GTO rolled off the assembly line this old thing was quite a peach, and it came with quite a few options. However it's got one that if we were buying this thing we would have clicked a total different box. What we wanted would have to be a four speed. Having the thrill of a manual shift, y'all know what I'm talking about. The ability to dump the clutch, run through the gears. Well that'll definitely put a smile on your face. This thing now's gonna have 5-speed in it and we need to make it work. It's gonna take a few components and a bit of work but it's gonna be all worth it in the end. Now we're gonna have to do quite a bit of disassembly. We're gonna be adding that third pedal over here. Sitting here looking at this thing. That's good that piece come off. It's one of them situations that when you get home at the end of the day and the wife asks, how'd your day go? You're supposed to say oh, it's great! It went wonderful! [ Music ]
Now we've gotta get this metal bracket. [ Music ] Now we need to install our hydraulic clutch assembly that we got from American Powertrain. We're gonna have to remove this bolt to slide out our brake pedal. What we wound up doing is ordering a standard set of replacement pedals to put in here. We're only gonna be using the brake pedal of course. The first thing we've gotta do is zip this thing out. So we've got to make a little noise. [ Music ] I like to put a little bit of dielectric grease on these things as good measure to keep them from squeaking. This is actually pretty simple. May not have had to take that bracket out. Remember you don't want to cinch that thing down crazy cause if you do you'll bind up your brake pedal. We don't want that. Easy enough. [ drill humming ] [ Music ] Push that one out. [ Music ] Oh yeah, way better! So far I'm putting it in the right way. Hopefully this goes smooth as butter. Look at that. Heck yeah! The next thing that we're needing to do is find our location for our reservoir. Now a lot of times people get ahead of themselves and just slap this thing on the firewall and move forward. Problem with that is you can run into some interference problems cause you don't want to screw and glue a bunch of stuff to your firewall and then later having to move things around. All we've got to do is slap this thing into place. Don't have to have all the bolts and brackets hooked up. Really only gonna mark one of these right now cause I can't get in there because this thing's in the way. Let's get that off so we can dial it in to perfection. Can't back up now. [ Music ]
Using this method of putting a screw in you probably could've put it up there and marked it and been fine on both sides. I like doing it this way cause it gives you an opportunity to mount it. Make sure that it's not sitting off to one side or the other. If you were to mark both holes and you were off just a little bit y'all know what that means, more modifying. [ Music ] Torque that to correct spec. Heck yeah, not too shabby! Once everything's the point where it's gonna live now you've gotta bleed the system. The way I'm gonna do this is a little bit odd than what most people would do. I'm gonna put a vacuum source up here and then I'm gonna draw fluid out of this cup where our hose is gonna be submerged into instead of trying to bleed it by pumping the pedal a bunch of times. This way is actually a little bit easier. You've gotta make sure that the bleeder is open. Even more so make sure you've got the right wrench. Need to put quite a bit of brake fluid in here. It's a lot easier to put it in here now. We can pour some of that back in there if we wind up not using it. Now this little vacuum kit that we've got has a tube that you can put on the cap and onto your reservoir. There will be some fluid get in here and as you start letting the air you'll see the bubbles come through there. Put a couple of connections here. Then put this into the hose like that. Now get to pumping. What you want to keep an eye out for is to see any air bubbles come out up here into that clear hose. You'll end up doing it a couple of times and don't really see anything probably in pretty good shape. I think we're getting close. Now if I only had a paper towel. We don't have any more bubbles coming out of here. So we can go ahead and remove this. Put your finger over this hole. Now you can take your little hose out of the big container down here and tighten up your bleeder screw. Now let's plug this dude into the bottom of our reservoir. Let's see if we've got a pedal. You should feel some resistance on this thing. Plus you should be able to hear the actuation of your pressure plate. Oh yeah, that thing's good to go. That's her. Up next, we unglue and unscrew the glass and dash of our '69 GTO.
[Tommy] With our clutch hydraulics completed now we're gonna take care of a few other procedures on this old car. I'm here to tell you that this thing is suffering from a serious condition. What I refer to as the ioughta disease. While we've got that steering column out we oughta go ahead and remove our dash pad. This thing's all busted up and it needs to be replaced. While that thing's out we oughta go ahead and freshen up this steel dash because it's faded from the sun. To do that properly we oughta go ahead and remove the windshield because it's scratched up. Once the windshield's out we oughta go ahead and take care of these little studs that are missing on both sides that's broke off that hold the trim clips on. I sure hope this patient survives. Also with this there's a few things that you should keep in mind and that's your safety. I know a lot of people don't like talking about it because it's all boring just keep this stuff in mind and it may save you a quick trip to the ER. Use you a pair of gloves because this thing has been known to pull through the windshield, and then you've got glass and sharp edges everywhere. Trust me, I've been there. Also you need a pair of safety glasses cause that stuff, whenever it breaks it splinters and goes everywhere. This is cheap insurance to help keep some of it out. The process with this thing we're gonna use a very primitive tool. What oftentimes people refer to as a pull knife. Just take that blade, kinda shove it up under the glass, wiggle it around a little. You don't want to put a crazy amount of pressure on it but you do need some. Also be a little cautious because if that blade was to break and your arm was to come out that you don't get stitches on the back side of your elbow from hitting something sharp. Luckily for us we're really not trying to save this piece of glass. We can get a replacement one. So if we do bust it it's not that big of a deal. There's that half. I'm a little light headed. With it cut all the way around this thing should lift out relatively easy. To push on it you don't want to use your fingers. Use the entire part of your hand. Apply some gentle pressure to it. That stuff is still sticky but you'll notice that starts to tear apart. [ Music ]
Believe it or not guys I've never taken a dash pad off a '69 GTO. There is screws and stuff or nuts usually on the back side up through here. So we'll have to pull all this out. Now up in this area I don't really know because there's a bunch of gauges and stuff in the way. Can't be all that complicated. We're just gonna keep removing stuff. I don't know if it looks as awkward as it feels right now but if eels pretty weird. This is some of that screwing that's too easy to do with a tool and too hard to do without. Let's see here. [ Music ]
Like a glove. That's a plus. [ Music ] That dude's tight. [ Music ]
[ ratchet clicking ] [ Music ]
I don't want to break nothing. I'm tired of monkeying with this thing too. That don't come out. Blooming sense fellars. [ Music ]
This is gonna be a huge undertaking. 100 percent. Coming up, we're laying down a whole lot of paint and we walk you through some simple upgrades.
[Tommy] With the dash pad out of the way now we really need to prepare for some painting. So I want to clean this really, really well, scrub it down. Then we'll probably still have some fish eyes but I'm hoping we don't. Now to scratch this thing up I'm using a little red scuff pad. You don't have to get crazy with it. I'm just trying to knock off the shine. Once I get this done I will come back and clean it once again with an air blower, and I will also come in with a wire brush and dig out a bunch of this rusty stuff in the trench where the windshield goes. Once we get that we can tape this thing down and paint her up. [ compressed air hissing ] [Tommy] Now I'm going to apply some rust converter to treat our corrosion. [ Music ] Kinda one of those quick and dirty, you too can paint your dash at home. [ Music ]
[ paper crackling ] [ Music ] [ spray gun hissing ] [ Music ] [Tommy] Well our dash top turned out pretty nice but it needs to sit back there and dry so that we can move on. I'm gonna get busy taking out the rest of our dash pieces here and getting them cleaned up. We picked up a new unit from ABC Moparts. They offer components to fit many makes and models. So if you're looking for a hard to find piece you may give these guys a shout. You want to be extremely careful with this stuff. It's old and kinda delicate. I don't know if you guys know this or not but I've got to remove my headlight switch from here, and with a headlight switch you always had the headlight knob. To remove one of these is you pull the headlights all the way on, push the button on the back, and then the knob comes off. Perfect example of making sure something else that doesn't need to come off first before you go to pulling. You'd never guess you have to remove all the hardware. Maybe coming, oh yeah! Just need to wiggle it. [ Music ]
We have all of our pieces cleaned up and we're ready to start moving on toward the next details before we start all of the assembly. A lot of times on your dashes you'll run into having some silver accents around a lot of the bezels, and knobs, and so on. Our little GTO is a perfect example of that. A lot of folks oftentimes use some silver permanent markers and take them and draw around here, but what you can run into is as you're applying it whenever you have to reset and try again it seems like you're wiping off some that you just put on and you're almost chasing your tail. There's another way that you can do this and you don't need any special tools. You just really need some paint, a flat surface, some masking tape, and a steady hand. You want to make sure that your surface that you think is flat is actually flat. So a quick rub of your hand. Put it on your edge. Pull it tight. [ Music ] What you'll want to do is take your paint and spray it onto the surface. What we're simulating is almost like a printing press. Once that paint's wet you'll take this piece and mash it and then lift it up. With that as long as this surface is flat it will transfer on here and you're in good shape. Remember this is only gonna be as deep as the paint that you spray. So let's go ahead and get started. You want the paper to be nice and wet. With silver of course that stuff will start moving around on you. Another note, I think you get the highest with silver paint. We should be feeling pretty nice after this. [ Music ] See, check that out. That look nice? I've been asked before how in the world I figured out some of these ways to do some stuff like this and I tell them, whenever you're building cars on a budget sometimes you have to figure out ways to rejuvenate old parts because you don't have money to buy the new ones. [Joel] Up next, we root out the core of our disabled dash and head to the finish line.
[Joel] Tommy's still got a few things to finish up on the dash. While he does that I'm gonna go ahead and swap out our heater core for this new one that we got from Duralast. There's a pretty good chance that's the original heater core that was still in the car because it's that old brass/copper style. With our firewall and our heater box and everything disassembled right now this is the time to do it because it's gonna take five minutes and a couple screws to get this thing swapped out. [ Music ]
[ ratchet clicking ] [ Music ]
[Joel] Bad boy don't want to come off of there. Granted it has been on here since 1969. Just about got her whooped though. [ Music ] [ ratchet clicking ] [ Music ]
There we go! Here's our old one. Sure enough we've got some corrosion around the tube as well a little hairline crack. As luck would have it as soon as we fired this thing up this would have been pouring coolant all over the floorboard. So go ahead and get this swapped out. Better to be safe than sorry. [ Music ]
Our new heater core is installed. Looks like we are ready to throw this thing back up in here, seal everything up, and call it a win. [ Music ]
Stay! [ Music ] Now that I've got that installed I'm gonna help Tommy finish slapping our components into our new dash so we can finally drop it into our '69 GTO. [ Music ]
[Tommy] Man, you're in a hurry. [Joel] I'll let you lead. [Tommy] You've got those studs in there. It basically slides right in there. Make sure you don't have any wires that are hitting anything. [Joel] Got two studs in the car too. [Tommy] One's bigger than the other one. [Joel] When's the last time you got tangled up in the floorboard of a GTO? [Tommy] Never with another man. I saved the screws so that we wouldn't lose them and guess what? They're m-i-a, yay! [Joel] Them boys on the GM assembly line had this down to a science I'm sure. [Tommy] Quick question. With all that in place can you plug up all the radio connections over there or do we need to pull it back out? [Joel] I think we can make it happen. At least my skinny arms will make it through there. That's more of a dig on me than it is on you. [ ratchet clicking ] [ Music ] [Tommy] Let me get you the lid. [ Music ]
Well we made some pretty decent progress for the day but we didn't get nearly as far as we was hoping. The dash looks pretty spectacular and we've still got work to do from what I mentioned. I want to get the windshield in. I've got to repair that T-stud so I can put the clip on, put the trim on, but also I've got to get this thing clean so we can get it back in. So all this stuff is just gonna have to hold off until another day. Hope you guys like what you saw and we've still got a whole lot more to come. [ Music ]