Carcass Featured Projects

Carcass Builds

Parts Used In This Episode

Black Widow Exhaust
Widowmaker 10-Inch
Chase Bays
Brake Line Relocation - Dual Piston Brake Booster Delete
Chase Bays
Dual Piston Brake Booster Delete
Chase Bays
Tucked Aluminum Radiator
Optima
OrangeTop Battery
Switch-Pros
Power Distribution Module

Video Transcript

[ Jimmy ] You're watching Powernation!

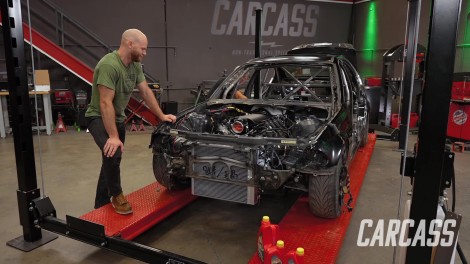
[ Jeremy ] Today on Carcass we address some fueling issues that may give us some problems on the track. [ Jimmy ] And we also get started on our exhaust system and see if we can get this thing fired up. [ Music ] [ engine revving ] [ Music ] [ Jeremy ] What's up everybody, welcome to Carcass. Now we're making leaps and bounds on our E-46 BMW race car. We managed to bend up and install a killer roll cage inside here, and we have the LS and five speed swapped in. Today we're gonna be tackling something that could be a potential problem out on the track, and that's something to do with the fuel system. The placement of the stock BMW tank is perfect in the middle here, and what that will do is give our car some really good track manners when we're out on the track but it does have one downfall. The way that it's designed is the top of the tank itself is pretty flat but on the bottom it has kind of a hump in the middle and that's to allow the driveshaft to pass underneath it and have some up and down movement. Really what that does is create a left and a right side to the fuel tank. So as you're going around the racetrack and you have a hard left or right hand turn it can actually pull fuel away from the pump side here. Kinda keep it over on the driver's side, and that will starve the fuel pump side, lowering your fuel pressure, lowering your horsepower, and that's how you're gonna lose some races. We do have a simple solution for that. What we're gonna end up doing is installing this MSeries or M-3 style baffle around the fuel pump. What that's gonna do is give us a little more fuel. So as we're making these big sweeping turns we can hold a little more over here, wait until we get back out on that straightaway, keep our fuel pressures up, stay in that horsepower range, and hopefully win some races. The pump itself is in a very easy location to get to. It's right underneath this cover here. So we'll get that out of the way and get the pump out of the way. [ ratchet clicking ] [ Music ]

[ Music ] [ Jeremy ] Get the locking ring off of here and try to pull the pump out of the way. There we go. [ Music ] [ hand crank squeaking ] [ Music ] [ Jeremy ] So the way that this works is currently we have a syphon tube that runs from the driver's side over here to the passenger's side of the tank and that tube comes out at the bottom of the stock sump area in the tank already. What this does is takes that tube from the bottom here and it's gonna put it up top and fill up this extra little bowl. At the bottom of this bowl there's two little holes that's gonna allow the fuel to drain out slowly and keep the sump that's down in the tank currently covered with fuel. Keeps our fuel pump covered up with fuel as well. This is a very simple solution to keep us out on the track longer, and it was pretty darn cheap too. [ Music ]

The trick here is getting it to sit in. [ Music ] That's good on that side, perfect! And then getting the hose connected. They don't fit super tight in here but that's all it needs to do. Then the fuel pump will kinda come down in here and put pressure down on this so it doesn't move so much. That's as simple as that needs to be. [ Music ] For the fuel pump that we're running this is a stock replacement fuel pump. The three liter that was in this car called for about 50 to 55 p-s-i and that's more than enough to run the FiTech Rebel EFI system we have sitting on top of our LC-9. Best part about all this, stock replacement. So it goes right back where it came from and uses the same connections. [ Music ]

So one last thing on the fuel side of things. Since we ditched all of the stock wiring in the BMW we're gonna have to find a way to command the new fuel pump to turn on. What we're gonna be using is a p-d-m. This is the same thing that we ran in the Road Course Camaro and it should work perfectly in our BMW. I've got a little test setup here because I need to find the two pins or two wires that I need to apply power and ground to. I think I have that figured out. We'll do a little test here. Yep, so if I take those two pins and transfer that over to the stock pigtail that we kept from the wiring. Looks like the brown wire's gonna be our ground and this white wire with the blue trace is gonna be our positive. So I'll label those and be able to transfer those over to the p-d-m. When we get ready to fire this thing up it should work perfectly. Stick around, we dive into our differential to improve performance on the track.

[ Jeremy] Hey guys, welcome back. As you can see we've got the car up here on a different lift because it's a little too small to fit on the other lift in the shop, in hopes to tackle a bunch of stuff underneath the car. Now that we have the engine and transmission installed we have to make sure that when all that power comes back here that both rear tires spin and that's currently not the case. What we're gonna be doing here is pulling out this rear differential, getting it over on the table. We're gonna be putting a couple of pieces inside of here, making sure that both of these rear tires spin. [ Music ] That actually looks pretty fresh. Somebody must have been in here recently. [ Music ] [ ratchet clicking ] [ Music ] [ drill humming ] [ Music ] [ drill humming ] [ Music ] [ drill humming ] [ Music ] [ drill humming ] [ Music ] [ Jeremy ] If you want to hold the back I'll try to get the bolt out of there. Then we'll try to weasel it down. [ Music ] Can't do much cause the pinion's gonna rotate. [ Music ] How you doing? [ Jimmy ] Just need to reposition my hand. [ Jeremy ] Alright, to the table. Now that we have the differential out I'm gonna take the cover off the back. We have to get rid of these axle adapters here, and then we'll get down to the meat and potatoes. [ drill humming ] [ Music ] [ Jeremy ] Using a hammer and a punch we'll knock the adapters free. Once removed we can access the C-clips that hold in the bearing races, get those out of the way, and remove the diff from the housing. [ Music ]

Alright guys, we have the rear differential all apart and I did take the parts and pieces over to the parts washer and cleaned everything up so we didn't have to work with a greasy mess. We're going to be working down here in the spider gear area, and we're gonna be installing these locking plates from Racing Diffs. What that's gonna do is apply pressure to the two outside spider gears locking them up and giving us full traction when we're out on the track. To get started I need to get this centering pin out of the way, but before I can do that I've got to get the ring gear out of the way. [ drill humming ] [ Music ] [ hammer tapping ] [ Music ] [ Jeremy ] So for the plates I just have to assemble these. It's got these four little springs. Put the top on. Then we've got to head over to the vice, compress that down, and add these little blocks. [ Music ]

[ Music ] So I got everything all lubed up. Now all we've got to do is set her inside, line up the hole, and take it apart. [ Music ]

Tell you one thing. That was terrifying. [ hammer tapping ] [ Jeremy ] Now tolerances are extremely tight here. It is okay to use a dead-blow like this to get the pin in. [ Music ] [ hammer banging ] [ Music ] [ Jeremy ] Then we just tighten down this little set screw. Make sure there is a little bit of thread locker on there. That pretty much buttons up the install of the limited slip. One thing to note. From the factory BMW uses this little snap ring or C-clip down here in the housing and that keeps this centering pin in place. Those C-clips can fail and that will allow that pin to slide around and get into your pinion, and you definitely don't want that. So one thing that Racing Diffs does recommend is you take a little punch here and you peen around the housing. You just create some little dimples on both sides and that will keep that pin in place in the event that the C-clip fails. We definitely don't want anything like that. So we will be peening this. Beyond that we are gonna end up putting a ring gear back on here. We'll get all of this set back into the housing and we'll get it back up in the car. [ Music ] [ Jimmy ] Coming up, we upgrade our master cylinder for better response while braking.

[ Jimmy ] We're making some good progress on our BMW and now it's time to start on the brake system. The biggest change that we're making is going to a full manual setup, and why would we want to do this in the first place? Well in a track and high performance setting you want to have as consistent brake feel as possible, and in a vacuum boosted system you might not have full assist at all times. So we went to Chase Bays and got this dual master cylinder, which is a full manual setup. We also had to change our pedals just a little bit. We went ahead and put on an E-36 pedal and Chase Bays sent us a new clevis to change the ratio so we could take full advantage of the manual brakes. I just have to get this master cylinder through the firewall and then we can install our pedals. Original firewall only had these two holes. So I went ahead and drilled these two other ones. And this thing goes in there no problem. [ Music ]

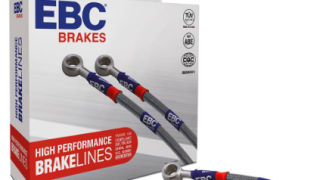
[ drill humming ] [ Music ] [ Jimmy ] After I reinstall the pedal I'll go ahead and install the push rod. To go along with our master cylinder we also have Chase Bays brake line relocation kit. This is gonna be a great way to adapt everything together and also clean up the engine bay because we can get rid of all the stock hard lines. Something else we're gonna be doing and something we have done in the past is use EBC's stainless steel brake lines, and we love these because they have identical routing to the o-e lines, which means it's a true direct fit to our car. They have a lifetime guarantee against any faults or failures, and before we get these every one is pressure tested. So we know we're getting a high quality product. Once we can get the car back up in the air we can get rid of all the old stuff and install all these new, nice parts. [ Jeremy ] Before this thing goes up in the air we're gonna take care of a couple of things underneath the hood to get this thing fired up. One of those being the radiator. We got this one from Chase Bays and it's designed to fit into an E-46 chassis with an LS swap or really any engine swap. It's got these two tabs on it that fit in between the frame rails, and we already went ahead and welded on some mounts so we'll go ahead and get this installed, and then at the end we'll put on the core support. [ Music ]

The way that this all falls together the radiator sits right behind the core support. We even welded on a couple of tabs up here to hold it in place. This should work out perfectly and we're one step closer to getting this thing fired up. [ Music ] [ drill humming ] [ Jeremy ] We do have a couple more things to tackle on the BMW here but it requires getting it up in the air. The oil pan itself is a tight fit in this chassis and it makes it really hard to run a stock oil filter in the stock location. So we've got an oil filter relocation kit. It's all pretty basic. Just a couple of lines and a little filter adapter that kinda just moves everything out of the way. Keeps it away from the heat as well. So we're gonna go ahead and get this installed and check one more thing off the list. Now we did end up making this little black bracket piece here and we're actually just using the stock bolt holes where the a/c compressor bracket bolted to. Just seems like a really good spot to put the filter. Plus when we go to drain it it'll be able to fall right on the ground in our drip pan and we won't make a huge mess. Now there is a specific way to plumb this in. The pan has it labeled "in" and "out" and so does the adapter here. So we'll get our lines on and tightened up. [ Music ]

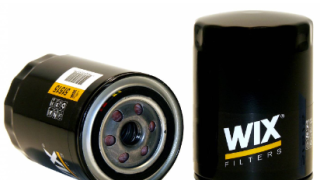
Now to protect our investment that we have in all our nice parts in our LC-9 we're gonna be running a Wix filter. Wix not only makes oil filters, they make air filters and fuel filters for your cars, trucks, and commercial vehicles. The media that's inside of here is 99 percent efficient at trapping dirt in your oils. There's a silicone anti drain back valve that prevents dry starts, and its high capacity is ideal for dirt and dusty conditions like this thing's gonna see when we're out on the track. That buttons that up. Now we'll move on to the next. Coming up, our BMW is almost ready to run. [ Jimmy ] We have a couple more things to check off the list and then we'll be ready to fire it up.

[ Jimmy ] What's up everybody! While the car has been in the air I've started working on the exhaust. What we have so far is three inch from the collectors into a "Y" and then we're just running three inch out the back. All pretty simple. Just mig welded stuff that we had laying around the shop. Now that we're in the back it's time to put the muffler in, and we've got from Black Widow a 10-inch Widow Maker that should give us a nice sound once this thing fires up. I've got a couple more tubes to put in and then this exhaust system will be finished. [ welder crackling ] [ Music ] [ welder crackling ] [ Music ] [ welder crackling ] [ Jimmy ] Alright, we got the muffler in here. That's one more task done. Just a few more things until we can fire it up. [ Jeremy ] With the bottom of the car pretty much buttoned up it's time to check a couple more things off the list and one of those is the battery. Now we're gonna be installing an Optima Orangetop lithium ion battery. Same one that we ran in the Camaro. We're gonna put it back here in the stock location. [ Music ] [ Jimmy ] One of the last steps before we fire up our engine is getting some oil in it. Because we tore this thing down quite a ways and some of the parts were stripped completely of oil we are going to prime it with our little tank sprayer. For the oil itself we're gonna go with Schaeffer's Supreme 9,000. [ Music ]

This is a synthetic 5-W-30 multi-grade gasoline engine oil that uses advanced performance additives and a viscosity index improver. This unique blend creates a longer lasting oil that withstands a higher heat range than conventional oil. This is super important for our engine since it will be used constantly at higher r-p-m operation and see higher temperatures than a standard street engine. [ Music ]

[ Music ] Schaeffer's also uses friction modifiers Micron Moly and Penetro to plate metal surfaces creating a slippery shield that prevents metal to metal contact reducing friction and wear. Using Schaeffer's oil we can expect durability and a long service life for our engine. [ Jeremy ] Now inside the car we did do a very basic wiring job just so we can see if we can get the LC-9 fired up. We are running a p-d-m from Switch Pros. Kinda the same one we've run before, and the way that we wired this up we've just gotta turn the toggle switch on here and we're gonna use the p-d-m itself to turn on the e-c-u. Then we also have a digital oil pressure gauge so we can watch the vital signs along with our hand held from FiTech. Once Jimmy gives me the green light we'll go ahead and push some buttons and see if this thing will fire up. [ Jimmy ] Alright, go ahead. [ Jeremy ] I will turn the e-c-u on. Do we have fuel pressure? [ Jimmy ] 60 pounds! [ Jeremy ] Let's see if it runs. [ engine starts ] [ Jeremy ] Got oil pressure. [ engine idling ] [ Jeremy ] I think we got it! Runs pretty good! Shut her down. [ Jimmy ] Well that's a huge task to check off the list. We still have a ton of stuff to do on the inside and finish out the interior. We'll save that for another day. See you guys next time. [ Jeremy ] Wiring worked out really good even though it's real basic. [ Jimmy ] We can tear it all back out now and finish whatever else we need to do.
Show Full Transcript