Video Transcript
(Jeremy)>> You're watching Powernation!
(Jeremy)>> On this episode of Carcass we take on a new project with the focus of getting in touch with mother nature. We take a bone stock Toyota 4Runner and start turning it into a weekend adventure machine.
(Jimmy)>> We'll tackle the factory suspension, upgrading it to handle some rougher terrain. Then help it stop with an improved brake and rotor combination. Plus add some bigger wheels and tires to help us get over the rocks. [ Music ] [ engine revving ] [ Music ]
(Jeremy)>> Hey guys, what's up, Jeremy and Jimmy here from Carcass. We're not in the studio today. We are out enjoying mother nature, and we got a cool new project we want to tell you about.
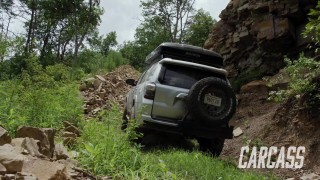
(Jimmy)>> So we've got our 2016 Toyota 4Runner that we're gonna be building in the overlanding style. You see these things everywhere. I see them on my drive to work, if I'm around town, whatever the case may be. I'd say actually the minority of them are bone stock. Most of them that I see they've been upgraded in some fashion. Everyone's kinda got their own twist on it. Whether it be lift, wheels, tires. You see rooftop tents, stuff like that, and we are gonna be doing overlanding. So, there's a good chance there's gonna be stuff going on the roof of this thing. So, we'll kinda see what we get into.
(Jeremy)>> You know there's really three different styles. You've got trucks, vans, and your s-u-vs. We chose to go with the s-u-v platform solely because you can pack so much stuff in the back to keep it out of the elements, and you've got all of this space on the roof that you can use as well. [ Music ] Really the overlanding thing has really come about in the past five to seven years, and there's so many different ways to get into it. You can go simple. These guys that have these Subarus, not that there's anything wrong with Subarus, but that platform of a Subaru is more simple as far as what you can bring with you and where it can take you. You can get into four-wheel drive stuff that's a little more intense where you can add a good lift, wheels and tires, and just have more of a payload, pack more stuff on top. Or you can get into these big vans where they sleep six, eight people, and you're bringing your mountain bikes with you, and you're pulling a trailer, and you're going off grid for a couple days at a time.
(Jimmy)>> Some people just live out of their van.
(Jeremy)>> Yeah exactly. So, it can get pretty intensive, but for what we're gonna do we're gonna keep it nice and simple. We're not going giant. We're not doing this huge lift. We're going tasteful is the way to put that.
(Jimmy)>> Fair enough.
(Jeremy)>> So along with aggressive tires comes a little bit of a lift. So, we'll also be putting a lift in it. Something to give the suspension a little more movement. We're gonna fabricate our own bumpers, front and rear. We're also gonna be putting some sliders on it just to save the bottom of the pinch weld area there. We'll put a winch on it for safety just in case we get into a sticky situation, and then at the end we'll do some lights. We'll put a nice roof rack on it, and on the camping side of things we'll throw on a rooftop tent.
(Jimmy)>> Call it a day.
(Jeremy)>> So I think we've got a great start to a good project, and we should be able to have a little bit of fun with this and do this some justice.
(Jimmy)>> I think so. I think we've got a nice plan, and we'll kinda see what happens.
(Jeremy)>> That turtle leaf that we just almost ran over, did he find his way down?
(Jimmy)>> I guess. I want to take a picture of him. I'm sure we'll see another one.
(Jeremy)>> He's a big-un too, good size. [ Music ] We install our new suspension to help improve articulation in the rocks and give us a comfortable ride for a daily drive.
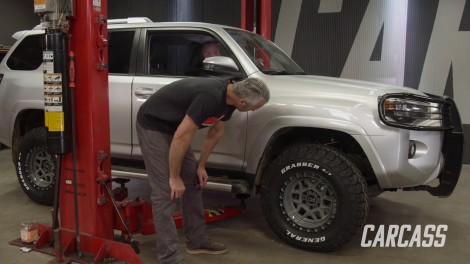
(Jimmy)>> We've got our 4Runner back in the shop, and we're about ready to get this thing up on the lift to blow the entire thing apart, and like we said out on the trail, we have quite a list of stuff that we want to throw on this thing.
(Jeremy)>> So here's the plan for the 4Runner. To give us a little more clearance for our bigger tires we'll be swapping the stock suspension for a lift kit, including rear coil springs and front coil over shocks. To help us stop we'll be adding better brakes and we'll round that off with some custom wheels and all terrain tires. From there we'll modify and build some custom bumpers for the front and the rear, and we'll add some rock sliders and a winch. To make this a true overlander we'll ditch the stock roof rack and add a full roof rack with some lights. We'll finish the build off with a rooftop tent.
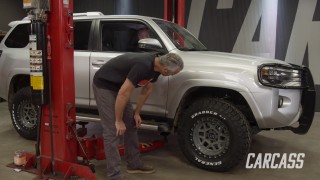
(Jimmy)>> Before we start tearing into our 4Runner we wanted to show you guys one of the reasons why we're putting a lift on. As you can see, we have a little bit bigger wheel and tire on it now, and with that comes some issues, especially on 4Runners. As you can see, the tire has a little bit of rubbing on the inner fender here, but we did size these to make sure we didn't have to do too much if anything at all to modify the inner fender. However if you were going to be running, let's say, a 33 inch tall tire or even bigger than that you would need to do something, but a lift will just give us a little bit of extra clearance to make sure we don't have any issues, and Jeremy's gonna tell you all about the suspension and lift kit we're putting on ours.
(Jeremy)>> Now for our suspension we went to Summit Racing and picked up an ICON Vehicle Dynamics Kit. Now this will work great in our Toyota, and it's gonna help just raise everything off the ground and give us a little more clearance for the tires and underneath the vehicle. In the back we've got a set of their coil springs, and they also sent us an extended set of shocks, but in the front it's a little more intricate. What these are is two and a half inch bodied, fully adjustable coil-over, and what that's gonna do is just give us more wheel travel. To go along with wheel travel, we also have their upper control arms with this delta joint. This is kinda like a ball joint, but it helps everything just move a little bit better. When we're out on the trails it lets the suspension just kinda move freely. We have to get all of this up underneath the 4Runner. Jimmy's gonna get that thing up in the air and we're gonna blast this thing apart. [ mechanical humming ] [ impact driver humming ]
(Jimmy)>> Before I start taking apart the suspension I want to get a few things out of the way, including the wheel and tire and the skid plate. [ Music ] Before I start taking stuff apart, I'm gonna go around to all four corners and spray it down with some Seafoam Deep Creep penetrating lubricant to make disassembly as easy as possible. Upon contact Deep Creep immediately begins to creep deeply into otherwise unreachable places. It can help free up rusted and sticky parts but not only that it can stop squeaks, displace moisture, protect, and clean metal parts. And you can even saturate metal engine parts with Deep Creep as it will remove carbon deposits. [ drill humming ]
(Jimmy)>> After letting everything soak for a few minutes I'll start taking the suspension apart, beginning with the tie rod. [ banging metal ] [ Music ]
(Jimmy)>> Get this guy disconnected and out of the way. [ Music ] Up next, we'll disconnect the sway bar, but we don't have to take it completely out. [ metal clanging on the floor ] [ Music ] [ metal clanging on the floor ] [ Music ] [ banging metal ]
(Jimmy)>> So once I get this unhooked here this knuckle's gonna want to kinda swing away. So, I have a little piece of welding rod hooked up here so it stays in place just in case it were to fall over. That way it doesn't stress out the brake line. We'll lower the 4Runner down until the suspension slightly compresses so we can remove the bolts that hold the original strut. [ Music ] [ drill humming ] [ Music ]
[ Music ]
(Jimmy)>> There we go! After removing the strut we'll take out the upper control arm. [ Music ] Jeez, that's a bolt! [ Music ] With the old control arm out we'll install our new coil-over setup. [ Music ] [ ratchet clicking ] [ Music ]
(Jimmy)>> I'm ready to put the upper control arm in, and this came with brand new bushings. So, make sure that you grease these before you install them, and also don't forget your washers. [ Music ] [ metal clanging ] [ Music ]
[ Music ]
(Jimmy)>> Once I get this tie rod all buttoned up I'll move on to the other side, finish it, and then the last thing is to install these sway bar relocation brackets. Otherwise, once we finish this we'll move on to the back. [ ratchet clicking ]
(Jimmy)>> We tackle the rear suspension next as we turn our 4Runner into a weekend expedition rig.
(Jeremy)>> Alright guys, well Jimmy has the front suspension all buttoned up underneath the 4Runner, and now it's time for us to focus our attentions on the rear and getting this thing sitting a little bit taller. Now the back's a little bit different because we have a solid rear axle. So, we're gonna replace all the parts at the same time. We've got to get in here and replace these big coil springs. We're also gonna replace the shocks, and that's a good place to start. [ Music ] Get this shock off of here, and then we'll move on to the sway bar links. [ ratchet clicking ]
(Jeremy)>> There it goes. Once we get the passenger side done we'll go over and do the same thing to the other side. [ drill humming ]
(Jeremy)>> I'll remove the bolt that holds on the track bar. This will let the axle swing out of the way, allowing me to easily remove the coil springs. [ Music ] Now to achieve the lift in the back of our 4Runner we're gonna be running a set of taller coil springs. Now not only are these springs a little bit taller, they're also rated to give us a two-inch lift. Now you guys can get springs that'll give you about a three-inch lift, but we are gonna put stuff on top of our 4Runner and we want to be able to access that. So, we don't want them too tall. Now I do have to use the stock isolators from the old springs. So, we'll go ahead and switch these out, get back underneath the truck, get these installed. [ Music ] To get these installed it takes a little finesse. [ Music ] This is the tricky part, but there we go. Get it in there! Alright, now we can go on to the shocks. [ Music ] Alright, so one thing to do here is before you can get the shock and the isolators to compress we did put it on the bottom of the axle, and we used a screw jack to push up on it. That compressed the isolators enough to get that big washer and the big nut started. So, we'll just tighten these down and we'll keep moving on. [ wrench clicking ] [ drill humming ] [ Music ]
(Jeremy)>> Lastly, I'll reinstall the sway bar and the track bar. [ drill humming ]
(Jeremy)>> Alright, that wraps up the rear suspension, and all in all this is a pretty simple kit to install. So, from here we've got a couple more things to do before we get our 4Runner back on the ground. Coming up, we finish our overlanding Toyota with upgraded brakes and rotors. Plus add some beefier wheels and tires to get us over the obstacles.
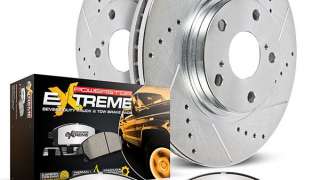
(Jeremy)>> Alright guys, we have the suspension installed on the 4Runner and we really want to get this thing sitting on the ground to get a really good look at what it truly looks like, but before we get to that point we've got to mount up some wheels and tires, and we're going to be doing a brake upgrade. We went to Powerstop and picked up their Z-36 truck and tow brake kit. That kit comes with rotors for the front and rotors for the rear, and it also comes with brake pads. Before I can get this stuff installed, I obviously got to take the rest of the truck apart. [ Music ] [ ratchet clicking ] [ Music ]
(Jeremy)>> Alright guys, one thing to note here. When you take your caliper off do not let it hang by the brake hose. You can actually damage the hose, and for us in the 4Runner we actually have this big, long wire here. It's either for the a-b-s or a speed sensor. We don't want to let that hang and actually damage that or tear that apart. So, a little tip here. You guys can go raid your wife's closet, go to your closet, or your hall closet, kids closet, whatever, and you can use one of these metal hangers. Plus, side to that is actually have a hook on one side so you can bend that around like your mounting tab. We're actually gonna drape the other side, the hanger, the strut mount here. It's gonna take all that pressure off of the line in the wire here. So, then we can get to the rotor and have both hands free. Let me get this off of here and get the other brakes on it. It's a little dirty. It's a good idea to prep the hub surface before we start installation. [ Music ] Then we'll spray everything down, clean it up, get all of the brake dust off the backing plate and the hub here. We'll clean the caliper a little bit later though. That should work. [ Music ] Alright so the rotor that came in the kit has all of these holes and this big groove cut in it. That means it's drilled and slotted, and what that does is it helps keep brake temps down under extreme driving conditions. So, if you guys are towing a big trailer, or if you have big, oversized tires like we have, this is gonna help keep the brake temps down. These are also zinc coated. So, they won't rust. From here I've got to get the caliper back on this thing, and we're gonna go ahead and replace the brake pads as well. [ Music ] [ ratchet clicking ]
(Jeremy)>> Alright, so it's a very good idea when you're doing any type of brake work to torque everything down to its specs. These caliper bolts are 137-foot pounds. So, we'll go ahead and torque these guys down as well. [ Music ] So, on the brake pads now one of the unique things about the 4Runners, or the Toyota side of things, is you can actually service the brake pads without taking the caliper off. Now we had to take the caliper off to put the rotor on it, but what you can do here to get the pads out is you just pull out these two little pins, and you can actually pull your brake pads right at you. So, we'll get these out of here, get the new ones installed, and we'll move on to the rear. As far as the pads go these are carbon fiber ceramic coated pads. This is a low dust formula. So, you guys won't get your new, shiny wheels all dirty. They're thermally scorched. So, they have a fast break in time, and they come with all the hardware you need to install them. So, you've got these two pins that go on the top and the bottom, stainless steel little keeper, a retainer down here on the very bottom as well.
And lastly, you'll have this little stainless steel keeper on the back side to keep the two pins in. Alright, with that clip in that buttons up the front. We still do have the back to do, but Jimmy's out mounting up some wheels and tires so we can get this thing on the ground and see what it looks like.
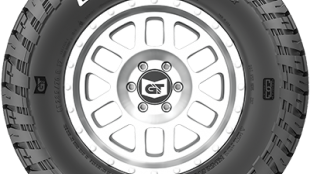
(Jimmy)>> For tires we're going with the General Tire Grabber ATX in a 285/70-17. These are an aggressive all season, all terrain tire with a good balance of off-road capability and on road performance for light trucks and s-u-vs. It features a long lasting tread wear with low road noise, which is huge for us because we still want to drive it on the highway. It also features the three peak mountain snowflake symbol for severe winter conditions and is pinned for winter studs. [ Music ] We'll mount these on a set of Black Rhino wheels that we got from Summit Racing. [ Music ] [ compressed air hissing ] [ Music ] Alright, got the tires mounted. Let's see what it looks like.
(Jeremy)>> I'll go grab the other ones and we'll get them all up there.
(Jimmy)>> Alright! [ Music ] [ drill humming ]
(Jeremy)>> Alright, you got that one on?
(Jimmy)>> Yep!
(Jeremy)>> Let's get this thing down on the ground. We'll check tire clearance in the front and see what it looks like. [ Music ] Alright, fire this thing up and let's see if it touches. [ engine starting ] [ tires squeaking ]
(Jeremy)>> You know they rub just a tiny bit on the mud flap here, and the mud flap itself is loose. So, it just kinda touches. Not that big of a deal.
(Jimmy)>> Just don't do anything with it.
(Jeremy)>> I don't thing we really need to do much about it. I am gonna torque these down, and then we should probably send it out and have it aligned.
(Jimmy)>> I'll put in a call.
(Jeremy)>> Coming down! If you like what you saw in this episode make sure you check out Powernation TV, and we'll see you next time.
Show Full Transcript
(Jeremy)>> On this episode of Carcass we take on a new project with the focus of getting in touch with mother nature. We take a bone stock Toyota 4Runner and start turning it into a weekend adventure machine.
(Jimmy)>> We'll tackle the factory suspension, upgrading it to handle some rougher terrain. Then help it stop with an improved brake and rotor combination. Plus add some bigger wheels and tires to help us get over the rocks. [ Music ] [ engine revving ] [ Music ]
(Jeremy)>> Hey guys, what's up, Jeremy and Jimmy here from Carcass. We're not in the studio today. We are out enjoying mother nature, and we got a cool new project we want to tell you about.
(Jimmy)>> So we've got our 2016 Toyota 4Runner that we're gonna be building in the overlanding style. You see these things everywhere. I see them on my drive to work, if I'm around town, whatever the case may be. I'd say actually the minority of them are bone stock. Most of them that I see they've been upgraded in some fashion. Everyone's kinda got their own twist on it. Whether it be lift, wheels, tires. You see rooftop tents, stuff like that, and we are gonna be doing overlanding. So, there's a good chance there's gonna be stuff going on the roof of this thing. So, we'll kinda see what we get into.
(Jeremy)>> You know there's really three different styles. You've got trucks, vans, and your s-u-vs. We chose to go with the s-u-v platform solely because you can pack so much stuff in the back to keep it out of the elements, and you've got all of this space on the roof that you can use as well. [ Music ] Really the overlanding thing has really come about in the past five to seven years, and there's so many different ways to get into it. You can go simple. These guys that have these Subarus, not that there's anything wrong with Subarus, but that platform of a Subaru is more simple as far as what you can bring with you and where it can take you. You can get into four-wheel drive stuff that's a little more intense where you can add a good lift, wheels and tires, and just have more of a payload, pack more stuff on top. Or you can get into these big vans where they sleep six, eight people, and you're bringing your mountain bikes with you, and you're pulling a trailer, and you're going off grid for a couple days at a time.
(Jimmy)>> Some people just live out of their van.
(Jeremy)>> Yeah exactly. So, it can get pretty intensive, but for what we're gonna do we're gonna keep it nice and simple. We're not going giant. We're not doing this huge lift. We're going tasteful is the way to put that.
(Jimmy)>> Fair enough.
(Jeremy)>> So along with aggressive tires comes a little bit of a lift. So, we'll also be putting a lift in it. Something to give the suspension a little more movement. We're gonna fabricate our own bumpers, front and rear. We're also gonna be putting some sliders on it just to save the bottom of the pinch weld area there. We'll put a winch on it for safety just in case we get into a sticky situation, and then at the end we'll do some lights. We'll put a nice roof rack on it, and on the camping side of things we'll throw on a rooftop tent.
(Jimmy)>> Call it a day.
(Jeremy)>> So I think we've got a great start to a good project, and we should be able to have a little bit of fun with this and do this some justice.
(Jimmy)>> I think so. I think we've got a nice plan, and we'll kinda see what happens.
(Jeremy)>> That turtle leaf that we just almost ran over, did he find his way down?
(Jimmy)>> I guess. I want to take a picture of him. I'm sure we'll see another one.
(Jeremy)>> He's a big-un too, good size. [ Music ] We install our new suspension to help improve articulation in the rocks and give us a comfortable ride for a daily drive.
(Jimmy)>> We've got our 4Runner back in the shop, and we're about ready to get this thing up on the lift to blow the entire thing apart, and like we said out on the trail, we have quite a list of stuff that we want to throw on this thing.
(Jeremy)>> So here's the plan for the 4Runner. To give us a little more clearance for our bigger tires we'll be swapping the stock suspension for a lift kit, including rear coil springs and front coil over shocks. To help us stop we'll be adding better brakes and we'll round that off with some custom wheels and all terrain tires. From there we'll modify and build some custom bumpers for the front and the rear, and we'll add some rock sliders and a winch. To make this a true overlander we'll ditch the stock roof rack and add a full roof rack with some lights. We'll finish the build off with a rooftop tent.
(Jimmy)>> Before we start tearing into our 4Runner we wanted to show you guys one of the reasons why we're putting a lift on. As you can see, we have a little bit bigger wheel and tire on it now, and with that comes some issues, especially on 4Runners. As you can see, the tire has a little bit of rubbing on the inner fender here, but we did size these to make sure we didn't have to do too much if anything at all to modify the inner fender. However if you were going to be running, let's say, a 33 inch tall tire or even bigger than that you would need to do something, but a lift will just give us a little bit of extra clearance to make sure we don't have any issues, and Jeremy's gonna tell you all about the suspension and lift kit we're putting on ours.
(Jeremy)>> Now for our suspension we went to Summit Racing and picked up an ICON Vehicle Dynamics Kit. Now this will work great in our Toyota, and it's gonna help just raise everything off the ground and give us a little more clearance for the tires and underneath the vehicle. In the back we've got a set of their coil springs, and they also sent us an extended set of shocks, but in the front it's a little more intricate. What these are is two and a half inch bodied, fully adjustable coil-over, and what that's gonna do is just give us more wheel travel. To go along with wheel travel, we also have their upper control arms with this delta joint. This is kinda like a ball joint, but it helps everything just move a little bit better. When we're out on the trails it lets the suspension just kinda move freely. We have to get all of this up underneath the 4Runner. Jimmy's gonna get that thing up in the air and we're gonna blast this thing apart. [ mechanical humming ] [ impact driver humming ]
(Jimmy)>> Before I start taking apart the suspension I want to get a few things out of the way, including the wheel and tire and the skid plate. [ Music ] Before I start taking stuff apart, I'm gonna go around to all four corners and spray it down with some Seafoam Deep Creep penetrating lubricant to make disassembly as easy as possible. Upon contact Deep Creep immediately begins to creep deeply into otherwise unreachable places. It can help free up rusted and sticky parts but not only that it can stop squeaks, displace moisture, protect, and clean metal parts. And you can even saturate metal engine parts with Deep Creep as it will remove carbon deposits. [ drill humming ]
(Jimmy)>> After letting everything soak for a few minutes I'll start taking the suspension apart, beginning with the tie rod. [ banging metal ] [ Music ]
(Jimmy)>> Get this guy disconnected and out of the way. [ Music ] Up next, we'll disconnect the sway bar, but we don't have to take it completely out. [ metal clanging on the floor ] [ Music ] [ metal clanging on the floor ] [ Music ] [ banging metal ]
(Jimmy)>> So once I get this unhooked here this knuckle's gonna want to kinda swing away. So, I have a little piece of welding rod hooked up here so it stays in place just in case it were to fall over. That way it doesn't stress out the brake line. We'll lower the 4Runner down until the suspension slightly compresses so we can remove the bolts that hold the original strut. [ Music ] [ drill humming ] [ Music ]
[ Music ]
(Jimmy)>> There we go! After removing the strut we'll take out the upper control arm. [ Music ] Jeez, that's a bolt! [ Music ] With the old control arm out we'll install our new coil-over setup. [ Music ] [ ratchet clicking ] [ Music ]
(Jimmy)>> I'm ready to put the upper control arm in, and this came with brand new bushings. So, make sure that you grease these before you install them, and also don't forget your washers. [ Music ] [ metal clanging ] [ Music ]
[ Music ]
(Jimmy)>> Once I get this tie rod all buttoned up I'll move on to the other side, finish it, and then the last thing is to install these sway bar relocation brackets. Otherwise, once we finish this we'll move on to the back. [ ratchet clicking ]
(Jimmy)>> We tackle the rear suspension next as we turn our 4Runner into a weekend expedition rig.
(Jeremy)>> Alright guys, well Jimmy has the front suspension all buttoned up underneath the 4Runner, and now it's time for us to focus our attentions on the rear and getting this thing sitting a little bit taller. Now the back's a little bit different because we have a solid rear axle. So, we're gonna replace all the parts at the same time. We've got to get in here and replace these big coil springs. We're also gonna replace the shocks, and that's a good place to start. [ Music ] Get this shock off of here, and then we'll move on to the sway bar links. [ ratchet clicking ]
(Jeremy)>> There it goes. Once we get the passenger side done we'll go over and do the same thing to the other side. [ drill humming ]
(Jeremy)>> I'll remove the bolt that holds on the track bar. This will let the axle swing out of the way, allowing me to easily remove the coil springs. [ Music ] Now to achieve the lift in the back of our 4Runner we're gonna be running a set of taller coil springs. Now not only are these springs a little bit taller, they're also rated to give us a two-inch lift. Now you guys can get springs that'll give you about a three-inch lift, but we are gonna put stuff on top of our 4Runner and we want to be able to access that. So, we don't want them too tall. Now I do have to use the stock isolators from the old springs. So, we'll go ahead and switch these out, get back underneath the truck, get these installed. [ Music ] To get these installed it takes a little finesse. [ Music ] This is the tricky part, but there we go. Get it in there! Alright, now we can go on to the shocks. [ Music ] Alright, so one thing to do here is before you can get the shock and the isolators to compress we did put it on the bottom of the axle, and we used a screw jack to push up on it. That compressed the isolators enough to get that big washer and the big nut started. So, we'll just tighten these down and we'll keep moving on. [ wrench clicking ] [ drill humming ] [ Music ]
(Jeremy)>> Lastly, I'll reinstall the sway bar and the track bar. [ drill humming ]
(Jeremy)>> Alright, that wraps up the rear suspension, and all in all this is a pretty simple kit to install. So, from here we've got a couple more things to do before we get our 4Runner back on the ground. Coming up, we finish our overlanding Toyota with upgraded brakes and rotors. Plus add some beefier wheels and tires to get us over the obstacles.
(Jeremy)>> Alright guys, we have the suspension installed on the 4Runner and we really want to get this thing sitting on the ground to get a really good look at what it truly looks like, but before we get to that point we've got to mount up some wheels and tires, and we're going to be doing a brake upgrade. We went to Powerstop and picked up their Z-36 truck and tow brake kit. That kit comes with rotors for the front and rotors for the rear, and it also comes with brake pads. Before I can get this stuff installed, I obviously got to take the rest of the truck apart. [ Music ] [ ratchet clicking ] [ Music ]
(Jeremy)>> Alright guys, one thing to note here. When you take your caliper off do not let it hang by the brake hose. You can actually damage the hose, and for us in the 4Runner we actually have this big, long wire here. It's either for the a-b-s or a speed sensor. We don't want to let that hang and actually damage that or tear that apart. So, a little tip here. You guys can go raid your wife's closet, go to your closet, or your hall closet, kids closet, whatever, and you can use one of these metal hangers. Plus, side to that is actually have a hook on one side so you can bend that around like your mounting tab. We're actually gonna drape the other side, the hanger, the strut mount here. It's gonna take all that pressure off of the line in the wire here. So, then we can get to the rotor and have both hands free. Let me get this off of here and get the other brakes on it. It's a little dirty. It's a good idea to prep the hub surface before we start installation. [ Music ] Then we'll spray everything down, clean it up, get all of the brake dust off the backing plate and the hub here. We'll clean the caliper a little bit later though. That should work. [ Music ] Alright so the rotor that came in the kit has all of these holes and this big groove cut in it. That means it's drilled and slotted, and what that does is it helps keep brake temps down under extreme driving conditions. So, if you guys are towing a big trailer, or if you have big, oversized tires like we have, this is gonna help keep the brake temps down. These are also zinc coated. So, they won't rust. From here I've got to get the caliper back on this thing, and we're gonna go ahead and replace the brake pads as well. [ Music ] [ ratchet clicking ]
(Jeremy)>> Alright, so it's a very good idea when you're doing any type of brake work to torque everything down to its specs. These caliper bolts are 137-foot pounds. So, we'll go ahead and torque these guys down as well. [ Music ] So, on the brake pads now one of the unique things about the 4Runners, or the Toyota side of things, is you can actually service the brake pads without taking the caliper off. Now we had to take the caliper off to put the rotor on it, but what you can do here to get the pads out is you just pull out these two little pins, and you can actually pull your brake pads right at you. So, we'll get these out of here, get the new ones installed, and we'll move on to the rear. As far as the pads go these are carbon fiber ceramic coated pads. This is a low dust formula. So, you guys won't get your new, shiny wheels all dirty. They're thermally scorched. So, they have a fast break in time, and they come with all the hardware you need to install them. So, you've got these two pins that go on the top and the bottom, stainless steel little keeper, a retainer down here on the very bottom as well.
And lastly, you'll have this little stainless steel keeper on the back side to keep the two pins in. Alright, with that clip in that buttons up the front. We still do have the back to do, but Jimmy's out mounting up some wheels and tires so we can get this thing on the ground and see what it looks like.
(Jimmy)>> For tires we're going with the General Tire Grabber ATX in a 285/70-17. These are an aggressive all season, all terrain tire with a good balance of off-road capability and on road performance for light trucks and s-u-vs. It features a long lasting tread wear with low road noise, which is huge for us because we still want to drive it on the highway. It also features the three peak mountain snowflake symbol for severe winter conditions and is pinned for winter studs. [ Music ] We'll mount these on a set of Black Rhino wheels that we got from Summit Racing. [ Music ] [ compressed air hissing ] [ Music ] Alright, got the tires mounted. Let's see what it looks like.
(Jeremy)>> I'll go grab the other ones and we'll get them all up there.
(Jimmy)>> Alright! [ Music ] [ drill humming ]
(Jeremy)>> Alright, you got that one on?
(Jimmy)>> Yep!
(Jeremy)>> Let's get this thing down on the ground. We'll check tire clearance in the front and see what it looks like. [ Music ] Alright, fire this thing up and let's see if it touches. [ engine starting ] [ tires squeaking ]
(Jeremy)>> You know they rub just a tiny bit on the mud flap here, and the mud flap itself is loose. So, it just kinda touches. Not that big of a deal.
(Jimmy)>> Just don't do anything with it.
(Jeremy)>> I don't thing we really need to do much about it. I am gonna torque these down, and then we should probably send it out and have it aligned.
(Jimmy)>> I'll put in a call.
(Jeremy)>> Coming down! If you like what you saw in this episode make sure you check out Powernation TV, and we'll see you next time.