Carcass Featured Projects
Carcass Builds
Want more content like this?
Join the PowerNation Email NewsletterVideo Transcript
(Jimmy)>> You're watching Powernation!
(Jimmy)>> It's full on fabrication today on Carcass. We'll cut out the quarter panels on our '72 Road Course Camaro to make room for the new carbon fiber panels. We'll install a few key components for the fuel system. Plus show you how we attach our new carbon fiber trunk lid. [ Music ] [ engine revving ] [ Music ]
(Jeremy)>> Hey everybody, welcome to Carcass. This is our 1972 Camaro that Jimmy and I are turning into a road course race car. We've done a bunch of work on the car already, and most recently we've welded the roof skin on this so it looks like a Camaro again, that's gonna take us down our path we're on today. We're gonna start working on some body mods.
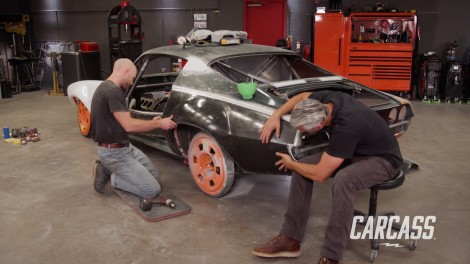
(Jimmy)>> So today we're gonna be focusing more on the rear of the car. We have some carbon fiber quarter panels that we've made already, and I've mocked one up on the passenger side. So I'm gonna show you how I did that on this side here. We also want to cut our poly carbonate sheet to replace our rear glass, and we'll show you how we mount that. We also have the carbon fiber deck lid, and we want to mount that and still make it functional so it hinges like the stock one would. For this right here I'm just gonna start with some tape so we can figure out a cut line. Before we can get the new carbon fiber quarter panels on here we want to get rid of the old steel. I'm using the tape as a guide to figure out where I'm gonna cut, and I'm making sure to keep a half inch to an inch of sheet metal that I can rivet the quarter panel to. [ Music ]
[ Music ] [ punch tapping ] [ drill humming }
(Jimmy)>> Alright, so we've got this thing taped up. I've got a hole drilled, and I'll explain why I'm doing that. When we go to cut this it's best not to have sharp corners up here just because it leaves the metal more prone to cracking especially with this thing vibrating so much. We just want to make sure these are nice, round edges so it's less of a stress point, and then these lines may change depending on how we fit up our carbon fiber quarter. So these are the end all, be all if want to grind and trim some stuff to move the lines back a little bit further. We can do that too. [ Music ] [ drill humming ] [ saw buzzing ] [ Music ] [ saw buzzing ] [ Music ]
(Jimmy)>> Okay, so I have the quarter panel mostly cut out, but to fully release it I actually need to get to the corner of the stock wheel lip. So everywhere along here I need to grind so that the sheet metal releases, and to get to it I need to get all this foam back off, or at least some of it, so I can get a grinder in there. So I'm just gonna take my screwdriver, shove it in here, hit it with a hammer, and just try to crack it off. [ hammer tapping ]
(Jimmy)>> The reason why the foam was on here in the first place is because it was used to shape our fender flares, which gave us the plug to mold the carbon fiber quarter panels. [ Music ] [ grinder buzzing ] [ Music ]
[ Music ] [ metal clanging ] [ Music ]
(Jimmy)>> With the quarter removed I'll start removing the paint on the edges so I can a get a really clear view of what I'm working with. [ grinder buzzing ] [ Music ] [ sander buzzing ]
(Jimmy)>> I've got this rear quarter panel cut out now and I've got this trimmed out, got these sharp edges taken care of. Couple things here about this. I'm probably gonna end up coming back and cutting this way down. Possibly cutting this entire lower section off and bracing it from the chassis to our new quarter. The other thing too is with this inner fender lip here, with our wide tires, if I left this it would end up cutting our tires. So at some point we're gonna come back and cut this entire section out. We've got our carbon fiber quarter about 90 percent trimmed, which is good enough to fit this up right now. We're gonna put some kleekos on it. So I have to drill some holes. [ Music ]
(Jeremy)>> What do you got for a gap, good?
(Jimmy)>> I'm good here. [ drill humming ] [ Music ] [ drill humming ] [ Music ]
(Jeremy)>> These things are so handy.
(Jimmy)>> I love them! [ Music ] [ drill humming ] [ Music ] [ drill humming ]
(Jimmy)>> So that's pretty much it to get this quarter installed. Still got a little bit of trimming to do, but as you can see this thing's really rigid up against the car, and I think that's gonna work out just fine.
(Jeremy)>> Up next, we'll show you a few tips on what to look for when installing the fuel system for your race car.
(Jeremy)>> Jimmy's go the carbon corners installed on the Camaro, and we did strip off all of the paint to give us a nice, clean surface to work with. Now since we're in the back we're gonna continue on with our fuel system. We already have a hole cut in the trunk for our Radium fuel cell. Now we just have to work on getting the fuel into it. Now Radium also sent us what we need to hook up a fuel neck to the fuel cell. They sent us this little 45. This goes on top of the cell itself. They also sent us this really cool sleek fuel neck. Now two things to when you guys are looking for a location to mount the fuel neck. One is the drop, or the angle of the tube as it goes into the fuel cell, and the second one is location. We're gonna mount ours up here on the quarter, and on the back side of this filler neck is this little foam pad. Now the best part about this pad is you guys can mount this on a little bit of a curve, which works great because our quarter has a little bit of a curve here. So this should seal everything up. I've got to take a couple of measurements. We're gonna drill some holes, and then we're gonna work on putting the fuel tube in itself. [ Music ] [ drill humming ] [ Music ]
(Jeremy)>> So before we put the neck in here we're gonna go ahead and use this deburring tool and take the sharp edge off of the ridge here. Then we'll go ahead and set this in place. Try to keep the handle here straight with the car. We'll mark these out and drill these out as well. [ Music ]
[ drill humming ]
(Jeremy)>> So we can go ahead and put the filler neck in. We will put that little piece of foam on there and drop in a couple of the screws. And then there's this retainer ring that goes underneath. Then we'll tighten everything down. [ Music ] Now let's go to the filler tube. So up underneath here we're gonna have to add this little 75 degree bend here. We got this one from Summit Racing. It's inch and a half o-d. So it works with the rest of what Radium sent us. This will get us in the direction of the fuel cell. So down here on the tank side we'll add the adapter that came with the Radium stuff. Here's the other side of it. Screw this all down, and then we will add the piece of tubing that they also sent, and that should button all this up. [ Music ]
So then we'll go ahead and add the adapter on top of this piece, and then we'll pull a measurement from here, and then we can cut our tube. That's gonna be 19. [ Music ]
[ Music ] Get that side, this side. This is just all mockup. This is super easy to install. We've got good drop on everything. That works for the mockup side of the things. Radium makes some really nice products, and this will work perfect in our Camaro. So we'll call this all wrapped up here. We'll go grab a couple more things, and we'll finish out the back end of the car. Coming up, with other racers staring at our taillights on the track we want to make sure they can see them. Plus we'll finish up installing our carbon fiber panels on the rear of our Camaro.
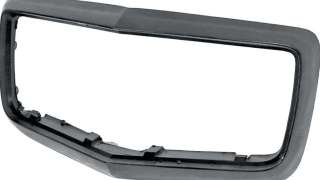
(Jeremy)>> So we've been working on the back half of the Camaro. One of the things that we are going to retain on the stock side of things is a set of taillights. Ours are in pretty rough shape and we want to make sure people can see us as we're entering the corner, applying our brakes. Now Classic Industries was nice enough to send us a brand new set of taillights for the rear. They've got the nice chrome trim ring on here, and the lenses themselves are crystal clear. This is a great option for you guys that are doing any restoration work, or it works great for us even on the race car side of things. Now beyond all of the taillights and stuff they did send us a nose cone and a couple of bits and pieces for the front. Our nose cone was pretty beat up. Somebody must have got in an accident. So to get these installed it's pretty simple. These just unsnap from the buckets. We'll get them set in the buckets here, install them in the car, and then we're just gonna worry about the wiring a little bit later. [ plastic clicking ] [ Music ]
(Jeremy)>> Set these on here. They're a little specific as to what side goes where. [ Music ] Let's get these set into place here and we'll bolt them down. To keep our new taillights and our buckets in place we'll be using the factory speed nuts. These don't require a lot of torque but will hold everything in nicely. [ Music ]
(Jimmy)>> Next thing up on the rear end of our Camaro is to get the carbon fiber trunk lid installed, and I'm really excited to see this thing in its full carbon trim, but to get it on here I have to get these hinges to lay all the way flat. How they're held up is there's a torsion bar that's under this cover that just runs from one side across to the other. So I've got to get that cover off and get those torsion bars out of the way. [ Music ] Now if I'm being honest I don't really need these springs to be functional anymore. So the easiest way to get rid of them is to just cut them. And they're obviously under a ton of tension. So one way to keep ourselves a little bit safer is to put something really heavy over the top of them, and this is just a rubber welding mat. So I'm gonna go ahead and cut one of the springs here, and I'll wear the appropriate p-p-e and we should be good to go. [ saw buzzing ] [ Music ] So now the next step is to figure out a way to get our holes transferred onto our deck lid so we know where to drill them for our rivet nuts. We think the best way to do that is to use paint pens, color the top of the hinges, put the deck lid on it and give it a nice press, and hopefully that paint transfers to the under side of the deck lid, and then we'll know where to drill the holes. [ Music ]
(Jeremy)>> You got enough on there?
(Jimmy)>> I think so. Give it a shot. [ Music ] Line up the end, get our gaps right! [ Music ]
(Jeremy)>> Think so?
(Jimmy)>> Yep! Give it a press on there. [ Music ]
(Jeremy)>> See what happens.
(Jimmy)>> There you go. So we did end up putting a little bit of paper towel under here and put tape on it so it could kinda conform. That's gonna be perfect for us to drill some holes. Gonna get some drill bits and some rivet nuts. After drilling some pilot holes I'll go ahead and drill to the final size for the rivet numbers. [ Music ] [ drill humming ] [ Music ]
[ metal clanging ] [ ratchet clicking ]
(Jimmy)>> That is the install of our carbon fiber deck lid. This thing's looking really nice. Got about a three-sixteenths gap all the way around, which is perfect. Now we just need a way to latch this thing down. Now that our trunk lid is installed we need a way to secure it. We'll show you a quick and easy way to keep it locked in place.
(Jimmy)>> With our deck lid installed we need some way to keep it secure, and the way we're gonna do that is by using a latch system that you've probably seen on race cars before. These aero catch latches that we got from Summit Racing, and the way that they work is pretty simple. You have your latch here, you open it up, take your pen, go ahead and install it, shut it, gives you a nice secure connection. So with these we have to mount the pens somewhere on the car, mount the latch onto our carbon fiber deck lid. So to get started I'm gonna cut some metal. To mount the pins I'm using one eighth inch place cut into a one inch strip. [ saw buzzing ] [ Music ]
(Jimmy)>> Got a strip of metal cut out that I'm gonna use to make two "L" brackets. They're gonna get welded to the inside of the taillight panel, and then they'll each have a hole so we can mount our pen. Now I want to locate the pen somewhere in the flat areas here on the underside of the deck lid. That way when we mount the latch we don't have to cut into the three dimensional structure of the deck lid, which makes it nice and rigid. So the way I'm gonna locate that is I'm gonna use my tape measure, just measure from each edge of the deck lid. Figure out where that's gonna go, and then I'll measure from the edge of the car and the outer edge of the deck lid opening. That way we can figure out how long our bracket needs to be and where the pins are gonna be located. [ Music ] About 11 and a half from the edge. [ saw buzzing ]
(Jimmy)>> After cutting the strip to length I'll put a 90 degree bend in it to give some area to weld to. [ mechanical humming ] [ drill humming ] [ Music ]
(Jimmy)>> I've got my L-bracket here with the pins bolted to it. Now I need to figure out where I need to weld this on the inside of the taillight panel. So what I have mocked up here is just a long ruler that kinda gives us a height gauge. Then basically I'm gonna take our 10.5 to 11 inch measurement that I had on the deck lid, go from the 50 inch mark that I have on the left side. I'll go over to 39.5, make sure the pin's about the height of the ruler, and then I'll mark so we know where to place it when we weld. [ Music ] [ welder crackling ] [ Music ]
(Jimmy)>> Perfect! [ drill humming ] Now I'm back on top of the deck lid and I'm getting ready to trace out the template for our latches, and I did a couple of things to help myself out. The first thing is I made a center line down the deck lid, and then I picked a reference point. Then I used a straight edge to go from the hole to the reference point, and I traced out the center axis of our latch. What this does is I can then measure from each hole to our reference point and I know that they're within a sixteenth. So I know everything's gonna be symmetrical and the angles are gonna be mirrored. So now I can just use the hole in our center axis and I can line this up on the template, trace everything out. [ Music ] [ drill humming ]
(Jimmy)>> To get rid of the material in the deck lid I'm using a hole saw to remove the bulk of it, and then I'll come back and trim it up to the line. [ grinder buzzing ] [ Music ] [ drill humming ] [ Music ]
(Jimmy)>> There we go! That's one installed. I still have one more to do. Still need to finish welding these brackets on the inside, but we've gotten a ton of work done on the rear end of this car getting all the carbon mounted. We still have some stuff to do, like the rear windshield, which we're gonna show you guys another time, but I still have a lot of work to do. So I'm gonna get at it.
Show Full Transcript
(Jimmy)>> It's full on fabrication today on Carcass. We'll cut out the quarter panels on our '72 Road Course Camaro to make room for the new carbon fiber panels. We'll install a few key components for the fuel system. Plus show you how we attach our new carbon fiber trunk lid. [ Music ] [ engine revving ] [ Music ]
(Jeremy)>> Hey everybody, welcome to Carcass. This is our 1972 Camaro that Jimmy and I are turning into a road course race car. We've done a bunch of work on the car already, and most recently we've welded the roof skin on this so it looks like a Camaro again, that's gonna take us down our path we're on today. We're gonna start working on some body mods.
(Jimmy)>> So today we're gonna be focusing more on the rear of the car. We have some carbon fiber quarter panels that we've made already, and I've mocked one up on the passenger side. So I'm gonna show you how I did that on this side here. We also want to cut our poly carbonate sheet to replace our rear glass, and we'll show you how we mount that. We also have the carbon fiber deck lid, and we want to mount that and still make it functional so it hinges like the stock one would. For this right here I'm just gonna start with some tape so we can figure out a cut line. Before we can get the new carbon fiber quarter panels on here we want to get rid of the old steel. I'm using the tape as a guide to figure out where I'm gonna cut, and I'm making sure to keep a half inch to an inch of sheet metal that I can rivet the quarter panel to. [ Music ]
[ Music ] [ punch tapping ] [ drill humming }
(Jimmy)>> Alright, so we've got this thing taped up. I've got a hole drilled, and I'll explain why I'm doing that. When we go to cut this it's best not to have sharp corners up here just because it leaves the metal more prone to cracking especially with this thing vibrating so much. We just want to make sure these are nice, round edges so it's less of a stress point, and then these lines may change depending on how we fit up our carbon fiber quarter. So these are the end all, be all if want to grind and trim some stuff to move the lines back a little bit further. We can do that too. [ Music ] [ drill humming ] [ saw buzzing ] [ Music ] [ saw buzzing ] [ Music ]
(Jimmy)>> Okay, so I have the quarter panel mostly cut out, but to fully release it I actually need to get to the corner of the stock wheel lip. So everywhere along here I need to grind so that the sheet metal releases, and to get to it I need to get all this foam back off, or at least some of it, so I can get a grinder in there. So I'm just gonna take my screwdriver, shove it in here, hit it with a hammer, and just try to crack it off. [ hammer tapping ]
(Jimmy)>> The reason why the foam was on here in the first place is because it was used to shape our fender flares, which gave us the plug to mold the carbon fiber quarter panels. [ Music ] [ grinder buzzing ] [ Music ]
[ Music ] [ metal clanging ] [ Music ]
(Jimmy)>> With the quarter removed I'll start removing the paint on the edges so I can a get a really clear view of what I'm working with. [ grinder buzzing ] [ Music ] [ sander buzzing ]
(Jimmy)>> I've got this rear quarter panel cut out now and I've got this trimmed out, got these sharp edges taken care of. Couple things here about this. I'm probably gonna end up coming back and cutting this way down. Possibly cutting this entire lower section off and bracing it from the chassis to our new quarter. The other thing too is with this inner fender lip here, with our wide tires, if I left this it would end up cutting our tires. So at some point we're gonna come back and cut this entire section out. We've got our carbon fiber quarter about 90 percent trimmed, which is good enough to fit this up right now. We're gonna put some kleekos on it. So I have to drill some holes. [ Music ]
(Jeremy)>> What do you got for a gap, good?
(Jimmy)>> I'm good here. [ drill humming ] [ Music ] [ drill humming ] [ Music ]
(Jeremy)>> These things are so handy.
(Jimmy)>> I love them! [ Music ] [ drill humming ] [ Music ] [ drill humming ]
(Jimmy)>> So that's pretty much it to get this quarter installed. Still got a little bit of trimming to do, but as you can see this thing's really rigid up against the car, and I think that's gonna work out just fine.
(Jeremy)>> Up next, we'll show you a few tips on what to look for when installing the fuel system for your race car.
(Jeremy)>> Jimmy's go the carbon corners installed on the Camaro, and we did strip off all of the paint to give us a nice, clean surface to work with. Now since we're in the back we're gonna continue on with our fuel system. We already have a hole cut in the trunk for our Radium fuel cell. Now we just have to work on getting the fuel into it. Now Radium also sent us what we need to hook up a fuel neck to the fuel cell. They sent us this little 45. This goes on top of the cell itself. They also sent us this really cool sleek fuel neck. Now two things to when you guys are looking for a location to mount the fuel neck. One is the drop, or the angle of the tube as it goes into the fuel cell, and the second one is location. We're gonna mount ours up here on the quarter, and on the back side of this filler neck is this little foam pad. Now the best part about this pad is you guys can mount this on a little bit of a curve, which works great because our quarter has a little bit of a curve here. So this should seal everything up. I've got to take a couple of measurements. We're gonna drill some holes, and then we're gonna work on putting the fuel tube in itself. [ Music ] [ drill humming ] [ Music ]
(Jeremy)>> So before we put the neck in here we're gonna go ahead and use this deburring tool and take the sharp edge off of the ridge here. Then we'll go ahead and set this in place. Try to keep the handle here straight with the car. We'll mark these out and drill these out as well. [ Music ]
[ drill humming ]
(Jeremy)>> So we can go ahead and put the filler neck in. We will put that little piece of foam on there and drop in a couple of the screws. And then there's this retainer ring that goes underneath. Then we'll tighten everything down. [ Music ] Now let's go to the filler tube. So up underneath here we're gonna have to add this little 75 degree bend here. We got this one from Summit Racing. It's inch and a half o-d. So it works with the rest of what Radium sent us. This will get us in the direction of the fuel cell. So down here on the tank side we'll add the adapter that came with the Radium stuff. Here's the other side of it. Screw this all down, and then we will add the piece of tubing that they also sent, and that should button all this up. [ Music ]
So then we'll go ahead and add the adapter on top of this piece, and then we'll pull a measurement from here, and then we can cut our tube. That's gonna be 19. [ Music ]
[ Music ] Get that side, this side. This is just all mockup. This is super easy to install. We've got good drop on everything. That works for the mockup side of the things. Radium makes some really nice products, and this will work perfect in our Camaro. So we'll call this all wrapped up here. We'll go grab a couple more things, and we'll finish out the back end of the car. Coming up, with other racers staring at our taillights on the track we want to make sure they can see them. Plus we'll finish up installing our carbon fiber panels on the rear of our Camaro.
(Jeremy)>> So we've been working on the back half of the Camaro. One of the things that we are going to retain on the stock side of things is a set of taillights. Ours are in pretty rough shape and we want to make sure people can see us as we're entering the corner, applying our brakes. Now Classic Industries was nice enough to send us a brand new set of taillights for the rear. They've got the nice chrome trim ring on here, and the lenses themselves are crystal clear. This is a great option for you guys that are doing any restoration work, or it works great for us even on the race car side of things. Now beyond all of the taillights and stuff they did send us a nose cone and a couple of bits and pieces for the front. Our nose cone was pretty beat up. Somebody must have got in an accident. So to get these installed it's pretty simple. These just unsnap from the buckets. We'll get them set in the buckets here, install them in the car, and then we're just gonna worry about the wiring a little bit later. [ plastic clicking ] [ Music ]
(Jeremy)>> Set these on here. They're a little specific as to what side goes where. [ Music ] Let's get these set into place here and we'll bolt them down. To keep our new taillights and our buckets in place we'll be using the factory speed nuts. These don't require a lot of torque but will hold everything in nicely. [ Music ]
(Jimmy)>> Next thing up on the rear end of our Camaro is to get the carbon fiber trunk lid installed, and I'm really excited to see this thing in its full carbon trim, but to get it on here I have to get these hinges to lay all the way flat. How they're held up is there's a torsion bar that's under this cover that just runs from one side across to the other. So I've got to get that cover off and get those torsion bars out of the way. [ Music ] Now if I'm being honest I don't really need these springs to be functional anymore. So the easiest way to get rid of them is to just cut them. And they're obviously under a ton of tension. So one way to keep ourselves a little bit safer is to put something really heavy over the top of them, and this is just a rubber welding mat. So I'm gonna go ahead and cut one of the springs here, and I'll wear the appropriate p-p-e and we should be good to go. [ saw buzzing ] [ Music ] So now the next step is to figure out a way to get our holes transferred onto our deck lid so we know where to drill them for our rivet nuts. We think the best way to do that is to use paint pens, color the top of the hinges, put the deck lid on it and give it a nice press, and hopefully that paint transfers to the under side of the deck lid, and then we'll know where to drill the holes. [ Music ]
(Jeremy)>> You got enough on there?
(Jimmy)>> I think so. Give it a shot. [ Music ] Line up the end, get our gaps right! [ Music ]
(Jeremy)>> Think so?
(Jimmy)>> Yep! Give it a press on there. [ Music ]
(Jeremy)>> See what happens.
(Jimmy)>> There you go. So we did end up putting a little bit of paper towel under here and put tape on it so it could kinda conform. That's gonna be perfect for us to drill some holes. Gonna get some drill bits and some rivet nuts. After drilling some pilot holes I'll go ahead and drill to the final size for the rivet numbers. [ Music ] [ drill humming ] [ Music ]
[ metal clanging ] [ ratchet clicking ]
(Jimmy)>> That is the install of our carbon fiber deck lid. This thing's looking really nice. Got about a three-sixteenths gap all the way around, which is perfect. Now we just need a way to latch this thing down. Now that our trunk lid is installed we need a way to secure it. We'll show you a quick and easy way to keep it locked in place.
(Jimmy)>> With our deck lid installed we need some way to keep it secure, and the way we're gonna do that is by using a latch system that you've probably seen on race cars before. These aero catch latches that we got from Summit Racing, and the way that they work is pretty simple. You have your latch here, you open it up, take your pen, go ahead and install it, shut it, gives you a nice secure connection. So with these we have to mount the pens somewhere on the car, mount the latch onto our carbon fiber deck lid. So to get started I'm gonna cut some metal. To mount the pins I'm using one eighth inch place cut into a one inch strip. [ saw buzzing ] [ Music ]
(Jimmy)>> Got a strip of metal cut out that I'm gonna use to make two "L" brackets. They're gonna get welded to the inside of the taillight panel, and then they'll each have a hole so we can mount our pen. Now I want to locate the pen somewhere in the flat areas here on the underside of the deck lid. That way when we mount the latch we don't have to cut into the three dimensional structure of the deck lid, which makes it nice and rigid. So the way I'm gonna locate that is I'm gonna use my tape measure, just measure from each edge of the deck lid. Figure out where that's gonna go, and then I'll measure from the edge of the car and the outer edge of the deck lid opening. That way we can figure out how long our bracket needs to be and where the pins are gonna be located. [ Music ] About 11 and a half from the edge. [ saw buzzing ]
(Jimmy)>> After cutting the strip to length I'll put a 90 degree bend in it to give some area to weld to. [ mechanical humming ] [ drill humming ] [ Music ]
(Jimmy)>> I've got my L-bracket here with the pins bolted to it. Now I need to figure out where I need to weld this on the inside of the taillight panel. So what I have mocked up here is just a long ruler that kinda gives us a height gauge. Then basically I'm gonna take our 10.5 to 11 inch measurement that I had on the deck lid, go from the 50 inch mark that I have on the left side. I'll go over to 39.5, make sure the pin's about the height of the ruler, and then I'll mark so we know where to place it when we weld. [ Music ] [ welder crackling ] [ Music ]
(Jimmy)>> Perfect! [ drill humming ] Now I'm back on top of the deck lid and I'm getting ready to trace out the template for our latches, and I did a couple of things to help myself out. The first thing is I made a center line down the deck lid, and then I picked a reference point. Then I used a straight edge to go from the hole to the reference point, and I traced out the center axis of our latch. What this does is I can then measure from each hole to our reference point and I know that they're within a sixteenth. So I know everything's gonna be symmetrical and the angles are gonna be mirrored. So now I can just use the hole in our center axis and I can line this up on the template, trace everything out. [ Music ] [ drill humming ]
(Jimmy)>> To get rid of the material in the deck lid I'm using a hole saw to remove the bulk of it, and then I'll come back and trim it up to the line. [ grinder buzzing ] [ Music ] [ drill humming ] [ Music ]
(Jimmy)>> There we go! That's one installed. I still have one more to do. Still need to finish welding these brackets on the inside, but we've gotten a ton of work done on the rear end of this car getting all the carbon mounted. We still have some stuff to do, like the rear windshield, which we're gonna show you guys another time, but I still have a lot of work to do. So I'm gonna get at it.