Carcass Featured Projects
Carcass Builds
Want more content like this?
Join the PowerNation Email NewsletterVideo Transcript
(Jimmy)>> You're watching Powernation!
(Jimmy)>> Today on Carcass we continue work on our '96 Tahoe. We tackle the rear drum brakes, replacing the worn out pads and drums.
(Jeremy)>> Plus our rear end is a little sloppy. So we'll tighten it up. We'll add new bearings and seals. Then we'll show you how to set up the ring and pinion to make it run nice and quiet. [ Music ] [ engine revving ] [ Music ]
(Jeremy)>> Hey everybody, welcome to Carcass. Well we are back on our 1996 Tuckered Out Tahoe and we've done a bunch of work so far up here to the front suspension, the steering, and the brakes, trying to make this thing roadworthy again.
(Jimmy)>> And now we're transitioning onto the back, and we have a few things to do but I'm gonna get started with the brakes. Obviously this is a drum setup, which is a little more complex than the disc and caliper up front. We're gonna show you guys how to take care of it. So we've got some Duralast parts. We've got the drums, shoes, and all the hardware with it. So I'm gonna get the old stuff pulled down and we'll see what we're working with. So I've got the drum off and I've been looking at this for a second, and the shoes are little bit worn but this one over here has a big crack all the way across. Then the other thing I notice, which is maybe a bigger issue, there's a lot of grease built up here and maybe the axle seal is going bad. So I'm not even gonna touch the brakes right now. I would rather get the rear end torn apart, get the axle out, and not only will that give me room to do the brakes, but then we can just go ahead and replace the axle seal. [ drill humming ] [ Music ]
[ Music ]
[ aerosol can hissing ]
(Jimmy)>> After removing the cover I'll spray it down with some brake cleaner to clean it up a little bit, and then I'll scrape the gasket surface to get it ready for when I seal it back up. [ Music ] I've got the cover off and I've done some cleaning. So I'm gonna take this bolt out, and then the pin, and then I can take the C-clips out, and then I can pull the axles. [ ratchet clicking ] [ Music ]
[ Music ]
(Jimmy)>> Taking the C-clips out can be a little bit tricky, and using a magnet can definitely help with that. [ Music ] Once I remove the axle seal I'll go ahead and start disassembling the brake system paying attention to how the components are assembled. [ Music ]
[ Music ] After that I'll remove the wheel cylinder and the axle bearing. [ Music ] After everything is disassembled I'll give it a good cleaning to get ready to reinstall the new parts. [ Music ] [ aerosol can hissing ] [ Music ]
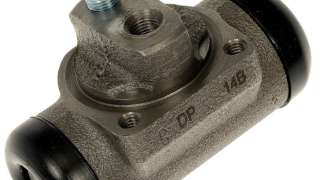
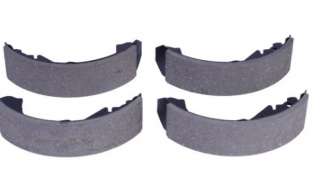
(Jimmy)>> I have the old brakes torn off of the axle, and I've got the backing plate cleaned up. So now we can put our Duralast brake parts on it. I'm just gonna start with the wheel cylinder and kind of work in the backwards order. Like I mentioned earlier, we're replacing our brake system with Duralast brake components. All of components match o-e quality specifications and help deliver quiet, more efficient braking performance. All the necessary hardware is included to complete the installation, and it will restore the brakes to maximum performance for safe and effective stopping. [ Music ]
[ Music ]
[ Music ]
[ Music ] I've got the brakes all set up here on the passenger side. I still have to hook up the brake line, but I'm just gonna go ahead and get to the driver's side and get this thing done. We disassemble our rear diff and show you some common wear items to look for on your rear end.
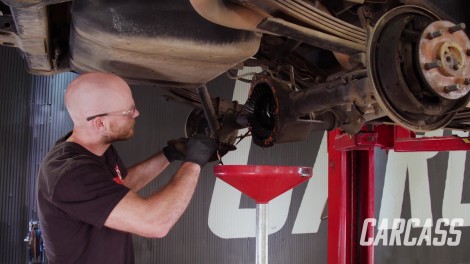
(Jeremy)>> Well now that Jimmy has the rear brakes pretty much buttoned up we're gonna continue working on the rear axle here. Now when he pulled the rear diff cover off of here we noticed quite a bit of debris stuck on the magnet. Plus there is a lot of movement in the ring and pinion. Now backlash specs on this are six to ten thousandths of an inch, and we come in at about 28 to 30 thousandths. So we are way out of spec. So since we're in here this far we're just gonna go ahead and take care of it. We have to get the carrier out of here and pull the pinion out of the way. We'll throw a bunch of bearings at it, we'll set it all back up, and we'll continue to move forward. When removing your bearing caps make sure to keep track of what side they come off of. Keep the driver's side on the driver's side and the passenger's side on its side. [ Music ] Always make sure when you pop these out put your hands on here and try to hang on to your shims the best you can. Keep them on the correct side. [ drill humming ]
(Jeremy)>> After removing the driveshaft I'll remove the pinion nut and slide the pinion out of the way. [ Music ]
[ Music ] Now that we have everything disassembled we've run into a couple more issues. First and foremost, this top bearing should not slide on and off the pinion like this. There should be a little bit of resistance. Plus down here on the bottom bearing closest to the gear there is quite a bit of damage to the actual rollers, and that's actually translated over onto the race but it's not a big issue. We're gonna replace all this stuff anyways. We have a complete rebuild kit including bearings and their races. We've got the seals, and we've got some shims to set this all back up. So from here what we need to do is press all the bearings off. We're gonna get all of this cleaned up, and then we're gonna get it all set up back in the Tahoe. Using a bearing separator in the press, we'll remove all of our bearings from our pinion and our ring gear. [ mechanical humming ] [ Music ]
(Jeremy)>> There we go! You want to grab that?
(Jimmy)>> Scared me! [ Music ]
(Jeremy)>> So we have all of our parts cleaned up and we did notice something once we got the carrier cleaned up. If you guys look real close you can see some marks that are kinda etched into the side here, and our best guess is that's from the pinion being adjusted too deep into the housing here and it's making contact. Now after we inspected the pinion we looked and there's really no marks on here. So at some point this has all been replaced. So really for the marks that are on here it's more of a cosmetic thing. There's really no need for us to replace it cause it did work just fine. Now the way you actually adjust this pinion is with a set of shims that go underneath the bearing. Instead of using a bearing that you have to press on and off, and on and off, you can go ahead and get a set of setup bearings. These are specifically made for you to be able to slide the bearing on and take the bearing off quite easily so you can adjust everything to get this riding just right and make sure your pattern on your teeth are just right. So we're gonna start here by putting this up in the truck. We've got our setup bearings. We're gonna run the original shim for now to see where we land. So let's get all this up in the truck. We have new races installed in the housing here and there. So we'll go ahead and slide our pinion into place. Back one in. We'll do the front bearing here. Follow that up with the yoke, the washer, and then we're gonna go ahead and use the old nut for the front. We don't want to use the new one until we are 100 percent done. Grab the impact and we'll tighten this down. [ drill humming ] [ Music ]
(Jeremy)>> Coming up, we'll show you how to set up your rear end to meet factory tolerances.
(Jeremy)>> We have our pinion installed, and I went ahead and installed the carrier already. Now the number here that we're shooting for is six to ten thousandths of an inch of backlash. Right now we are coming in at about eight thousandths, almost nine thousandths of an inch. So we are right there in the middle. Let's say you don't nail that the first time, or you have to make adjustments. The way you adjust that is with some shims that usually come with the kit when you get your bearings and such. So let's say you come in a little bit bigger or a little bit smaller. Let's say you come in at 15 thousandths of inch. What you're gonna want to do is add more shims to your driver's side, or the left side, or the ring gear side of your carrier and subtract shims from the opposite side, or the right side. Now if you take shims away from one side you have to add that to the other side. That way what you're doing is driving your ring gear a little bit closer to your pinion and you're closing up that gap, or that backlash. Since we landed right here at about eight thousandths of an inch we're gonna call that a win. The next step we have to do here is take some of our marking compound, this comes with the kit as well, and our little acid brush here, and we're gonna go ahead and paint at least five of the teeth on the ring hear up here. We're gonna spin our pinion over, and then we're gonna go ahead and check our pattern. [ Music ]
[ Music ]
That pattern looks really good. We're not too deep, we're not too shallow. We're kinda right in the center. So we're gonna go ahead and run that. We've got to rip all this down, take our setup bearings out of the way, press our real bearings on, and we should be all set. [ Music ] Definitely want to make sure we keep our hands on our shims as they come out. [ Music ] Yoke off of here, bearing and pinion out. We'll go over to the press. [ mechanical humming ] [ Music ]
(Jeremy)>> Slide that in. Go ahead and put the crush sleeve on there too. [ Music ] [ hammer tapping ]
(Jeremy)>> That should do it. Put a new seal in here too. [ hammer tapping ] [ Music ]
(Jeremy)>> From here we have to set a pre-load on this bearing. So we're gonna have to tighten it down quite a bit, and then get our torque wrench. We will check pre-load once we think it's tight. [ drill humming ] Tighten that up just for now. Then we'll go ahead, tighten this down until we have the right amount of pre-load. So I've got to get the big bar now. Now we have to set pre-load on the bearings, and we have that crush sleeve that's down inside of here. What I have to do is tighten this nut enough to crush that sleeve, and that's gonna put a certain amount of pre-load on the bearings. Got this cool little tool that we've made so it can hold the yoke here. What I have to do is get the biggest bar I have in the shop and try to tighten this nut, and it takes a lot of force but we'll get there. [ Music ] Getting close now! Put a little more on it and then we'll check our pre-load. [ Music ] We'll check our pre-load on our bearings. It should be between 14- and 19-inch pounds, and we come in right at 15. Pre-load is set. Our backlash comes in at 10. That's right where we want to be. So we're gonna call this all buttoned up.
(Jimmy)>> Now we can go ahead and reassemble the rear axle, starting with the bearings and the seals, throw the axles in, and get the clips on it. [ Music ] [ hammer tapping ] [ Music ]
(Jimmy)>> Just like before, I'm using a magnet to reinstall the C-clips. [ Music ]
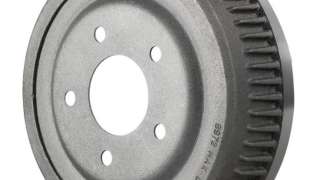
With both axles installed I'll put on a new gasket and seal everything up with the rear cover. Last thing we'll do is put on our Duralast brake drum and our brake system will be complete.
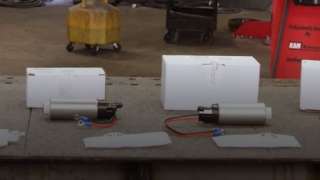
(Jeremy)>> With the popularity of these o-b-s trucks, like our '96 Tahoe, a lot of you guys are doing a lot to add horsepower, and even beyond that you guys are doing LS swaps. Now FiTech has you covered in the fuel delivery side of things. The best thing about this GMT-400 platform is that they have a serviceable in-tank fuel pump, and FiTech has multiple solutions for your needs. Anything from your 255 liter per hour pump for basic horsepower all the way up to your 440 liter per hour pump for some pretty serious horsepower. They have a couple of pumps right here in the middle. This one's 340 liter per hour, and they even have a pump that is E-85 rated. They come with the pigtails, and the screens, and what you guys need to install them. So if you're looking for fuel system solutions FiTech fuel injection should have something for your needs.
(Jimmy)>> Up next, the Tahoe is almost ready for the road but we need to address the stance for bigger wheels and tires.
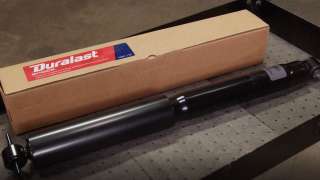
(Jeremy)>> I have all the brakes buttoned up on the rear axle and I have gear oil in the differential. And now for one last step to finish this thing up, replace the old worn out shocks with some Duralast twin tubes. Duralast offers a full line of shocks and struts for your vehicle. They're constructed using high quality components that meet or exceed o-e performance for ride height and stability, which gives your vehicle quicker response, making for better comfort and handling. They also offer monotube upgrades that can replace many dual tube applications. Duralast shocks are tested under extreme loads to ensure your repairs don't come back, and they are backed by a limited lifetime warranty. No matter what vehicle you're working on, Duralast has parts that can help get it back on the road. We got our Duralast shocks from the AutoZone Pro website. [ Music ] [ drill humming ] [ Music ] [ drill humming ] [ Music ] [ drill humming ]
(Jimmy)>> Installation of the shocks is pretty straightforward. Just two bolts at the top and one bolt at the bottom. If you don't have access to a lift just make sure you put your truck up on jackstands and let the axle sag all the way out. [ Music ] [ drill humming ]
(Jeremy)>> The overall look that we're going for with our two door Tahoe is a little bit more aggressive than stock. We're gonna be running a bigger set of wheels and tires, and we're gonna be putting those on shortly, but to pull that off we want to level off the front of the Tahoe. So we're gonna be adding a different set of torsion bar keys. We got these from Summit Racing, and they're clocked just a little bit differently in here in the casting, and that's gonna apply a little more pressure to the torsion bar, hence leveling out our Tahoe. [ Music ]
[ drill humming ]
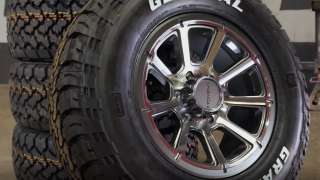
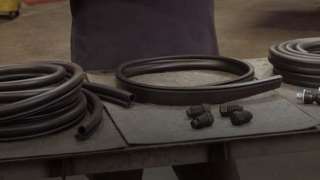
(Jeremy)>> All I'm gonna do to adjust the torsion bar keys is to make sure there's the same amount of thread showing on each one of these adjustment bolts. Then once we get the wheels and tires on this thing and set it on the ground we'll make our final adjustments. For the wheel and tire combo for our Tahoe we choose the General Grabber ATX. It's an aggressive all season all-terrain tire for light trucks and s-u-vs designed to balance exceptional off-road capability with on road performance. It comes complete with the Dura-gen technology, which provides robust strength and durability. It also had low road noise and a long lasting tread wear. It carries the three peak mountain snowflake symbol for severe winter conditions. It's available in raised white letters or a solid black wall. The size we chose for our Tahoe is a 275/70-17. We pair our General Grabbers with a set of Vision wheels that we picked up from Summit Racing. Now we've buttoned up quite a bit of work on our two door Tahoe and one thing that we don't want to overlook are the weatherstrips and the seals around the truck. Over time this can show signs of wear and tear. It can actually let moisture inside of your vehicle. Steele Rubber Products has a full line of items for your cars, trucks, your street rods, and even marine applications. Now we picked up a couple of pieces for our two door Tahoe, and the weatherstripping is designed from original parts for superior fitment and seal. They are made with a superior grade 100 percent e-p-d-m sponge rubber extrusion designed to last, which means it will not fade, shrink, or crack. They're excellent at resisting moisture, the ozone, and even u/v exposure. They have an easy to install push-on design that requires no adhesive. They also offer the sway bar end links and the hood and fender bumpers. So if you guys are looking to replace any seals around your project why don't you check out Steele Rubber Products? We've got a couple more things to tackle on the two door Tahoe before it hits the street, but for now that's gonna button it up for us today.
(Jimmy)>> Wheels look good!
(Jeremy)>> Get these seals on here and get this thing out on the road!
Show Full Transcript
(Jimmy)>> Today on Carcass we continue work on our '96 Tahoe. We tackle the rear drum brakes, replacing the worn out pads and drums.
(Jeremy)>> Plus our rear end is a little sloppy. So we'll tighten it up. We'll add new bearings and seals. Then we'll show you how to set up the ring and pinion to make it run nice and quiet. [ Music ] [ engine revving ] [ Music ]
(Jeremy)>> Hey everybody, welcome to Carcass. Well we are back on our 1996 Tuckered Out Tahoe and we've done a bunch of work so far up here to the front suspension, the steering, and the brakes, trying to make this thing roadworthy again.
(Jimmy)>> And now we're transitioning onto the back, and we have a few things to do but I'm gonna get started with the brakes. Obviously this is a drum setup, which is a little more complex than the disc and caliper up front. We're gonna show you guys how to take care of it. So we've got some Duralast parts. We've got the drums, shoes, and all the hardware with it. So I'm gonna get the old stuff pulled down and we'll see what we're working with. So I've got the drum off and I've been looking at this for a second, and the shoes are little bit worn but this one over here has a big crack all the way across. Then the other thing I notice, which is maybe a bigger issue, there's a lot of grease built up here and maybe the axle seal is going bad. So I'm not even gonna touch the brakes right now. I would rather get the rear end torn apart, get the axle out, and not only will that give me room to do the brakes, but then we can just go ahead and replace the axle seal. [ drill humming ] [ Music ]
[ Music ]
[ aerosol can hissing ]
(Jimmy)>> After removing the cover I'll spray it down with some brake cleaner to clean it up a little bit, and then I'll scrape the gasket surface to get it ready for when I seal it back up. [ Music ] I've got the cover off and I've done some cleaning. So I'm gonna take this bolt out, and then the pin, and then I can take the C-clips out, and then I can pull the axles. [ ratchet clicking ] [ Music ]
[ Music ]
(Jimmy)>> Taking the C-clips out can be a little bit tricky, and using a magnet can definitely help with that. [ Music ] Once I remove the axle seal I'll go ahead and start disassembling the brake system paying attention to how the components are assembled. [ Music ]
[ Music ] After that I'll remove the wheel cylinder and the axle bearing. [ Music ] After everything is disassembled I'll give it a good cleaning to get ready to reinstall the new parts. [ Music ] [ aerosol can hissing ] [ Music ]
(Jimmy)>> I have the old brakes torn off of the axle, and I've got the backing plate cleaned up. So now we can put our Duralast brake parts on it. I'm just gonna start with the wheel cylinder and kind of work in the backwards order. Like I mentioned earlier, we're replacing our brake system with Duralast brake components. All of components match o-e quality specifications and help deliver quiet, more efficient braking performance. All the necessary hardware is included to complete the installation, and it will restore the brakes to maximum performance for safe and effective stopping. [ Music ]
[ Music ]
[ Music ]
[ Music ] I've got the brakes all set up here on the passenger side. I still have to hook up the brake line, but I'm just gonna go ahead and get to the driver's side and get this thing done. We disassemble our rear diff and show you some common wear items to look for on your rear end.
(Jeremy)>> Well now that Jimmy has the rear brakes pretty much buttoned up we're gonna continue working on the rear axle here. Now when he pulled the rear diff cover off of here we noticed quite a bit of debris stuck on the magnet. Plus there is a lot of movement in the ring and pinion. Now backlash specs on this are six to ten thousandths of an inch, and we come in at about 28 to 30 thousandths. So we are way out of spec. So since we're in here this far we're just gonna go ahead and take care of it. We have to get the carrier out of here and pull the pinion out of the way. We'll throw a bunch of bearings at it, we'll set it all back up, and we'll continue to move forward. When removing your bearing caps make sure to keep track of what side they come off of. Keep the driver's side on the driver's side and the passenger's side on its side. [ Music ] Always make sure when you pop these out put your hands on here and try to hang on to your shims the best you can. Keep them on the correct side. [ drill humming ]
(Jeremy)>> After removing the driveshaft I'll remove the pinion nut and slide the pinion out of the way. [ Music ]
[ Music ] Now that we have everything disassembled we've run into a couple more issues. First and foremost, this top bearing should not slide on and off the pinion like this. There should be a little bit of resistance. Plus down here on the bottom bearing closest to the gear there is quite a bit of damage to the actual rollers, and that's actually translated over onto the race but it's not a big issue. We're gonna replace all this stuff anyways. We have a complete rebuild kit including bearings and their races. We've got the seals, and we've got some shims to set this all back up. So from here what we need to do is press all the bearings off. We're gonna get all of this cleaned up, and then we're gonna get it all set up back in the Tahoe. Using a bearing separator in the press, we'll remove all of our bearings from our pinion and our ring gear. [ mechanical humming ] [ Music ]
(Jeremy)>> There we go! You want to grab that?
(Jimmy)>> Scared me! [ Music ]
(Jeremy)>> So we have all of our parts cleaned up and we did notice something once we got the carrier cleaned up. If you guys look real close you can see some marks that are kinda etched into the side here, and our best guess is that's from the pinion being adjusted too deep into the housing here and it's making contact. Now after we inspected the pinion we looked and there's really no marks on here. So at some point this has all been replaced. So really for the marks that are on here it's more of a cosmetic thing. There's really no need for us to replace it cause it did work just fine. Now the way you actually adjust this pinion is with a set of shims that go underneath the bearing. Instead of using a bearing that you have to press on and off, and on and off, you can go ahead and get a set of setup bearings. These are specifically made for you to be able to slide the bearing on and take the bearing off quite easily so you can adjust everything to get this riding just right and make sure your pattern on your teeth are just right. So we're gonna start here by putting this up in the truck. We've got our setup bearings. We're gonna run the original shim for now to see where we land. So let's get all this up in the truck. We have new races installed in the housing here and there. So we'll go ahead and slide our pinion into place. Back one in. We'll do the front bearing here. Follow that up with the yoke, the washer, and then we're gonna go ahead and use the old nut for the front. We don't want to use the new one until we are 100 percent done. Grab the impact and we'll tighten this down. [ drill humming ] [ Music ]
(Jeremy)>> Coming up, we'll show you how to set up your rear end to meet factory tolerances.
(Jeremy)>> We have our pinion installed, and I went ahead and installed the carrier already. Now the number here that we're shooting for is six to ten thousandths of an inch of backlash. Right now we are coming in at about eight thousandths, almost nine thousandths of an inch. So we are right there in the middle. Let's say you don't nail that the first time, or you have to make adjustments. The way you adjust that is with some shims that usually come with the kit when you get your bearings and such. So let's say you come in a little bit bigger or a little bit smaller. Let's say you come in at 15 thousandths of inch. What you're gonna want to do is add more shims to your driver's side, or the left side, or the ring gear side of your carrier and subtract shims from the opposite side, or the right side. Now if you take shims away from one side you have to add that to the other side. That way what you're doing is driving your ring gear a little bit closer to your pinion and you're closing up that gap, or that backlash. Since we landed right here at about eight thousandths of an inch we're gonna call that a win. The next step we have to do here is take some of our marking compound, this comes with the kit as well, and our little acid brush here, and we're gonna go ahead and paint at least five of the teeth on the ring hear up here. We're gonna spin our pinion over, and then we're gonna go ahead and check our pattern. [ Music ]
[ Music ]
That pattern looks really good. We're not too deep, we're not too shallow. We're kinda right in the center. So we're gonna go ahead and run that. We've got to rip all this down, take our setup bearings out of the way, press our real bearings on, and we should be all set. [ Music ] Definitely want to make sure we keep our hands on our shims as they come out. [ Music ] Yoke off of here, bearing and pinion out. We'll go over to the press. [ mechanical humming ] [ Music ]
(Jeremy)>> Slide that in. Go ahead and put the crush sleeve on there too. [ Music ] [ hammer tapping ]
(Jeremy)>> That should do it. Put a new seal in here too. [ hammer tapping ] [ Music ]
(Jeremy)>> From here we have to set a pre-load on this bearing. So we're gonna have to tighten it down quite a bit, and then get our torque wrench. We will check pre-load once we think it's tight. [ drill humming ] Tighten that up just for now. Then we'll go ahead, tighten this down until we have the right amount of pre-load. So I've got to get the big bar now. Now we have to set pre-load on the bearings, and we have that crush sleeve that's down inside of here. What I have to do is tighten this nut enough to crush that sleeve, and that's gonna put a certain amount of pre-load on the bearings. Got this cool little tool that we've made so it can hold the yoke here. What I have to do is get the biggest bar I have in the shop and try to tighten this nut, and it takes a lot of force but we'll get there. [ Music ] Getting close now! Put a little more on it and then we'll check our pre-load. [ Music ] We'll check our pre-load on our bearings. It should be between 14- and 19-inch pounds, and we come in right at 15. Pre-load is set. Our backlash comes in at 10. That's right where we want to be. So we're gonna call this all buttoned up.
(Jimmy)>> Now we can go ahead and reassemble the rear axle, starting with the bearings and the seals, throw the axles in, and get the clips on it. [ Music ] [ hammer tapping ] [ Music ]
(Jimmy)>> Just like before, I'm using a magnet to reinstall the C-clips. [ Music ]
With both axles installed I'll put on a new gasket and seal everything up with the rear cover. Last thing we'll do is put on our Duralast brake drum and our brake system will be complete.
(Jeremy)>> With the popularity of these o-b-s trucks, like our '96 Tahoe, a lot of you guys are doing a lot to add horsepower, and even beyond that you guys are doing LS swaps. Now FiTech has you covered in the fuel delivery side of things. The best thing about this GMT-400 platform is that they have a serviceable in-tank fuel pump, and FiTech has multiple solutions for your needs. Anything from your 255 liter per hour pump for basic horsepower all the way up to your 440 liter per hour pump for some pretty serious horsepower. They have a couple of pumps right here in the middle. This one's 340 liter per hour, and they even have a pump that is E-85 rated. They come with the pigtails, and the screens, and what you guys need to install them. So if you're looking for fuel system solutions FiTech fuel injection should have something for your needs.
(Jimmy)>> Up next, the Tahoe is almost ready for the road but we need to address the stance for bigger wheels and tires.
(Jeremy)>> I have all the brakes buttoned up on the rear axle and I have gear oil in the differential. And now for one last step to finish this thing up, replace the old worn out shocks with some Duralast twin tubes. Duralast offers a full line of shocks and struts for your vehicle. They're constructed using high quality components that meet or exceed o-e performance for ride height and stability, which gives your vehicle quicker response, making for better comfort and handling. They also offer monotube upgrades that can replace many dual tube applications. Duralast shocks are tested under extreme loads to ensure your repairs don't come back, and they are backed by a limited lifetime warranty. No matter what vehicle you're working on, Duralast has parts that can help get it back on the road. We got our Duralast shocks from the AutoZone Pro website. [ Music ] [ drill humming ] [ Music ] [ drill humming ] [ Music ] [ drill humming ]
(Jimmy)>> Installation of the shocks is pretty straightforward. Just two bolts at the top and one bolt at the bottom. If you don't have access to a lift just make sure you put your truck up on jackstands and let the axle sag all the way out. [ Music ] [ drill humming ]
(Jeremy)>> The overall look that we're going for with our two door Tahoe is a little bit more aggressive than stock. We're gonna be running a bigger set of wheels and tires, and we're gonna be putting those on shortly, but to pull that off we want to level off the front of the Tahoe. So we're gonna be adding a different set of torsion bar keys. We got these from Summit Racing, and they're clocked just a little bit differently in here in the casting, and that's gonna apply a little more pressure to the torsion bar, hence leveling out our Tahoe. [ Music ]
[ drill humming ]
(Jeremy)>> All I'm gonna do to adjust the torsion bar keys is to make sure there's the same amount of thread showing on each one of these adjustment bolts. Then once we get the wheels and tires on this thing and set it on the ground we'll make our final adjustments. For the wheel and tire combo for our Tahoe we choose the General Grabber ATX. It's an aggressive all season all-terrain tire for light trucks and s-u-vs designed to balance exceptional off-road capability with on road performance. It comes complete with the Dura-gen technology, which provides robust strength and durability. It also had low road noise and a long lasting tread wear. It carries the three peak mountain snowflake symbol for severe winter conditions. It's available in raised white letters or a solid black wall. The size we chose for our Tahoe is a 275/70-17. We pair our General Grabbers with a set of Vision wheels that we picked up from Summit Racing. Now we've buttoned up quite a bit of work on our two door Tahoe and one thing that we don't want to overlook are the weatherstrips and the seals around the truck. Over time this can show signs of wear and tear. It can actually let moisture inside of your vehicle. Steele Rubber Products has a full line of items for your cars, trucks, your street rods, and even marine applications. Now we picked up a couple of pieces for our two door Tahoe, and the weatherstripping is designed from original parts for superior fitment and seal. They are made with a superior grade 100 percent e-p-d-m sponge rubber extrusion designed to last, which means it will not fade, shrink, or crack. They're excellent at resisting moisture, the ozone, and even u/v exposure. They have an easy to install push-on design that requires no adhesive. They also offer the sway bar end links and the hood and fender bumpers. So if you guys are looking to replace any seals around your project why don't you check out Steele Rubber Products? We've got a couple more things to tackle on the two door Tahoe before it hits the street, but for now that's gonna button it up for us today.
(Jimmy)>> Wheels look good!
(Jeremy)>> Get these seals on here and get this thing out on the road!