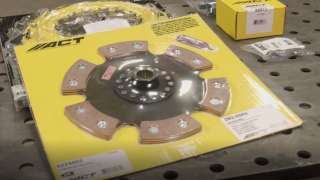
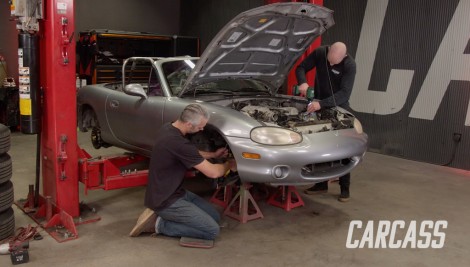
Carcass Featured Projects

Carcass Builds

Parts Used In This Episode

Summit Racing
Bilstein Shocks & Struts
Summit Racing
Eibach Anti-Roll Sway Bars
The Industrial Depot
Tools, Hardware, Shop Supplies

Episode Transcript

(Jeremy)>> You're watching Powernation!

(Jimmy)>> Today on Carcass we keep working on our spec Miata race car beefing up the subframe. We'll install a sportier clutch to handle the track abuse, and add some new struts, giving our Mazda a true coil over setup.

(Jeremy)>> Then we'll help it stop faster with some performance goodies for the turns. [ MUSIC ]

(Jeremy)>> Hey guys, welcome to Carcass, where our little spec Miata is really starting to take shape, and we've already managed to strip the entire interior and add a roll cage, and as you can see, we have the engine, transmission, and subframe out of the car cause there's a couple of things that we want to tackle.

(Jimmy)>> Yeah so while we have everything out of here we're gonna take care of the suspension and brake system. We'll take the engine and transmission out and put a new clutch in it, and then while the subframe is bare we will add some reinforcements to solve a common problem among Miata race cars.

(Jeremy)>> And then at the end we're just gonna toss this back underneath the car, gets some wheels and tires on it, set it on the ground, and we'll be one step closer to making this thing hit the track.

(Jimmy)>> So where do you want to start, engine and transmission?

(Jeremy)>> Yeah, we'll get this all out of here. I'll go get the cherry picker, or the forklift. That's probably easier. [ MUSIC ]

(Jimmy)>> A little more, stop. [ MUSIC ] [ drill humming ] [ mechanical humming ]

(Jeremy)>> Got it jammed in there a little bit. [ MUSIC ] You think a pry bar or something?

(Jimmy)>> Maybe.

(Jeremy)>> Just waiting for him to get tools. Never prepared Jimmy, never prepared.

(Jimmy)>> Why wouldn't it just come out easy?

(Jeremy)>> Well that's what I would assume as well. [ MUSIC ]

(Jeremy)>> There we go. You alright?

(Jimmy)>> Yeah, don't step under heavy things.

(Jeremy)>> How's this side cause it looks like it's still engaged? [ MUSIC ] Oh no, we're good! Got a hose that came up. That's probably enough, huh?

(Jimmy)>> Yeah, that's good.

(Jeremy)>> Grab the connector for the oxygen sensor on this side. Tear that off. Ready? Backing up, exhaust okay. Well, that's simple. [ drill humming ] [ MUSIC ] [ drill humming ] [ MUSIC ]

(Jeremy)>> Ready? Oh, that's lighter. No engine, no trans on it, that's way easier.

[ metal clanging ]

(Jeremy)>> Flip it over, this way?

(Jimmy)>> Yeah. [ metal clanging ]

(Jeremy)>> At lot simpler to work on, right?

(Jimmy)>> Just clean it off a little bit and we'll be good. Something that's really common with Miatas that are driven very, very hard is that the subframe will crack where the lower control arm mounting bracket is welded to the subframe. This sharp corner in here is a stress riser. So over time when this subframe has seen millions and millions of loading cycles the steel will fatigue, and then it will crack. To mitigate that issue before it happens, we have these subframe reinforcements that'll weld in. These are very common to use with guys that do h-p-d-e or actually race in spec Miata. So, I just have to prep the subframe, weld it, and then we'll move on. [ aerosol can hissing ] [ grinder buzzing ]

(Jimmy)>> To get the subframe reinforcements in I'll start by grinding the paint off... [ welder crackling ]

(Jimmy)>> ...tacking the reinforcements to make sure everything is lined up, and final weld it in. [ welder crackling ]

(Jimmy)>> Alright, so we've got everything welded in and we won't have to worry about our subframe cracking. This thing's gonna be nice and strong for us on the track, and that'll just protect it with a coat of paint. [ aerosol can hissing ]

(Jimmy)>> Alright, this thing's all wrapped up. We'll just wait for it to dry and then this will be ready for brake and suspension work.

(Jeremy)>> Coming up, we give our transmission a little pep with a new clutch setup.

(Jeremy)>> Alright guys, well Jimmy's worked his magic on the subframe. He's welded the reinforcements in, and now it's time to move on to the engine, transmission, and the clutch setup. Now this is gonna be a race car for the rest of its life. So, it's a good idea to do some maintenance issues like this. It's pretty simple to get to. All we've got to do is take out a couple of bolts, and then we'll get rid of the clutch, the flywheel, and we'll do something with the pressure plate as well. [ drill humming ]

(Jeremy)>> Before we take off the transmission, we'll have to remove the starter, followed by the slave cylinder. [ drill humming ]

(Jeremy)>> Get the transmission off of here. Pretty small, pretty light thing. It's simple enough. Get it out of the way! [ MUSIC ] Pretty dirty though. [ drill humming ]

(Jeremy)>> Now I don't know if you guys can tell this, but this clutch setup looks pretty much brand new. Now we weren't told that when we bought the car, but it doesn't matter any ways because per spec rules we can actually run a performance style clutch. So, we were just gonna end up replacing this one anyways. So, the clutch that we're gonna be running is an ACT clutch that we got from Summit Racing. Now in the spec rule book they actually give you the part number for this specific clutch. It's got a six-pad racing disc. It comes with the pressure plate, the pilot bearing, throw out bearing, and the alignment tool, and where we're gonna get started is we have to get the old pilot bearing out and install the new one. [ MUSIC ] The easy way to do this, just slide the bearing in, use a socket that's about the same diameter as the outside and just give her some taps, and get it in there. That'll work! Now before we install the clutch and the pressure plate it's a good idea to either have your flywheel machined or turned down, but in our case since this whole setup was new anyways you can actually still feel the grooves or the machining grooves that are in the flywheel here, so we know it's in really good shape. All I'm gonna do is use a little bit of solvent. Then we'll just wipe it down, put the clutch and the pressure plate on it. [ MUSIC ] Now we'll grease up the threads here just a little bit. Put her together, it goes smoothly. [ MUSIC ] Then we can throw everything together. Get my hands clean too! [ MUSIC ] Make sure and add just a little bit of thread locker to these before we hammer them down. [ MUSIC ] [ drill humming ] [ MUSIC ]

(Jeremy)>> Jimmy, why do seagulls live by the sea?

(Jimmy)>> Cause they're not bagels.

(Jeremy)>> Dang it he knew it! That's terrible! Because if they lived by the bay they'd be called bagels. Come on man, that's funny.

(Jimmy)>> Yeah, I've heard that about seven thousand times.

(Jeremy)>> Well seven thousand and one's good too. [ MUSIC ] Alright the last thing we need to do is replace the throw out bearing inside the bell housing here, but it's pretty filthy. So, we're gonna go ahead and clean this up. We'll get the new throw out bearing in it, and then we'll just put the whole assembly back together. [ MUSIC ] This thing's filthy dirty in here, but this was a good idea. Let's get this on the table and we'll get the new bearing in. These are simple to install. Just pop out the old one and slide the new one on. Alright, let's get this transmission back on here and we'll just keep rocking and rolling. [ MUSIC ] [ drill humming ]

(Jeremy)>> Alright, the last thing we're gonna do before we set this thing back in the cradle is we'll go ahead and replace the old motor mounts. Just one more thing we can do for maintenance. [ drill humming ]

(Jeremy)>> Alright, we'll get this old mount off of here. It's pretty simple. It's got a little locking pin down there. We'll just put the new on, set that locking pin in place there a little bit. Then reuse the old nut that goes on there, tighten this one down, and then get this back on the motor. Be one step closer to getting this back in the subframe, and then from here we'll start working on the suspension and the brakes.

(Jimmy)>> We take our Miata suspension to the next level adding new coil overs.

(Jimmy)>> Jeremy's got the new clutch installed, and I'm ready to keep moving forward with the suspension. I do need a couple of pieces from the old strut. So, I'm gonna take those off, and then we'll get all the new stuff installed on the subframe. [ MUSIC ] When using a spring compressor like this, or any spring compressor for that matter, it's best to stand off to the side just in case something happens, and it'll decrease your chances of getting hit. We only need the top half from the strut. So, I'll take these two nuts off and the hat will just slide off. [ MUSIC ] With the hat off the old strut, we can start assembling the new ones. They consist of a damper from Bilstein and a spring from Eibach, both of which we got from Summit Racing, and the part numbers are in the spec Miata rule book. So, it's all really easy to find, and we also have the accompanying hardware to put it together. [ MUSIC ] That's it! [ MUSIC ] To finish this thing off we're going with a pad and rotor combo by Hawk Performance. These are gonna deal with the heat quite a bit better in a track scenario, and it's just gonna help us stop faster. [ MUSIC ] Alright then last thing, I'm just gonna clean the surface real quick with some brake clean. [ MUSIC ]

(Jeremy)>> Alright, so Jimmy's got the front all buttoned up, and in the rear it's pretty much the exact same thing. We'll get the pads and the rotors out of the way, get rid of that old strut, and we'll replace it with all the new stuff. [ MUSIC ] Let's find some where to pry there. [ MUSIC ] Get this thing off here. Seized up. Alright, there's a fun little fact about the rotors here. So, there is a couple of holes here on the face of the rotor but one of those holes is actually threaded that it's made for. So, you guys put a bolt into that hole. Then you grab your impact, and what that does is it pushes force on the hub, and it releases the rotor from the hub. Just like that! Alright, now we'll just go ahead and pull the bolts and get the strut out of here. [ drill humming ]

(Jeremy)>> With the bottom hole removed we'll head up top. [ MUSIC ] We'll just use this big bar here to get the strut out cause I gotta kinda push everybody down. Weeble wobble it up. There it goes! I'll go switch this out just like Jimmy's. Try to weasel this in here. [ drill humming ]

(Jeremy)>> Alright, that buttons up the suspension. Just got to throw the brakes on this thing, and then we'll get the engine and subframe back in this car. We'll finish it off with some sway bars. [ MUSIC ] Up next, we add the final touches to our suspension and reinstall our stronger subframe.

(Jeremy)>> You know these coil overs look pretty darn nice.

(Jimmy)>> This thing looks good. Alright, so we've got all the new suspension components and brake components on the subframe. So now we're ready to put the engine back in here and get it up under the car.

(Jeremy)>> And before we get this thing fully assembled, we'll go ahead and take care of the sway bars cause they're easy to get to. I'll go get the forklift and we'll get all this bolted up underneath here, and then at the very end we'll make it a roller. [ MUSIC ] [ drill humming ] [ MUSIC ]

(Jimmy)>> We're replacing our old sway bar with a bigger one from Eibach that we got from Summit Racing. [ MUSIC ] [ drill humming ] [ MUSIC ] [ mechanical humming ]

(Jeremy)>> Tell me when I can go forward.

(Jimmy)>> Keep going up. Alright let's go. [ mechanical humming ]

(Jimmy)>> Alright, stop right there. Start going down a little bit. Keep going. Stop! [ MUSIC ] Shimmy some stuff around here. [ MUSIC ] Go down very slow. [ MUSIC ] Stop!

(Jeremy)>> You've got to engage those studs, one side then the next.

(Jimmy)>> Alright, go down.

(Jeremy)>> Going slowly. [ MUSIC ]

(Jimmy)>> That's good right there.

(Jeremy)>> You in?

(Jimmy)>> Yeah!

(Jeremy)>> I'll put the nuts on it. [ drill humming ] [ MUSIC ]

(Jeremy)>> How's that look?

(Jimmy)>> Yep! [ MUSIC ]

(Jeremy)>> Center the engine off of the Miata symbol on the bumper. I don't know if it's right but that's what I'm gonna do. What do you think?

(Jimmy)>> Sure! Figure something out.

(Jeremy)>> I'm gonna lower it down a little bit.

(Jimmy)>> Come forward a little bit.

Keep coming! A little more, a little more, nice!

(Jeremy)>> It's just like eking on the thing. I'm gonna lower it down. Then we'll get the jack stands close. Slowly going down. That'll work? [ MUSIC ] Backing up. Good?

(Jimmy)>> Yep!

(Jeremy)>> Love the enthusiasm. To make this easier on ourselves we're gonna use a plumb bob. I'll drop this down and see how close we are. I say that's pretty close. Put it together, here we go! It may take a while.

(Jimmy)>> I've got about an inch until the strut engages. [ MUSIC ] [ drill humming ] [ MUSIC ]

(Jeremy)>> Alright, I think that pretty much buttons this whole thing up. Let's get the wheels and tires back on this. Then we'll get it down to the prep booth and start taking care of this faded out paint and this crummy clear coat.

(Jimmy)>> Yeah, we'll make it look good.

(Jeremy)>> Got some parts to get back on here though, and then we'll get the tires and wheels on it. Make our pile of parts go down a little bit.

(Jimmy)>> If you like anything you've seen on today's show go to Powernation TV dot com.
Show Full Transcript