Carcass Featured Projects
Carcass Builds
Want more content like this?
Join the PowerNation Email NewsletterParts Used In This Episode
Matco Tools
MATCO Tools are the Official Tool Supplier to PowerNation
The Industrial Depot
Tools, Hardware, Shop Supplies
Video Transcript
(Jimmy)>> Today on Carcass we
hear our 630 horse powerhouse roar between the frame rails.
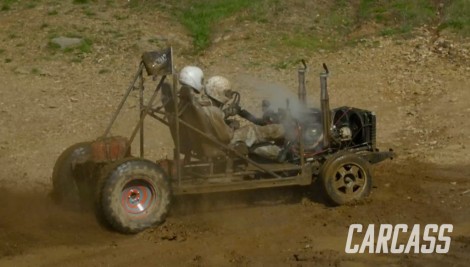
(Jeremy)>> And we slosh around in the mud with our man sized go kart called Frankenregal. [ Music ]
(Narrator)>> When you want to build something different you turn to these guys, Jeremy Weckman and Jimmy King. Jeremy was raised in Minnesota building street rods. He's a builder, fabricator, and welder. Jimmy grew up in Nevada working in his dad's garage building cars. He's a mechanical engineer, builder, and fabricator. They take left for dead rides and transform them into one of a kind builds. If you can dream it they can build it. This is Carcass, a non-traditional speed shop.
(Jimmy)>> This is our Chevy M1010 military ambulance chassis. It started with a big ambo box out back and a Chevy truck cab out front, but we've made a lot of changes to transform this tough chassis into a mud monster.
(Jeremy)>> That's right we sliced over two feet out of the frame, added some fish plates, and boxed it in for strength. We added some custom body mounts and got the first look of our Willys body sitting on top.
(Jimmy)>> With the dream coming alive we gutted the interior pulling up the carpet, trashing the rat's nest of wiring, and remove the chicken wire firewall.
(Jeremy)>> Then we got to work upgrading our suspension and our front axle. We added an eight inch lift to give us more ground clearance and an Eaton E-locker to give us true four wheel drive.
(Jimmy)>> Inside the cab we added a fuel cell in the back and fabbed up a pretty basic roll cage, which allowed us to mount a radiator in the window.
(Jeremy)>> With our fuel and cooling system in place we're now ready to drop the drivetrain in our M1010 chassis.
(Jimmy)>> Our engine is a 383 stroker small block Chevy with a roots style blower. It pushes out a whopping 630 horsepower and 532 pound feet of torque.
(Jeremy)>> Our goal was to back this new powerhouse up with the original turbo 400 transmission and our 208 transfer case but reverse went out on us in the parking lot. So we sent the whole setup off to Gear Star for a complete rebuild so it can withstand all of the horses our power plant can throw at it.
(Jimmy)>> You making way for the new engine and transmission?
(Jeremy)>> Yeah you know we're not gonna use these stock mounts anyways. They're just in the way. We're gonna do something completely unconventional and go with motor plates.
(Jimmy)>> I'm excited to use the motor plate and mid-plate. It's something I haven't done before, and there's some fabrication involved, and I think it's gonna be a lot easier than reusing the stock mounts.
(Jeremy)>> Yeah this will definitely be a learning experience for both of us.
(Jimmy)>> If we use the stock engine mounts our engine and transmission will sit way too far forward in relation to our Willys body. So we're gonna use an engine plate and a mid-plate, which essentially lets us put our drivetrain wherever we want.
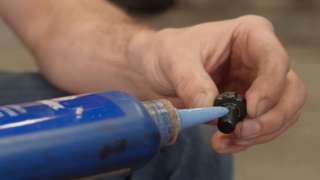
(Jeremy)>> The mounting solution we're using is from Summit Racing, and since it includes a mid-plate we're gonna add a spacer between the crankshaft and the flex plate. And then we'll just install the flex plate like normal, making sure we add blue Permatex thread locker to the bolts and torqueing them down. [ torque wrench clicking ]
(Jimmy)>> With the engine supported by the hoist we can remove the cart it was sitting on, which allows us to line up the mid-plate with the back of the engine.
(Jeremy)>> Keep coming! Slowing down!
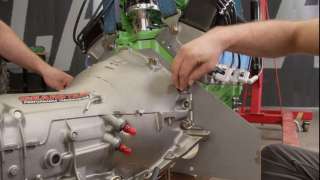
(Jimmy)>> We'll line up the bell housing and the transmission with the holes on the back of the engine. Then we'll add bolts marrying the two together. [ drill humming ]
(Jeremy)>> Alright you ready? I'll spin the engine over. Turning the engine over with a ratchet allows us to align the flex plate with the torque converter. Then we'll just start the bolts by hand, snug them up with an impact, and torque them down to 40 pound feet.
(Jimmy)>> To install the motor plate we'll remove the water pump. With it out of the way we'll add the plate using the bottom holes to hold it in place. Then the water pump is re-installed sharing the same bolt holes as the motor plate.
(Jeremy)>> Alright a little bit on the throttle.
(Jimmy)>> Now we're ready to test fit our engine. We'll lower it into place until it touches the frame rails.
(Jeremy)>> Almost, there we go. Okay to get this thing centered so we know how much we should be cutting off. That's 14 and three quarterish. That's actually about 14 and five-eighths. So that's super close so we'll called that centered.
(Jimmy)>> How's the front look?
(Jeremy)>> We'll go see. That should be hopefully centered. Got two feet across, and if I eyeball it that actually looks super, super close. And the plates, look right from side to side. So put a mark here and I'll do the same thing on the other side, and we'll just trim right there.
(Jimmy)>> These are universal mid and engine plates, which need to be trimmed down to fit our frame rails. The measurement doesn't have to be exact but we need just enough clearance to fit between the frame rails centering the crank pulley and the tail shaft.
(Jeremy)>> With a quick measurement up front we now know we have enough room to clear the grille shell, and Jimmy, well he came up with an easy mounting solution out back.
(Jimmy)>> How far apart are those crossmember bolts?
(Jeremy)>> They're three inches. That's gonna work. With the location that we've picked for the drivetrain we're still gonna be able to use the stock transmission crossmember, which is great because that's gonna save us quite a bit of time. All we have to do is slide it back one bolt hole, and then just drill another hole in the frame, and then we'll just use all the stock hardware to put it back on.
(Jimmy)>> Securing the transmission to the crossmember will help us make the motor mounts because it'll locate everything front to back. With the transmission locked in we're gonna get started on the engine mount. Making a template will make sure that everything's gonna fit.
(Jeremy)>> We're making these brackets out of three-sixteenths steel, and the Edwards Iron Worker will get the job done quickly. We'll first cut out a chunk on the shear. Then we'll move over to the notcher doing some very specific cuts to give this bracket its shape.
(Jimmy)>> We'll clean that up with a belt sander before bringing it back to the engine. With it clamped in place we'll be able to tack it in, followed by drilling a hole through the engine plate and the fabricated mount.
(Jeremy)>> We'll add some grade eight hardware and then just tighten them down, and then we'll make these engine mounts a permanent part of our chassis.
(Jimmy)>> The mid-plate gets the same treatment, rinsing and repeating the process to wrangle those 630 horses between our two frame rails. Hey Jeremy, so we had a tough time getting those rusty bolts out when we were installing the suspension kit right? So I picked up this new tool from our local Matco distributor and to be honest it just makes sense the next time we do something like this. This is the half inch high power impact wrench from Matco Tools. With 1,600 pound feet of breakaway torque this lightweight pneumatic impact will allow us to break bolts free like on our M1010 chassis that have decades of corrosion build up.
(Jeremy)>> Yeah let me see this thing. It's actually pretty light.
(Jimmy)>> Yeah it only weighs like four and a half pounds but packs a punch.
(Jeremy)>> Yeah I bet.
(Jeremy)>> Up next our Willys body finds its final resting place.
(Jimmy)>> Plus we fill this giant space with a custom firewall. You're watching Carcass.
(Jimmy)>> Our Willys body swap is finally starting to take shape. With the 630 horsepower supercharged engine and the turbo 400 transmission in their final resting place we're getting really close to seeing these two decade old hunks of metal breathe new life.
(Jeremy)>> You know what Jimmy. This giant green behemoth sure is a snug fit in between the frame rails of the mud monster.
(Jimmy)>> And we used the engine plate, mid plate to put this thing exactly where we wanted to and we even got to use the stock trans crossmember.
(Jeremy)>> Right but I think it's about time we bring this whole build together but we're missing one thing. That's a giant silver thing.
(Jimmy)>> The body!
(Jeremy)>> We've done just about all we can do with the Willys body since it's been separated from the M1010 chassis. Well now we need to see how it all fits together with the upgraded engine and the beefier transmission. So we're gonna marry these two together for the very last time. [ drill humming ] [ Music ]
(Jimmy)>> I'm five foot 16 in boots and this thing is still taller yet.
(Jeremy)>> You're 6'4.
(Jimmy)>> Yes exactly. So 8 inches total lift now and still we have six inch taller tires to put on it.
(Jeremy)>> Right we could build like this goofy step thing right here for you and I to get into it.
(Jimmy)>> We'll need it.
(Jeremy)>> Speaking of being taller we still have the throttle bodies, some spacers. We have the air cleaner on the front of the engine to put on. This thing's gonna be massive as well and stick way out of the hood, but we're missing something.
(Jimmy)>> What's that?
(Jeremy)>> There's a giant hole right here.
(Jimmy)>> So we need to build a firewall?
(Jeremy)>> We should probably build a firewall.
(Jimmy)>> Well let's build a firewall.
(Jeremy)>> I'll go this way.
(Jimmy)>> Before we can make our new firewall we need to pull some measurements from the giant hole where the old firewall used to be. We'll measure the overall width and length taking note of where a bend can transition the firewall to the kick pan. We measured an overall width of 50 inches and a length of 26 inches keeping in mind that the floor tapers near the bottom. Leaving the piece a little long will allow us to estimate where the bend will be and trim the excess later.
(Jeremy)>> Following our measurements we'll lay down a couple of lines on our steel. The first line is the center line, and the outside marks are the cut lines that follow the taper of the floor. With the lines laid out we'll cut the piece down on the shear, and then we'll come back, trim the edges down its final size with our Matco Tools Power Shear. After we hand form the transition from the firewall to the kick pan on our break... [ Music ] ...we'll come back and do one more cut making way for the transmission. Hey Jimmy you want to give me a hand? Let's see if we can sneak it behind the supercharger. That just kind of slid right in there.
(Jimmy)>> It actually looks like it fits pretty well. We might have a little trimming to do but it shouldn't be too much.
(Jeremy)>> Yeah I think we'll be more than fine. It actually fits in there pretty darn good. Before we can do any cutting we need to mark the areas where we can't cut. Then we'll take our firewall over to the table for some modifications.
(Jimmy)>> We'll cut a curve in the corners to mask the curvature of the cowl. Then we'll need to cut a hole to make room for the distributor on the back side of the engine.
(Jeremy)>> We'll add a distributor relief panel that we made in the slip roller... [ welder crackling ]
(Jeremy)>> ...and then just tack it into place. We'll cap it off with the matching plate and weld it in. [ welder crackling ]
(Jimmy)>> Finally we'll add a bend for the kick pan bending it just enough so it'll line up with the original floor. Now at this point the metal is pretty flimsy. So to stiffen it up we're gonna add some ribs at the bead roller. These not only add some rigidity to the firewall but they also add some style points in the cab and the engine bay.
(Jeremy)>> That's right and to wrap up this firewall install all we need to do is add a couple dozen rosette welds. And our Willys body, well it's starting to look whole again.
(Jimmy)>> Hey Jeremy.
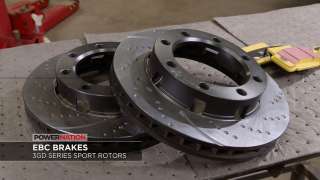
(Jeremy)>> I was looking into a way to increase performance on this big guy. With the bigger tires and larger rotational mass we should definitely do a brake upgrade. So I found these eight lug slotted and dimpled 3-GD series sport rotors from EBC. They're precision machined and they have full sweep slots, which will help clear any debris from our rotors, and if we match these with EBC's yellow stuff 4,000 series brake pads, which are formulated to withstand ultra high friction, this little combo will give us plenty of stopping power on our mud truck. Coming up we take care of some housekeeping before this mud wagon breathes new life. You're watching Carcass. [ engine revving ]
(Jeremy)>> You know this whole thing is coming together but there's still a bunch of stuff we've got to do. We've got to put the entire fuel system in it. We've got to hook up the whole e-f-i. We've got to hook the coolant lines from here to the back. Some stuff to do with the transmission yet, and we've got to put the headers on.
(Jimmy)>> Well I'm gonna be working in the back. I'm gonna get rid of those drum brakes and install our disc brake conversion kit.
(Jeremy)>> That sounds good. You know by the end of the day I really would like to hear this thing run and I would love to see this big blower belt spinning.
(Jimmy)>> In order for us to knock this all out Jeremy and I will have to get cranking on some of the hot list items. Now the brakes aren't a necessity but I know we're waiting on a few parts to arrive today. So converting the brakes is a good use of our time.
(Jeremy)>> To do the disc brake conversion there's quite a bit of disassembly required. We'll need to gain access to the drum and axle assembly to get started. We'll unbolt and break free the axle shaft. Then we'll just pull the axle shaft out of the housing.
(Jimmy)>> Next we'll need to get the hub and drum free. To do this we'll first remove the snap ring. Then we'll take out the woodruff key that locks in the spindle nut. We'll back that out next, leaving us to pull the hub and drum free.
(Jeremy)>> Now we just need to remove the brake assembly. With a few hits of the dead blow the backing plate comes free, leaving us with a bare spindle.
(Jimmy)>> We'll need to press out the wheel studs so we can separate the hub from the drum. We're sacrificing an extra lug nut so we don't mushroom the top of the stud with our Edwards hydraulic press.
(Jeremy)>> The press breaks the studs free, but we'll need to use a dead blow to remove them completely. This will allow us to tap the hub free from the drum.
(Jimmy)>> We can now start assembling our disc brake conversion kit starting with the rotor. The original studs are pressed back through the new rotor and the original hub. Then we can throw on the caliper bracket we got from Rough Stuff Specialties on our bare spindle. The hub and rotor assembly can go back on, followed by the spindle nut, the woodruff key, and finally the snap ring.
(Jeremy)>> The axle is then slipped back into its housing, giving it a little twist and a lift to fully engage it in the differential. We'll throw the caliper on the newly installed bracket and tighten it down. When we're ready to add brake lines we'll hook everything back up. Then we'll have a better performing brake system. [ Music ] Parts delivery! [ Music ]
(Jimmy)>> That's the stuff we need to finish up right?
(Jeremy)>> Right, we've got our fuel injection from Holley Performance and we got our coolant hose from AutoZone.
(Jimmy)>> Awesome, I just finished up the brakes and I have a little bit of a mess to clean up but I can join you in a little bit.
(Jeremy)>> Fantastic, when you're done cleaning up come and find me. We'll start our engine prep with a cooling solution. Now we mounted our radiator out back so we have a unique plumbing situation to maneuver around our new engine mount.
(Jimmy)>> With that out of the way we can start running our hose. We'll need to drill a hole in the cab to pass it through to the radiator.
(Jeremy)>> Good thing we're not restoring this truck.
(Jimmy)>> Then we'll fish our hosing through the hole up to the radiator where we'll make our final connections to cool the engine. The same will be done with the return lines carrying the hot water from the engine.
(Jeremy)>> Now that we've got our coolant hoses run we'll work on keeping our transmission happy too. We're using dash six hose and a-n fittings. They screw directly into the ports on the transmission and the hoses are braided, allowing them to survive the rigorous conditions they'll be exposed to. This all gets looped together in the rear of the vehicle where we mounted the trans cooler.
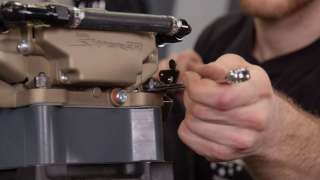
(Jimmy)>> With all the cooling out of the way we can get to work doing a little upgrade to the top end of our engine. We're adding Holley Performance Sniper EFI's to replace the dual carbureted solution that we were using before. We'll need to tie these throttle bodies together because they're gonna be working in tandem with each other.
(Jeremy)>> That's right, there's a lot more wiring involved in this setup over the dual carbs we had before, but let's face it. Modernizing our 67 year old Willys is just plain cool.
(Jimmy)>> And it should be mentioned that these kind of systems require high fuel press to operate. So we're gonna be using line rated for e-f-i throughout our entire fuel system. And since we mounted the fuel tank in the rear we'll fish the line under the chassis making connections at the fuel pump and filters before finishing up at the tank.
(Jeremy)>> There are a few more things we need to button up before we can get this engine started. We need to slap on an alternator from Summit Racing and install the belt that will drive it. Then we'll add a set of zoomy headers that will give this small block Chevy that signature sound. And finally we'll button up the top of the engine with the matching scoop. Okay man fluid's in it and it's all wired up.
(Jimmy)>> Let's get some spark going on this guy.
(Jeremy)>> Let's see if it rocks. Ready? [ engine starting ]
(Jimmy)>> Ohh yeaaah, woo! That's awesome!
(Jeremy)>> Just like that! [ engine revving ]
(Jimmy)>> Yes!
(Jeremy)>> Up next we take our inadequate vehicle through some impractical scenarios. This is Carcass.
[ Music ] [ engine revving ]
(Jeremy)>> Our Willys build has been a bit of challenge so far but we've hit a major milestone. Getting the engine running, setting in between the frame rails, and putting the body on top of the chassis.
(Jimmy)>> Yeah and what a better way to celebrate than with a motivational drive at Woolys Off Road Park. We're gonna spin some tires, sling some mud in this man size go kart we know as Frankenregal.
(Jeremy)>> You remember this build where we took a junkyard bound Buick Regal chassis and got it running with whatever we could find around the shop. Well we took it one step further with an engine swap, a rear locker, and a whole safety package.
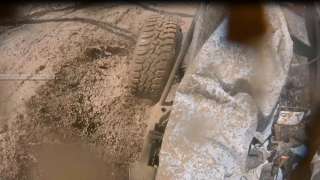
(Jimmy)>> This vehicle was purpose built to have some fun on the asphalt but we slapped on a pair of 35 inch General Tire X-3's and thought what's stopping us from running this thing through the mud? I mean what could go wrong? [ Music ]
(Jeremy)>> We really don't have any objective for this thing. We're just gonna take it out, have some fun slipping and sliding through the mud, but if we get stuck that's okay because our camera crew is here on standby with a four wheel drive, but let's hope it doesn't come to that.
(Jimmy)>> When we first hit the trail this thing felt pretty powerful going up the hills but as soon as we hit the rocks it felt pretty brutal in the seat. With so little suspension travel on a car that was originally designed to be on the road we could feel every bump, divot, and rock up through the chassis but driving this thing around was still a ton of fun.
(Jeremy)>> Yeah this thing has done pretty amazing on the trail for it being a car and not a truck, but you know what, we're going through the water next. [ engine revving ] [ Music ]
(Jeremy)>> That was awesome but dude you are totally soaked.
(Jimmy)>> But I feel alive!
(Jeremy)>> You're gonna wish you had a pair of these for where we're headed next.
(Jimmy)>> Bigger mud hole?
(Jeremy)>> We are going to a bigger mud hole. It's been raining a lot over the past few weeks, and we've seen a lot of sloppy conditions here at Woolys Off Road Park, but these are the exact muddy conditions we want to see when we bring out our Willys mud wagon.
(Jimmy)>> And lucky for us we know all the areas that collect the most water during any rain, and especially the rain we had two days ago.
(Jeremy)>> Meet what we call the Wooly basin. It's nearly 100 yards across and the depth, well it's unknown, but one thing we do know about this area is that if you show up with a vehicle that's not equipped properly you're gonna get stuck.
(Jimmy)>> We're not gonna go too hardcore like we would with our Willys wagon. So we're just gonna stay on the outskirts of this giant mud hole, and it's pretty obvious that our vehicle is quite equipped to get all the way through it. [ engine revving ] [ Music ]
(Jimmy)>> This thing has been a blast!
(Jeremy)>> Yeah and what better motivation to go back and finish our Willys mud truck than a day of fun in the sun and the mud.
(Jimmy)>> Yeah I can't wait to get some huge tires on that thing, slosh around in the mud, and after the beating we gave the Frankenregal we're gonna have go back and give that thing some r&r.
(Jeremy)>> You know we threw the belt off of it the last time we went through the water. So we're gonna need a little help getting out of here anyways. So hey camera crew, you want to give us a tow? At least it's way quieter this way.
(Jimmy)>> Follow along with this build at Powernation TV dot com.
Show Full Transcript
(Jeremy)>> And we slosh around in the mud with our man sized go kart called Frankenregal. [ Music ]
(Narrator)>> When you want to build something different you turn to these guys, Jeremy Weckman and Jimmy King. Jeremy was raised in Minnesota building street rods. He's a builder, fabricator, and welder. Jimmy grew up in Nevada working in his dad's garage building cars. He's a mechanical engineer, builder, and fabricator. They take left for dead rides and transform them into one of a kind builds. If you can dream it they can build it. This is Carcass, a non-traditional speed shop.
(Jimmy)>> This is our Chevy M1010 military ambulance chassis. It started with a big ambo box out back and a Chevy truck cab out front, but we've made a lot of changes to transform this tough chassis into a mud monster.
(Jeremy)>> That's right we sliced over two feet out of the frame, added some fish plates, and boxed it in for strength. We added some custom body mounts and got the first look of our Willys body sitting on top.
(Jimmy)>> With the dream coming alive we gutted the interior pulling up the carpet, trashing the rat's nest of wiring, and remove the chicken wire firewall.
(Jeremy)>> Then we got to work upgrading our suspension and our front axle. We added an eight inch lift to give us more ground clearance and an Eaton E-locker to give us true four wheel drive.
(Jimmy)>> Inside the cab we added a fuel cell in the back and fabbed up a pretty basic roll cage, which allowed us to mount a radiator in the window.
(Jeremy)>> With our fuel and cooling system in place we're now ready to drop the drivetrain in our M1010 chassis.
(Jimmy)>> Our engine is a 383 stroker small block Chevy with a roots style blower. It pushes out a whopping 630 horsepower and 532 pound feet of torque.
(Jeremy)>> Our goal was to back this new powerhouse up with the original turbo 400 transmission and our 208 transfer case but reverse went out on us in the parking lot. So we sent the whole setup off to Gear Star for a complete rebuild so it can withstand all of the horses our power plant can throw at it.
(Jimmy)>> You making way for the new engine and transmission?
(Jeremy)>> Yeah you know we're not gonna use these stock mounts anyways. They're just in the way. We're gonna do something completely unconventional and go with motor plates.
(Jimmy)>> I'm excited to use the motor plate and mid-plate. It's something I haven't done before, and there's some fabrication involved, and I think it's gonna be a lot easier than reusing the stock mounts.
(Jeremy)>> Yeah this will definitely be a learning experience for both of us.
(Jimmy)>> If we use the stock engine mounts our engine and transmission will sit way too far forward in relation to our Willys body. So we're gonna use an engine plate and a mid-plate, which essentially lets us put our drivetrain wherever we want.
(Jeremy)>> The mounting solution we're using is from Summit Racing, and since it includes a mid-plate we're gonna add a spacer between the crankshaft and the flex plate. And then we'll just install the flex plate like normal, making sure we add blue Permatex thread locker to the bolts and torqueing them down. [ torque wrench clicking ]
(Jimmy)>> With the engine supported by the hoist we can remove the cart it was sitting on, which allows us to line up the mid-plate with the back of the engine.
(Jeremy)>> Keep coming! Slowing down!
(Jimmy)>> We'll line up the bell housing and the transmission with the holes on the back of the engine. Then we'll add bolts marrying the two together. [ drill humming ]
(Jeremy)>> Alright you ready? I'll spin the engine over. Turning the engine over with a ratchet allows us to align the flex plate with the torque converter. Then we'll just start the bolts by hand, snug them up with an impact, and torque them down to 40 pound feet.
(Jimmy)>> To install the motor plate we'll remove the water pump. With it out of the way we'll add the plate using the bottom holes to hold it in place. Then the water pump is re-installed sharing the same bolt holes as the motor plate.
(Jeremy)>> Alright a little bit on the throttle.
(Jimmy)>> Now we're ready to test fit our engine. We'll lower it into place until it touches the frame rails.
(Jeremy)>> Almost, there we go. Okay to get this thing centered so we know how much we should be cutting off. That's 14 and three quarterish. That's actually about 14 and five-eighths. So that's super close so we'll called that centered.
(Jimmy)>> How's the front look?
(Jeremy)>> We'll go see. That should be hopefully centered. Got two feet across, and if I eyeball it that actually looks super, super close. And the plates, look right from side to side. So put a mark here and I'll do the same thing on the other side, and we'll just trim right there.
(Jimmy)>> These are universal mid and engine plates, which need to be trimmed down to fit our frame rails. The measurement doesn't have to be exact but we need just enough clearance to fit between the frame rails centering the crank pulley and the tail shaft.
(Jeremy)>> With a quick measurement up front we now know we have enough room to clear the grille shell, and Jimmy, well he came up with an easy mounting solution out back.
(Jimmy)>> How far apart are those crossmember bolts?
(Jeremy)>> They're three inches. That's gonna work. With the location that we've picked for the drivetrain we're still gonna be able to use the stock transmission crossmember, which is great because that's gonna save us quite a bit of time. All we have to do is slide it back one bolt hole, and then just drill another hole in the frame, and then we'll just use all the stock hardware to put it back on.
(Jimmy)>> Securing the transmission to the crossmember will help us make the motor mounts because it'll locate everything front to back. With the transmission locked in we're gonna get started on the engine mount. Making a template will make sure that everything's gonna fit.
(Jeremy)>> We're making these brackets out of three-sixteenths steel, and the Edwards Iron Worker will get the job done quickly. We'll first cut out a chunk on the shear. Then we'll move over to the notcher doing some very specific cuts to give this bracket its shape.
(Jimmy)>> We'll clean that up with a belt sander before bringing it back to the engine. With it clamped in place we'll be able to tack it in, followed by drilling a hole through the engine plate and the fabricated mount.
(Jeremy)>> We'll add some grade eight hardware and then just tighten them down, and then we'll make these engine mounts a permanent part of our chassis.
(Jimmy)>> The mid-plate gets the same treatment, rinsing and repeating the process to wrangle those 630 horses between our two frame rails. Hey Jeremy, so we had a tough time getting those rusty bolts out when we were installing the suspension kit right? So I picked up this new tool from our local Matco distributor and to be honest it just makes sense the next time we do something like this. This is the half inch high power impact wrench from Matco Tools. With 1,600 pound feet of breakaway torque this lightweight pneumatic impact will allow us to break bolts free like on our M1010 chassis that have decades of corrosion build up.
(Jeremy)>> Yeah let me see this thing. It's actually pretty light.
(Jimmy)>> Yeah it only weighs like four and a half pounds but packs a punch.
(Jeremy)>> Yeah I bet.
(Jeremy)>> Up next our Willys body finds its final resting place.
(Jimmy)>> Plus we fill this giant space with a custom firewall. You're watching Carcass.
(Jimmy)>> Our Willys body swap is finally starting to take shape. With the 630 horsepower supercharged engine and the turbo 400 transmission in their final resting place we're getting really close to seeing these two decade old hunks of metal breathe new life.
(Jeremy)>> You know what Jimmy. This giant green behemoth sure is a snug fit in between the frame rails of the mud monster.
(Jimmy)>> And we used the engine plate, mid plate to put this thing exactly where we wanted to and we even got to use the stock trans crossmember.
(Jeremy)>> Right but I think it's about time we bring this whole build together but we're missing one thing. That's a giant silver thing.
(Jimmy)>> The body!
(Jeremy)>> We've done just about all we can do with the Willys body since it's been separated from the M1010 chassis. Well now we need to see how it all fits together with the upgraded engine and the beefier transmission. So we're gonna marry these two together for the very last time. [ drill humming ] [ Music ]
(Jimmy)>> I'm five foot 16 in boots and this thing is still taller yet.
(Jeremy)>> You're 6'4.
(Jimmy)>> Yes exactly. So 8 inches total lift now and still we have six inch taller tires to put on it.
(Jeremy)>> Right we could build like this goofy step thing right here for you and I to get into it.
(Jimmy)>> We'll need it.
(Jeremy)>> Speaking of being taller we still have the throttle bodies, some spacers. We have the air cleaner on the front of the engine to put on. This thing's gonna be massive as well and stick way out of the hood, but we're missing something.
(Jimmy)>> What's that?
(Jeremy)>> There's a giant hole right here.
(Jimmy)>> So we need to build a firewall?
(Jeremy)>> We should probably build a firewall.
(Jimmy)>> Well let's build a firewall.
(Jeremy)>> I'll go this way.
(Jimmy)>> Before we can make our new firewall we need to pull some measurements from the giant hole where the old firewall used to be. We'll measure the overall width and length taking note of where a bend can transition the firewall to the kick pan. We measured an overall width of 50 inches and a length of 26 inches keeping in mind that the floor tapers near the bottom. Leaving the piece a little long will allow us to estimate where the bend will be and trim the excess later.
(Jeremy)>> Following our measurements we'll lay down a couple of lines on our steel. The first line is the center line, and the outside marks are the cut lines that follow the taper of the floor. With the lines laid out we'll cut the piece down on the shear, and then we'll come back, trim the edges down its final size with our Matco Tools Power Shear. After we hand form the transition from the firewall to the kick pan on our break... [ Music ] ...we'll come back and do one more cut making way for the transmission. Hey Jimmy you want to give me a hand? Let's see if we can sneak it behind the supercharger. That just kind of slid right in there.
(Jimmy)>> It actually looks like it fits pretty well. We might have a little trimming to do but it shouldn't be too much.
(Jeremy)>> Yeah I think we'll be more than fine. It actually fits in there pretty darn good. Before we can do any cutting we need to mark the areas where we can't cut. Then we'll take our firewall over to the table for some modifications.
(Jimmy)>> We'll cut a curve in the corners to mask the curvature of the cowl. Then we'll need to cut a hole to make room for the distributor on the back side of the engine.
(Jeremy)>> We'll add a distributor relief panel that we made in the slip roller... [ welder crackling ]
(Jeremy)>> ...and then just tack it into place. We'll cap it off with the matching plate and weld it in. [ welder crackling ]
(Jimmy)>> Finally we'll add a bend for the kick pan bending it just enough so it'll line up with the original floor. Now at this point the metal is pretty flimsy. So to stiffen it up we're gonna add some ribs at the bead roller. These not only add some rigidity to the firewall but they also add some style points in the cab and the engine bay.
(Jeremy)>> That's right and to wrap up this firewall install all we need to do is add a couple dozen rosette welds. And our Willys body, well it's starting to look whole again.
(Jimmy)>> Hey Jeremy.
(Jeremy)>> I was looking into a way to increase performance on this big guy. With the bigger tires and larger rotational mass we should definitely do a brake upgrade. So I found these eight lug slotted and dimpled 3-GD series sport rotors from EBC. They're precision machined and they have full sweep slots, which will help clear any debris from our rotors, and if we match these with EBC's yellow stuff 4,000 series brake pads, which are formulated to withstand ultra high friction, this little combo will give us plenty of stopping power on our mud truck. Coming up we take care of some housekeeping before this mud wagon breathes new life. You're watching Carcass. [ engine revving ]
(Jeremy)>> You know this whole thing is coming together but there's still a bunch of stuff we've got to do. We've got to put the entire fuel system in it. We've got to hook up the whole e-f-i. We've got to hook the coolant lines from here to the back. Some stuff to do with the transmission yet, and we've got to put the headers on.
(Jimmy)>> Well I'm gonna be working in the back. I'm gonna get rid of those drum brakes and install our disc brake conversion kit.
(Jeremy)>> That sounds good. You know by the end of the day I really would like to hear this thing run and I would love to see this big blower belt spinning.
(Jimmy)>> In order for us to knock this all out Jeremy and I will have to get cranking on some of the hot list items. Now the brakes aren't a necessity but I know we're waiting on a few parts to arrive today. So converting the brakes is a good use of our time.
(Jeremy)>> To do the disc brake conversion there's quite a bit of disassembly required. We'll need to gain access to the drum and axle assembly to get started. We'll unbolt and break free the axle shaft. Then we'll just pull the axle shaft out of the housing.
(Jimmy)>> Next we'll need to get the hub and drum free. To do this we'll first remove the snap ring. Then we'll take out the woodruff key that locks in the spindle nut. We'll back that out next, leaving us to pull the hub and drum free.
(Jeremy)>> Now we just need to remove the brake assembly. With a few hits of the dead blow the backing plate comes free, leaving us with a bare spindle.
(Jimmy)>> We'll need to press out the wheel studs so we can separate the hub from the drum. We're sacrificing an extra lug nut so we don't mushroom the top of the stud with our Edwards hydraulic press.
(Jeremy)>> The press breaks the studs free, but we'll need to use a dead blow to remove them completely. This will allow us to tap the hub free from the drum.
(Jimmy)>> We can now start assembling our disc brake conversion kit starting with the rotor. The original studs are pressed back through the new rotor and the original hub. Then we can throw on the caliper bracket we got from Rough Stuff Specialties on our bare spindle. The hub and rotor assembly can go back on, followed by the spindle nut, the woodruff key, and finally the snap ring.
(Jeremy)>> The axle is then slipped back into its housing, giving it a little twist and a lift to fully engage it in the differential. We'll throw the caliper on the newly installed bracket and tighten it down. When we're ready to add brake lines we'll hook everything back up. Then we'll have a better performing brake system. [ Music ] Parts delivery! [ Music ]
(Jimmy)>> That's the stuff we need to finish up right?
(Jeremy)>> Right, we've got our fuel injection from Holley Performance and we got our coolant hose from AutoZone.
(Jimmy)>> Awesome, I just finished up the brakes and I have a little bit of a mess to clean up but I can join you in a little bit.
(Jeremy)>> Fantastic, when you're done cleaning up come and find me. We'll start our engine prep with a cooling solution. Now we mounted our radiator out back so we have a unique plumbing situation to maneuver around our new engine mount.
(Jimmy)>> With that out of the way we can start running our hose. We'll need to drill a hole in the cab to pass it through to the radiator.
(Jeremy)>> Good thing we're not restoring this truck.
(Jimmy)>> Then we'll fish our hosing through the hole up to the radiator where we'll make our final connections to cool the engine. The same will be done with the return lines carrying the hot water from the engine.
(Jeremy)>> Now that we've got our coolant hoses run we'll work on keeping our transmission happy too. We're using dash six hose and a-n fittings. They screw directly into the ports on the transmission and the hoses are braided, allowing them to survive the rigorous conditions they'll be exposed to. This all gets looped together in the rear of the vehicle where we mounted the trans cooler.
(Jimmy)>> With all the cooling out of the way we can get to work doing a little upgrade to the top end of our engine. We're adding Holley Performance Sniper EFI's to replace the dual carbureted solution that we were using before. We'll need to tie these throttle bodies together because they're gonna be working in tandem with each other.
(Jeremy)>> That's right, there's a lot more wiring involved in this setup over the dual carbs we had before, but let's face it. Modernizing our 67 year old Willys is just plain cool.
(Jimmy)>> And it should be mentioned that these kind of systems require high fuel press to operate. So we're gonna be using line rated for e-f-i throughout our entire fuel system. And since we mounted the fuel tank in the rear we'll fish the line under the chassis making connections at the fuel pump and filters before finishing up at the tank.
(Jeremy)>> There are a few more things we need to button up before we can get this engine started. We need to slap on an alternator from Summit Racing and install the belt that will drive it. Then we'll add a set of zoomy headers that will give this small block Chevy that signature sound. And finally we'll button up the top of the engine with the matching scoop. Okay man fluid's in it and it's all wired up.
(Jimmy)>> Let's get some spark going on this guy.
(Jeremy)>> Let's see if it rocks. Ready? [ engine starting ]
(Jimmy)>> Ohh yeaaah, woo! That's awesome!
(Jeremy)>> Just like that! [ engine revving ]
(Jimmy)>> Yes!
(Jeremy)>> Up next we take our inadequate vehicle through some impractical scenarios. This is Carcass.
[ Music ] [ engine revving ]
(Jeremy)>> Our Willys build has been a bit of challenge so far but we've hit a major milestone. Getting the engine running, setting in between the frame rails, and putting the body on top of the chassis.
(Jimmy)>> Yeah and what a better way to celebrate than with a motivational drive at Woolys Off Road Park. We're gonna spin some tires, sling some mud in this man size go kart we know as Frankenregal.
(Jeremy)>> You remember this build where we took a junkyard bound Buick Regal chassis and got it running with whatever we could find around the shop. Well we took it one step further with an engine swap, a rear locker, and a whole safety package.
(Jimmy)>> This vehicle was purpose built to have some fun on the asphalt but we slapped on a pair of 35 inch General Tire X-3's and thought what's stopping us from running this thing through the mud? I mean what could go wrong? [ Music ]
(Jeremy)>> We really don't have any objective for this thing. We're just gonna take it out, have some fun slipping and sliding through the mud, but if we get stuck that's okay because our camera crew is here on standby with a four wheel drive, but let's hope it doesn't come to that.
(Jimmy)>> When we first hit the trail this thing felt pretty powerful going up the hills but as soon as we hit the rocks it felt pretty brutal in the seat. With so little suspension travel on a car that was originally designed to be on the road we could feel every bump, divot, and rock up through the chassis but driving this thing around was still a ton of fun.
(Jeremy)>> Yeah this thing has done pretty amazing on the trail for it being a car and not a truck, but you know what, we're going through the water next. [ engine revving ] [ Music ]
(Jeremy)>> That was awesome but dude you are totally soaked.
(Jimmy)>> But I feel alive!
(Jeremy)>> You're gonna wish you had a pair of these for where we're headed next.
(Jimmy)>> Bigger mud hole?
(Jeremy)>> We are going to a bigger mud hole. It's been raining a lot over the past few weeks, and we've seen a lot of sloppy conditions here at Woolys Off Road Park, but these are the exact muddy conditions we want to see when we bring out our Willys mud wagon.
(Jimmy)>> And lucky for us we know all the areas that collect the most water during any rain, and especially the rain we had two days ago.
(Jeremy)>> Meet what we call the Wooly basin. It's nearly 100 yards across and the depth, well it's unknown, but one thing we do know about this area is that if you show up with a vehicle that's not equipped properly you're gonna get stuck.
(Jimmy)>> We're not gonna go too hardcore like we would with our Willys wagon. So we're just gonna stay on the outskirts of this giant mud hole, and it's pretty obvious that our vehicle is quite equipped to get all the way through it. [ engine revving ] [ Music ]
(Jimmy)>> This thing has been a blast!
(Jeremy)>> Yeah and what better motivation to go back and finish our Willys mud truck than a day of fun in the sun and the mud.
(Jimmy)>> Yeah I can't wait to get some huge tires on that thing, slosh around in the mud, and after the beating we gave the Frankenregal we're gonna have go back and give that thing some r&r.
(Jeremy)>> You know we threw the belt off of it the last time we went through the water. So we're gonna need a little help getting out of here anyways. So hey camera crew, you want to give us a tow? At least it's way quieter this way.
(Jimmy)>> Follow along with this build at Powernation TV dot com.