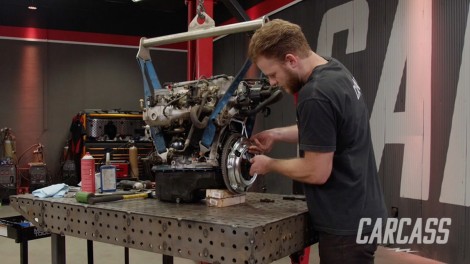
Carcass Featured Projects

Carcass Builds

Parts Used In This Episode

Summit Racing
Permatex The Right Stuff Gasket Maker
Summit Racing
Summit Racing 2.1 VOC Clear Coat
Summit Racing
Summit Racing 2.1 VOC Primer Sealer
Summit Racing
Summit Racing 3.5 VOC Base Coat Paints
AutoZone
Exedy Stage 2 Clutch & Flywheel
Matco Tools
MATCO Tools are the Official Tool Supplier to Carcass
The Industrial Depot
Tools, Hardware, Shop Supplies

Episode Transcript

(Jeremy)>> You're watching Powernation

(Jimmy)>> Today on Carcass we strip down our leaky 1.6 liter Honda Civic engine, replacing some common wear items to freshen it up for some upgrades later.

(Jeremy)>> Plus we add a performance clutch to help our little hatchback get around the course. Then we head into the paint booth to lay down a rally inspired paint scheme with some sporty graphics. ♪ ♪ [ tires squealing ] ♪ ♪

(Jeremy)>> Hey guys welcome to Carcass. We've made pretty good progress on our little Honda Civic rally car. We've managed to strip the entire interior, Jimmy built a killer roll cage, and we even plucked the motor out of this thing.

(Jimmy)>> And today I've got a new timing belt and some gaskets to replace on the engine to keep it running a little while longer and I've a new clutch to throw at it to put the power down on the dirt.

(Jeremy)>> I'm gonna let you take care of the engine side of things. I'm gonna disappear with the car so we can start prepping cause we're gonna do a color change.

(Jimmy)>> I'll help you push. Our engine has almost 300,000 miles and we're not really too sure of the history of it, and this thing for all we know could be a reman. So we're gonna be replacing a couple of parts like the timing belt and we're gonna try and fix an oil leak. So we're gonna throw some gaskets at it too. I'm gonna start taking off these two front belts to give myself some room, and I'll start taking it apart. ♪ ♪ Take these plug wires out, get the valve cover off, and see what we got. ♪ ♪ [ drill humming ] ♪ ♪

(Jimmy)>> Come on! There we go! [ drill humming ] ♪ ♪

(Jimmy)>> There we go! Alright, at this point is where things start to get a little bit tricky. On the came gear here there's a mark 180 degrees out from each other, and then the word up is stamped into the cam gear. These two marks should line up with the top surface of the cylinder head and make sure up is in the up direction so you don't have everything rotated 180 degrees. Along with the two marks on the cam gear there's also a mark on the crank pulley itself that'll line up with an indicator on the front of the timing cover. So I'm just gonna rotate the engine until I can get all of those in good alignment. ♪ ♪ Alright that looks pretty close. Now I can take the crank pulley off and once I crack the bolt loose I'll go back and double check to make sure the marks are still in alignment. Oh yeah, not too bad. [ drill humming ]

(Jimmy)>> Yeah, nicely done, cool! I left the belt on here when I cracked the bolt loose on the cam gear because that way it provides some resistance. So when you back the bolt out it doesn't just spin the cam gear. [ drill humming ] ♪ ♪

(Jimmy)>> Tensioner out. It spins okay, doesn't feel too loose but while you're in here it's probably a good idea to go ahead and replace this. ♪ ♪ Junk! Gasket junk! Nice! [ drill humming ]

(Jimmy)>> I'm gonna take this cam gear off and that way I can take the plastic behind it off, inspect the cam seal, and then replace it if we need to. ♪ ♪ Yeah I've seen better. Even looks like maybe it's dripped down onto here. So we'll go ahead and replace it. Oh we got it, yeah! ♪ ♪ It's also a good idea to replace the water pump while we're in here too. ♪ ♪ [ drill humming ] ♪ ♪

(Jimmy)>> Torque these down to 102 inch pounds. Get this front cover back on, and then the cam gear. ♪ ♪ With the cam gear in place we'll put on the new belt with the tensioner... ♪ ♪ ...and don't forget the spring. ♪ ♪ Alright so I'll torque down the tensioner to 33 pound feet, and then after that I can torque down the cam gear and I've already made sure that the timing marks are still in the correct spot. Then I'll throw on the timing cover, throw the valve cover on it, and then I can move on to the back of the engine. ♪ ♪ Coming up, with the front of our engine all buttoned up we turn our focus to the rear adding a performance clutch setup.

(Jeremy)>> So I've been sanding on this Honda for just a little bit and this is what I've found. The flat black that's on this car is extremely thin and it's coming off quite easily. So what I'm gonna do here is I'm actually gonna strip the car completely down to the red. 'm gonna do that for two reasons. One, I have no idea what type of product or paint was laid down for this color and two, I have no idea how well the car was prepped before it was painted. Now we want our paint to stick very well. So I'm just gonna strip all the black off, get all the way down to the red, make sure that's prepped. We'll lay some sealer down, and then we'll start laying our color down. The easiest way for me to get to that point is to just keep sanding. [ sander buzzing ]

(Jimmy)>> I got the front of the engine done now and I'm ready to move on to the back. So I'm gonna upgrade the clutch, replace the oil pan gasket, and while I'm there I'm gonna check out the rear main seal and see if that needs to be replaced. [ drill humming ]

(Jimmy)>> To access the rear main seal I'll remove the old clutch and the flywheel. [ drill humming ] ♪ ♪

(Jimmy)>> Oh there's a lot of oil down there that's for sure. Yeah that probably needs to be replaced. I'm gonna be replacing the rear main seal and the gasket for the rear main seal cover, and to do that I have to take the oil pan off. So I've got to get this engine off the table and we'll tear into it. ♪ ♪ [ drill humming ]

(Jimmy)>> Nope it's stuck on there. Alright let's see. ♪ ♪ [ drill humming ]

(Jimmy)>> Just be kinda gentle with this thing. Don't want to break it. ♪ ♪ Almost, there we go. Alright I'm gonna replace the seal, get the gasket on, and we'll be good to go. We'll clean off the old gasket with a razor blade... ♪ ♪ ...knock out the old seal... ♪ ♪ ...and install the new one. ♪ ♪ And we'll put some gasket maker on the rear main seal cover and the block. ♪ ♪ Alright time to reassemble. ♪ ♪ Alright I've torqued these down, and then we'll move on to the oil pan. ♪ ♪ Gonna put a little gasket maker on here to get the gasket to stick. Then we can throw it on there. ♪ ♪ Alright try to put this guy on here. ♪ ♪ Oh yeah! ♪ ♪ Because we're throwing more horsepower at our Honda we decided to upgrade the clutch as well. So we went to Autozone and got this stage 2 clutch from Exedy. This features a metallic three puck disc that has a sprung center damper to handle any impact or shock loads, and this thing is just flat out designed for more horsepower. To pair with that we also got this Exedy flywheel. It's made from one piece of chro-moly and designed to be lightweight, low inertia, and have a high thermal capacity, which will be great for when we're out on the rally course. ♪ ♪ Once installed we'll snug it down and torque it to final spec. ♪ ♪ With that in place we can install the clutch disc and the pressure plate. ♪ ♪ Alright that wraps up our engine for now and as soon as Jeremy's done painting we can drop this thing back in.

(Jeremy)>> Next on Carcass we turn our focus to the body of our Honda and start our rally themed paint job.

(Jimmy)>> I've got our engine stuff all wrapped up with a new clutch and some other new parts to keep that thing running for a little while longer. While I was taking care of that Jeremy prepped our Honda.

(Jeremy)>> And now it's time to lay down some color but as you guys can see we are standing outside, and that's because our paint booth inside is a little preoccupied but we do a solution for that. We're gonna paint this a little portable paint booth that we got from Mobile Environmental Solutions. So we've got to push this thing inside and we'll start laying down some color. ♪ ♪ Alright now we'll give it a quick wipe down and then we'll move on to sealer. ♪ ♪ While I get my paint gear on and ready Jimmy's gonna mix up some Summit Racing 2.1 VOC primer/sealer. ♪ ♪ I'll lay this down in two medium wet coats. What this will do is give us a uniform base to lay down our first color coat, and will reduce the chance of our solvent lifting or reactions to the original paint on the Honda. After the first coat flashes off to hand slick we'll lay down our second coat. [ spray gun hissing ]

(Jeremy)>> The reason why I chose a white sealer is because the base color for our Honda is also white, and we didn't want to have to lay down a ton of paint to make the white really pop. So pay attention when you're ordering your paint products. Use the best color sealer to make your colors really come to life. [ spray gun hissing ]

(Jeremy)>> Just like with our sealer the color we're putting down on the Honda also came from Summit Racing. This is their 3.5 VOC paint and the color of choice is Champ White. Now this is mixed two to one, and we're gonna spray the entire Honda with this, and we'll come back later and put down a couple of accent colors but first I've got to get this mixed up and then sprayed on the Honda. ♪ ♪ Oh it's perfect! ♪ ♪ Alright we'll get this mixed up and get it in the gun, and go lay down our first color. ♪ ♪ [ spray gun hissing ]

(Jeremy)>> And like we said earlier, we're using our Mobile Environmental Solutions 23 by 15 HDLT portable spray booth. These paint booths are American made with commercial grade quality. They perform just like a permanent fixed style paint booth. [ spray gun hissing ]

(Jeremy)>> They draw in clean air from the outside and move it through the booth to keep your paint job nice and clean. Having a clean environment is very important to a quality paint job, and being able to paint outside in natural sunlight, well that gives you a huge advantage in seeing how your paint is being laid down and what the finished product truly looks like outside. [ spray gun hissing ]

(Jeremy)>> Don't go away. We add graphics to our Civic, finishing up our rally car paint scheme.

(Jeremy)>> Alright so we've laid down our first base color and it's had time to flash off, but now it's time to move on to some masking.

(Jimmy)>> And if you've ever seen a rally car before you know that they usually have a really crazy color scheme, and while we're not gonna get as complex we will have a few colors. So we're gonna mask off and lay down some blue. ♪ ♪

(Jeremy)>> Like Jimmy said, our color scheme isn't complex but the way we have to mask off for those colors is a little tricky. As we start laying out our lines for the blue we want to make sure we keep in mind how we're gonna mask off for the third and fourth colors. This makes it easier as we go back to re-mask between colors. Now while it's not ideal for two people to be masking off at the same time Jimmy and I both have discussed the layout of the paint scheme on the car and are following specific lines on the body to get a uniformed look. ♪ ♪ Once we have our lines laid out on the car we'll come back and start laying down the paper so we can spray our first color. ♪ ♪ A good clean mask job plays a huge part in the finished product. ♪ ♪ Okay so the Honda's all masked off and we're ready to lay down some paint, and the first accent color's gonna be Summit's Blue Sky Metallic. ♪ ♪ Once we get everything mixed up I'll get it in the gun, head into the booth, and start laying it down. [ spray gun hissing ]

(Jeremy)>> For the blue we'll lay down two to three medium wet coats to get a uniform coverage, allowing five minutes flash time between each coat. [ spray gun hissing ] ♪ ♪

(Jeremy)>> Alright that wraps up the blue. We'll let this flash and then we'll come back and mask off for the red. ♪ ♪ Woo that's red! [ spray gun hissing ]

(Jeremy)>> We'll follow that same process for the viper red. We'll lay this down in three coats as well. [ spray gun hissing ]

(Jeremy)>> Once the red has had time to flash off we'll go back and mask out for our third color, which is Summit's Silver Rush Metallic. ♪ ♪ [ spray gun hissing ]

(Jeremy)>> And to wrap it all up and protect our paint we'll spray down two wet coats of Summit Racing 2.1 VOC clear coat. This will help protect our paint and all our hard work for years to come. [ spray gun hissing ]

(Jimmy)>> Oh yeah, this thing in the sun looks great! You did a really good job laying down the paint and the clear, and I think we did just enough. You know, a little something to make it look like a rally car.

(Jeremy)>> It looks really, really good but right now I'm tired, I'm sweaty, and I think we should just call it a day.

(Jimmy)>> Well if you guys like anything you've seen today go to Powernation TV dot com.

(Jeremy)>> And you can also go there and check out our project pages and get a little more information on past builds like our postal Jeep or some info on our little rally car here.

(Jimmy)>> Alright let's deflate it.

(Jeremy)>> Yeah, shut these things off.
Show Full Transcript