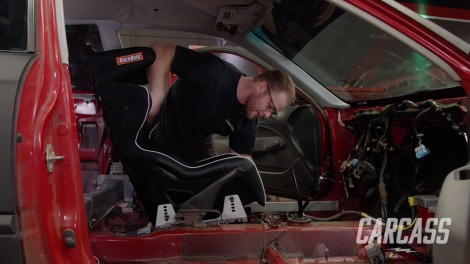
Carcass Featured Projects

Carcass Builds

Parts Used In This Episode

Summit Racing
RaceQuip Composite Full Containment FIA Racing Seats
Summit Racing
RaceQuip Seat Mounting Brackets
Matco Tools
MATCO Tools are the Official Tool Supplier to Carcass
The Industrial Depot
Tools, Hardware, Shop Supplies

Episode Transcript

(Jeremy)>> You're watching Powernation

(Jeremy)>> Today on Carcass our Rally Honda is in the shop and we start prepping for its day at the track. We'll show you how to make new racing seats fit in the factory locations by using some existing hardware.

(Jimmy)>> Then we'll fabricate a custom roll cage that'll keep us safe out on the course. ♪ ♪ [ tires squealing ] ♪ ♪

(Jimmy)>> Hey guys, welcome to Carcass. Today we've got our 1996 Honda Civic in the shop, and the last time we got the entire interior stripped, and now we're ready to move.

(Jeremy)>> And how this all got started was with a Driveway Rescue. When we found our Civic it wasn't in running condition and had been parked for a while. So after doing a quick tune-up and replacing the fuel pump we fired this thing up and took it for a test drive. Then we brought it back to the shop and took it down to Engine Power for Pat and Frankie's very first front wheel drive dyno pulls, and you could say the numbers we got were pretty surprising.

(Pat)>> 93!

(Jeremy)>> After we were all done with that we brought it back down to our shop and started stripping the interior to prep for our roll cage. What we have in store for our little hatch back is to make this into a bonafide rally car, adding some race seats and five point harnesses to go along with our roll cage.

(Jimmy)>> To help in the horsepower category we're gonna throw on a better flowing intake and injectors, upgrading the clutch and axles, and top it off with a turbo. To finish the look we'll give it a rally inspired paint job and wrap it up with a set of new wheels and rally specific tires. So today we're gonna be addressing some safety equipment and fitting up a couple of racing seats and building a roll cage.

(Jeremy)>> And we don't want to work on this thing when it's so low to the ground. So the first thing we're gonna do is build a set of wheel stands. A quick and easy way to build a set of wheel stands is by using some two by fours. They're plenty strong and our Civic doesn't weigh that much anyways. Plus this will get our Civic off the ground and yet it'll still keep the suspension loaded, which is ideal for us as we start building out our roll cage. When making your wooden wheel stands or cribs you'll want to measure the width of your tire to help you decide on how long to cut your boards. You'll also want to know the desired height you want to get your project off the ground. We're going with a foot, which will give us plenty of room around our Honda. We cut our boards to about 14 inches a piece. That gives us a good saddle for our Honda tires to sit in. Plus makes these things usable for other projects. So now what we do is just stack them up kinda like Jenga and then we just screw them down. [ drill buzzing ]

(Jeremy)>> When assembling you may want to pre-drill your holes to help your wood from splitting on the ends. Alright take a look at these things.

(Jimmy)>> Oh yeah, that's gonna be nice. Got it! ♪ ♪

(Jeremy)>> There we go. Yeah that'll do it.

(Jimmy)>> That's gonna make it a lot easier on us too. So we're not stooped over the whole time.

(Jeremy)>> Yeah this is a good working height right here.

(Jimmy)>> For our driver's seat we're going with Racequip's FIA certified full containment composite seat. If you've ever had a high performance driving experience or if you've ever just whipped a car around a turn really fast you could probably look at the seat and tell it's not gonna hold you in that well, but with these seats we have the nice hip, shoulder, and helmet bolsters that keep you locked in and help you control the car a lot better. We also got these nice aluminum mounting brackets but we will be modifying those because the overall idea here is to take our stock sliders and mount them to this seat. That way we can adjust for different driver heights and if you've ever mounted seats before it just kinda sucks because often times you have to try to contour metal to match the floor and it's very time consuming versus these. They already fit in the car. So it's just dead easy. So I've got to start by taking these brackets off. ♪ ♪ After taking off the nuts on the left side bracket we can use the air hammer to pop off the rivets holding on the other. ♪ ♪ Oh that easy. A little superficial damage but nothing crazy. ♪ ♪ Now we can take off the adjustor handle. This is held on with a couple of spot welds. So we'll drill them out and the bracket comes right off. ♪ ♪ This is our left side seat mount. So the idea here is to take a measurement between this hole and this stud, transfer it to the bottom face of our new mount, and then I'm actually gonna drill two or three holes and slot them because that way when the seat is mounted it'll allow for some adjustment of the rails because you don't want them to bind and that way they'll glide freely. So I've just got to take a measurement. About 12.5. With our measurement I'll scribe out where we need to make our holes on our bracket. Then we can start drilling out the holes. [ drill buzzing ]

(Jimmy)>> The last thing we've got to do is use a die grinder and make these into slots, and here's a tip for using a die grinder. There are bits out there like this one that are specific for aluminum but if you don't have one and you only have one that's used for steel they can load up with aluminum. So one way to get around that is to take a bar soap that you get from the store, just any generic brand, and load up the bit first. That way the aluminum doesn't get in there and just make your life a nightmare. [ drill humming ]

(Jimmy)>> We don't need these perfect. Just enough so the seat bracket can move freely. Alright put this dude on. Then we can move on to the other side. For our other seat bracket I'll use the factory bracket to mark my holes with a punch, drill them out, and mount them up. ♪ ♪ Now let's see how this thing fits. Everything's kinda loose so I can make sure everything's gonna line up. It looks like everything's lining up pretty well. So we'll throw some bolts in it. Then we can start on the cage. Coming up, we start making plans for our rally car roll cage.

(Jimmy)>> I've got the seat installed now and I actually have it slide far enough back where it's too far away for my preference, but that way it simulates if there is someone who's taller than me driving. So now I can work on placing the main hoop, and if you are doing any kind of racing it's a good idea to consult whatever rule book there is available. That way you can build your cage and make sure it's legal. So now all I have to do is take some measurements, cut, bend, and we'll see where were at. I'm gonna put a piece a tape roughly in the center of the roof and I'm actually gonna take a measurement across the roof and mark the center cause I think it's easier to build hoops from the center out rather than try to do it from one end. So this is 35 and three quarter divided by two, 17.5 plus three-eighths is 17-70. ♪ ♪ Okay now I'm gonna put my cheater up here roughly where the tube's gonna land. Then put my mark on the cheat to the center, 13 and a quarter, and also tracked probably a half inch just to give myself some room over here against the body. ♪ ♪ 52! ♪ ♪ With our measurements we can head over to the chop saw and start cutting our tube. We're using one point five inch by .120 wall d-o-m for our cage. With it cut we can head over to the tubing bender and get started on the main hoop and the side hoops. One more bend and then we should be good. Two! [ mechanical humming ]

(Jimmy)>> That's right about two, cool. That's it!

Alright, fits pretty good actually. Hits the roof in a couple of spots, which we can weld it there, add some more rigidity. ♪ ♪ At this point we have three most difficult tubes to make out of the way. We've got the side hoops in and we have the main hoop in. There's plenty of clearance between the back of the seat and the main hoop, which is something we were looking for, and these three tubes are the base of any roll cage. So we'll have no problem making the rest of the tubes off of them, and before we start tacking anything in we have to consider how we're gonna weld the top portion of the cage. So what I'm gonna do is take a marker, mark around where each tube lands, and then we'll take a hole saw and drill a hole in the floor. That way once the cage is completed we can drop everything down and we'll have access with our torch up at the top. Right now I've just got to mark some holes and get the cage out here. ♪ ♪ Alright that's all of them. ♪ ♪ [ saw buzzing ]

(Jimmy)>> We've got our holes cut in the floor now, and while this is a common method of constructing roll cages if you've never done one before you might be wondering how the heck we're gonna keep the roll cage up now that we have holes in the floor. So all we're gonna do is make a plate to go over the hole and under the roll cage, and then later on that plate will get welded to the floor, and then the cage will get welded on top of the plate. So I've just got to take some measurements and I'll cut it out on the iron worker. It's about six and a half by three and a half. For our plates we'll be using some one-eighths inch steel. [ mechanical humming ]

(Jimmy)>> Alright now we can keep working on our roll cage. We'll show you a cool trick on how to remove factory sound deadening. Plus put the finishing touches on our roll cage.

(Jimmy)>> Alright that'll work. We have our floor plates made now and we have to prep the floor for welding later. We've got this sound deadening stuff on the floor and we have to get rid of it. One way to do that is to use a propane torch and something to scrap it with, but that just makes this hot gooey mess. The way that we're gonna do it is use a mixture of dry ice and rubbing alcohol. What that does it kinda just freezes everything and helps separate the glue from the floor and it doesn't leave a sticky residue. You'll want to make sure you're wearing a pair of insulated gloves when doing this to protect you from frostbite burns. Okay so that crackling sound that you're hearing is actually the glue releasing from the floor. So once that kinda stops we'll know it's a good time to start scraping. I think this is ready. I'm gonna move this to a new spot, and then I'll see if we can't get this up. Oh yeah, it's coming off easy now. Yeah nice! After the floor is clean of the sound deadening we can take our wire brush and clear up any seam sealer or glue that was left in the corners, ♪ ♪ and then finish prepping the surface with a grinder. Alright now we have the floor prepped and we can start throwing down the base plates and put together the cage. ♪ ♪ Number one! ♪ ♪ Alright, got to get the welding stuff. You could mig weld these joints but I'm gonna be using the tig welder. The reason for this is because it's my preference and that's what I'm comfortable with. I'll start by tacking in the main hoop and the door bars. Then add our dash bar, followed by the upper hoop cross member. ♪ ♪ Next we can add our corner gussets. ♪ ♪ [ welder crackling ]

(Jimmy)>> Finally I'll tack in the upper roof braces. [ welder crackling ]

(Jimmy)>> All the tubes that we have in here now need to be welded before I keep going forward. Once I put the door bars in the cage won't be able to drop as far down through the floor. So right now I'm gonna pull the floor plates, drop this thing down, and start welding the top. ♪ ♪ With our cage all the way down I can access the top of the roll cage and fully weld all the joints. ♪ ♪ Then we'll slide the cage back up and drop in our plates. [ welder crackling ]

(Jimmy)>> We'll lay down a few tacks to hold everything in place, and then we'll go back and fully weld everything in. This will give us a super strong base for the roll cage. [ welder crackling ] ♪ ♪

(Jimmy)>> With the plates fully welded to the floor now we can tig the roll cage to the base plates. [ welder crackling ]

(Jimmy)>> With the main portion of our cage all welded in the next thing I'm gonna do is fit up our harness bar, and there's one really important thing that you have to consider when you put this in. To make sure that the harnesses work properly the top of the bar has to be level with your shoulders or up to 20 degrees below. I've already had the seat in here. So I made a mark where my shoulders were. So all I have to do is tack this in. ♪ ♪ Alright with that tacked in place I have a couple more support tubes to put in and the rear support section but other than that this cage is looking really good. ♪ ♪

(Jeremy)>> With our roll cage done now we can start tearing out our engine.

(Jimmy)>> I've got the cage all wrapped up and the seat in here, and everything fits great. The cross brackes, down bars, and door bars all fit up no problem and I'm really happy with how this thing came out. So now we're moving on to everything under the hood.

(Jeremy)>> The plan there is to add some horsepower to our little four cylinder. There's a couple of things we want to take care of. We're gonna end up replacing the clutch. We're gonna end up taking care of a couple of little oil leaks, and probably throw a timing belt at it. It's gonna be a whole lot easier if we just pick the engine and transmission clean out of the car. So that's where we're gonna start. ♪ ♪

(Jimmy)>> We're not gonna need this any more. Get out some of these electrical connectors. ♪ ♪

(Jeremy)>> Get the radiator out of here next. [ drill humming ] ♪ ♪

(Jeremy)>> Moving over to some hard parts on the engine I'll remove the bolts that hold on the heat shield, followed by the nuts that hold on our exhaust manifold. ♪ ♪ With our exhaust out of the way it makes easy to access our a/c compressor. So small, so tiny. And our lower motor mount. So this is what you find on high mileage cars like our Honda's got over 250,000 on it. This is one of four motor mounts. So we're definitely gonna have to replace that cause that's completely shot. You know this is one thing a lot of people forget about. Motor mounts is just something that you don't think about replacing but they do need to be replaced. We're almost done underneath here. I've got a couple more connections and then we've got to go down, take some of the suspension apart cause I've got to get the axle shafts out. Coolant temp sensor. That's the distributor. Here's another coolant temp sensor. ♪ ♪ [ drill humming ] ♪ ♪ [ drill humming ] ♪ ♪

(Jeremy)>> This car's coming apart quite easily. That's why I love southern cars. ♪ ♪ Just like that! ♪ ♪ That just straight up fell apart. It goes through there or not. At this point it don't matter. We're not reusing them. Now that I've made a giant mess with axle grease I'm gonna put the suspension back together cause we do plan on rolling this thing around. Then we'll go underneath the hood, get rid of a couple of connections, grab the cherry picker, get that engine out of there. Perfect timing! ♪ ♪ With our engine supported we'll loosen the rest of the motor mounts and pick this little four cylinder out of its home. ♪ ♪ Yeah you're clear. Man that sure did come out of here easily, but that thing's filthy and so is the inside of the car actually.

(Jimmy)>> I'm gonna take this outside and power wash it. Maybe you want to roll this thing out there.

(Jeremy)>> I'll just do the engine bay here. This will be simple. I can push the car out by myself.

(Jimmy)>> Before we wash this thing we're gonna spray it down with heavy duty degreaser to break up some of the dirt and grime. To clean this stuff up we're using a Bauer 2,300 p-s-i electric pressure washer that we picked up from Harbor Freight. The 13 amp brushless motor delivers 2,300 p-s-i of cleaning force and delivers over 30 percent cleaning power than standard electric pressure washers. It plugs into a regular 120 volt outlet using a 35 foot power cord. This quiet pressure washer puts out 1.2 gallons per minute, comes with four quick connect spray nozzles, and has an onboard detergent tank for improved cleaning.

(Jeremy)>> If you like anything you've seen on the show today why don't you check us out at Powernation TV dot com.

(Jimmy)>> And be sure to check out our project pages where you can stay up to date on any past and current projects like our square body tow truck, Project Junk Mail, and our Rally Honda.

(Jeremy)>> Thanks for watching Carcass.
Show Full Transcript