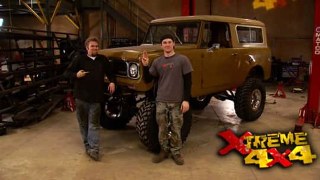
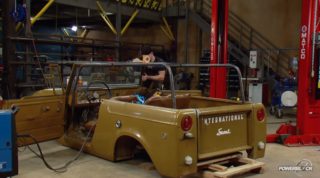
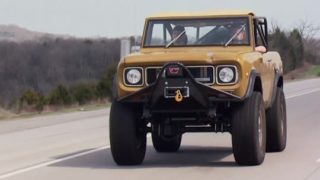
More '69 International Scout 4x4 Episodes

Xtreme 4x4 Builds

Parts Used In This Episode

EBC Brakes
EBC Greenstuff 6000 Series SUV and Light Truck Organic Brake Pads.
EBC Brakes
EBC 3GD Series Sport Rotors.
Mickey Thompson
37x13.50R17 M/T Baja Claw.
Mickey Thompson
17x9 Mickey Thompson Classic Lock wheels, Gold Classic Lock Ring set.
Superior Axle and Gear
4.88 Ring and Pinion set, Install kit.
ARB 4x4 Accessories
Air Lockers give you the traction you need, when you need it, all at the flick of a switch.
Blue Torch FabWorks
BTF Dana 44 Kryptonite Differential Cover.
Blue Torch FabWorks
BTF Weld On Caliper Brackets.
CTM Racing Products
Dana 44 CTM U-Joints.
IH Only North
Transmission Adapter for GM700R4 to IH Engine.
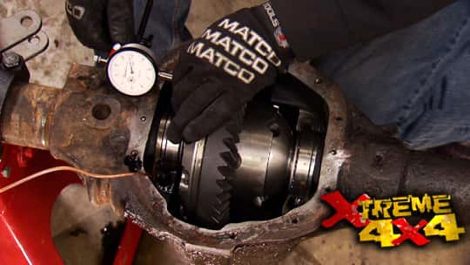
Matco Tools
Dial type Inch/Lb. 3/8" torque wrench, 1/2" torque wrench, magnetic base dial indicator set, vernier caliper, micrometer.
O'Reilly Auto Parts
Stock replacement brake calipers.
Randy's Ring & Pinion
Side bearing puller tool.
T & D Machine Products
Pinion depth checking tool.

Video Transcript

Now, not too long ago, we pulled this classic 1969 scout 800 A into the shop to put together a great work trail truck with classic style. And the same time, we want to pay homage to a great series of trucks all built by international harvester that are out there, tearing it up on the trails and looking cool doing it.

We started by dropping out both axles and the entire drive train

and we stripped down a scout two donor truck that we picked up for free

to get a 345 V8 and a Dana 44 rear

spring over on the front and a four L

out back tossed on to 37 inch Mickey Ts

and we had one awesome looking scout.

Now today we're gonna take care of a bunch of stuff on our scalp, but we're gonna go into extreme detail for you guys at home. We're gonna tear down this 345 V8, carry it out of the machine shop. First things first, we're gonna take the front axle back out.

Last time we installed the A RB and gear set into the rear axle and honestly we're going to drop the front in the other day,

but then we realized it's been a long time since we went step by step to an entire gear install

and I love installing

ringing opinions.

Now, the front axle on our scout project gives us a great opportunity to take you guys step by step through the replacement of a ring and pinion and the installation of an A RB air locker. Now, the first thing we wanna look at are the special tools needed for that job.

Setting up a gear set is a fairly in depth process and you'll need a number of special tools. Now, the first one you're gonna need is a good torque wrench, preferably half inch drive for tightening the bearing caps on the carrier. You're gonna have to be able to measure the shims on both the pinion and the side bearings. So you're either gonna need a Vern your caliper or a micrometer. A magnetic based dial indicator

is used to check your backlash. Now, one tool that you don't necessarily have to have, but it makes it a lot easier is a pin, depth checker and you'll also need an inch pound torque wrench with a dial, not a click type. Now, this is used to check the rotational load on the pinion. I like this one from Matco because it has this little memory bar on it was you rotate the torque crunch and then let it go. It gives you the last reading when you're doing the rotational load on the pinion. Sometimes you can't really see the dial on the inch pound torque crunch so you can just do it and check it and check your measurement. And you're also gonna need a press to install the bearings if you don't have a press. Another option is one of these kits from Randy's Ring and pinion. This is designed to remove the side bearings off the carrier without the need for the big press.

You don't need to remove the axle housing from the truck to do this job, but it will make it a little bit easier.

And with the axle shafts removed, you need to mark both bearing caps with a number punch

and pull them off

and pry out the carrier,

flip it over

and take out the pin.

Now, the first thing we have to do is make some set up bearings for three different locations. All the adjustments inside a rear axle like our Dana 44 are done using Shem packs. Now, we're gonna be installing a set of 488 gears on an A RB air locker. So we went ahead and picked up a complete install kit. Now, it comes with all the shims that we need. We got new shims for our side bearings as well as our pin depth. These smaller shims are used to adjust the rotational torque on the pinion head itself as well as all the new bearings. Now, the shims fit in three different locations. They're behind these side bearings on the carrier, as well as behind the pinion race that is in the axle housing. Now, the downfall here is when you wanna change those shims to make adjustments, you have to press the

bearings on and off and you have to make a lot of adjustments when you're setting up a rear end and you can actually damage your new bearings. So the best solution go ahead and get a brand new matching set of bearings to the ones that come in your kit. We'll make set up bearings out of these

using a dye grinder with a carbide bit. You just have to open up the inside race on the bearing until it can easily slide onto the locker.

I've also ground down this rear pinion race that presses into the housing to make it a set up bearing as well. Now, behind this race, there are shims and that's what sets the pin depth pin depth will determine where the pinion gear rides on the ring and we want it riding right in the middle. And the best way to set your opinion depth is with the pin depth checker and I've gone ahead and installed ours into the housing and all I have to do is drop the race in.

I've got the new bearing on the pin and I'll drop it in as well. And now we can begin to measure.

I'm gonna throw some numbers at you here, but don't worry, it's actually pretty easy. I've gone ahead and installed the long indicator shaft on the dial indicator and zeroed it out and put this small magnetic block on top of the pinion and measure how far away it is from the axle center line. Now, on our axle,

we are exactly

737 1000th of an inch away from that center line. Now, there is a baseline measurement we start with which is 3.375 and we subtract the measurement we just made

at 737,000 and

we end up with 2.638 inches away from the axle center line. Our gear sets come shipped with a marking on the side of it to tell us what that measurement is supposed to be. And this set up here says it should be 2.625. So I simply subtract that

minus 2.625

equals.

And it shows me that I need just over 10,007 inch worth of shims of under that pinion race to have

gear set set up correctly. So all they have to do now is take it apart, drop the shim in and recheck it. Now, if you don't have a pin depth checker tool like we have here, you can go ahead and just ballpark it drop in about 20,000 worth of shims behind that set up. Race. Go ahead and completely do all the rest of your measurements and check your gear tooth pattern. You have to adjust it as necessary. Now to adjust it, you have to tear the axle all down and change those shims. So if you're gonna do more than one set of gears in your life, buying one of these pin depth tools is a great investment

after the break. We'll bolt up the ring here and prepare to set a good gear tooth pattern as our axle

set up continues

today on extreme. We're taking you guys step by step through the process of swapping in a new ring opinion as well as an A RB air locker into our data 44 front axle that's going underneath our scout. Now, we're doing this to show you guys that even though it's in depth, anyone can do this. We have to follow the procedure. Now, right here, the procedure changes from a stock carrier. Now, the stock carrier, the shims for the side bearings go in between the bearings and the carrier and the A RB air locker moves those shims to the outside of the bearing. They supply you a master shim and a new shim pack to use. Now, how we measure for the size of the shims is the same, just the location is different. First thing we gotta do, bolt up the ring gear

now, to measure for the size of the side bearing shims. We simply drop the carrier in the housing without the pinion and move it back and forth, measuring the dial indicator. In this case, we're gonna need a total shim count

of 40

50,000 of an inch

under the same measurement

with the pin back in the housing.

This will tell us how many shims go on this side of the carrier because we're just measuring how far the ring gear moves from the pinion

back against the housing.

In our case, it's going to be 35.

The shin packs come in varying thicknesses. You just have to mix and match until you get the number. You're after

the yellow paint on the ring gear is gear marking compound. And then all you do is apply a light load to the ring and turn the pinion with the opposite hand that'll basically mimic the drive line pressures on the ring opinion

and it'll give us a marking as to where the ring and pin are contacting each other. Now, we want the ring gear and the pin to touch right in the middle of the tooth. Not too deep, not too shallow, not too far to the outside, not too far to the inside. And this one's actually pretty good.

Now, if we had a problem, there's two things that can be wrong, we can have opinion, depth problem if we have a problem with opinion depth, that means that the pattern is either too far to the outside of the ring gear. Our opinion is too deep or too close to the inside of our ring gear. That means the opinion is too shallow. If the gear tooth pattern goes all the way down into the valley of the tooth,

that means that backlash is wrong. The ring gear is too close to the pinion

and if the gear tooth pattern is way out near the edge, well, that's just the opposite, the ring gear is too far away. Now, to change those things, you have to change the shin packs, you basically move them around until you get a good pattern. But we have a good pattern here right now. So the next step is pretty simple. We take it all back apart, we replace all the set up bearings with the actual bearings and we put it together for good

with the housing empty. This is the perfect time to drill a 7, 16 inch hole and then tap it with a quarter NPT pipe tap for our A RB air fitting.

Now, we have one more procedure to perform and that is to set our opinion bearing preload. Now we save it to the very end because it has no effect on the gear tooth pattern or the backlash of the ring gear.

Now, P

bearing preload is basically a fancy word for pressure on these bearings. And I have the old pin here to show you what it looks like inside the housing. We have the large bearing on the pin that we've already installed when we put the yoke on for the drive shaft to attach to it, presses, is this bearing down onto the pinion? We have this shim pack here. Now, these shims will adjust the pin bearing preload. Now, we've used the term preload before and we talked about the side bearings and preload is basically extra pressure on those bearings because as they wear, they'll tend to loosen up a little bit. Now, your gear set has a specification for preload. And on the pinion, we measure it with that inch pound torque wrench and to change it, we just swap out those shins

to make the adjustment on some axles. It uses what's called a crush sleeve instead of ships. Now, this type of setup, it's a one shot deal. You've seen us use these before you put it in, you tighten down the nut and this actually gets smaller, you tighten it until the pin bearing preload is right. If you go too far, you have to take it apart and throw this out. The nice thing about the Dana series using these shams is it's infinitely adjustable and we can get it set bang on.

We will start with a shim combination of 60/1000 of an inch,

install the yoke with the old knot

and tighten with an impact to approximately 200 ft pounds.

Turn the pin with the inch pound torque wrench.

We're looking for between 14 and 19 inch pounds of rotating torque.

If the reading is too low, you've got too many champs.

If the reading is too high, you don't have enough shims.

Once the measurement is within spec,

we'll install the seal

and then tighten the oak with the new nut supplied in the install kit,

flip the axle over drop in the locker

bearing caps are torn

and the A RB Airline is routed to the bulkhead fitting.

Then the backlash is checked for the last time

on a da

44 you need between six and 9/1000 of an inch.

And that should give you guys some insight into all the steps it takes to properly install a ring and pinion as well as an A RB air locker into the front axle. Now don't be discouraged if this is taking you guys a day or two or three or four. A train mechanic gets paid over eight hours worth of labor to do this exact same install. And for the first time you do one of these, if it takes longer, it's just a learning process and trust me learning to install your own gear set will pay for itself in the very first time you do it. Now, this is an investment of both time and money in here. So you want to protect it. So get yourself a good diff cover like this one that we got from Blue Torch fap. It's extra thick cover will protect the ring gear as well as the locker. When you're out on the trail.

Today, we're looking at some popular upgrades that we're doing on our Scout 800 A and we're doing it in detail. And right now we want to cover a rear disc brake conversion on our Dana 44 with a little bit of homework. You can have the latest technology of brakes on a classic truck.

Now, there is no direct bolt in rear disc brake conversion for the Dana 44 rear axle, but we were able to mix and match some components and come up with something that's pretty unique. Now, it all starts with an E BC brake rotor. Now, this is a brake rotor that's designed to go on a 94 to 2004 Dodge pickup truck. We chose this because it has the five on 5.5 bolt pattern

also because it is an upgrade from the stock dodge rotor. It is slotted as well as dimpled to assist in off gassing. When you apply the brakes and your pad rubs on the rotor, it creates a gas, these dimples and slots help that gas get out and therefore improve your brake performance. The black zinc coating will just keep it from rusting. Now, at the same time, we're going to install a set of E BC brake pad.

Now, these are from a mid seventies GMC. Now they have an anti rattle clip glued on to the back and they are also slotted to also assist in that off gassing procedure. They have a break in coating on the top of the pad to help burnish them to the rotor quicker and improve your braking performance. Uh The caliper, we just got from our local o'reilly Auto parts store and we're gonna attach it all with a blue torch fab bracket.

The rotor simply slides over the axle flange and we secure it in place with a lug knot.

Our blue torch fab bracket is a little bit too tall. So we'll measure it,

mark it,

trim the bracket to fit

tack, weld it in place

next, we'll tear into our scouts 345 V8 to see what surprises Lurk inside. Oh, no, stay tuned.

Now, even though our 69 scout truly is a classic truck. We're trying to update it with modern technology wherever possible. That's why we put a RB air lockers inside those Dana 44 axles. And for the same reason, we did the rear disc brake upgrade on the back. Now under the hood, we want to keep it all international.

So we have this 345 V8 that we pulled out of a scout too. So we have that classic style, but behind it, we wanted something other than the traditional three speed automatic or three speed standard transmission. We really wanted a four speed. So we could take advantage of that overdrive when we're out on the highway, I'm gonna do that. We're gonna need an adapter kit.

Ih Only North has a complete kit that will adapt a general motors automatic behind our 345 V8. It has this piece of machine built aluminum that will bolt up to the bell housing and has provisions for the transmission also has a small adapter to adapt the flex plate over to the automatic transmission torque converter. Now, this will allow us to bolt up either a 700 R four A four L 60 or A four L 60 E. So we'll have that classic style under the hood. But the modern four speed drive train that we're after, but before we bolt anything up, we want to go ahead and tear this engine down. Have a look inside.

We're going to keep track of everything we take off this motor, finding little parts and brackets for a classic 345 would be a lot harder than finding stuff for a run of the mill. Small block, Chevy.

Oh, no.

What's probably happened here is the motor took on some water and hydraulic basically locked it up and the push rods just bent and the lifters fell out of their boards. That's why it's a good idea to tear a motor down. Even though it was running in the truck, we took it out,

we're probably gonna find more when we get in this thing deeper.

Now, before we pull the pistons and rods, we'll mark the locations with some numbered punches.

Then the bearing caps

and the crank shaft can be removed.

Now, with our engine completely tore down, we're gonna take the block, the pistons and the rods and the crank shaft as well as the cylinder heads off to a local machine shop, they'll inspect them all bore the engine if necessary. And then the next time we have the scout back in the shop, we'll put it all back together and then stuff it under the hood.
Show Full Transcript