Parts Used In This Episode

Bob Hook Chevrolet
Engine Accessory Drives.
Chevrolet Performance
RamJet 502 Crate Motor.
Crawl Magazine
Crawl Magazine.
Mickey Thompson
46" Baja Claw Tires.
Miller Electric Manufacturing Co.
Millermatic Auto-Set 140 Welder.
Summit Racing
16 gal Aluminum Racing Fuel Cell.
Warn Industries
Powerplant HD Winch.
Video Transcript

Welcome to the shop and another season of Xtreme 4x4. You would think that after almost 70 episodes in over 20 hardcore projects that we would have built at least one of everything, but you guys know better than that. And according to your emails, there are tons of project ideas that we haven't even touched on yet. Like this case series pick up that's gonna get built. As can you guess it,

a

doc mud mud racer that's gonna hit the slop hard and we picked up this truck honestly pretty cheap because, well, it's ugly. But as you guys know, when you're shopping for project trucks, it's not how it looks on the outside. It's what's underneath that counts. And under the hood in between the frame rails of this truck is an off Roader dream. We're talking an NV 4500 transmission, a Dana 60 out back and a Dana 44 up front. This truck has it where it counts when it comes to the drive train department.

Now, under the hood of this truck is a 400 cubic inch small block V8. Now, the plan here is simple, we're gonna pull this motor out completely rebuild it while we're at it, we'll throw a stroke or crank in it to build some serious cubic inches and some monster power.

The

Suki samurai that we started last year is coming back into the shop for one of the craziest engine swaps ever. This little forbear is going to be taken out and replaced with this VW diesel 1.6 turbo and to top it off, we're going to be running this diesel with waste vegetable oil. And at the complete opposite end of the spectrum, our core Pro

Two race truck would be back into the shop and completely finished up this year. Right now. It's just sitting underneath their mezzanine. We're building all the tubing to help support the fiberglass body, getting this truck one step closer to the track. We already have so many projects in for this year that we couldn't even fit them into the shop. And this little Nissan Pathfinder we picked up for a steel now the engine shop, but we can go ahead and fix this and this truck is gonna get put together with some serious axles that maybe some of you have never even seen.

Can you say portals?

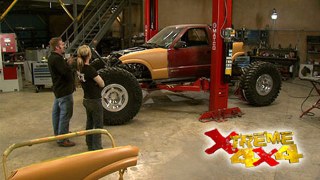
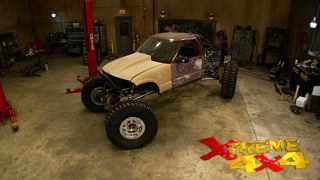
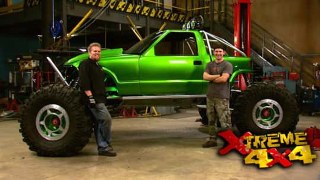
But today, we're not gonna be working on any of those trucks. We're gonna be starting a brand new project and it begins with this old beat up Chevy S 10 that we're gonna turn into a hardcore rock crawling trie

basically half truck and half buggy.

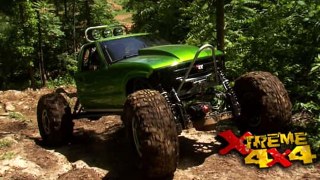
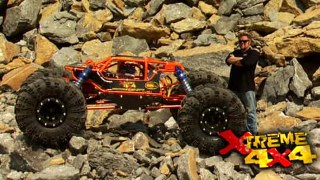
Now, this is not a new idea. And a lot of you guys often ask where project ideas come from. Well, this one came right out of the pages of Crawl magazine when we were flipping through and saw that monster, we knew we had to build one of our own. Oh, and not only does this monster look like it'll eat you alive, but once you start reading into it, it probably could eat you alive.

Now, the plan here is not to copy this truck. Exactly, but to build one similar in style with over the top attitude and of course, with our own twist,

now, this is definitely not going to be a budget build. In fact, it's going to be a way over the top, but a lot of these ideas you can put into projects of your own. And obviously the first step today is going to be to tear this truck apart.

This 1994 Chevy

down

short bed has obviously seen better days

and the fact that it's a parts truck makes the 750 stones we paid well worth it.

Even the guys already pulled the drive train, tossing out everything of no use to us. So today we're starting with a basic rolling chassis.

Now, depending on how aggressive you plan to get with your truckie project will honestly determine how much of the factory frame you're gonna use. If any guys on a budget will take an S 10 cab like that, drop it on a full size pickup truck frame and build a truck out of it that way. In our case, we're gonna ditch this stock frame completely for a couple of reasons. Number one, we'd be cutting this frame in half right behind the rear cab mount to start all the tube work in the rear. We'd also be cutting it up in the front right in front of the motor mounts and then we'd have to deal with all this ifs suspension and we'd have to rework the motor mounts anyway, to make the engine fit inside this frame. So for us, the best solution, it's going to be a custom tube frame,

two by 3, 3/16 inch wall, rectangular tubing makes for great set of frame rails for a project like this. Just the sheer thickness of the material are sure that this truck is going to be built on a good strong foundation.

Plus there's other benefits to using rectangular tubing.

So you're going to be installing a conventional steering box, you have a nice flat surface to mount it to plus if you're planning on running leaf springs in the front of project, having a rectangular frame rail like this will make it a lot easier to mount the fix as well as the swing shackle into the project. Rectangular tubing is very easy to work with. There's just a couple of rules to follow the first one is whenever you have an angle, you want to split the total amount of the angle between the two cut pieces. As an example, here, I have a 30 degree bend in this tube. So I cut each piece at 15 degrees. That way it will match up perfect all the way around and be strong, but it's not strong enough. Just to leave it alone, you need to install a fish plate to carry the load across the joint and that way it will distribute the load further on the tubing itself. Now, another place for a fish plate is going to be on the 90 degree corner at the front and it will carry the load across the two pieces making this frame extra strong

up. Next, our chugging transformation continues with fender stretching plus front and rear tube design. Stay tuned.

Welcome back to Xtreme 4x4 and the beginning of our s 10 druggie project. Now, so far, we've completely gutted this truck, throwing away everything that we don't want to use, basically just keeping the cab and the front clip. And now that the beginnings of our custom tube frame is underneath the body on some jack stands, we can work on some body mounts.

Our frame is 30 inches wide

and to keep things simple, the body mounts are gonna be made from an eight inch plate using a Scotchman iron worker.

The rear mounts will get some bracing

and of course, what would a high end finish be without flared holes

for now, we will reuse the original body isolated,

but we will swap these out later for new ones.

In this case, we want our project to continue to look like the original 10 on the outside.

So we're going to be reusing the grill, the vendor, the bed side, and then we're going to install a brand new fiberglass hood from Summit, but all of these pieces need some serious massaging to fit.

Now, the only thing that we didn't like about our inspirational truck is that the rear tire and the wheel well, and the front tire and the wheel, well, the distances they do not match. Now, there's a reason for that, this truck has got rockwells underneath it and so will our

and the Rockwell needs to hang way out the front end of the truck. So the reduction housing doesn't get into the oil pan. Now, we're gonna solve this problem by doing a front end stretch on Rs 10 fenders. Now, this is not an easy job, but in the end, it'll be well worth it.

We basically have to stretch our front fenders about 16 inches.

Now, this can be tricky. But believe me, if I can do this, anyone can.

Now this tool right here,

it's a flashing tool. Basically what it does is it creates this lower level on the sheet metal panel. That way when I put the new one on it to butt weld it.

I'll actually end up with a lower area that needs fill. This makes it a little bit easier, one less step in the process.

Once the new wheel well is set, a filler panel is cut from the rear bedside,

then it will all be temporarily held together with some drill screws.

Once the fit looks good,

all the joints are welded,

be sure to move around the panel a lot to minimize your heat input. To help with this project. I boiled a small 110 volt Miller auto set welder that is great for sheet metal.

Now, with all the front sheet metal in place, you can get an idea of how much of a difference it actually makes to stretch that wheel well forward. Now, obviously, all the finished welding and body work still needs to be done on this fender. And when that's finished, only a trained eye is gonna be able to tell that this s 10 fender has been heavily modified, but it really makes a difference. And now that we have all this in place, we can start on the tubing for our tube chassis. What do you think Chris?

It's on spot, dude,

it's on spot.

All the tubing we're using in this project is 581 20 wall dom.

Now the rear is basically to support the suspension as well as the fuel cells.

The front is a simple engine cage that's designed to protect our 502 in the event of a rollover

to hold the fuel for this monster. We chose this 16 gallon Summit racing aluminum cell. It's been fully pressure tested for leaks has dashed 8 ft and return lines. A roll over vent. Plus we opted for the 0 to 90 own fuel center already installed

with the rear cage completed. It can now using the integrated mounting tabs

up next the big block rat that will power our S 10 beast when Xtreme 4x4 continues.

Hey

guys, welcome back to Xtreme 4x4

10 tr

build. So far, that truck has undergone a huge transformation since its first coming into the shop.

And now it's time for us to take a look at the power plant for that project.

The G performance ram Jet family of engines is a great, great m

not only are they guaranteed power in this case, 502 horsepower

and 565 ft pounds of torque, but it truly is a turnkey engine with its starter flex plate engine wires, water pump, throttle brackets and the ECU mounted under the intake. Plus it's got a forged crank pistons, rods and a roller cam shaft. This engine's got all the good stuff inside too

to make the installation of the engine as easy as possible. We're simply going to raise the truck up in the air on the left.

We'll position the motor underneath right on the pallet itself and then lower it down over the top

in case you haven't guessed by now, the radiator will be going in the rear of this truck. So the only real clearance issue we have up front will be the accessory drives that we got from Bob Hook Chevrolet

using some 316 plate

will shear and punch an engine side mount plate.

It's like a ninja star.

Then we'll cut some tubing

and insert a leaf spring bushing inside of it to make up the frame mouth.

And all we have to do is put everything in place.

Yeah,

and pack it together.

Putting a radiator in the back of a truck like this does not affect the cooling efficiency of the system. You got to think most trail trucks have a winch blocking the air flow to the radiator.

Plus they're only going about two miles an hour anyway. So most of us choose to use an electric cooling fan.

A radiator is basically just a heat exchanger.

It uses air

that travels across the radiator core to remove the heat from the coolant as it moves from one tank to the other through the small flat tubes in the core itself. Now, the heat is transferred from the coolant to the air by dissipating as the air travels past these small little fins that connect the two tubes together.

Uh The cores are available in a couple different variations. You can get a dense core that has a very high fin per inch count or an open core like this one here. Uh The dense core radiators are seen more in either NASCAR or Indie cars because that dense package of fins needs high velocity or high speed air to basically force its way through the core itself.

Now, an electric fan moves just as much air through an open core radiator like this as a car just driving down the road on a regular day. But the key is how you mount this fan. If you were to mount it back from the radiator, the air itself would not keep the engine cool enough because the air would bounce off the core instead of going through it. If you took the same fan and mounted it directly to the radiator, the air would be forced through the core, therefore, cooling the engine or better yet, set it back a little bit and build shroud around the entire core itself.

Now, you also want to be sure as to where you mount this radiator in the chassis. If you end up with the radiator fill cap below the highest point of the engine, you're gonna end up with an air pocket in the cooling system. And therefore it will constantly be overheating a way to solve that is to install what's called a surge tank. It's basically a small tank with a separate radiator cap. You can install anywhere else in the system as long as it's the highest point you won't have any trouble

back on extreme. And as you can see, our

S 10 has undergone a huge transformation

from a once worn out pickup truck into this, the beginning stages of a hard core high end.

We brought these tires into the shop during the early stages of the build to make sure we had clearance while bending tubing and hanging sheet metal. Now, obviously, these tires are pretty freaking huge. These 46 inch Mickey Thompson Baha

claws have 20 inches of contact area from side biter to side Bitter.

They also have a six ply side wall with cut resistant compound

and the 23 degree lugs have a deep void ratio for easy clean out

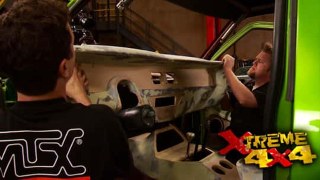
the rear tube structure built on the back half of this truck is not specifically designed to protect the driver and passenger in a roll over for that, we obviously need a roll cage, but instead of building an exo

cage on the outside of this cab, we're going to punch through and put a full roll cage inside the truck. But to do that, we need to make room first. So we got to get rid of all this stuff.

Woo hoo

and wretch.

This is where we run into a problem that a lot of you guys at home might have whenever you're trying to get a cage from the inside of a truck to the outside,

and we still wanna make this cab removable from the chassis itself so we can actually do the body work on the truck as well as have the chassis powder coated or painted. So that means we have to use a plate system to attach it. Now, it's not that big of a deal. There's just a couple of rules to follow. When you do it,

you wanna make your outside plate just a little bit smaller than your inside plate or vice versa. A good rule of thumb is between half inch to three quarters of an inch all the way around.

The reason for that is as the load is transferred. If the plates are different sizes, they won't act like a metal shear. If they were the same size, that vibration over time would just basically cause the sheet metal around it to fail. Now, it wouldn't make it any weaker, but it certainly wouldn't do much for the paint job itself. Now, the only problem we have here is where we want to put the plate, there's a concave band inside this truck. So we're gonna have to go ahead and make that plate fit that bend

when it comes to winches. Nowadays, you can pretty much have everything that you may need when you're out on the trail. This one power plant HD is not only a 12,000 pound three stage planetary win with 80 ft of 38 inch cable, but it's also a 100% duty cycle air compressor that puts out about 100 P si

that's enough to air your tires or even use air tools out on the trail.

Oh,

there you guys have it. The beginning of one sweet monster of truck all with the one day's work. And the next time we have this truck back in the shop, we deal with the rest of the drive train and getting some axles underneath it. You won't want to miss that.

It's smooth.

I didn't even catch it.
Show Full Transcript