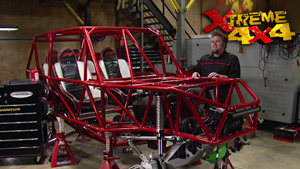
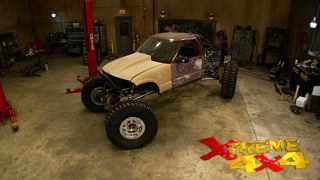
More S10 Truggy Episodes
Xtreme 4x4 Builds
Want more content like this?
Join the PowerNation Email NewsletterParts Used In This Episode
Bilstein
9100 Series rockcrawler shocks. 2.625" threaded bodies with a 7/8" hardened shaft. Valved specifically for rock crawling purposes, and an external reservoir. , The Bilstein Bump Stop improves suspension performance with more up-travel impact control and durability for off-road racing vehicles and prerunners. To assist in smooth deceleration of suspension components for added control, this new Bump Stop features a stronger mount design and a longer lasting contact pad for unequalled durability.
Chevrolet Performance
With an 11" fuel-injected intake manifold flexing out of the top of a 502" big-inch Rat, the GMPP Ram Jet 502 is just plain cool. Not only attractive, the Ram Jet intake adds a significant amount of function to the big-block with amazing throttle response that you just have to experience to believe. Combining our aluminum-headed 502 with a modern fuel-injected intake results in 502 horsepower and 565 lb.-ft. of neck-snapping torque. With the Ram Jet intake, you also have over 500lb.-ft. of torqu
CTEK Power Inc.
The MULTI US 3300 is a versatile battery charger in a compact format that makes it convenient and easy to charge and maintain all household vehicles., Comfort Indicator panel.
Advanced Plating
Polishing and Chrome Plating of upper intake and runners.
Bengel's Off-Road
Tube clamps with weld on saddle to fit all popular tube sizes.
Icon TV
7" Motorized flip out screen with DVD player, Night vision cameras.
MasterCraft Safety
Rubicon seats with custom black and grey vinyl material with "XTREME 4X4" logos and green piping around the edges.
Mitek Corporation
Power Station Capacitor, 1 Farad, 20/24 volt with digital display, 4 guage power and ground cables, RCA jacks, battery terminal ends and eyelets.
MTX Audio
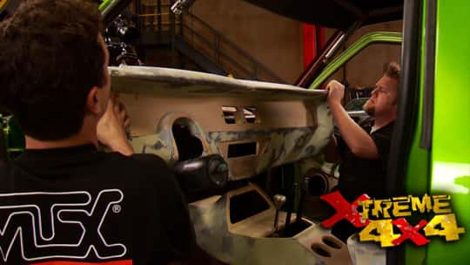
Custom fabrication of console, dash and door panels. Thunder Thin series 10" subwoofers, X Thunder series 6.5" speakers, RFL series amplifiers.
O'Reilly Auto Parts
4 Gauge Battery Cable 25 FT., Top Terminals, Copper End Lungs
O'Reilly Auto Parts
10, 15, 20, 25 Amp Mini Fuses
O'Reilly Auto Parts
Ground straps (2), pcv valve, heater hose
Powder-X
Powder coating of chassis and cage in metallic silver.
Rhino Linings Corporation
Truck bed coating of dash and console pieces.
Sniper Fabworks LLC
SFW Deluxe Stainless Steel Battery Box.
Video Transcript
Today on extreme, the sawdust flies when a couple of experts custom fabricate our S 10 interior and give it some rock and hardware to match. It's the next installment of our Way over the top trucking
and it starts right now.
Project ideas here at Xtreme 4x4. They come from everywhere but most of the time they're driven by you guys at home, you tell us what you like and what you don't like. Now, recently, you guys have sent us tons of emails and messages to let us know that you love our S 10 tr
clumsy directors.
Hold on, I'll help you with that.
Now, back here, this is what you guys tune in for and we know that we plan these projects with you guys in mind and we try to take some of them and we try to push them way over the top. Now, our S 10 truck,
that's exactly what we've done. And you guys have told us that you like the direction it's going
right now. We have to deal with the interior on that truck. We could have done a lot of different things, could just put an aluminum dash and some gauges made it real clean looking.
But you guys want that truck to have a life of its own. You want it to be even more over the top. So for that, we had to call in a few favors.
The big Wings at MTX Audio agreed to send us two of their hot shot installers.
Craig Marsh has almost a decade's worth of experience in wiring up custom
auto sound
and Jason Plank can rock the router table like nobody's business turning MD
F into dust and building some wild fiberglass enclosures.
Now, they agreed for unlimited pizza and energy drinks, they would take care of our entire interior on the S 10 tring.
But before we had there, let's take a look back, see how we turned a $750 trash pick up into a high end custom crawler.
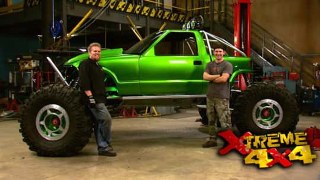
There isn't much left of the original S 10 that rolled into our shop, but we knew that would be the case.
But once we had the cab off the stock frame, we tossed it aside and built a 100% custom to frame assembly.
After a pile of body work, the truck was fully assembled and the Ram Jet 502 was fired up
and we stripped the entire truck apart to take care of the details.
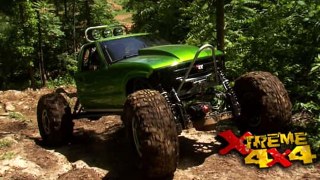
After a coat of PPG Andy Frees, green paint was laid down on the sheet metal.
The chassis got a thick layer of powder,
a
heavy flakes, silver powder coat.
Then we assembled the truck for good
down with 2.5 inch Bill Stein Rock Crawler shocks, 20 inch aluminum wheels, a 502 ram jet with a chrome plated intake
and a custom powder coated four L ad E
not to mention Rockwells with 47 flying chrome muley shafts
and a pile of other custom touches. We knew this truck was going way over the top.
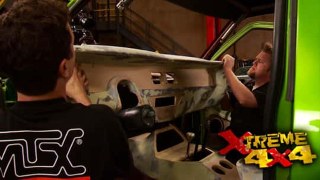
Now, these guys have already made some pretty serious headway inside our truckie and this is a perfect example of the kind of game these guys are bringing instead of messing around with this old stock dash that we mocked into place, they went ahead and built a 100% custom replacement piece. Now, this thing is a work of art has a nice spot right in the middle for a metal inlay that will really help the gauges pop spot here for our switches. Now, the one downfall is before we can install this, we got a little bit of trimming to do.
We hacked up our stock dash piece pretty good to fit around the roll cage,
but we didn't want to do that with our new custom piece.
So with the down bars marked
and cut,
we'll tig weld in some tooth clamps from ballistic fab.
Now, all we gotta do is cut the holes for the down tubes in the new dash piece and see how she fits.
I
mean, it's a little wide, man.
You can go your way.
Yeah, if the hole was wider, I could go my way.
What I'm hitting, I'm hitting some of this internal structure and then I think I might be all right.
Can you see what I'm talking about right here?
This tube is digging into this little piece of MD.
Where's the
hole and
relevance to that in front of it?
Yeah, it actually looks pretty good.
Ok.
After some modifications in the cab,
Jason Can Mart and cut his custom dash. So it'll fit like a glove
sweet.
Now, it took a little bit of grinding and a couple of fits, but it's in there and it looks great. Certainly better than the stock dash would have looked in this truck. Now, Jason and Craig got to go and take care of the rest of the custom parts. This interior, we've already put together this little skeleton back here that's gonna get all wrapped with fiberglass. It's gonna flow into a custom made center console, it's gonna tie in the dash, then we're going to stuff it full of all sorts of goodies. But before we do any of that,
let's have a look at the seats,
Mastercraft really outdid themselves when it came to the seats for our truck.
This is their Rubicon style seat and just like all Mastercraft seats. They are a full suspension seat with the parachute corb draped in between a steel frame to absorb those bumps when we're out on the trail. But they put together this custom cover for us with black and gray vinyl and they even stitched our logo into the headrest and to tie the inside to the outside on this truck, they added this lime green piping all the way around the seat.
Here's how we're gonna finish off this Center Council.
We're gonna take some sticks in a method we call stick building.
We're gonna line them up here
and we're gonna mark them
the pencil
where we need to cut them or grind them to get them to fit.
Then we'll take them one by one and glue them in until we close this in much like a barrel is made.
After we get this all closed in, we'll go to the next step which was give Ian a cup holder in his
rock crawler.
So this will be the next step
again. We'll enclose this in sticks all the way down, follow the form of the truck and like back here it will all be finished off giving the contours right up to our dashboard.
The
glue is a fast set super glue like you can get at any hobby shop. Nothing
real special about
it. The spray I'm using is the accelerator glue won't harden without that. So you have a little bit of work time, but once you spray it,
you got 10 seconds and it's set up
once we get
a
bond with that we'll go through with fiberglass and reinforce everything
coming up. Fiberglass, green co
and a ton of sanding. Even the Canadian pitches in.
We'll make a body man out of you yet. No, I hope not.
Plus a sound system that'll rock the rocks. Stay tuned.
Welcome back to extreme where our S 10 truckie continues its way over the top transformation
today, it's a console dash
and speaker enclosure from two of MTX audio's top installers,
Jason Plank
and Craig Marsh. These guys are famous for creating some of the sickest custom cars and trucks on the planet.
Everything from
a
vicious vibe
to this earth shattering escalade.
What I like best about this job is being allowed to be creative and free with my ideas and the artistic side of the job. When I get a car at MTX, I'm given a general direction, but as far as what we do with the car,
they pretty much let us go. My favorite car was a car. We did a Hyundai Tiberon,
we did two of them, actually one
that we did for them
in conjunction with Playboy.
And uh I was chosen to go debut it at the Playboy Mansion.
The Jackhammer came to be
simply
because we can,
we were running a campaign, biggest batts and boldest and we were challenged to build the biggest Battiston, boldest woofer and uh the R and D group up there did it and then we got bored with that and built a bigger one. So the 24 is out this year, a
24 inch seven the S 10 and we'd be sitting on the roof. So on a much smaller scale, this enclosure will be the housing for our twin tens.
The process begins by stretching fabric across the entire structure.
It's a weird shape. So we do have to kind of patch this thing together.
A polyester resin is prepped
and then applies,
it's absorbed into the material, creating a hardened shell. Well, now that our fleece is dried over our form,
we're applying a coat of chopped mat to give it extra strength.
We may do this in one or two layers depending on the thickness. We're trying to achieve
thicker, the better,
the less filler we have to use the, the better off we're gonna be.
This is how I got started. It is definitely a hobby. You can buy all these materials, your local fabric store, even bigger department stores,
resin
and chop Matte
Home Depot or any auto body shop. And
then once this dries, we go on to the next step which will be shaping, adding the body filler
and then after paint.
Yeah, fiberglass,
we'll make a body man out of you yet. No, I hope not
while the guys finish up. Let's take a look at some of the goodies going in our trucks.
We're going to be installing two MTX audio RFL series amplifiers. Now, one amplifier will power the speakers in the front and we'll have 4, 6.5 inch speakers in the doors to handle the mids as well as the highs. The second amp will be a dedicated subwoofer amp
and those will power these 210 inch thunder thin series subs. Now, these are in super thin sub that only needs 0.65 cubic feet of air to operate. There are three 38 of an inch deep and can handle 300 R MS watts, which makes them great for tight fitting applications like our standard cab s tent.
At the same time, we'll be wiring up one of these street wires, power station capacitors. Now, what this does is it basically takes power from the battery and stores it. That means when you got the stereo cranked all the way up and the base hits and it draws all the amperage down in the system. This tops it up faster. So your lights don't dim. Every time the system hits,
wiring up a high end audio system, like the one we're putting into our truckie can be a little bit complicated. So we went ahead and laid everything out on this board so we can show you how it's gonna happen. Instead of trying to explain it when everything's crammed inside the truck, we're gonna start with the power side of things. We'll be running 24 gauge street wires, power cables down one side of the truck to power our amplifiers. Now, one will go directly into the amp.
The other will also loop up and deliver power to the capacity
that we were talking about earlier. We'll also hook up two very short ground cables and we'll ground them probably right to the roll cage. The short cable will eliminate lots of resistance in the ground circuit just make it work a little bit more efficiently. Now, the amplifiers will not switch on until you turn your radio on. That's because the head unit has a remote switching wire. When you turn the head unit on, power comes down the remote switching wire and actually turns the amplifiers on that way, you're not wasting a lot of power when you're not listening to music.
Now, when it comes to music on the back of your head, you know, there's probably gonna be some speaker wires coming out of them. Well, just don't pay any attention to those. We're gonna be hooking up all RCAS for this. The RC A has a lot cleaner sound and it's definitely a must for a high end type system. And we run the rcas on the opposite side of the truck to eliminate any alternator noise from feeding into them and then showing up in the speakers. Now, one set of rcas will come up and feed our four channel amp. The four channel lamp will have four sets of speaker wires that come out
to feed all the speakers in the doors. The other AMP is a dedicated subwoofer AMP and it feeds out just to the two tens that we're running in the box. Now, the key to this system is right here. This little knob is our external base control. Now, this will allow us to adjust the base output of these subs depending on what kind of music we're listening to just from the driver's seat of the truck and we're not just dealing with vid or audio here. We're also dealing with video
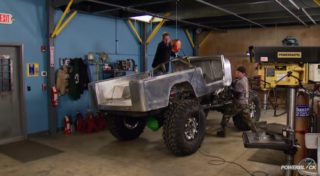
and we're gonna be installing this seven inch icon TV, motorized
dash screen along with their DVD head unit. Now, what this will allow us to do is not only watch Xtreme 4x4 when we're on the trail, we're also going to be able to switch to four of these night vision cameras. Now, we'll strategically place these cameras around the truck, one straight out the back, one in front of the rear wheels and then two in front of the front wheels. So we'll be able to sit in the driver's seat and see exactly what we're crawling over without having to get out of the truck. But before we install any of this stuff, we need to build a rack for these two.
Later on, all the components are installed in the cab. But what finish will the custom pieces get? Stay tuned to find out when Xtreme 4x4 continues,
the MTX guys packed up all of their stuff and headed home, we then cleaned up the shop and pulled all the enclosures out of our S 10, sent them out to get finished. They'll be back a little bit later. Right now, we're going to deal with the rest of the interior and we're going to be using some sound deadening product. Now, this is boom mat from,
it comes in two forms, a sheet form like this that has an adhesive back. We'll be using this inside the doors. Now on the floor and firewall, we'll be using their spray on boom mat. Now, this will reduce the noise inside the cab as well as eliminate some of the heat that's kicked up from the exhaust and the engine
before we put any of the interior components back in, we're going to deal with the power and grounds in our wiring system. Now, it's going to start with an optimal battery that we're gonna mount up underneath the dash on this battery tray. We got from sniper fab works. We'll install a remote disconnect switch in a pretty cool location
and instead of punching a hole in the firewall and just running wires through it, we're going to use these painless junction blocks that insulate the wire against the steel and you just mount on either side of the firewall. Now, all the powers and grounds are going to be run using street wires for gauge cable.
The new optima battery will mount right on the firewall
and then the bulkhead connectors can be installed.
The battery is wired up on the inside
and in the engine compartment, the starter
main power feed for the 502
and the winch get all hooked up.
A lot of people asked why we didn't shave the fuel door off our bedside.
Well, it makes a cool place to hide our remote battery, disconnect
these two cables that I've added to our battery are for our C
tech comfort indicator panel that will mount up in the dash. Now, this will give us a constant indication of the power that we have left in our battery. Now, the nice thing about this is we'll just have to stick our head in the truck and we'll be able to tell if our battery is fully charged, half charged or even completely dead if it needs to be charged up. We just pull our C tech charger out of our toolbox and we'll be able to plug it right into the dash. The truck will be ready to go wheeling in a couple hours.
We packed up everything that Jason and Craig built and carried it out to Rhino linings of Cookeville, Tennessee. Now there they sprayed every panel with their Rhino truck bed coating that did a couple of things for us because it has this rough texture.
That means that we didn't have to take the understructure to a perfect
finish. We could get away with a couple of cents, but more importantly, they were able to spray our panels both front and back. Now, what that means is once we have all the audio gear bolted in, all this stuff will virtually be waterproof, which is a huge benefit when we're putting it in an off road buggy.
And now that this is done, we can go ahead, throw them in.
Let's turn this thing up open.
So today, Rs 10, it made a huge transformation from a truck with no interior to one with a 100% custom interior. And the best thing is if we ever get tired of listening to music. When we're on the trail, we can always throw in an episode of our favorite TV show.
Welcome back to Xtreme 4x4 and the beginning of our S 10 Druggie Project.
Show Full Transcript
and it starts right now.
Project ideas here at Xtreme 4x4. They come from everywhere but most of the time they're driven by you guys at home, you tell us what you like and what you don't like. Now, recently, you guys have sent us tons of emails and messages to let us know that you love our S 10 tr
clumsy directors.
Hold on, I'll help you with that.
Now, back here, this is what you guys tune in for and we know that we plan these projects with you guys in mind and we try to take some of them and we try to push them way over the top. Now, our S 10 truck,
that's exactly what we've done. And you guys have told us that you like the direction it's going
right now. We have to deal with the interior on that truck. We could have done a lot of different things, could just put an aluminum dash and some gauges made it real clean looking.
But you guys want that truck to have a life of its own. You want it to be even more over the top. So for that, we had to call in a few favors.
The big Wings at MTX Audio agreed to send us two of their hot shot installers.
Craig Marsh has almost a decade's worth of experience in wiring up custom
auto sound
and Jason Plank can rock the router table like nobody's business turning MD
F into dust and building some wild fiberglass enclosures.
Now, they agreed for unlimited pizza and energy drinks, they would take care of our entire interior on the S 10 tring.
But before we had there, let's take a look back, see how we turned a $750 trash pick up into a high end custom crawler.
There isn't much left of the original S 10 that rolled into our shop, but we knew that would be the case.
But once we had the cab off the stock frame, we tossed it aside and built a 100% custom to frame assembly.
After a pile of body work, the truck was fully assembled and the Ram Jet 502 was fired up
and we stripped the entire truck apart to take care of the details.
After a coat of PPG Andy Frees, green paint was laid down on the sheet metal.
The chassis got a thick layer of powder,
a
heavy flakes, silver powder coat.
Then we assembled the truck for good
down with 2.5 inch Bill Stein Rock Crawler shocks, 20 inch aluminum wheels, a 502 ram jet with a chrome plated intake
and a custom powder coated four L ad E
not to mention Rockwells with 47 flying chrome muley shafts
and a pile of other custom touches. We knew this truck was going way over the top.
Now, these guys have already made some pretty serious headway inside our truckie and this is a perfect example of the kind of game these guys are bringing instead of messing around with this old stock dash that we mocked into place, they went ahead and built a 100% custom replacement piece. Now, this thing is a work of art has a nice spot right in the middle for a metal inlay that will really help the gauges pop spot here for our switches. Now, the one downfall is before we can install this, we got a little bit of trimming to do.
We hacked up our stock dash piece pretty good to fit around the roll cage,
but we didn't want to do that with our new custom piece.
So with the down bars marked
and cut,
we'll tig weld in some tooth clamps from ballistic fab.
Now, all we gotta do is cut the holes for the down tubes in the new dash piece and see how she fits.
I
mean, it's a little wide, man.
You can go your way.
Yeah, if the hole was wider, I could go my way.
What I'm hitting, I'm hitting some of this internal structure and then I think I might be all right.
Can you see what I'm talking about right here?
This tube is digging into this little piece of MD.
Where's the
hole and
relevance to that in front of it?
Yeah, it actually looks pretty good.
Ok.
After some modifications in the cab,
Jason Can Mart and cut his custom dash. So it'll fit like a glove
sweet.
Now, it took a little bit of grinding and a couple of fits, but it's in there and it looks great. Certainly better than the stock dash would have looked in this truck. Now, Jason and Craig got to go and take care of the rest of the custom parts. This interior, we've already put together this little skeleton back here that's gonna get all wrapped with fiberglass. It's gonna flow into a custom made center console, it's gonna tie in the dash, then we're going to stuff it full of all sorts of goodies. But before we do any of that,
let's have a look at the seats,
Mastercraft really outdid themselves when it came to the seats for our truck.
This is their Rubicon style seat and just like all Mastercraft seats. They are a full suspension seat with the parachute corb draped in between a steel frame to absorb those bumps when we're out on the trail. But they put together this custom cover for us with black and gray vinyl and they even stitched our logo into the headrest and to tie the inside to the outside on this truck, they added this lime green piping all the way around the seat.
Here's how we're gonna finish off this Center Council.
We're gonna take some sticks in a method we call stick building.
We're gonna line them up here
and we're gonna mark them
the pencil
where we need to cut them or grind them to get them to fit.
Then we'll take them one by one and glue them in until we close this in much like a barrel is made.
After we get this all closed in, we'll go to the next step which was give Ian a cup holder in his
rock crawler.
So this will be the next step
again. We'll enclose this in sticks all the way down, follow the form of the truck and like back here it will all be finished off giving the contours right up to our dashboard.
The
glue is a fast set super glue like you can get at any hobby shop. Nothing
real special about
it. The spray I'm using is the accelerator glue won't harden without that. So you have a little bit of work time, but once you spray it,
you got 10 seconds and it's set up
once we get
a
bond with that we'll go through with fiberglass and reinforce everything
coming up. Fiberglass, green co
and a ton of sanding. Even the Canadian pitches in.
We'll make a body man out of you yet. No, I hope not.
Plus a sound system that'll rock the rocks. Stay tuned.
Welcome back to extreme where our S 10 truckie continues its way over the top transformation
today, it's a console dash
and speaker enclosure from two of MTX audio's top installers,
Jason Plank
and Craig Marsh. These guys are famous for creating some of the sickest custom cars and trucks on the planet.
Everything from
a
vicious vibe
to this earth shattering escalade.
What I like best about this job is being allowed to be creative and free with my ideas and the artistic side of the job. When I get a car at MTX, I'm given a general direction, but as far as what we do with the car,
they pretty much let us go. My favorite car was a car. We did a Hyundai Tiberon,
we did two of them, actually one
that we did for them
in conjunction with Playboy.
And uh I was chosen to go debut it at the Playboy Mansion.
The Jackhammer came to be
simply
because we can,
we were running a campaign, biggest batts and boldest and we were challenged to build the biggest Battiston, boldest woofer and uh the R and D group up there did it and then we got bored with that and built a bigger one. So the 24 is out this year, a
24 inch seven the S 10 and we'd be sitting on the roof. So on a much smaller scale, this enclosure will be the housing for our twin tens.
The process begins by stretching fabric across the entire structure.
It's a weird shape. So we do have to kind of patch this thing together.
A polyester resin is prepped
and then applies,
it's absorbed into the material, creating a hardened shell. Well, now that our fleece is dried over our form,
we're applying a coat of chopped mat to give it extra strength.
We may do this in one or two layers depending on the thickness. We're trying to achieve
thicker, the better,
the less filler we have to use the, the better off we're gonna be.
This is how I got started. It is definitely a hobby. You can buy all these materials, your local fabric store, even bigger department stores,
resin
and chop Matte
Home Depot or any auto body shop. And
then once this dries, we go on to the next step which will be shaping, adding the body filler
and then after paint.
Yeah, fiberglass,
we'll make a body man out of you yet. No, I hope not
while the guys finish up. Let's take a look at some of the goodies going in our trucks.
We're going to be installing two MTX audio RFL series amplifiers. Now, one amplifier will power the speakers in the front and we'll have 4, 6.5 inch speakers in the doors to handle the mids as well as the highs. The second amp will be a dedicated subwoofer amp
and those will power these 210 inch thunder thin series subs. Now, these are in super thin sub that only needs 0.65 cubic feet of air to operate. There are three 38 of an inch deep and can handle 300 R MS watts, which makes them great for tight fitting applications like our standard cab s tent.
At the same time, we'll be wiring up one of these street wires, power station capacitors. Now, what this does is it basically takes power from the battery and stores it. That means when you got the stereo cranked all the way up and the base hits and it draws all the amperage down in the system. This tops it up faster. So your lights don't dim. Every time the system hits,
wiring up a high end audio system, like the one we're putting into our truckie can be a little bit complicated. So we went ahead and laid everything out on this board so we can show you how it's gonna happen. Instead of trying to explain it when everything's crammed inside the truck, we're gonna start with the power side of things. We'll be running 24 gauge street wires, power cables down one side of the truck to power our amplifiers. Now, one will go directly into the amp.
The other will also loop up and deliver power to the capacity
that we were talking about earlier. We'll also hook up two very short ground cables and we'll ground them probably right to the roll cage. The short cable will eliminate lots of resistance in the ground circuit just make it work a little bit more efficiently. Now, the amplifiers will not switch on until you turn your radio on. That's because the head unit has a remote switching wire. When you turn the head unit on, power comes down the remote switching wire and actually turns the amplifiers on that way, you're not wasting a lot of power when you're not listening to music.
Now, when it comes to music on the back of your head, you know, there's probably gonna be some speaker wires coming out of them. Well, just don't pay any attention to those. We're gonna be hooking up all RCAS for this. The RC A has a lot cleaner sound and it's definitely a must for a high end type system. And we run the rcas on the opposite side of the truck to eliminate any alternator noise from feeding into them and then showing up in the speakers. Now, one set of rcas will come up and feed our four channel amp. The four channel lamp will have four sets of speaker wires that come out
to feed all the speakers in the doors. The other AMP is a dedicated subwoofer AMP and it feeds out just to the two tens that we're running in the box. Now, the key to this system is right here. This little knob is our external base control. Now, this will allow us to adjust the base output of these subs depending on what kind of music we're listening to just from the driver's seat of the truck and we're not just dealing with vid or audio here. We're also dealing with video
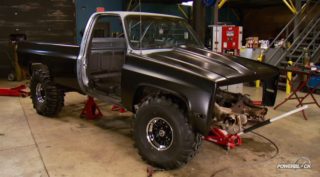
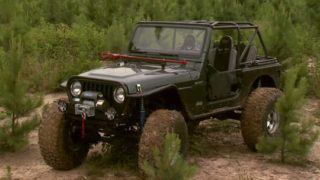
and we're gonna be installing this seven inch icon TV, motorized
dash screen along with their DVD head unit. Now, what this will allow us to do is not only watch Xtreme 4x4 when we're on the trail, we're also going to be able to switch to four of these night vision cameras. Now, we'll strategically place these cameras around the truck, one straight out the back, one in front of the rear wheels and then two in front of the front wheels. So we'll be able to sit in the driver's seat and see exactly what we're crawling over without having to get out of the truck. But before we install any of this stuff, we need to build a rack for these two.
Later on, all the components are installed in the cab. But what finish will the custom pieces get? Stay tuned to find out when Xtreme 4x4 continues,
the MTX guys packed up all of their stuff and headed home, we then cleaned up the shop and pulled all the enclosures out of our S 10, sent them out to get finished. They'll be back a little bit later. Right now, we're going to deal with the rest of the interior and we're going to be using some sound deadening product. Now, this is boom mat from,
it comes in two forms, a sheet form like this that has an adhesive back. We'll be using this inside the doors. Now on the floor and firewall, we'll be using their spray on boom mat. Now, this will reduce the noise inside the cab as well as eliminate some of the heat that's kicked up from the exhaust and the engine
before we put any of the interior components back in, we're going to deal with the power and grounds in our wiring system. Now, it's going to start with an optimal battery that we're gonna mount up underneath the dash on this battery tray. We got from sniper fab works. We'll install a remote disconnect switch in a pretty cool location
and instead of punching a hole in the firewall and just running wires through it, we're going to use these painless junction blocks that insulate the wire against the steel and you just mount on either side of the firewall. Now, all the powers and grounds are going to be run using street wires for gauge cable.
The new optima battery will mount right on the firewall
and then the bulkhead connectors can be installed.
The battery is wired up on the inside
and in the engine compartment, the starter
main power feed for the 502
and the winch get all hooked up.
A lot of people asked why we didn't shave the fuel door off our bedside.
Well, it makes a cool place to hide our remote battery, disconnect
these two cables that I've added to our battery are for our C
tech comfort indicator panel that will mount up in the dash. Now, this will give us a constant indication of the power that we have left in our battery. Now, the nice thing about this is we'll just have to stick our head in the truck and we'll be able to tell if our battery is fully charged, half charged or even completely dead if it needs to be charged up. We just pull our C tech charger out of our toolbox and we'll be able to plug it right into the dash. The truck will be ready to go wheeling in a couple hours.
We packed up everything that Jason and Craig built and carried it out to Rhino linings of Cookeville, Tennessee. Now there they sprayed every panel with their Rhino truck bed coating that did a couple of things for us because it has this rough texture.
That means that we didn't have to take the understructure to a perfect
finish. We could get away with a couple of cents, but more importantly, they were able to spray our panels both front and back. Now, what that means is once we have all the audio gear bolted in, all this stuff will virtually be waterproof, which is a huge benefit when we're putting it in an off road buggy.
And now that this is done, we can go ahead, throw them in.
Let's turn this thing up open.
So today, Rs 10, it made a huge transformation from a truck with no interior to one with a 100% custom interior. And the best thing is if we ever get tired of listening to music. When we're on the trail, we can always throw in an episode of our favorite TV show.
Welcome back to Xtreme 4x4 and the beginning of our S 10 Druggie Project.