Parts Used In This Episode

Mickey Thompson
19.5/54-20LT Baja Claw TTC
Baileigh Industrial, Inc.
R-M55 Ring Roll Bender

Video Transcript

There is no question that we built a pile of different trucks. Here. At extreme, we built everything from race trucks to mud trucks, trail trucks and even a few tow rigs. But there's one thing that really floats your guys' boats and that's when we break out the bender and the welder and we tear into some true custom fab and we've done it at either end of the spectrum,

we built a high horsepower, no money spared S 10 cab truck. We call our toxic trie

built with some of the best off the shelf parts designed to tackle any trail you pointed it at

and at the same time, look like a show car.

And at the other end of the spectrum, we've also built this small single seat four wheel steer buggy with a focus on saving money and building a hardcore trail truck in the process. But it doesn't matter whether we talk about this small little cheap truck or our over the top 10. 1 question question that you guys always seem to ask us is you want more information. You wanna know, what does it take to design something like this? How do you determine where all the tubes go in that cab truck. Well, that's what we're gonna do today. We're gonna take you step by step through the process of designing a tube chassis.

We've run a pile of tube through our bender and built a ton of one off rigs. We've even gone, start to finish on the design and building of a roll cage, but building a complete tube chassis, that's a different animal altogether.

Now, the first step in your design is gonna be deciding the overall size of the buggy and that starts in the passenger compartment. You need to decide you're gonna build a single seat chassis or you're gonna build a monster six seater, so you can take all your friends four wheeling. You're gonna need to decide on the overall shape of the buggy. And for that, it's best to look around your local off road park, maybe scour the internet a little bit or pick up a good magazine that has a bunch of chassis in it and you can really decide what kind of style you like.

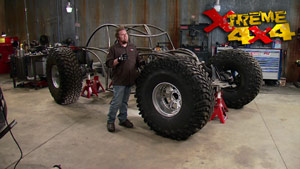
Now, when you're talking about size, you're gonna talk about wheelbase and that depends on where you go riding. Now, if you want to build a big buggy, you want big tires like these 54 inch tall monsters and this will mean that you have a fairly decent wheelbase just because of the sheer size of the rubber. Now, with a big tire, you're definitely gonna need a monster drive train to turn it. You can't run a Toyota motor with 54 inch tall tires. You just don't have the horsepower. Our drive train is right outside.

One of the biggest benefits to building a custom tube chassis is you can honestly build it around any drive train you want. Now you can use a mock up block but nothing will substitute having the actual engine and transmission in the shop to build around. And ours is right here in this wreck truck. It is a six

0.6 L turbo diesel

Duramax engine and Allison transmission. Now, I honestly have never seen a

Duramax diesel powered trail rig and that's the theme for this buggy. We're going to build something that we've never seen before on the trail and it starts with that motor.

The nice thing about tearing into a truck that's been in an accident is there's a bunch of stuff that's already garbage. You can just pull it off and throw it in a pile. You don't have to worry about hurting those parts. Someone else wrecked them for you.

Now, when you're designing a tube chassis, you can break it down into three distinct sections. You're gonna need a space to hold your engine that you're gonna call your engine compartment section. And it's basically a tube structure that goes all the way around the engine, whether it's in the front or in this case in the back of the buggy. Now, the next section will be your passenger compartment. It'll start right after the engine and it's gonna go up and around all the occupants

that you're going to put in your car, whether it's 24 or possibly six. And the last one is going to be a small storage section

that'll go in the front or rear of the car, depending on the layout of the drive train and it's there to hold your fuel cell. But more importantly, it has a tube structure around it and that's where you're going to mount your front or rear shocks. Now, before we start designing any chassis here, we need to measure this engine.

The first measurement will be the length, be sure to add enough room here for the radiator and all the accessory drives.

Then the height

add a couple inches here for air boxes or air cleaners depending on your engine.

Now, the width is last and this is key too wide and the tubing can get into your tires too narrow

and obviously you won't have room for the engine.

Now, you have to think of each one of these spaces

as a three dimensional area. And the best way to do that is to draw it out with a top view side view and an end view. But before we start drawing any part of this chassis, we're gonna move on and measure the passenger compartment. Best way to do that is to go ahead, throw a set of seats like the seats you're gonna use in place, so you can set them all up measure from there.

We'll make the same measurements for the passenger compartment starting with wi

be sure to leave room for shifters between the seats. And of course, some cup holders,

height

measure to the top of your head or the seat

add four or five inches to give yourself enough head room to move around inside the cage. And lastly link, sit in the seat in a comfortable seating position and see where your feet lay.

Nothing's worse than building a buggy, too small to ride in.

Now that we have some measurements, we're going to go ahead and do three different scaled versions of the buggy on our chalkboard. We're going to create three views. We're going to do a top view, a side view as well as a view looking at it from the end.

Now, this is the start of what's called a mechanical blueprint.

Just two thirds of the buggy will explain what all these lines mean. A little bit later

today in Xtreme 4x4, we're taking you guys step by step through the process of designing your own tube chassis.

Now, so far, we've laid out a very unique drive train as well as mocked up some seats into place to take some measurements. Now, we know how much space we need for our engine and how much space we need for the driver and passenger in order to fit inside the buggy comfortably. And now we're gonna set the total width of our chassis as well as our wheel base.

When you're doing wheelbase, it's best to have the actual tires you plan to use on your buggy in the shop. Now, since we're going all out into left field with this buggy doing stuff we've never done before, like rear engine and a diesel powered power plant. We decided to use a very unique set of tires. These are Mickey Thompson, Ball

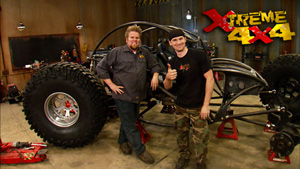
ha clot. Tt CS. They measure 19.5 inches wide and a whopping 54 inches tall.

The TT C stands for the top truck challenge.

The top truck challenge is an event that happens every year. Guys build huge horsepower giant tire rigs and they throw them into deep mud pits and perform huge hill climbs to determine who has the toughest truck in the country.

And this year Mickey Thompson designed the tire specifically for that event. They took the classic Baha

claw and completely redesigned the tread with one thing in mind. Hardcore off road.

They went ahead and opened up the space between the tread blocks to give you more sharp edges to tear into the dirt. They added sipping to certain parts of the tread that'll cause this tread block to open up when it gets hot and help with tire clean up. They

went ahead and removed every other outer lug on the

side edge and even added a small scoop into these logs to really help the tire dig into the mud and dirt kind of like a paddle tire. Now, these tires really shown in the top truck challenge and guys loved them. We chose them for this project

because they're damn cool.

We'll start by rolling the tires into place around our drive train to get an idea where they're going to sit.

100 and 25 inch wheel base will be our baseline measurement

and we set the center of the tires at 67 inches to represent a full

width axle.

Now, we need to turn the tires to simulate the front and rear steer.

This will tell us how skinny the chassis needs to be to keep the tires from rubbing the tube.

We have the ability to move the tires further away or closer by changing the axle win.

Right now, we're just looking for a ballpark figure.

Now these three view drawings can seem a little complicated, but when you break them down, it's actually very easy to understand.

The first thing we drew up here were a couple of white rectangles and this one on the back is for our engine. Now, the green lines are the potential tubes in our roll cage and you can see that there are no tubes inside this rectangle. So we know that the engine will fit in the back of the car that's the same with the passenger compartment. These two tubes right here are roof bars and these outer edges are the sides of the chassis. So we know we've got enough room to sit in here because we first drew in that white rectangle at the right width as well as the right length. Now, these last two lines that I added here, this is that width measurement that we calculated by moving the tires in and out. So we know that nothing can protrude past here. The front, you can see we got the tubes diving in under those and these two lines right here,

the center line of both our front and rear axle. You can see we have a problem back here. This tube may be a little close, but we can change that later because we'll just have to cheat that tube in as close to the engine as we can get it and then adjust the location of the axle. So the tires actually turn. Now this is the top view and that's the easiest one to draw out. What we're gonna do now is drop it down to the side view and then we'll actually lay it out on some graph paper so we can get some dimensions for our tubing

one buggy. Ah

ah

ah

ah,

now that we have measurements that are actually set in stone, it's time to sit down and design a chassis and you can do it a bunch of different ways. You can have a lot of straight pieces with minimal bends or you can even think outside the box.

Great.

Now you've seen us draw chassis on the computer before and get printouts of how to build them on what's called a Ben sheet. But you can do the same thing on a big piece of paper when you draw it out to scale. Now, this first chassis up here, I use just a lot of simple straight pieces and this design right here, one inch will equal 1 ft. And so if you wanted to build this chassis, you just have to break it down and come in here and pick out one piece of tubing and build it from there. But we're gonna do something a little bit differently on this buggy. We're gonna do what's called a lot of roll bending. Now, this might not be the best drawing, but you can get a good idea of what we have going on here. We have a lot of long arcs in our tubing. Little big swooping bends for the door bars as well as right up here at the front kind of make it look a little bit like a Volkswagen bug. But of course, with 54 inch tall tires, it's gonna be like it's on steroids. Now to do a roll bent chassis like this, you need a very specific tool called a

roll bend.

Listen up ladies, a sure fire way straight to your man's heart. Have one of these babies delivered, Ian shows off his new tool. After these brief messages.

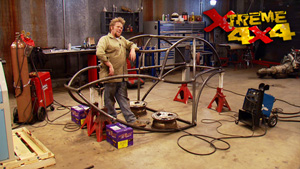
So far, we've shown you guys the steps it takes to design your own tube chassis. We took all the critical measurements we needed around our drive train and our passenger compartment even set our tires in place to set our wid. Then sat down and sketched out a very unique design on a piece of paper that included a lot of large radius bends. Now to get those radius bends, you need this tool right here. This is a Bailey industrial tubing roller. And unlike a bender, it doesn't just grab the tube and bend it to a specific angle.

It slowly rolls the tube to get that large radius bend into it over a long period of time.

Now, we opened up our wallet here and dumped a lot of coin into a full electric, heavy duty version because we're building an entire chassis. But if you don't want to dump a lot of Cash Bailey has a manual tubing roller, you can get works the same way. It has a great big handle on the front that you got to crank the tube through over and over and over again. You'll end up with one huge arm. In our case, it's got a couple foot pedals.

The two powered rollers will pull the tube through the machine

and will slowly apply pressure to the center roller rolling the tube into a large radius bend.

The machine has a gauge to determine the amount of arc rolled into the tube.

So you can ensure that you have two identical rolls when needed.

Now, there comes a point in building your chassis when you need to stop and remove your mock up drive train just to make it easier to put the rest of the tubing in. But when you do that, you have to plan ahead, you have to plan ahead and figure out how you're going to put it all back into the buggy. In our case here, we're going to have to split the engine and transmission and install them separately mainly because we have a crosser running across underneath the chassis

right between the engine and transmission that we're going to be

for our lower link mounts. Now, that's not a bad thing. You just got to think ahead. Nothing is worse than completely building an entire chassis and then a not being able to get your engine out or b not being able to get it back in without cutting it all apart. Now, in our case, we're going to take it all out through the top, but when it comes back in, the engine will come in through the bottom transmission and transfer case will come in from the front. And now that we know that we can think ahead plan where our tubes are going to go.

Now you've seen us build chassis and roll cages from blueprints before. But honestly, when you're working with all this roll tube, it's better just to step back, line it all up in your eyes, make it look good. Stick it in place.

You're watching Xtreme 4x4 for a DVD copy of this episode, just go to Power Block tv.com and order your copy for just 595 plus shipping and handling. Start your own Xtreme 4x4 collection delivered right to your door from the power block.

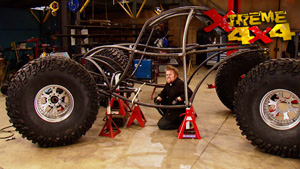
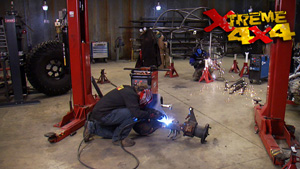
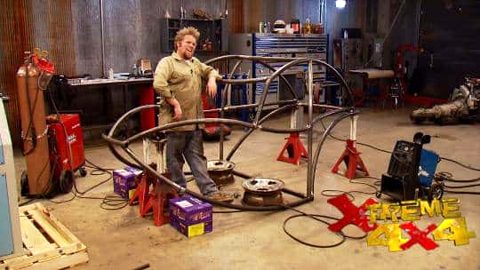
After a good solid eight hours of bending, notching, grinding and welding. We have the start of our custom chassis and it looks pretty good. Thanks to all the roll tubing that we ran through our new tubing roller. Now, before we go ahead and add any more tubes to this particular set up, I wanna show you a couple of tips and tricks that'll help you when you're working with any type of chassis. Not necessarily this design here. The first one is gonna be what's called a slug joint.

When you're joining two pieces of tube in what would be normally a butt. Well, just two tubes slid up against each other. You need to first insert a slug. A slug is a smaller piece of tubing that fits inside to help spread the load out of that joint over a larger area. But you can't just leave the slug in there alone. You need to support it on as many sides as possible. You can see here, we have the A pillar coming down and that will support it on the top side, we'll run another piece of tube

on the bottom side down to the bottom of the chassis. And then finally the dash bar will pick up the backside of the slug and come around to where the other slug is on the opposite side. That way, we'll have it supported on three sides making it almost as strong as if we had one solid piece of tube running through here. Now, slug joints aren't bad. You just need to know where to use them. In a case like this, we had to use it because we have two different arcs that join right here. It's a perfect location for a slug.

Now, when you're mounting your engine and drive train, you basically have three options. You can work off the factory motor mounts on the side of the engine. You can do what you've seen us do in the past which you use these small leaf spring bushings with a piece of tubing and build a mount off of it or you can even solid mounted into the chassis which is some flat plate working off some bosses in the block. But the key here is no matter how you mount your engine, you have to mount your transmission and transfer case the same way or the drive train can twist and you can break your transmission.

You've probably noticed that we didn't use a jig when we put together our chassis. Now, the reason we did that is jigs are nice to have, especially if you're going to duplicate the same design over and over again. But if you're just building one buggy, like we are here, a good flat piece of concrete and a tape measure will save you a pile of money. Now, the buggy will not come out perfectly square no matter how hard you try. But honestly the first time you roll this truck on the trail, it's not gonna be perfectly square anymore anyway. So just get it as close as you can. Now, if at any time when you're putting your chassis together, you see something you don't like, trust me. Take the time now, cut it out and change it. I'm not real happy with how this tube here looks running down at this arc. So I think I'm gonna swap it out for this tube going in the other way. I just think it gives it a meaner style. And when I go ahead and do this,

you guys get to relax.

Watch the rest of the shows. Bye now.
Show Full Transcript