More Project HRT Episodes
Trucks! Builds
Want more content like this?
Join the PowerNation Email NewsletterParts Used In This Episode
Auto Body Toolmart
Adjustable paintless dent repair light and stand.
Auto Meter
Old tyme black 5 pc. kit.
Dual Liner
Bed liner for 99-06 Chevrolet short bed.
Pertronix
Second strike ignition box.
Watsons Street Works
Hot slot sequential taillight kit, one piece hot slot led taillight kit.
Video Transcript
If you're not sure about working on fiberglass, then don't be. Today, we're doing body work on Project H RT and showing you how to work glass the right way, we're cleaning up the seams in the panels and we'll show you how to flush mount led taillights for an even cleaner look. That's all today here on trucks.
Hey, welcome to the shop and thanks for watching trucks. Well, today we're going to jump with both feet into a subject that some people consider to be automotive voodoo body work and not just your average run of the mill body work on sheet metal
fiberglass body work. Now, if you've been around body shops much, you've heard the rumors about what kind of a royal paine fiberglass cars are to work on and replicas and kit cars could be even worse, but that's not always the case. In fact, fiberglass has huge advantages over sheet metal and being able to customize it faster and easier is just one of them. So it's not necessarily more difficult to work on. It's just a different animal.
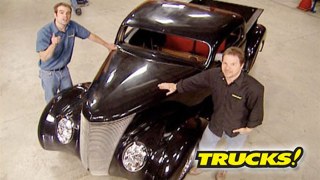
So today we're gonna bust some of those myths and show you guys that customizing or repairing body damage on a fiberglass vehicle is something you can do. No problem. And today's victim is Project H RT. Our Legend Motors 37 Ford, that's already customized and looks as straight as a lot of finished
jobs, even though it's still in raw gel coat, but it's still got the mold line right here from the two part manufacturing process.
Now, it seems fair to assume you could just sand these lines flat, spray on some high build primer block it and paint it.
But a lot of guys have been bitten by these mold lines showing through or mapping through their paint job. And here's why
now a cross section of that mold line would look something like this. And you can see that if you just resurface that mold line and level it down with the rest of the panel surrounding it. Well, it's gonna expose these layers of gel coat which are harder than the polyester material underneath it. And eventually due to the curing of the fiberglass and natural heating and cooling cycles. Well, these lines are gonna show through your paint and they can't be buffed out.
So the way to get around that is to completely remove the entire cross section of layers that are being exposed
and fill it in with the material that's as strong as the gel coat.
And then
you can do your paint and body work on top of that
and that all starts with removing this mold line here.
Now, this is a messy job. So wear the appropriate safety gear to protect yourself and do it in a well ventilated area. We're using our down draft prep station to remove the fiberglass particles from the air.
And by the way, when you're done, wash up with cold water, warm water will open up your skin's pores allowing the fiberglass particles to get in even deeper, making your edge worse.
Ryan's using a carbide bur and grinding about an inch outside the mold line and digging about an eighth of an inch deep into the polyester.
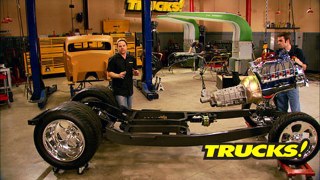
While Ryan works on the rear fenders, check out the dog house. Now when we first got this truck, the body panels were pre ft but not finished, which is perfect for us because it gives us options. For instance, we can do things like filling these seams rolling lines, smoothing things over, basically putting our own personal custom to
touches on this truck. And since Legend Motors cures their bodies before delivery, there's no worries of anything shifting or changing shape on us. So, one of the things that we're gonna do is smooth this area up in here and bond these panels together so that when we open the hood, we look down in here and everything looks like a real street rod
using 50 grid discs, we can rough up the surface on each side. So the adhesive has something to grab onto as it cures.
Ok. Hold it right there. I
now these bolts only serve as locators. They'll come back out after the adhesive is set up, which is gonna take about 30 minutes. After that, we'll use fiberglass to fill in the holes.
All right, with the mold line gouged out. I went ahead and sanded the edges using 80 grip.
Then we'll fill in that gouge with this two part epoxy we got from Legend Motors.
The epoxy is mixed at a 5 to 1 ratio and will stay workable for about 20 minutes,
ok? With our inner aprons bonded to the outer fender. Let's take a look at these hood sides.
Now, these holes that you see were drilled in here purely for the mock up stage. These holes are gonna get filled in and these edges smoothed over and that's gonna start with 36 grit on a grinder.
We're using short strand filler to bridge the gap between the two panels which will take about 10 minutes to set up
with the epoxy dry. My fenders are ready
now, it's just a matter of leveling it out to the height of the surrounding gel coat.
Now, we'll follow that with some 80 grit just to smooth over some of the deep scratches
and now it's ready for the next step.
This is not epoxy or Bondo.
The short strand fiberglass sets up as hard and as strong as the panels around it, making it less likely to crack or shrink back
and the sander will knock the basic shape into the filler. But you always want to come back with a hand board and do your final shaping by hand.
All right, our gaps are filled. Our screw holes are filled. We got everything blocked down with 80 grit. Now we're ready for primer
surfer and the blocking starts all over again.
When we come back from the break, we're going to show you guys how to jail coat. Those zero offenders stick around.
But up next, it looks like we're ruining the tail lights but have a little faith.
And later we'll lay out and mount our gauges. Stick around.
Welcome back. And thanks for watching trucks. Today, we're working over the fiberglass body of Project H RT and giving you guys a few tips on working with fiberglass.
And what we're gonna do next is not something that you see every day.
Well, I've been to 14 county fairs and a horse marriage and I hadn't seen this technique until we went to Legend Motors to pick our truck up. And what those guys do is to spray gel coat over top of a repair and that way they create a rock solid foundation that's ready for whatever type of work you have to do over top of it.
The gel coat has reduced approximately 5% with Acetone to make it sprayable and then mixed in a 10 to 1 ratio with Mek hardener.
Now this will take three coats to get the proper coverage and will be about 15 mils thick, which is plenty thick enough to block or prep for filler.
Now, like we were talking about earlier, having a fiberglass body gives you plenty of options when it comes to custom treatment.
And since this is far from a stock truck right out of the box, well, you're not gonna offend anybody if you wanna change things up a bit and throw in some custom touches.
And since we've already got mini Cooper headlights
molded into the front fenders, but we want to do something trick for the tail lights as well because customizing is all about putting your own stamp on a vehicle. Now, we started shopping around and found a couple of cool led lighting options from Watson Street works like this one piece sequential led tail light kit.
Now, we ended up going with Watson's two piece sequential kit that includes all the wiring and hardware lenses and buckets with enough material on the lenses to allow it to be flush mounted and sanded down smooth for a nice clean look. Now, instead of mounting them in the fenders, we're gonna sink them into the roll pan right here.
Now, working with fiberglass sucks because it's itchy. But in a lot of ways, it's easier than working with sheet metal. For instance, cutting out the recesses to sink our tail lights in is a very simple procedure and starts with a pilot hole on each side.
Now, we switch to a half inch bit and utilizing our pilot holes. We create a perfectly rounded end that matches our taillight lens.
Yeah.
Ok. Perfect. That's what I wanted. Now, the lens is higher than the fiberglass around it.
And this beveled edge around here, it looks like a mistake, but it's not because when we put the filler in there, we can block it all smooth
and it's going to hold the lens in perfectly
well, an hour has passed and my filler is finally dry and I hadn't done anything but it takes that long for this fiberglass to set up. Now, if you look, you think he made a mess, but hey, have a little faith.
Now, this so is just a cheap trick to show you guys what this is gonna look like finished up. So I'm gonna hit this with 600 grip while you guys take a break.
Hey, welcome back to trucks. If you're just joining us, we're tweaking the body work on our fiberglass 37 Ford Project H RT. Now, the last step in flush mounting these led taillights we got from Watson's Street Works is mounting the buckets in the back of the roll pan
and we've had to trim this guy to compensate for the, the license plate bracket here. And we also glassed in a couple of the screws that came with the kid to hold the bucket in place from here. All we have left to do is wire this into the chassis. When we put everything together,
an original 37 Ford had a steel dash that looked a lot more like an old jukebox than this cool looking wrap around dash that Jamie Downs designed, but like a lot of things on this truck.
It left the gauge placement up to us. Obviously, you want to put your gauges where you can,
how else are you gonna keep tabs of what's going on underneath the hood? Typically, the speedometer is centered in front of the driver with the rest of the gauges on either side,
but this dash is pretty small. So grouping everything together on the left side
is just gonna be cluttered and make the gauges hard to read.
There's nothing wrong with the spacing and configuration of the way these auto meter gauges are packed. So we're just gonna use the box as our template
and the cab is small enough that we can put the gauges right in the center
and still see them from the driver's seating position.
Now, we'll use a whole saw kit to get close
and trim the edges of the openings carefully since we don't have a lot of flange on these gauges.
Now, just like the rest of this truck, the fiberglass on the dash is nice but it's not perfect and we've got something really cool planned for these pieces. You'll have to keep on watching to see what we do.
And since some of these edges are visible from the outside of the truck, well, we're gonna sand them down
and make them as smooth as possible.
Now, this is just part of the deal. When working with fiberglass, you're gonna get some air pockets. And since that's an exposed edge, well, we've got to fill it. So here's a little tip for you if you're doing detail work like that
small job, small tool, using a single edge razor blade to mix your filler allows you to apply it with greater accuracy and less clean up.
Depending on your mix ratio, this stuff will set up pretty fast. So within a couple of minutes, you're ready to sand and then prime
now we really like the symmetrical look of the dash
and really from the driver's seat, you've got a perfect view of all the gauges. Plus it leaves this room on either side for ac vents and we'll come up with some sort of center console that has a radio and switches and stuff like that.
But if you're putting together a truck like this, well, the cool thing about it, there's no wrong way to do it. You can lay this stuff out any way you want to. After all, it's your truck.
After the break, our flaws can't hide from the light. So we'll keep smoothing things out. Stay tuned.
Welcome back to trucks today, we're smoothing out a few rough edges on project H RT. And I gotta tell you, I'm a little itchy. It feels like I've been insulating the house. That's ok. The effort is well worth it. And the work we're doing on this body, well, it's gonna make the paint job smooth as glass. Now, we've talked an awful lot about how nice the gel coat is on these panels. There's no TV. Magic going on here. This stuff is nice
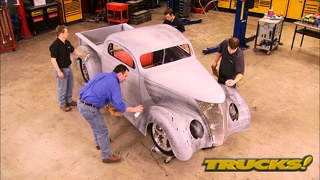
straight but it's not quite ready for paint yet. For instance, if you take a look at the reflection of this PDR light we got from Autobody Tool Mart, you can see that the reflection is distorted
and that means the panel has waves in it. Now fixing the waves is easy seeing them is the hard part. But if you can learn to read a movable light, well, you can smooth out every inch.
All right, with our low spots marked. Now it's time to fix them.
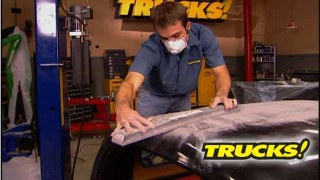
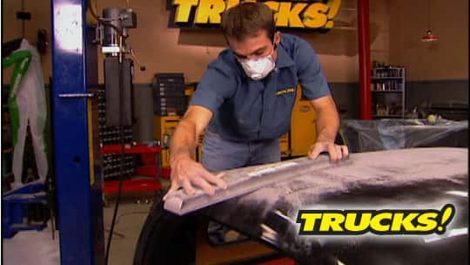
And we'll do that by cross blocking with 120 grit on a 24 inch dura block.
Cross blocking means using the leading edge of the block and making an X pattern as you travel, this uses the straight edge of the block to level the surface you're working on.
All right, this is the low spot that the light showed us earlier. And what we're gonna do is keep working this area until we bring the surrounding Joe
go down to the same height as our low spot.
This right here is a real good indicator on when to stop because the gel coat is getting real thin and we don't want to go any further.
And for these spots right here, well, we'll come back, spray them with some high build primer and block. Again.
Our goal here is to create a pleasant viewing experience on our street rod by eliminating as many inconsistencies as possible. Like this door gap, it's narrow at the top and gets progressively wider as it gets down to the bottom. But it's hard to see in here because the gel coat is black and the panel gap is black. So we're gonna fix that
by spraying a light colored primer over the gap. It highlights the problem areas and creates a contrast that's easy to read.
Ok. Now take a look again and you'll see exactly what I'm talking about. It's narrow at the top
and gets wider as it gets to the bottom.
So now what we're going to do is take a sanding board with 80 grit paper and just work the door edge to widen the gap.
It's getting better.
Now, the panel gap is consistent. You can tell just by looking at it, but you can check it with a homemade gauge made with one of these paint stir sticks. It's about an eighth of an inch wide.
You just slide it in
just like gapping a spark plug.
Yeah,
that's nice.
Now we all know patrons for their high output flamethrower coils and their points conversion kits.
Well, they also have their second strike ignition system
and unlike other multiple spark discharge boxes, the second strike provides a powerful second spark all the way through the RPM range. Instead of dropping off to a single spark around 3000 RPM.
This system supplements most existing ignition systems like points, heitf I and
Dura spark. So no special coil or distributor is needed. It's an easy five wire hook up and the cao or crank angle offset is easily adjustable. So you can tune the strength of the second spark to where it works best on your truck. It has a built in digital rev limiter and standard RPM output compatible with most
hackers. You can pick up your second strike ignition system for just under 300 bucks
if you've invested in a newer truck and you plan on using it for a work truck. Well, chances are you're going to need some sort of a bed liner system in the back to protect the sheet metal and paint. But launching your cargo into the tailgate at every traffic light is not the best way to protect that investment. Well, dual liner has a solution in the form of their money, modular bed liner systems that feature
hard plastic sides and a tailgate protectors and this zero skid rubber bed mat for the floor that's gonna hold your cargo where you put it. These modular systems are available for most Ford Chevy and Dodge pickups and they ship in a box that's not oversized. So it's not gonna cost you an arm and a leg to get it to your front door, dual liner, modular bed liner system. Start at about 350 bucks
if you're wondering why we're paying so much attention to detail on this truck. Well, it's because we wanna be proud of it. We wanna put our stamp on this thing because one of you guys gets to win it when we're done.
So keep watching and follow the build up of this 37 Ford and go to Power Black tv.com to find out how to win this thing.
Thanks for watching trucks. See you guys next week.
Show Full Transcript
Hey, welcome to the shop and thanks for watching trucks. Well, today we're going to jump with both feet into a subject that some people consider to be automotive voodoo body work and not just your average run of the mill body work on sheet metal
fiberglass body work. Now, if you've been around body shops much, you've heard the rumors about what kind of a royal paine fiberglass cars are to work on and replicas and kit cars could be even worse, but that's not always the case. In fact, fiberglass has huge advantages over sheet metal and being able to customize it faster and easier is just one of them. So it's not necessarily more difficult to work on. It's just a different animal.
So today we're gonna bust some of those myths and show you guys that customizing or repairing body damage on a fiberglass vehicle is something you can do. No problem. And today's victim is Project H RT. Our Legend Motors 37 Ford, that's already customized and looks as straight as a lot of finished
jobs, even though it's still in raw gel coat, but it's still got the mold line right here from the two part manufacturing process.
Now, it seems fair to assume you could just sand these lines flat, spray on some high build primer block it and paint it.
But a lot of guys have been bitten by these mold lines showing through or mapping through their paint job. And here's why
now a cross section of that mold line would look something like this. And you can see that if you just resurface that mold line and level it down with the rest of the panel surrounding it. Well, it's gonna expose these layers of gel coat which are harder than the polyester material underneath it. And eventually due to the curing of the fiberglass and natural heating and cooling cycles. Well, these lines are gonna show through your paint and they can't be buffed out.
So the way to get around that is to completely remove the entire cross section of layers that are being exposed
and fill it in with the material that's as strong as the gel coat.
And then
you can do your paint and body work on top of that
and that all starts with removing this mold line here.
Now, this is a messy job. So wear the appropriate safety gear to protect yourself and do it in a well ventilated area. We're using our down draft prep station to remove the fiberglass particles from the air.
And by the way, when you're done, wash up with cold water, warm water will open up your skin's pores allowing the fiberglass particles to get in even deeper, making your edge worse.
Ryan's using a carbide bur and grinding about an inch outside the mold line and digging about an eighth of an inch deep into the polyester.
While Ryan works on the rear fenders, check out the dog house. Now when we first got this truck, the body panels were pre ft but not finished, which is perfect for us because it gives us options. For instance, we can do things like filling these seams rolling lines, smoothing things over, basically putting our own personal custom to
touches on this truck. And since Legend Motors cures their bodies before delivery, there's no worries of anything shifting or changing shape on us. So, one of the things that we're gonna do is smooth this area up in here and bond these panels together so that when we open the hood, we look down in here and everything looks like a real street rod
using 50 grid discs, we can rough up the surface on each side. So the adhesive has something to grab onto as it cures.
Ok. Hold it right there. I
now these bolts only serve as locators. They'll come back out after the adhesive is set up, which is gonna take about 30 minutes. After that, we'll use fiberglass to fill in the holes.
All right, with the mold line gouged out. I went ahead and sanded the edges using 80 grip.
Then we'll fill in that gouge with this two part epoxy we got from Legend Motors.
The epoxy is mixed at a 5 to 1 ratio and will stay workable for about 20 minutes,
ok? With our inner aprons bonded to the outer fender. Let's take a look at these hood sides.
Now, these holes that you see were drilled in here purely for the mock up stage. These holes are gonna get filled in and these edges smoothed over and that's gonna start with 36 grit on a grinder.
We're using short strand filler to bridge the gap between the two panels which will take about 10 minutes to set up
with the epoxy dry. My fenders are ready
now, it's just a matter of leveling it out to the height of the surrounding gel coat.
Now, we'll follow that with some 80 grit just to smooth over some of the deep scratches
and now it's ready for the next step.
This is not epoxy or Bondo.
The short strand fiberglass sets up as hard and as strong as the panels around it, making it less likely to crack or shrink back
and the sander will knock the basic shape into the filler. But you always want to come back with a hand board and do your final shaping by hand.
All right, our gaps are filled. Our screw holes are filled. We got everything blocked down with 80 grit. Now we're ready for primer
surfer and the blocking starts all over again.
When we come back from the break, we're going to show you guys how to jail coat. Those zero offenders stick around.
But up next, it looks like we're ruining the tail lights but have a little faith.
And later we'll lay out and mount our gauges. Stick around.
Welcome back. And thanks for watching trucks. Today, we're working over the fiberglass body of Project H RT and giving you guys a few tips on working with fiberglass.
And what we're gonna do next is not something that you see every day.
Well, I've been to 14 county fairs and a horse marriage and I hadn't seen this technique until we went to Legend Motors to pick our truck up. And what those guys do is to spray gel coat over top of a repair and that way they create a rock solid foundation that's ready for whatever type of work you have to do over top of it.
The gel coat has reduced approximately 5% with Acetone to make it sprayable and then mixed in a 10 to 1 ratio with Mek hardener.
Now this will take three coats to get the proper coverage and will be about 15 mils thick, which is plenty thick enough to block or prep for filler.
Now, like we were talking about earlier, having a fiberglass body gives you plenty of options when it comes to custom treatment.
And since this is far from a stock truck right out of the box, well, you're not gonna offend anybody if you wanna change things up a bit and throw in some custom touches.
And since we've already got mini Cooper headlights
molded into the front fenders, but we want to do something trick for the tail lights as well because customizing is all about putting your own stamp on a vehicle. Now, we started shopping around and found a couple of cool led lighting options from Watson Street works like this one piece sequential led tail light kit.
Now, we ended up going with Watson's two piece sequential kit that includes all the wiring and hardware lenses and buckets with enough material on the lenses to allow it to be flush mounted and sanded down smooth for a nice clean look. Now, instead of mounting them in the fenders, we're gonna sink them into the roll pan right here.
Now, working with fiberglass sucks because it's itchy. But in a lot of ways, it's easier than working with sheet metal. For instance, cutting out the recesses to sink our tail lights in is a very simple procedure and starts with a pilot hole on each side.
Now, we switch to a half inch bit and utilizing our pilot holes. We create a perfectly rounded end that matches our taillight lens.
Yeah.
Ok. Perfect. That's what I wanted. Now, the lens is higher than the fiberglass around it.
And this beveled edge around here, it looks like a mistake, but it's not because when we put the filler in there, we can block it all smooth
and it's going to hold the lens in perfectly
well, an hour has passed and my filler is finally dry and I hadn't done anything but it takes that long for this fiberglass to set up. Now, if you look, you think he made a mess, but hey, have a little faith.
Now, this so is just a cheap trick to show you guys what this is gonna look like finished up. So I'm gonna hit this with 600 grip while you guys take a break.
Hey, welcome back to trucks. If you're just joining us, we're tweaking the body work on our fiberglass 37 Ford Project H RT. Now, the last step in flush mounting these led taillights we got from Watson's Street Works is mounting the buckets in the back of the roll pan
and we've had to trim this guy to compensate for the, the license plate bracket here. And we also glassed in a couple of the screws that came with the kid to hold the bucket in place from here. All we have left to do is wire this into the chassis. When we put everything together,
an original 37 Ford had a steel dash that looked a lot more like an old jukebox than this cool looking wrap around dash that Jamie Downs designed, but like a lot of things on this truck.
It left the gauge placement up to us. Obviously, you want to put your gauges where you can,
how else are you gonna keep tabs of what's going on underneath the hood? Typically, the speedometer is centered in front of the driver with the rest of the gauges on either side,
but this dash is pretty small. So grouping everything together on the left side
is just gonna be cluttered and make the gauges hard to read.
There's nothing wrong with the spacing and configuration of the way these auto meter gauges are packed. So we're just gonna use the box as our template
and the cab is small enough that we can put the gauges right in the center
and still see them from the driver's seating position.
Now, we'll use a whole saw kit to get close
and trim the edges of the openings carefully since we don't have a lot of flange on these gauges.
Now, just like the rest of this truck, the fiberglass on the dash is nice but it's not perfect and we've got something really cool planned for these pieces. You'll have to keep on watching to see what we do.
And since some of these edges are visible from the outside of the truck, well, we're gonna sand them down
and make them as smooth as possible.
Now, this is just part of the deal. When working with fiberglass, you're gonna get some air pockets. And since that's an exposed edge, well, we've got to fill it. So here's a little tip for you if you're doing detail work like that
small job, small tool, using a single edge razor blade to mix your filler allows you to apply it with greater accuracy and less clean up.
Depending on your mix ratio, this stuff will set up pretty fast. So within a couple of minutes, you're ready to sand and then prime
now we really like the symmetrical look of the dash
and really from the driver's seat, you've got a perfect view of all the gauges. Plus it leaves this room on either side for ac vents and we'll come up with some sort of center console that has a radio and switches and stuff like that.
But if you're putting together a truck like this, well, the cool thing about it, there's no wrong way to do it. You can lay this stuff out any way you want to. After all, it's your truck.
After the break, our flaws can't hide from the light. So we'll keep smoothing things out. Stay tuned.
Welcome back to trucks today, we're smoothing out a few rough edges on project H RT. And I gotta tell you, I'm a little itchy. It feels like I've been insulating the house. That's ok. The effort is well worth it. And the work we're doing on this body, well, it's gonna make the paint job smooth as glass. Now, we've talked an awful lot about how nice the gel coat is on these panels. There's no TV. Magic going on here. This stuff is nice
straight but it's not quite ready for paint yet. For instance, if you take a look at the reflection of this PDR light we got from Autobody Tool Mart, you can see that the reflection is distorted
and that means the panel has waves in it. Now fixing the waves is easy seeing them is the hard part. But if you can learn to read a movable light, well, you can smooth out every inch.
All right, with our low spots marked. Now it's time to fix them.
And we'll do that by cross blocking with 120 grit on a 24 inch dura block.
Cross blocking means using the leading edge of the block and making an X pattern as you travel, this uses the straight edge of the block to level the surface you're working on.
All right, this is the low spot that the light showed us earlier. And what we're gonna do is keep working this area until we bring the surrounding Joe
go down to the same height as our low spot.
This right here is a real good indicator on when to stop because the gel coat is getting real thin and we don't want to go any further.
And for these spots right here, well, we'll come back, spray them with some high build primer and block. Again.
Our goal here is to create a pleasant viewing experience on our street rod by eliminating as many inconsistencies as possible. Like this door gap, it's narrow at the top and gets progressively wider as it gets down to the bottom. But it's hard to see in here because the gel coat is black and the panel gap is black. So we're gonna fix that
by spraying a light colored primer over the gap. It highlights the problem areas and creates a contrast that's easy to read.
Ok. Now take a look again and you'll see exactly what I'm talking about. It's narrow at the top
and gets wider as it gets to the bottom.
So now what we're going to do is take a sanding board with 80 grit paper and just work the door edge to widen the gap.
It's getting better.
Now, the panel gap is consistent. You can tell just by looking at it, but you can check it with a homemade gauge made with one of these paint stir sticks. It's about an eighth of an inch wide.
You just slide it in
just like gapping a spark plug.
Yeah,
that's nice.
Now we all know patrons for their high output flamethrower coils and their points conversion kits.
Well, they also have their second strike ignition system
and unlike other multiple spark discharge boxes, the second strike provides a powerful second spark all the way through the RPM range. Instead of dropping off to a single spark around 3000 RPM.
This system supplements most existing ignition systems like points, heitf I and
Dura spark. So no special coil or distributor is needed. It's an easy five wire hook up and the cao or crank angle offset is easily adjustable. So you can tune the strength of the second spark to where it works best on your truck. It has a built in digital rev limiter and standard RPM output compatible with most
hackers. You can pick up your second strike ignition system for just under 300 bucks
if you've invested in a newer truck and you plan on using it for a work truck. Well, chances are you're going to need some sort of a bed liner system in the back to protect the sheet metal and paint. But launching your cargo into the tailgate at every traffic light is not the best way to protect that investment. Well, dual liner has a solution in the form of their money, modular bed liner systems that feature
hard plastic sides and a tailgate protectors and this zero skid rubber bed mat for the floor that's gonna hold your cargo where you put it. These modular systems are available for most Ford Chevy and Dodge pickups and they ship in a box that's not oversized. So it's not gonna cost you an arm and a leg to get it to your front door, dual liner, modular bed liner system. Start at about 350 bucks
if you're wondering why we're paying so much attention to detail on this truck. Well, it's because we wanna be proud of it. We wanna put our stamp on this thing because one of you guys gets to win it when we're done.
So keep watching and follow the build up of this 37 Ford and go to Power Black tv.com to find out how to win this thing.
Thanks for watching trucks. See you guys next week.