More Project HRT Episodes

Trucks! Builds

Parts Used In This Episode

Advantage Driveline
3" aluminum driveshaft, turbo 400 yoke and 1350 U-joint.
Competition Engineering
Lower shock mounting bracket, ladder link, polyurethane rod end, universal crossmember, diagonal link, upper shock mount.
Competition Engineering
Steel wheel tubs 23.25" w x40" l x 20" h.
Currie Enterprises
9 inch round back housing, 4.30 gears, trac-loc differential, 31 spline axles, 40.75" overall width including brake hat spacing.
Engine Factory
347 cubic inch stroker motor, complete turnkey assembly.
Legend Motors Worldwide
Fiberglass 1937 Ford pickup body and steel bed, custom frame, complete with motor mounts from chassis engineering and adjustable control arms.
McLeod Industries
10.5 clutch disc 1 1/8 x10 organic, pressure plate, hydraulic throwout bearing, hydraulic bearing spacer, SFI approved bellhousing.
Mickey Thompson
20x16 HR-1 wheel, 33x22.00R20 sportsman S/R radial, 18x 4.5 HR-1 wheel, 26x6.00r18 sportsman S/R radial.
QA1
Coilover shocks and springs.
Richmond Gear
Six speed overdrive transmission complete with long shifter.
Taylor Cable Products
Thundervolt 8.2 mm series spark plug wire set.
Video Transcript

Today, project H RT is back and we're gonna put a train in it.

The drive train,

it's a hot small block Ford six speed transmission and a bulletproof rear end all guaranteed to smoke this hot rod trucks. 22 inch wide tires.

That's all today here on trucks.

Hey, welcome to trucks. Well, if you're a true gearhead car, not like we are after a while, these vehicles, when they take on personalities, they become characters. Heck, we even name them and even people that don't live for their project vehicles. Well, they can't deny that they get a certain sense or a feeling from the overall look or stance of a vehicle and from there, well, they're hooked wheels and tires. Well, they set the mood paint follows form proportion and style. And before long, you've created an extended member of your family with its own unique identity.

And the project we're working on today shows the beginning of a pretty strong personality and a lot

of genuine muscle, which is where we're gonna focus right now.

And if you remember this all started when we took a little road trip up to Lawton Michigan to legend Motors Downs design and gave you guys a tour of their manufacturing facility

and we've got an insider's view of everything from concept drawings, clay modeling,

fiberglass mold creation

all the way up to finished street rods and muscle cars.

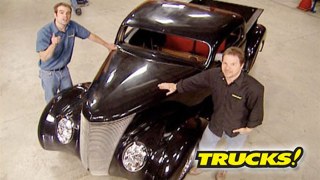
And they put together one of their popular 37 Ford trucks for us, but made room for these massive Mickey Thompson hr one wheels and Sportsman sr tires.

They added a pros pick steel bed with 40 Ford fenders and the cab is molded with a chop top and mini Cooper headlights in the fenders that when assembled give this hot rod truck looks that kill.

And as you guys can see,

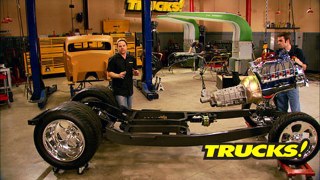
we've got this thing all blown apart so we can pay closer attention to the foundation of our H RT project truck, namely the drive train, which as you guys know, is really the heart of any vehicle. Now, this is far from an original 37 Ford. So obviously it's not gonna get an original engine,

but we wanted to stay

through to the blue oval and deviate from the engine. A lot of guys reach for when it comes time to choosing some motivation for their street rod, small block Chevy.

That's right. He said, Chevy. But the reason a lot of guys reach for a small block Chevy in their Rod even a Ford like ours is because you can make big power with these engines and they're cheap to work on. But a lot of guys would bristle

at the thought of one of these sitting in between the rails of a classic Ford.

Well, we like the idea of a Ford and a Ford as well. And in our opinion, there's no better place to start than the time tested and proven 302 small block.

But

we're not talking about vintage blocks. What we had in mind is what made the Fox Mustang such great performance machines.

The aftermarket has built an industry on these Ford 5 L engines. Everything from Ford's rotating assemblies to ef I upgrades.

It's no big deal anymore to get around 300 ponies out of a stock block and even a little more with some basic power ADDers.

So we did some digging a couple of internet searches and we came across a family owned business out of Lebanon, New Jersey named Engine factory.com and they build Fords and they build Chevys. But what they specialize in are turnkey engine packages. Now, after a couple of phone conversations, some planning and letting them know what our goals were. Well, this is what showed up at our doorstep.

Now, this is a great looking set up. And though it's based on a 5 L engine internally, it's a little different

engine. Factory offers this 347 Stroker engine that starts out with a 30,000 overboard

polished and D Bird scat crank

steel, I beam rods,

10 to 1 forged pistons with chrome

Ley rings, high volume oil pump

and a double roller timing set

and sporting all the precision machine works. It takes to clearance the block for the stroked internals.

Now, for the top end hiding underneath the valve covers, we've got a full roller valve train,

Edelbrock performer RPM cylinder heads that have been massaged a little bit for better oil drain back.

We got Enduro

shine finish on our dual plane intake manifold and Edelbrock 650 CFM electric choke carburetor all laid off by a protonic distributor and a high voltage coil driving our accessories up front is this bill of aluminum serpentine system from concept one pushing

a our master 100 amp alternator and this aluminum sand and ac compressor along with your typical dampener, water pump and idler pulleys. Now everything is very clearly labeled. An engine factory even gives you a DVD, the engines run in. So it's built right. It's a drop in plug and play issue and it requires no tuning which makes it the perfect engine for project H RT.

Oh, and by the way did I mention that it pushes 415 horsepower at the crank.

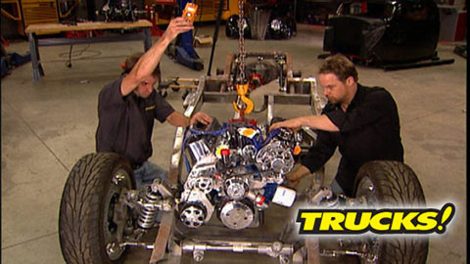
Now, we sent the transmission and engine specs and measurements to downs while they were building the truck. So they went ahead and installed these chassis engineering engine mounts, they welded them to the frame rail. The isolator sits on the lower and the uppers bolted the engine block and sits on the isolator it's a nice clean set up, but we're not quite ready to drop this engine in place yet.

After the break, we'll bolt up our V8 and show you how to measure for a new drive shaft. Stick around.

Hey guys, welcome back. Today, we're working on project H RT dropping in our engine transmission and the rest of the drive train.

And today we're just mocking everything up starting with that 347 Stroker we got from engine factory.com. But first, let's talk about a transmission. Now, we knew we wanted a standard shift just for the fun factor and a five speed is a pretty common choice for a small block Ford. But we've got a 20 inch wheel with an overall tire diameter of 31 inches. So we figured an extra gear would give us the best possible performance with this combination.

So we called Richmond and had them ship us one of their six speed rod overdrive transmissions features CNC machine and heat treated internals and total weight is only about 100 pounds. Now, we did some calculations to figure out what RPM we would be running at different speeds. We decided on a 3.28 1st gear ratio and ended up going with a 0.76 overdrive.

Now, Richmond transmissions have a reputation of being nearly bulletproof and one of the nice features where you can custom tailor your gear selection to match your vehicle's weight, engine RPM, power band, rear axle ratio, tire size, et cetera. But really the main reason we went with this transmission, it's a single overdrive unit compared to a lot of other late model six speeds which have two overdrives. And the advantage here is that there's tighter gear spacing which translates to less RPM drop as you shift

our engine factory 347 Stroker already came with the billet steel fly wheel, but this one's got to come off so we can install our McLeod steel bell housing.

Normally, this is the time that we'd install and align the clutch and pressure plate. But since we're just checking for fitment, we'll throw in the bell housing so we can vote the transmission out.

Now that six speed is gonna transfer all that power and energy back here and we wanted something that was gonna hold together. So we had downs load up our chassis with a narrow nine inch rear end housing that's held in place by this competition engineering ladder bar set up. Now don't be alarmed by all the surface rust that you see on this frame. This is a mock up phase and all that's gonna get taken care of later on.

Now to fill up the axle housing, we had curry enterprises send us some 31

flying axles and a loaded third member with 430 gears and a track lock, limited slip.

We went with a limited slip so we could have the best of both worlds. We can send power to both rear tires and still retain some street manners without the annoying clunking or chirping of a full locker or spool.

A Ford nine inch is a common choice for a lot of car builders. Mostly due to its durability. If it's good enough for NASCAR,

it's good enough for us, but it's also easy to work on. Since the third member comes easily away from the housing

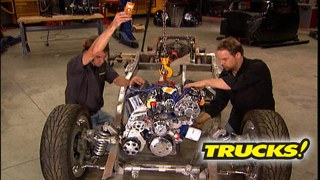
with the engine bolted to the bell housing and transmission, we'll set it on the rear cross member and front isolators and check for any clearance issues with the surf system up front.

But the most important thing this step gives us is the ability to see what length drive shack we need

when you're measuring your drive shaft, go from the end of the tail housing to the center line of the yoke and we've got exactly 48 inches, but also make a note of how much the output shaft sticks out of the tail housing, which is about 3/8 of an inch. In our case, give this information to whoever's building your drive shaft and they can manufacture the correct amount of slip travel based on the rest of the chassis. Now, with this short of a space, we can go with a lightweight one piece aluminum drive shaft that's gonna look good and be strong enough to get the job done too.

Now, don't put your tape measure away just yet, you still got to give the drive shaft shop some U joint dimensions and the measurements they're after are the U joint cross diameter and the cap width to measure the cross diameter. If the U joint yoke has locating tabs, you measure in between the tabs. In our case, we got three and five eights. If you don't have the locating tabs, you measure in between the flats of the yoke and for the cap diameter. Well, there's generally three choices. You have an inch and 1/16 inch and an eighth and inch and 3/16.

In our case,

we got in and an eight

up. Next, we'll show you how to set up a chassis for caster camber and tow

and later we'll install our new drive shaft, stay tuned.

Hey, welcome back. Well, the foundation to project H RT is really starting to come together and take shape and it doesn't hurt that we had such a great head start with a full rolling chassis from downs, but there's a lot of work to do yet before one of you can drive it home. So today we're mocking up the drive train checking for things like fit and clearance.

One of the nice things about starting with the chassis like this, aside from the fully box frame that looks like a piece of art is that it's outfitted for modern components and systems like independent front suspension and rack and pinion steering, but there are still some things that you're gonna need to take care of when it comes to setting up a chassis properly. Well, there's a lot of things to consider, but regardless of the style of suspension you're on, there's a few basic ground rules to follow.

Let's start with steering geometry for the front end. There's three basic variables. You have to work with camber caster and toe camber is the lean of the tire. As viewed from above with the tire leaning out. You've got positive Camra, the leaning in negative,

the caster, that's the imaginary line drawn between the upper and lower control arm ball joints as it passes through the steering knuckle

with the lean back a little bit. You're looking at positive caster, that's what gives the car the return to center field after you make a turn. It also helps the vehicle track straight at speed,

but too much caster, it'll increase steering effort and tow in and tow out. Well, it's pretty self explanatory when the front of the tires are pointing in towards each other. You've got a tow in condition pointed out,

look at it tow out.

So we're using a fairly common and not too expensive home alignment tool to measure caster and Camber

and to measure tow. Well, like we showed you guys before you can just use a tape measure.

But remember that all we're doing right now is getting things close later on when the body is on the frame, we've got the full vehicle weight on the suspension, then we can dial it in for real.

With the gauge at the wheel hub, center turn the wheels until they're at a 20 degree angle to the frame rail,

then zero out the bubble and turn the wheels to the opposite position, which is just about a complete lock to lock, turn and then check the caster bubble.

Now with the vehicle weight off the chassis, we can adjust castor by disconnecting the upper arm from the frame mount and turning the adjusters in at the rear and out at the front, pitching the center of the arm back, creating the positive caster we want,

then everything gets reassembled and checked by the gauge.

Oh cool, like three and a quarter degrees positive.

What did you end up with? It's about 3.5.

So with both sides between three and 3.5 degrees positive caster, it's time to measure for Camber.

You got nothing.

No

CBA

straight up and down.

Need a little lean in at the top.

What you got?

Zero.

All right. So we're in pretty good shape. We're not gonna make any adjustments. Now, what we're after is between zero and one degree negative camera

and that's the body and all the weight settles on the chassis while the suspension will compress and we'll probably gain a little bit of camera. Now, if we do need to make an adjustment, we'll come down here to the lower control arm because just like the uppers, they're adjustable. But on the lowers, we wanna move both ends in and out equally. So we don't alter the caster adjustment we've made up top

to measure for tow. Find a common reference point like the center mold line or even a tread to compare the front to the back.

55 and an eight

right, 54 and a quarter.

Well, that tells us we're towed out almost a complete inch. So we'll adjust from the tie rod ends equally on each side.

Since there's no adjusting sleeve like typically found on an OEM tie rod, we'll take the rod end out of the knuckle on each side

and turn it clockwise to bring the front measurement in more

0.54 and three quarters.

All right.

All right. 54 and almost seven eights. So we're 1/16 of an inch towed in which is right inspected.

Now, the rear suspension is adjustable as well. But unlike the front, it only has one real job to do, plant the power to the ground. So as long as you're tracking straight and the rear axle is perpendicular with the center line of the vehicle, you should be pretty well set. But the important thing here is the pinion angle, which is set under full chassis load and adjusted here at the ladder bars. And we'll do that when the trucks just about complete for now. All we're really worried about is squaring up this rear axle.

The ladder bars use hem

joints for mounting points which are threaded into the link bars and adjustable.

All we're after here is getting the left side, move forward a quarter inch and we'll be tracking completely straight.

See, 24.5,

24.5, we're square. That's about all we can do for now.

Hey, thanks for sticking with us as we mock up the chassis of project H RT. And now about all we got left to do

is drop in our drive shaft. So with our U joint dimension and drive shaft length measurements in hand, we gave Advantage drive line a call

and they sent us this great looking lightweight aluminum drive shaft. It's fully balanced and features a steel input yoke that of course matches the spine count of our Richmond six speed tranny.

Now, if you're wondering why we didn't go with a larger diameter aluminum drive shaft. Well, for one, it's relatively short at only about 4 ft and two, we've got a bit of a clearance issue here with the frame. So we went with a three inch diameter tube.

And according to Advantage Drive Line, even with the built 347 for 30 years, and these big old tires out back, we won't have any issues transferring the power.

Now, the reason that your opinion is always gonna be offset one way or the other is to initiate needle bearing rotation.

Otherwise you end up with what's called a Burnell effect where the needle bearings actually establish a wear pattern inside the bearing cup. So 1 to 2 degrees of offset ensures needle bearing rotation and a smooth law

life for your universal joints.

Well, there you go. Everything dropped right in and fit really well. We're off to a great start on project H RT.

We just gotta smooth out some of these welds and

get rid of some of that surface rust. And

that way we can give this chassis the degree of detail that it deserves.

A good set of plug wires is just as important as anything else on your engine. And Taylor makes some of the best and they've just come up with these thunderbolt 8.2 millimeter performance wires for your race or street application.

They feature a 50 ohm spiral wound and coated core giving you less resistance between your coil and the spark plug, which equals a more powerful spark and a more efficient engine. The silicone two layer outer jacket ensures the signal with no radio interference and heat protection up to 600 degrees.

They come in several different colors in universal race and custom fit lengths and you can pick up a set of Taylor thunder volt wires for about 60 bucks.

Have you ever found yourself in the situation where you've hosed down or pressure washed your engine bay? Gotten everything all nicely detailed up when you got in your truck to leave,

it wouldn't start. Well, chances are you've forced water or moisture down into an electrical connection or your distributor with this stuff

can get you up and running in no time. WD 40 stands for water displacement perfected on the 40th tribe and it was originally developed to protect the outer hull on long range missiles against rusting. Now, not very many people know it's in this stuff and they're not going to tell you, but here's what it does.

The WD 40 is actually heavier than the water and it displaces it actually pushing the water out of the way.

You just spray it on your electrical connectors or up in your distributor and it pushes the moisture off the contact points, restoring your electrical connection and it's not a bad detailer either. Thanks for watching trucks. See you guys next week.
Show Full Transcript