Parts Used In This Episode

Aerospace Components
Front disc brake setup, drag race version, aluminum hubs, aluminum calipers, drilled and slotted rotors, hardware.
Aerospace Components
Rear disc for FORD 9 inch big FORD bearing for S&W fabbed housing.
Borgeson
-Manual gearbox and couplers -Steering U-JOINT 3/4-36 X 1" DD -14 " Long Steering shaft.
Currie Enterprises
31 Spline custom length axles.
Currie Enterprises
Detroit Locker, 4.56 gears.
KW Automotive
2 inch lowing spindles.
Mickey Thompson
-31 x 16.50-15 E/T street. -28 X 4.5-15 E/T front. -Racing Tube. -Front Wheels 15x3.5
Mickey Thompson
15 X 14 5X4.5/5X4.75 3.5 B.S. E/T DRAG WHEELS
QA1
12" Spring 95 LB Spring rate
QA1
Front coilover shock.
S&W Race Cars
Aluminum spoiler kit.
S&W Race Cars
Bare axle housing.
S&W Race Cars
Four link tubes and hardware, welded rear frame section, wheel tubs.
S&W Race Cars
Ten point roll cage.
Summit Racing
15 gallon fuel cell with 0-90 OHM sending unit.
Taylor Cable Products
Optima battery relocate with wires.
Video Transcript

Today on trucks,

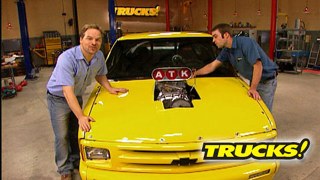
we're tearing apart one of our favorite projects. Our budget muscle truck S

10-K is gonna get chopped up.

We're gonna start transforming it into a full on super charged pro street truck with a brand new name Hallen S 10.

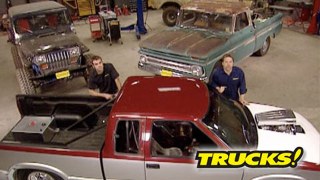
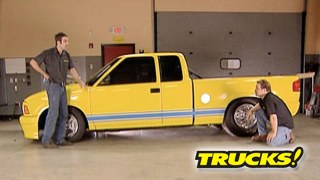
Hey, welcome to trucks. Today is all about rebirth, rejuvenation, recycling and moving on to the next step in the evolutionary ladder. Where are we going with that? Well, I know you recognize this truck as what used to be project S

10-K. Now S

10-K started out as a budget build up something within the reach of the average gearhead, but with a $10,000 ceiling and the goal of creating a very quick great looking street truck

in the spirit of true hot rodding, a quick suspension drop, a transplanted 350 TB I crate engine and a cool but inexpensive paint and body rest style, made a fast little truck that met our budget and turned some heads.

So we used it as a parts runner hit a couple showing shines and with our project goals achieve, we're pretty much done. So I know you're asking yourself why would they tear apart a perfectly good project vehicle. You just got it dialed in. Well, the truth is, the more we started looking around and looking at this s 10,

we realized that

we weren't done with it yet.

Yeah, because there's some s tens out there that turn some pretty impressive times at the track

and there are some that can be driven on the street too.

Like Carl P's

truck. We showed you a while back. It

runs in the low sevens in the eighth mile and just keeps on getting faster with every modification you make.

So after more than a few bench racing sessions, we thought it was about time for phase two of this project.

So the plan we came up with was to completely rethink the performance goals of this truck address things like suspension dynamics, power to weight ratios and traction.

Basically, we're going to build our own version of a pro street S 10 with twice as much horsepower. And more importantly, the ability to safely and effectively transfer that power to the pavement.

The good thing about essentially starting over with this S 10 is that we ended up with a great small block Chevy engine and transmission that we can use in another project or we could always sell it to Ian Lou or Mike.

Now, we had already changed from V6 to V8 power with S

10-K and you guys know there's a lot of different ways you can get great numbers and big power with a naturally aspirated small block but nothing makes a statement like one of these sticking out of your hood.

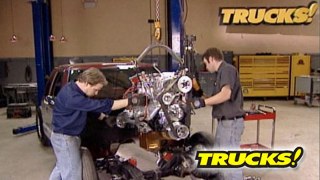
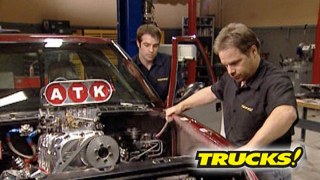
Now, this is a big block, of course, but our small block will have all fortune internals, high flow heads and just like this one, a big nasty blower sitting on top.

We're thinking that'll put us somewhere in the neighborhood of 600 horsepower,

but now we got to find a way to plant that power and those are great street tires, but there's just no way they're gonna hook up. So we know we got to replace these tires. But if you start combining drag slicks with this

axle under that much power, it's just a short amount of time before you start to break universal joints and axle shafts. Not to mention that this stock rear end is an open differential and that presents its own traction problem. Most guys that want some serious traction use an adjustable rear suspension like a ladder bar set up or a for

this allows you to create the type of traction you need to launch a high horse power vehicle and fine tune how your vehicle reacts and tuning is the key to getting the rubber to meet the road

Rs 10 came with a two piece drive shaft with five U joints which gives you more weak points. And again, under the demands of that much power, there's going to be failures and when you're talking about a vehicle with the potential to run mid tens in the quarter breakage can get real serious real fast.

So we knew we had to turn Rs 10 into a credible drag truck at the same time as being a legitimate street truck. So we put in a call to S and W race cars. S and W is one of the country's leading manufacturers of high end race chassis and suspension components. And they have a client list that includes the likes of three time

top alcohol funny car, world champion Bob Newberry, as well as a list of division champions a quarter mile long. But S and W doesn't just cater to high end race teams. They also make system for bracket racers as well as street trucks on a limited budget like this complete back as system for an S 10.

And this frame kit comes with coil overs, a wheel tub widening kit, gives you the choice of four link or a ladder bar set up and has options like this narrow nine inch housing and even this cool adjustable spoiler.

And they also set us this 10 point roll cage kit. And since all of this is engineered for an S 10, the guess work is gone when it comes time to weld it in place. But the best thing is that everything that you see here will only run you about 2700 bucks.

So he said, thank you and goodbye to Sak one final time and went to work

the Ss Ten's front, two cross members need to go away. But S and W wants you to leave the frame rails in place to serve as a locator for their back half.

See, now we get the BFH and adjust that sucker.

That's that Brian's got a bigger hammer than me.

The stock frame is only C channel which flexes a lot under load.

But SNW provides precut boxing plates for a very secure mounting point and more rigidity to boost,

measuring back from the front bed mounts. You'll need to cut some reliefs in the stock frame for the back half to slide into.

After you're done with measuring and cutting the frame, the rear cross member is sacrificed along with the rest

today, gentlemen.

Ok. We gotta do this quick because his shop rate is expensive. You just don't know why.

With the help of a couple of friends, your back app will quite literally drop into place using the boxing plates as support and the bed mounting holes as exact mounting points.

We're good.

Probably.

There it goes.

Woo

what golden

money drop some bolts in.

Thank you, sir.

Yeah.

What a train wreck. Thank you.

See you, man.

Once you're sure that everything is level and located,

the new frame is tacked in

and the old frame rails are finally lopped off

when we come back. It's powder coating 101

and then we'll set up our four link.

Stay tuned.

Hey, welcome back.

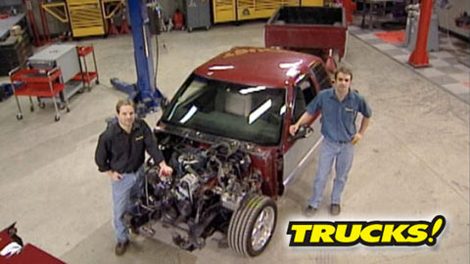
We're performing major surgery on the truck, formerly known as S

10-K.

And we're using a back half system from S and W race cars to turn our once quick V8 street truck into a blown pro street monster.

Now, welding in this frame and roll cage kit is not something you want to rush. You guys know a project like this takes a lot of time and planning.

But us 10 guys know this is a great platform to start with

because they're cheap, easy to get a hold of and there are tons of parts in the aftermarket.

Yeah,

and SNW even offers this narrow nine inch housing with their

system. This looks great and these welds are fantastic, but this is bare steel and unless we do something with it, it's good to rust. Now, even with the cheapest of pain systems, you can get great results. But the truth is that paint is just not as strong as powder coat. So that's exactly what we're gonna do with this. And the best prep for powder coat is

to media blast, the surface,

blasting the parts, roughs up the surface at the same time as cleaning it up

and sets up the metal for great powder and as

well guess what color powder we're going to use.

But before coating, use Acetone or TSP to wipe down your parts

because just like paint, the quality of your coating depends on clean parts.

The powder is cured with heat. So whatever your heat source is pre heat it to 400

°F

powder is applied with a low air pressure applicator as well as drawn to the part. With the help of a static electric charge coat. The part in powder until it has an even velvety look with no metal shown.

One of the advantages of powder over paint is that you can coat under and even inside parts with no trouble since the powder is dry and can't drip off

with your powder applied. You want to be very careful transporting the part to your heat source. You can knock the powder off if it bumps into anything. Be careful of bumps in the road too.

0,

400 degrees for about 15 minutes

which your powder flows out as

soon as it cools down.

It's ready to put back into service.

Try that with paint

while the axel housing is cooking.

We shot the S and W back half with some chassis black.

We use three coats on our frame to give it a nice satin look and some protection against rusty

the nozzle cam

that rocks

larger parts like a rear end or cast parts, hang on to the heat and take a little longer to cool down. But smaller pieces like brackets and pulleys are ready to handle in just a few minutes

and this powder coating really turned out nice.

But now we've got to stuff some axles and a third member into our S and W housing

and we want parts that are strong enough to handle the amount of power we're gonna be running through here. The curry enterprises is well known for making high quality axles and components for all kinds of high performance applications.

So we had them send us some of the 31 spline custom length axles along with a curry third member utilizing the nodule or iron strange engineering case. A

race proven Detroit Lager in 456 years,

Ryan is using a quarter inch rope of R TV to seal the third member to the housing.

The Vaseline will lubricate the O ring so they don't get torn while you install the rear axles.

Now SNW offers this back half kit is either a ladder bar or a four L

set up. We're gonna run with a four L because like we talked about earlier, a four L

set up is a little more adjustable and it's gonna suit our goals for this truck a bit better.

The kit comes complete with everything including the rod ends and shocks. Now we opted for the deluxe package with the Q A one adjustable coil overs

good. Yeah, let it grow,

man. This thing is looking tough. That looks great.

Stick around because up next, we're swapping out our old stock suspension

and later

we're making room for these.

Hey, welcome. Back to trucks if you're just joining us. Well, we've taken the plunge and we're transforming project S

10-K here from a very capable little street truck into a mind blowing Pro Street Jekyll and Hyde special. Now with our back end, completely done our new rear axle powder coated and fully assembled. Now it's time to take a look at this front,

check out these stock upper, lower control arms. These are very strong, but they're also very heavy.

So we're swapping them for these tubular upper and lower control arms from Global West along with these Bell tech two inch drop spindles to help keep our front end out of the wind.

Now, the oe steering box is a power unit. You guys know weight reduction is a big part of the equation of building a successful race truck. So we're ditching the power steering pump, replacing the factory box with this lighter manual box from Borgeson and using their spline shaft and U joint system.

Things like the A BS sensors, the heavy anti sway bars,

dust shields,

they won't do us any good anymore. So they'll hit the parts file and save us weight because every little bit adds up,

the Global West control arms are made for an S 10 pickup and are designed for coil over sharks, the boat ride in and give us the option to run with or without a sway bar.

Now, for brakes, we decided to go with this lightweight pro street brake kit from aerospace components. It features billet everything including four piston calipers,

hubs,

adapters, brackets. This stuff looks fantastic and the machine work is excellent. The kit

chips with seals, bearings,

new pads, rated stainless lines, even these half inch sets.

And we also kicked in a little extra for these cross drilled invented rotors. All of this system is designed to work with our SS 10 spindles, but there's a little bit of trimming needs to happen. First,

the Star knuckles interfere with the aerospace spray calibers. So using the caliper bracket as a template,

you can trace out the metal to be trimmed off

and the spindles can be mounted

the bearings packed

and finally, the bearing preload set

out back with the rotors installed simply bolt the caliper bracket to the axle bearing retainers

after the break. No, it's not a funny car. It's gonna be our tense pro street hauler.

Hey, welcome back to trucks.

Well, Ryan's over here cutting giant holes in the bed floor. The project formerly known as Snk and one that we've aptly renamed Hall and as Ken

and these are what he's making room for. Say hello to Mickey Thompson's ET Streets. These are a dot class race tire with the same great performance as their ET drags but with a dot Stamp on them, this is a 31 by 16.5 inch tire wrapped around a 50

by 12 inch fully forged lightweight ET drag wheel.

Now, out front, we're using Mickey Thompson's et fronts wrapped around their 15 by 3.5 inch forged and fully polished drag wheels. Now, both front and rear are drilled for multiple mounting applications. But the coolest thing about these wheels and tires is this,

these weigh 40 pounds less than the front wheels we took off of this truck. So we've shed 80 pounds off the front of our vehicle just by swapping wheels and tires

and that fits in there. Great.

I don't think we're gonna have any traction issues.

And the next time you guys see Halling ass 10, we'll take care of the motivation on the front end of this rig.

One of the future modifications we're gonna make to project hall an S 10

is to relocate the battery to the bed of the truck. The reason we're gonna do that is for better weight distribution.

The Taylor makes an aluminum battery relocation kit that fits our needs perfectly.

This box is gonna protect the battery, give it a nice professional appearance and it's N hr A approved if you're going to a sanction track Taylor now makes boxes for yellow and red top batteries for you guys that run optimist. One of these kits set you back about 100 and 60 bucks.

Air ride technologies has made it one of their missions to prove that a vehicle on an air suspension system can handle great and they just come out with a strong arm system for 63 to 72 Chevrolet C 10 pickups. Now, if you've ever driven one of those trucks in the stock form, you know that they leave a little to be desired in the handling department. Mostly due to the stock trailing arms that GM put on the rear suspension of those trucks with air rides two inch 120 wall dom lower trailing arms and

they're bolt on sea notches that allow maximum drop without cutting your stock bed floor. Combined with heavy duty cross members, industry standard Firestone air bags and adjustable shocks. This system is rock solid.

Now, to keep the rear axle located, they incorporate an adjustable panhard bar with this cool looking billet bracket that mounts right to the axle housing. Now, this stuff is powder coated. It looks great. It's very well engineered, but the best thing is that it's all bolted. So you could be either in the weeds or on the highway after a weekend's worth of work and about 1700 bucks. Not bad. Huh? No, that's not bad at all. But here's a tip that will only cost you a few bucks a few minutes of your time and it's something available at any part store.

The guys I know you spent a lot of time thinking about your truck and the next modification you're gonna make. Well, sometimes you're gonna overlook the little things like this mass airflow sensor found on a lot of late model EF I trucks.

This little wire tells the engine's computer how much air is entering the engine. So it can calculate how much fuel to add. If the wire gets contaminated with oil and dirt, it'll send inaccurate signals costing you at the pump. Now, this sensor is relatively new, doesn't need to be cleaned,

but on this 02 F 150 well, this one's got 82,000 miles. It could use a cleaning.

That's all it takes to cure a rough idol and hesitation.

I just pop this thing back in. You're all set.

Then go charge your buddies five bucks each to do theirs. Thanks for watching trucks. We'll see you next week.
Show Full Transcript