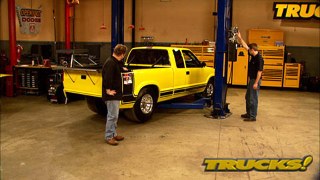
More Haulin S-10 Episodes
Trucks! Builds
Want more content like this?
Join the PowerNation Email NewsletterParts Used In This Episode
4 Wheel Parts
Pro-comp extreme alloy series 9089,black chrome 20 x 9.5,procomp all terrain 275/60r20.
Aam/Parts Pro
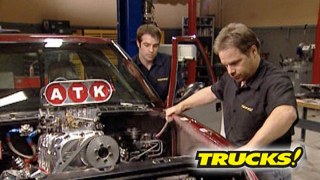
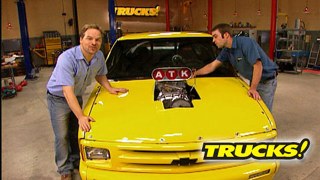
Extractor style functional fiberglass ram air hood.
Auto Body Color & Supply Co.
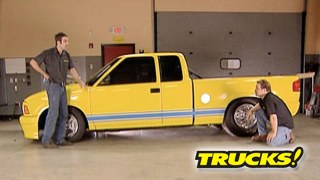
Yellow paint used for haulin S-10.
Cherry Bomb
Cherry Bomb extreme mufflers, Cherry Bomb turbo mufflers.
Edge Products
Evolution series computer upgrade and custom pod.
Skyjacker
3.5" lift kit complete with crossmembers, cnc machined knuckles, re-indexed strut assembly, axle spacers, end links for sway bar, rear lower control arms, rear coil springs, and shocks.
Video Transcript
Today, it's an avalanche that goes up. We're taking a stock Chevy avalanche and raising it up for a better stance and a much better look. We'll also give it new wheels and tires and a power upgrade. That's so easy. It's plug and play,
then we'll mock up some stripes on project hall and S 10 to see what looks best when it comes to a graphic design. That's all today here on trucks.
Hey, welcome to trucks. Well, today we get to mess around with one of the best selling suvs ever put into production. Check out this brand new 2007 Chevy avalanche.
Now, the avalanche debuted in 2001 kind of to mixed reviews mostly due to the disproportionate amount of plastic cladding on the sides. Nonetheless, sales were huge and the avalanche has sold almost a half a million units since it came onto the scene.
And like all the trucks and G M's lineup, the avalanche benefits from the GMT 900 Series platform and all of its improvements, a
boxed frame, refined suspension rack and pinion steering and an automatic adaptive suspension that will level loads and help control body roll even flex fuel capabilities with the 5.3 L V8 engine.
We also like the fact that there's still a solid axle out back, but with 20 inch cast aluminum wheels, street tires and more interior options than your average mid size luxury car. Well, there's no mistake in these things for hardcore off rotors. This thing screams SUV all the way to the soccer field
and there's nothing wrong with that GM is not trying to pull the wool over your eyes and neither are we. And even though this mid gate folds down and greatly increases your cargo capabilities, hauling around a full load of stuff in one of these
is a little more involved than your regular pickup truck
and the flip side to that. Well, it's nice to think you can get 20
MPG out on the highway and haul five people around in a full size SUV, with all the comfort you could ask for.
And like Ryan said, it's no off road monster. But if you're looking for a truck that does several things, well, the avalanche is that
and since it shares suspensions with other models, well, the aftermarket is right there with boltons
and upgrades. So if you're looking to get a little more aggressive with an avalanche, it's not as hard as you think.
So, today, we're gonna show you how to install a 3.5 inch lift on one of these trucks. Add a little kick in the power department and address some of the issues that result in going up entire size.
Skyjacker has been an innovator in the automotive aftermarket since they started in the early 19 seventies. They are right on time with this 3.5 inch lift system for the new GMT 900 series avalanche.
It starts out with front and rear cross members that utilize the factory, lower control arms
CV, spacers and these heavy duty CNC machine knuckles that allow you to retain the factory steering geometry.
All the spacers boots, hardware and links and these heavy duty urethane bushings are provided
including lower control arms spring, spacers and these coral springs to take care of the lift out back. Now, skyjacker getting their vehicle ready for the show circuit. So they asked us to throw on this 3.5 inch lift onto their avalanche and show you guys how easy it is to get an extra few inches attitude with one of these trucks.
Now, like we've talked about before, there's a few things to consider when it comes to compensating for larger wheels and tires. One of the most important being an accurate road speed signal and with just about every new vehicle electronically controlled, it's not just a matter of swapping in a different nylon gear to correct your speedometer, you got to get inside the computer reset a few saying and adjust some parameters.
Well, the good news here is that one of the easiest ways to get inside the ECM is with a performance programmer like this evolution from edge products.
This module will give us four different levels of performance with as much as 40 extra horsepower in the extreme setting.
It also gives us quarter mile and 0 to 60 times as well as full diagon
plastic capabilities. You can even program it to give you an audible alert for things like transmission fluid temperature. If you're towing something,
it connects to your OBD two port and sits in this molded pot out of the way on the dash.
And since we're definitely going with some larger diameter rolling stock, it'll just take a few moments to reprogram the changes. But for now, we got a truck to tear down
after you've got your wheels off for better access, disconnect the ride height sensors. If you've got the factory auto ride system,
then disconnect your end links and brake calipers.
Yeah.
As well as the ball grounds,
the factory sway bar comes off,
then you can use an impact wrench and remove the actual retaining nets
and then wrestle the knuckles off which might be a little snug. So you may have to persuade them a little,
the factory axles work great with most lift systems but need spacers. So the CV joints won't over extend.
The lower control arms get set aside
and finally the factory struts are taken out of the way
you'll need to support your rear axle withstands
on both the factory shocks
and links and lower control arms.
That's good
with the axle lowered out of the way the original springs get set aside
after the break, we'll finish installing our lift kit. So stick around.
Hey, welcome back to trucks. Now, if you're just joining us, we're about to change the look of this 2007 Chevy avalanche with Skyjacker's 3.5 inch lift system.
Now, you can do this job in your driveway with basic hand tools and some jack stains. But you definitely want to plan on a trip to the alignment shop to get this job done right
now. Before the break, you guys saw us tear apart the suspension on this truck, including the sway bar, lower control arms, rear cross member and CV axles. Now, one of the nice things about this lift system is that it requires no cutting or drilling. However, you will have to create some clearance on your differential
six.
Now, these two fins need to be ground down this rear wood fin almost all the way off in this one pretty close too. Now, this is gonna create the clearance that you need for the new cross members.
We keep a little urethane windshield rope around for jobs like this.
It's sticky enough to hold these front diff spacers in place until we can reassemble. The front end,
the front diff is a tight fit. So a buddy helping you out is a good idea.
Skyjackers drop cross members saddle the original control arm mounts and utilize grade eight crushed sleeves to maintain strength and parallel alignment.
The original lower a arms get reused
and the axles are reinstalled using the CNC aluminum spacers and new hardware.
Now, the avalanche we're working on came stock with the auto ride system, but in case your vehicle has a standard front strut configuration. Well, Skyjacker's got you covered there as well by offering these replacement strut bodies with the re index spring seat to get the 3.5 inches of lift. Now you're going to have to rebuild this assembly utilizing your stock spring and hat. But for us, it's just a simple matter of installing these spacers locking them in and reinstalling the whole assembly.
Yes,
a magnet works great for locating washers and nuts into tight spots like these strut spacers
swapping the factory hub bearings into the new Skyjacker knuckles is no big deal. Just be careful not to pinch your A BS lines,
drop the knuckle onto the hub snug it down
and then your brake rotor gets dropped on and bolted in, reusing all the original hardware.
The extended knuckles utilize the same geometry as the originals. And by design compensate for any bump steer issues.
As you can see with our brake caliper installed, our flex line is just a little bit too tight, but don't worry, Skyjacker provides a solution in the form of these relocation brackets, one
for the A BS sensor wire, the other one for the brake line bracket.
The rear system is pretty simple and starts with the urethane bushings getting installed into the new lower trailing arms
which are then bolted into the truck.
The rear lift comes from new extended coil springs that utilize factory rubber spring seats,
stock shocks get reused but drop brackets bolted the axle that compensate for the longer coils,
new longer end links get bolted in and finish up this system. That should take you an honest day to bolt in at home
up. Next, we'll pick up more power without even cracking open the hood and then later with some TV, magic blue tape becomes black paint to help us decide the final look for halling ass 10.
Hey, welcome back to trucks. Well, now that we got a little more altitude and attitude with the avalanche, we can sure do better than the stock wheels and tires, even though they're 20 inch alloys, they're just a little on the plain side and the tread on the tires is nothing more than street.
So we decided to go with pro cop extreme alloys with this cool looking black chrome finish.
And even though it's a 20 inch wheel and tire package, we've got a lot more aggressive tread pattern that's going to give us good traction on and off the road.
Now, you still need to recalibrate your speedometer for the larger tires. But instead of a trip to the dealership to have your truck reprogram, you've got an opportunity here
to spend a few minutes, installing a programmer that'll take performance a step further. It'll give you the ability to improve fuel economy, your truck's power for towing or just plain better acceleration as well as full diagnostic capabilities
with the cable fed through the fuse panel cover and up to the top of the dash feed, a couple of inches of cable through the pod face,
connect the cable to the evolution and push it into the pod until it snaps in
next, turn the ignition key on
then plug the cable into the OBD two port.
Once you press the menu button, the evolution will map your sock PC M storing the parameters in case you ever need to reset it to its original settings for dealer service or emissions testing.
This will take a couple of minutes
once calibration is complete, press the menu button and select power programming and choose the setting that suits your needs for. Now, we're going with the extreme power setting. Of course, from here, we can reset the wheel size by going into the custom options menu
as well as gear ratio and speed limiter settings.
But since we haven't changed anything else, we'll just reprogram the tire size.
Well, that was simple enough. Now, anytime edge has an update, all you gotta do is hook the edge up to your computer. Download the files from the internet, reprogram your truck's PC M.
You're ready to go.
Well, that evolution really kicked this thing in the pants. And now with our speedometer recalibrated for the larger wheels and tires, we are sure we're going to get an accurate speeding ticket.
When we come back, we're laying out graphics on our drag truck hall and S 10. Stay tuned.
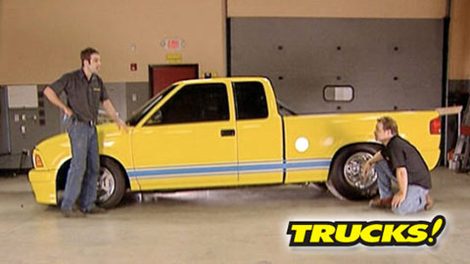
Hey, welcome back to trucks. Well, Ryan and I have been hard at work getting our Hall and S 10 project ready for some track testing. And even though the bright trucks yellow that Brian at auto body color and supply mixed up for us. Well, it looks great but it still needs a little something to break up all that color.
So we've been looking around at some designs and taking a few cues from some of the old muscle cars since this truck is definitely bringing it when it comes to muscle. So with the magic of television, a little bit of blue tape, we're gonna try out some designs. See what looks best
kind of a classic GT rocker Strat.
That's what it's saying, except we need GT 355 instead.
What do you think
that looks good? Looks really good logo in the middle?
Yeah, definitely.
It looks like the Dodger Rumble. Bee stripes. Cool.
Boss Mustang.
You don't think the Ford lovers are gonna hate it, do you?
I don't know. That's all right.
Yeah,
man. Lifted right off the old Baldwin motion Camaro. What do you think? I think it looks right at home on this pickup truck.
It's a Chevy on a Chevy
look good at 100 miles an hour too.
When you're designing stripes or graphics, it really helps to lay it out, stand back and take a look at it and this blue painter's tape is low
tech. It's not gonna hurt your paint and it's cheap
and we've got a few really cool designs to choose from. And obviously we haven't decided on something yet.
So you're just gonna have to wait and see which one ends up on the truck.
If you pay attention to the tools we use at the truck shop. Well, then you've seen us use this line of champ accessories like this rolling bed, do it. That can hold up to 1000 pounds. This adjustable PDR work light,
this overhead creeper. That's perfect for working up under the hood of a lifted up truck.
We've got folding heavy duty catwalks, even adjustable door dollies. Well, everything here comes from auto body tool Mart who's been around since 1981 and offers a full line of auto body tools and equipment. The champ line of stands is very well made and like everything auto body tool Mart sells, it comes with a full warranty and guarantee the champ line of stand starts at about 100 and 80 bucks.
Hey guys, I know, you're familiar with the classic cherry bomb glass packs, but they offer more options to give your ride the sound. You're after their turbo mufflers will reduce exhaust back pressure while providing a distinct sound without high decibel levels. So you can keep your neighbors happy.
But for those of you that don't mind disturbing the piece. A little cherry bombs, extreme muffler with its wing plate and straight through design will get the job done with an aggressive roar. Cherry bombs turbo mufflers are about 30 bucks each.
They're extremes running about 65.
Now, you've probably seen a lot of ram air hoods on the market that just let air into your engine compartment to blow around.
Well, suncoast has a new line of hoods that actually forces air into your truck's intake system.
The design of their hoods actually interfaces directly with your stock air box to maintain the RA M pressure into the intake. And most of their hoods can also interface with aftermarket cold air intakes to force in even more air. Now, these are well built hoods that they say are ready to scuff and shoot right out of the box sun coastline or ram air truck hoods start at about 750 bucks.
Will you guys at paint know how important it is to have the proper CFM and air pressure at the inlet of your gun? Especially if you're using HV LP and LV LP equipment.
One of the issues with one of these cell regulators is that, well,
they can be restrictive and rob you of CFM. And they add literally about three inches to the gun body. Well, here's something that's gonna cost you less than 15 bucks and it's really gonna help you out.
Now, this is nothing more than a brass T fitting with quarter inch pipe thread that you can get at any auto parts store and it's hooked to a Milton gauge. It's a nice quality gauge but still not very expensive. And obviously there's no restriction here. So it's not gonna interrupt your airflow or rob your CFM. And it's gonna be accurate
with your gauge screwed on to the gun inlet, connect your air supply, pull your trigger fully and adjust at the wall regulator to get the recommended air pressure at the gun inlet.
Once you've got your pressure set,
disconnect everything and remove your homemade gauge
and you just throw on a regular coupler
reattach your air supply and you know, for sure you've got 100% accuracy in your inlet pressure with no awkward restrictive middleman in between your air supply and your paint gun.
Thanks for watching trucks. We'll see you guys next week.
Show Full Transcript
then we'll mock up some stripes on project hall and S 10 to see what looks best when it comes to a graphic design. That's all today here on trucks.
Hey, welcome to trucks. Well, today we get to mess around with one of the best selling suvs ever put into production. Check out this brand new 2007 Chevy avalanche.
Now, the avalanche debuted in 2001 kind of to mixed reviews mostly due to the disproportionate amount of plastic cladding on the sides. Nonetheless, sales were huge and the avalanche has sold almost a half a million units since it came onto the scene.
And like all the trucks and G M's lineup, the avalanche benefits from the GMT 900 Series platform and all of its improvements, a
boxed frame, refined suspension rack and pinion steering and an automatic adaptive suspension that will level loads and help control body roll even flex fuel capabilities with the 5.3 L V8 engine.
We also like the fact that there's still a solid axle out back, but with 20 inch cast aluminum wheels, street tires and more interior options than your average mid size luxury car. Well, there's no mistake in these things for hardcore off rotors. This thing screams SUV all the way to the soccer field
and there's nothing wrong with that GM is not trying to pull the wool over your eyes and neither are we. And even though this mid gate folds down and greatly increases your cargo capabilities, hauling around a full load of stuff in one of these
is a little more involved than your regular pickup truck
and the flip side to that. Well, it's nice to think you can get 20
MPG out on the highway and haul five people around in a full size SUV, with all the comfort you could ask for.
And like Ryan said, it's no off road monster. But if you're looking for a truck that does several things, well, the avalanche is that
and since it shares suspensions with other models, well, the aftermarket is right there with boltons
and upgrades. So if you're looking to get a little more aggressive with an avalanche, it's not as hard as you think.
So, today, we're gonna show you how to install a 3.5 inch lift on one of these trucks. Add a little kick in the power department and address some of the issues that result in going up entire size.
Skyjacker has been an innovator in the automotive aftermarket since they started in the early 19 seventies. They are right on time with this 3.5 inch lift system for the new GMT 900 series avalanche.
It starts out with front and rear cross members that utilize the factory, lower control arms
CV, spacers and these heavy duty CNC machine knuckles that allow you to retain the factory steering geometry.
All the spacers boots, hardware and links and these heavy duty urethane bushings are provided
including lower control arms spring, spacers and these coral springs to take care of the lift out back. Now, skyjacker getting their vehicle ready for the show circuit. So they asked us to throw on this 3.5 inch lift onto their avalanche and show you guys how easy it is to get an extra few inches attitude with one of these trucks.
Now, like we've talked about before, there's a few things to consider when it comes to compensating for larger wheels and tires. One of the most important being an accurate road speed signal and with just about every new vehicle electronically controlled, it's not just a matter of swapping in a different nylon gear to correct your speedometer, you got to get inside the computer reset a few saying and adjust some parameters.
Well, the good news here is that one of the easiest ways to get inside the ECM is with a performance programmer like this evolution from edge products.
This module will give us four different levels of performance with as much as 40 extra horsepower in the extreme setting.
It also gives us quarter mile and 0 to 60 times as well as full diagon
plastic capabilities. You can even program it to give you an audible alert for things like transmission fluid temperature. If you're towing something,
it connects to your OBD two port and sits in this molded pot out of the way on the dash.
And since we're definitely going with some larger diameter rolling stock, it'll just take a few moments to reprogram the changes. But for now, we got a truck to tear down
after you've got your wheels off for better access, disconnect the ride height sensors. If you've got the factory auto ride system,
then disconnect your end links and brake calipers.
Yeah.
As well as the ball grounds,
the factory sway bar comes off,
then you can use an impact wrench and remove the actual retaining nets
and then wrestle the knuckles off which might be a little snug. So you may have to persuade them a little,
the factory axles work great with most lift systems but need spacers. So the CV joints won't over extend.
The lower control arms get set aside
and finally the factory struts are taken out of the way
you'll need to support your rear axle withstands
on both the factory shocks
and links and lower control arms.
That's good
with the axle lowered out of the way the original springs get set aside
after the break, we'll finish installing our lift kit. So stick around.
Hey, welcome back to trucks. Now, if you're just joining us, we're about to change the look of this 2007 Chevy avalanche with Skyjacker's 3.5 inch lift system.
Now, you can do this job in your driveway with basic hand tools and some jack stains. But you definitely want to plan on a trip to the alignment shop to get this job done right
now. Before the break, you guys saw us tear apart the suspension on this truck, including the sway bar, lower control arms, rear cross member and CV axles. Now, one of the nice things about this lift system is that it requires no cutting or drilling. However, you will have to create some clearance on your differential
six.
Now, these two fins need to be ground down this rear wood fin almost all the way off in this one pretty close too. Now, this is gonna create the clearance that you need for the new cross members.
We keep a little urethane windshield rope around for jobs like this.
It's sticky enough to hold these front diff spacers in place until we can reassemble. The front end,
the front diff is a tight fit. So a buddy helping you out is a good idea.
Skyjackers drop cross members saddle the original control arm mounts and utilize grade eight crushed sleeves to maintain strength and parallel alignment.
The original lower a arms get reused
and the axles are reinstalled using the CNC aluminum spacers and new hardware.
Now, the avalanche we're working on came stock with the auto ride system, but in case your vehicle has a standard front strut configuration. Well, Skyjacker's got you covered there as well by offering these replacement strut bodies with the re index spring seat to get the 3.5 inches of lift. Now you're going to have to rebuild this assembly utilizing your stock spring and hat. But for us, it's just a simple matter of installing these spacers locking them in and reinstalling the whole assembly.
Yes,
a magnet works great for locating washers and nuts into tight spots like these strut spacers
swapping the factory hub bearings into the new Skyjacker knuckles is no big deal. Just be careful not to pinch your A BS lines,
drop the knuckle onto the hub snug it down
and then your brake rotor gets dropped on and bolted in, reusing all the original hardware.
The extended knuckles utilize the same geometry as the originals. And by design compensate for any bump steer issues.
As you can see with our brake caliper installed, our flex line is just a little bit too tight, but don't worry, Skyjacker provides a solution in the form of these relocation brackets, one
for the A BS sensor wire, the other one for the brake line bracket.
The rear system is pretty simple and starts with the urethane bushings getting installed into the new lower trailing arms
which are then bolted into the truck.
The rear lift comes from new extended coil springs that utilize factory rubber spring seats,
stock shocks get reused but drop brackets bolted the axle that compensate for the longer coils,
new longer end links get bolted in and finish up this system. That should take you an honest day to bolt in at home
up. Next, we'll pick up more power without even cracking open the hood and then later with some TV, magic blue tape becomes black paint to help us decide the final look for halling ass 10.
Hey, welcome back to trucks. Well, now that we got a little more altitude and attitude with the avalanche, we can sure do better than the stock wheels and tires, even though they're 20 inch alloys, they're just a little on the plain side and the tread on the tires is nothing more than street.
So we decided to go with pro cop extreme alloys with this cool looking black chrome finish.
And even though it's a 20 inch wheel and tire package, we've got a lot more aggressive tread pattern that's going to give us good traction on and off the road.
Now, you still need to recalibrate your speedometer for the larger tires. But instead of a trip to the dealership to have your truck reprogram, you've got an opportunity here
to spend a few minutes, installing a programmer that'll take performance a step further. It'll give you the ability to improve fuel economy, your truck's power for towing or just plain better acceleration as well as full diagnostic capabilities
with the cable fed through the fuse panel cover and up to the top of the dash feed, a couple of inches of cable through the pod face,
connect the cable to the evolution and push it into the pod until it snaps in
next, turn the ignition key on
then plug the cable into the OBD two port.
Once you press the menu button, the evolution will map your sock PC M storing the parameters in case you ever need to reset it to its original settings for dealer service or emissions testing.
This will take a couple of minutes
once calibration is complete, press the menu button and select power programming and choose the setting that suits your needs for. Now, we're going with the extreme power setting. Of course, from here, we can reset the wheel size by going into the custom options menu
as well as gear ratio and speed limiter settings.
But since we haven't changed anything else, we'll just reprogram the tire size.
Well, that was simple enough. Now, anytime edge has an update, all you gotta do is hook the edge up to your computer. Download the files from the internet, reprogram your truck's PC M.
You're ready to go.
Well, that evolution really kicked this thing in the pants. And now with our speedometer recalibrated for the larger wheels and tires, we are sure we're going to get an accurate speeding ticket.
When we come back, we're laying out graphics on our drag truck hall and S 10. Stay tuned.
Hey, welcome back to trucks. Well, Ryan and I have been hard at work getting our Hall and S 10 project ready for some track testing. And even though the bright trucks yellow that Brian at auto body color and supply mixed up for us. Well, it looks great but it still needs a little something to break up all that color.
So we've been looking around at some designs and taking a few cues from some of the old muscle cars since this truck is definitely bringing it when it comes to muscle. So with the magic of television, a little bit of blue tape, we're gonna try out some designs. See what looks best
kind of a classic GT rocker Strat.
That's what it's saying, except we need GT 355 instead.
What do you think
that looks good? Looks really good logo in the middle?
Yeah, definitely.
It looks like the Dodger Rumble. Bee stripes. Cool.
Boss Mustang.
You don't think the Ford lovers are gonna hate it, do you?
I don't know. That's all right.
Yeah,
man. Lifted right off the old Baldwin motion Camaro. What do you think? I think it looks right at home on this pickup truck.
It's a Chevy on a Chevy
look good at 100 miles an hour too.
When you're designing stripes or graphics, it really helps to lay it out, stand back and take a look at it and this blue painter's tape is low
tech. It's not gonna hurt your paint and it's cheap
and we've got a few really cool designs to choose from. And obviously we haven't decided on something yet.
So you're just gonna have to wait and see which one ends up on the truck.
If you pay attention to the tools we use at the truck shop. Well, then you've seen us use this line of champ accessories like this rolling bed, do it. That can hold up to 1000 pounds. This adjustable PDR work light,
this overhead creeper. That's perfect for working up under the hood of a lifted up truck.
We've got folding heavy duty catwalks, even adjustable door dollies. Well, everything here comes from auto body tool Mart who's been around since 1981 and offers a full line of auto body tools and equipment. The champ line of stands is very well made and like everything auto body tool Mart sells, it comes with a full warranty and guarantee the champ line of stand starts at about 100 and 80 bucks.
Hey guys, I know, you're familiar with the classic cherry bomb glass packs, but they offer more options to give your ride the sound. You're after their turbo mufflers will reduce exhaust back pressure while providing a distinct sound without high decibel levels. So you can keep your neighbors happy.
But for those of you that don't mind disturbing the piece. A little cherry bombs, extreme muffler with its wing plate and straight through design will get the job done with an aggressive roar. Cherry bombs turbo mufflers are about 30 bucks each.
They're extremes running about 65.
Now, you've probably seen a lot of ram air hoods on the market that just let air into your engine compartment to blow around.
Well, suncoast has a new line of hoods that actually forces air into your truck's intake system.
The design of their hoods actually interfaces directly with your stock air box to maintain the RA M pressure into the intake. And most of their hoods can also interface with aftermarket cold air intakes to force in even more air. Now, these are well built hoods that they say are ready to scuff and shoot right out of the box sun coastline or ram air truck hoods start at about 750 bucks.
Will you guys at paint know how important it is to have the proper CFM and air pressure at the inlet of your gun? Especially if you're using HV LP and LV LP equipment.
One of the issues with one of these cell regulators is that, well,
they can be restrictive and rob you of CFM. And they add literally about three inches to the gun body. Well, here's something that's gonna cost you less than 15 bucks and it's really gonna help you out.
Now, this is nothing more than a brass T fitting with quarter inch pipe thread that you can get at any auto parts store and it's hooked to a Milton gauge. It's a nice quality gauge but still not very expensive. And obviously there's no restriction here. So it's not gonna interrupt your airflow or rob your CFM. And it's gonna be accurate
with your gauge screwed on to the gun inlet, connect your air supply, pull your trigger fully and adjust at the wall regulator to get the recommended air pressure at the gun inlet.
Once you've got your pressure set,
disconnect everything and remove your homemade gauge
and you just throw on a regular coupler
reattach your air supply and you know, for sure you've got 100% accuracy in your inlet pressure with no awkward restrictive middleman in between your air supply and your paint gun.
Thanks for watching trucks. We'll see you guys next week.