More Project HRT Episodes
Trucks! Builds
Want more content like this?
Join the PowerNation Email NewsletterParts Used In This Episode
Advanced Plating
Plating of non-metal materials, dash panel and door panels.
Auto Meter
Old tyme black 5 PC. Kit.
B&B Auto Trim Shop
Custom upholstery, door panels, dash insert, seats, flooring and headliner.
Bay One Customs
Frame sanding, prepping and painting.
Be Cool, Inc.
Custom 37 Ford aluminum radiator, overflow tank, aluminum radiator cap.
Blue Torch FabWorks
The BTF battery box is a very cool looking and safe way to mount your Optima battery. This battery box is strong enough to be mounted in any position. The battery box could be bolted down through 6 laser-cut holes in the bottom of the box or it could be welded to a battery tray. The Optima battery is held in with a clamping action to ensure the battery stays where you put it. It is formed on a from 1/8" high-strength steel plate. Battery clamping hardware is included.
Covell Creative Metalworking
Custom Metal Fabrication and Instructor. Offering workshops and instructional DVD's. Custom carb. hat for Project HRT.
Crown Performance
Custom made DOT approved brake lines.
Design Engineering, Inc. (DEI)
Boom Mat Acoustic Insulation 12"x23", Boom Mat Spray, Cool Tape, Floor & Tunnel Shield.
Edelbrock
Quiet-Flo Electric Fuel Pump.
Edge Products
The Insight is an easy-to-install standalone multi-gauge display. With what would otherwise cost thousands of dollars and take hours to install, the Insight provides inexpensively and instantly.
Holley
1 3/4" Form-A-Flex 3' kit with chrome ends.
Holley
Earl's Performance Products, -3 tube sleeve, -3 to 1/8" npt tee fitting, -3 tube nut, 3/8" stainless tubing, -3 to 1/8" straight fitting.
Line-X
LINE-X XTRA delivers added protection against cracking, bubbling, peeling and color fading. Not to mention that DuPont KEVLAR┬о is up to five times stronger than steel, making your truck bed stronger than just about anything you can put in it.
Made For You Products
Assortment of single and double T-clamps in black.
McLeod Industries
10.5 clutch disc 1 1/8 x10 organic, pressure plate, hydraulic throwout bearing, hydraulic bearing spacer, sfi approved bell-housing.
Metalcraft Tools
The English Wheel is shaped like a large "C". There is a large 9" x 3" wheel with a flat working surface mounted at the top. There is a smaller 3" x 3" wheel mounted at the bottom with a curved working surface. The more shape desired in the panel, the more curved the lower wheel or anvil will be. Steel or aluminum can easily be shaped by pushing the metal back and forth between the wheels. Very little pressure is needed to shape the panel. The panel is stretched or raised to the desired shape. P
Mickey Thompson
20x16 HR-1 wheel, 33x22.00R20 sportsman S/R radial, 18x 4.5 HR-1 wheel, 26x6.00r18 sportsman S/R radial.
Nitro-Plate
NitroPlate Bright is a highly polished aluminum ceramic coating capable of withstanding 1300 degrees. NitroPlate Bright is perfect for headers that see high heat but can also be used on a number of items such as intake manifolds, brake rotors, rear end housings, control arms, brackets, wheelie bars, and hood hinges.
Optima
Red Top Optima battery.
Rick's Hot Rod Shop
Custom stainless steel fuel tank.
USDRILL
29 pc. fractional drill index contains 1/16" to 1/2" in 1/64" increments.
Vintage Air
GEN-IITM SYSTEMS Comes complete with: Evaporator and Mounting Brackets, Wiring Harness, Adjustable Servo, Heater Control Valve, A/C Duct Hose, Drain Kit, Defrost Option, Includes Hoses and Ducts.
Video Transcript
Today, we'll show you all the work that's gone into Project H RT and a few of the little details still left to go.
Then one of the very best metal crafters ever. Ron Coll
stops by the shop to teach us how to make a handmade and very unique air intake for our hot rod truck. It's all today here on trucks.
Hey, thanks for watching trucks and thanks for sticking with us on the show. Well, it's been a jam packed here with tons of cool projects and most of them have been finished and paid off big time, but there's a couple that haven't quite been finished up yet like our section 66 Chevy C 10. But don't worry, you guys will see that thing again soon enough. And when you do, well, it'll be road ready
and then there's this thing
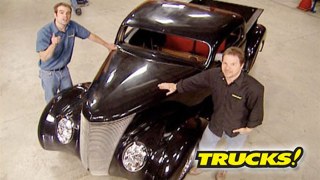
37 Ford Project H RT. Now we're going over this thing making sure every nut and bolt is tight and that it performs flawlessly for whoever wins it. But we've also got one more new project for this truck and one that's going to give it a lot more personality and peg the cool meter with some handcrafted automotive jewelry. We'll talk more about that a little bit later and we're also going to remind you guys how this truck got to where it is from where it started.
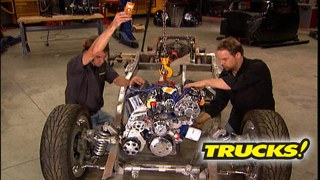
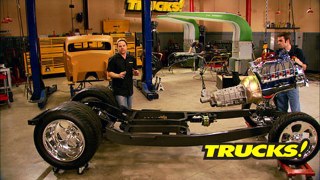
If you remember we started out with a fiberglass body on a box frame, rolling on giant Mickey Thompson wheels and tires, but that's about all it did. And as good as it looked, it was a long way from a driver
after we had the front end dialed in
and the drive line in place,
the body work was next
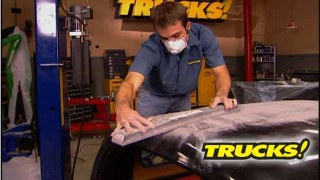
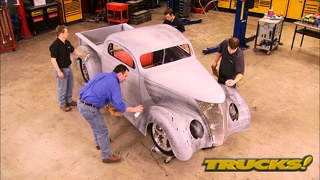
and as straight as the gel coat was, it still was not up to the standard we wanted to set with this bill. So the time consuming process of blocking filling seams,
gapping the doors
and final fitting, all of the panels was drawn out over several weeks.
Now, that body work kept all three of us plenty busy, but it's no secret that we had lots of good help along the way because these frame rails, well, they didn't get looking that smooth on their own
bay. One customs stepped up and offered to smooth and finish the frame for us while we had some other stuff going on. And
what they gave back to us was quality, craftsmanship,
smooth welds blocked primer and perfect semi gloss paint. We're now the foundation of this hot rod truck and that fit perfectly with the plans that we had for paint and body prep and that meant priming
and blocking
and priming and blocking and blocking and blocking and fitting until the body was mocked up, fit perfectly and was finally ready for a new coat of paint.
Now, we're all proud of this paint job and you guys know that that doesn't just happen by accident
and the paint doesn't just fall out of the gun.
But one of the things we were able to do is show you some insight into what it takes to plan a paint job like this and to execute it afterwards,
before the first drop of paint was in the cup, we sat down for a planning session and me, Tommy Ryan and Steve Longacre tossed around some ideas on form proportion, colors and designs
and with Steve's talents as a graphic artist, we ended up with a killer rendering to go by for the layout of the paint
with a plan to go by the red and black base colors were laid down.
And Brian Bodker from car Crafter customs helped us lay down the flames.
We use the time tested method of Tracy using a pounce bed to transfer a mirror image of the flames onto the other side
and then shaded in the traditional flame colors.
Rick Bacon from muscle car outlined the fire. And after a drop shadow was added to the flame licks, everything was buried in clear coat and then cut and rub to a glass like finish.
Now, we've managed to keep the screwdrivers, belt buckles and jack handles out of the paint so far. But there's still a ton of work to do before we give this thing away. And even with all this pretty paint on it, well, it was still a hollow shell of a truck. So it was time to pay attention to the interior
and it needed to be outstanding.
We had already spent some time picking out a seat style
and sadly, the armchair lost out.
But once we decided on a comfortable design that fit the truck,
we focused on driver controls and layout
and then we carried the whole truck over to B and B auto trim.
Steve Gifford and his crew started with the layer of insulation from de I to make sure the road noise was held to a minimum.
Then the process of making the headliner and trim panels was started,
followed by the custom center console
door panels,
recovered seats from a nineties vintage Pontiac.
Some cool accents in detail,
followed by several cows worth of hides stitched together to finish it off the centerpiece to any interior is the dash
and this truck already had a cool design.
So with our gauges laid out,
Steve and the guys over at advanced plating chromed, the wrap around fiberglass dash and door trim for a seriously cool look.
A lot of time and energy was put into this truck
and we thank everybody at B and B for their hard work
and they did a good job
up. Next. Details, details, details and we've got plenty of them. And later Ron Coll
is in the kitchen cooking up something inspired by this hot rod. Stick around.
Hey, welcome back to trucks. Today, we're giving you a little insight on all the progress that's been made on project H RT. In between the shows you've seen like the brake system.
Tommy Ben up, some 316 stainless steel brake line held everything in place, using these T clamps were made for you
and we sent it through the frame rail utilizing Russell fittings. Now, if you guys are
this kind of work at home, make sure you use steel fittings, not aluminum, it just won't hold up to the extreme pressures of a hydraulic brake system.
Then to finish things off, we install these color match crown flex lines.
Now to keep this thing from running hot, we're using the all aluminum radiator from B
who incorporated for hoses. We're using the Earl's former flex with the chrome ends.
Now, it doesn't matter how much measuring test fitting or mocking up that you do on a build, there's always going to be stuff that has to be adjusted after reassembly, for instance, take a look at our running board here. There's not enough tire clearance. This doesn't allow any lateral movement in the axle or tire swell, but it's ok because we can
along the line that I've marked this is a thick running board and our fender edge starts right here. So we got lots of room.
I guess what I'm trying to say is that it takes a long time to debug a vehicle. So in the immortal words of my good friend Randy Este,
it ain't messed up so you can't fix it anymore.
Now, on a truck this night, we wanted to make sure it was still a driver and part of that is making sure the driver and passenger are comfortable. So we're installing a vintage air compact gen two system. It tucks nicely up behind our chrome dash. It should handle climate control. No sweat,
get it no sweat
for fuel delivery. We're using 38 inch braided stainless fuel line and is connected at the top of the rail with more tea clamps to keep it away from anything that moves nice and safe and it's feeding an ante Brock electric fuel pump that's internally regulated. There's a filter behind the carburetor. And since this is a carbureted application, it's nice and clean since we don't have a reason for a return line
at the tank. Reasoning.
Dash six stainless connection.
Yeah. And if you guys ever wonder what the dash six and dash 12, all those numbers mean. Well, it was a system developed by the US military based on 16th of an inch. So if you got a half inch, that's 8/16 the dash eight line,
you've got a quarter inch. Well, it's 4/16. So you got a dash four. It's really kind of simple. Now, we didn't have a whole lot of room to work with as far as a fuel tank. So we took some careful measurements and sent them over to Rick and Hector at Rick's Hot Rod Shop and they crafted up this great looking stainless steel tank. It's fully baffled, has a nice brushed finish and comes with a fuel level sender now to get some gas in this thing, what we'll have to do like we did on project old school and put a fuel filler in the bed floor.
Now, as good as these optimum batteries look, this thing is not going under the hood. It's too clean in there and there's not enough room. So with the street rod, you got to get creative and we found some free real estate back here behind the fender, the wheel's not going to come in contact with it. So we talked to our buddies at Blue Torch fab and they sent us a battery box that's specifically designed to house an
out of a battery with the nitro plate coating we had put on it. It should stay nice looking and rust free
because this guy who owns this truck
now to separate this truck from a lot of the other hot rods out there. We wanted to run a manual transmission, a six speed,
but we didn't want a hard to depress clutch pedal. So we ended up going with a complete hydraulic set up from a cloud like Kevin was talking about with the battery. We didn't want a bunch of stuff in the engine bay or on the firewall cluttering up the nice clean look. So we've got everything mounted down here on the frame rail where it's hidden and out of the way.
Now, this truck is really starting to come together. But like we said, there's one more project that we're gonna do that's really gonna make this engine bay pop and it's gonna be handmade by a master craftsman and it's gonna happen
right before your eyes. So
stick around
when we come back. It's metal forming taught by the master. Stay tuned.
Hey, welcome back to trucks. Well, with project H RT on the home stretch, we wanted to do one more thing to dress it up under the hood. We heard our good buddy, Ron Cove
is here in the area presenting a workshop at metal craft tools. So we dragged him over here to help. Now, those of you who've studied welding or metal
fab.
Well, you probably know Ron as Professor Hammer from his magazine columns. Now, Ron's been working with metal for
more than 40 years and he presents workshops all over the world.
That's right. Kevin. Every year I cross the country from coast to coast presenting workshops primarily on sheet metal fabrication.
I cover both aluminum and steel and the workshops are open to both the beginning and advanced students. And
not only does Ron put on his workshops, he's got a full line of instructional DVD s
covering many
aspects of metal working and welding. That's right, Ryan. For those who can't come to a workshop, I've made 23 DVD S that cover a wide range of metal working processes. It's like having a workshop at home and believe it or not, Ron has a master's degree in metal sculpture. And the project he's got for us today is pretty darn cool. What we're going to sculpt today is an air cleaner and we'll start with the base plate.
So I've made a form from medium density fiberboard. The form has the contoured edge that we want the base of the scoop to have. We're working with aluminum. This is 1/16 of an inch thick and I'm going to soften this metal by a kneeling to make it easier to work.
A kneeling is done with an acetylene torch in two steps.
The first step is applying the soot which becomes a temperature indicator.
Step two is burning off the soot and when the soot is gone, you know, the metal is fully annealed.
That means the friction is changed and lowered between the grains of metal relieving internal stress making it soft.
We're using pins to keep the parts aligned while hammering
and using the vice to hold the form tight against the metal hammer forming allows us to create a curved edge around the base while keeping the center flat
with the base form. It's time to shape the sides. This time by hand using the base as a reference.
These pieces have previously been Anne,
so they're nice and soft and easy to work with
the sides can now be tack welded to the base. Ron's tig welding with aluminum rod.
The rod he's using is 1/16 inch diameter 1100 rod which is pure aluminum
to give the scoop its dome shape on the top. Ron's using an English wheel for metal craft.
The metal gets rolled between the upper and lower wheel stretching it and doming it.
Ron's chosen a lower wheel with the same crown that the top piece needs.
One edge of each top piece gets peaked using a tea dolly mounted in the vice and a slap
hammer
with the top halves formed and checked. You can start to see the design emerge as they get tacked together.
After the break. Ron will finish up our custom intake for project H RT. Don't go away.
Hey, thanks for watching trucks as we get a hands on lesson from Ron
Kell with our final H RT project.
So there's two more pieces left to complete our air cleaner and those are the air intake or nostrils and they look just like this and they're made using another type of a hammer form this time, a metal one,
the nostrils are made with a different hammer form. This time with the flat stock sandwiched in between the wood and metal forms using pins for alignment
with the fixture mounted in the Vice. Ron uses a wooden drift to fold the edges flat against the internal metal form for the corners. He uses a rounded dowel to shape the flange hammering gently gives him the control he needs. So the soft aluminum doesn't split.
Now with your work piece shaped and out of the hammer form, here's a cool tip. You can use quarter inch, fine line tape to get a perfect half inch and quarter inch outside dimension for your final cut.
When it's cut, your finished piece looks exactly like this.
The nostrils are tack welded together at an angle that matches the front of the scoop.
And I made a template that shows the contour it needs to be shaped too.
This is a homemade fixture made from scrap pieces of metal. Any of you could make a project like this and it's perfect for giving a curved shape to the opening of the nostrils.
I think I'm done
with everything tacked together to form the basic shape. Now, it can be finished welded with the same aluminum rod
tig. Welding aluminum takes a lot of finesse, but Ron's had a bit of practice and lays down a flawless beam.
Once the seams are welded, they get metal finished first with a grinder, then they can be filed or sanded, depending on the type of finish that you want.
So, with a couple more hours of clean up work, this is what we've got.
So let's slip this into place and there you go,
man. This looks fantastic, Ron.
And if this looks familiar to some of you guys out there, there's a reason for that. Take a look at this.
This is Greer Black and Prudhomme's famous 1962 front engine dragster with its distinctive air scoop made by Wayne Ewing.
And this car is the inspiration for our handcrafted piece,
Ron. Thanks so much for spending some time with us today and showing our viewers some excellent tips on working with aluminum. Thank you, Kevin. I've had a ball with this project and I really appreciate your help with it. Well, it's going to be a nice finishing touch for project H RT,
but I've got this car at home in the shop. I wanted to do a molded in hood scoop. What do you think?
Now we've shown you and we've used the edge evolution. Well, this is the edge insight and it takes the place of a lot of different gauges.
Insight monitors up to 100 different vehicle parameters and instead of taking hours to install like all those individual gauges. Well, it's a simple plug in and just takes a couple of minutes.
The insight is a scan tool capable of data logging, which means it'll read vehicle information while you're driving which you can later upload to a computer and analyze the data. It's also capable of performance testing, things like 0 to 60 or top speed or RPM. The inside is internet up update
and available for most Ford Dodge and Chevy late model diesel trucks. You can pick one up for right around 330.
Now, one of the things I always wanted to do to this truck that we never got around to was take care of this ratty looking bed. So to make sure it doesn't get any worse and looks a whole lot better. We send it over to
LINX after Linex preps the surface to create some mechanical tooth.
They spray the bed liner in the color of your choice.
Now, Linex sprays their bed liner at a higher temperature and a higher pressure
causing it to dry within 3 to 5 seconds, eliminating runs or puddling.
Now, we chose to go with the Linex extra. It's their newest coating that will keep its like new gloss without fading due to its UV radiation protection. Plus it's bonded with Kevlar, which we all know is very, very tough. We got our truck Linex for just over 600 bucks.
If you're looking for a thorough, easy to carry set of drill bits, then check out us drills, ultimate index set of bits.
This 29 piece fractional index set is made up of bits 1/16 of an inch to half inch by 64th, they're all 135 degrees split point drills and start even on a rounded surface without center punching, they've got three flats on a shank to eliminate spinning in the chuck and are made from a high Molly
Beum tool steel with a nitro carbonized coating.
The unbreakable case is water tight and waterproof and it comes with a clip so you can hang it on your tool box or on your belt. Us. Drill's ultimate index kit is us made and it starts at about 100 and 30 bucks. Now, if you've got any questions about this product or anything else you've seen on our shows, go to Power Block tv.com and check it out. Thanks for watching. See you guys next week.
Show Full Transcript
Then one of the very best metal crafters ever. Ron Coll
stops by the shop to teach us how to make a handmade and very unique air intake for our hot rod truck. It's all today here on trucks.
Hey, thanks for watching trucks and thanks for sticking with us on the show. Well, it's been a jam packed here with tons of cool projects and most of them have been finished and paid off big time, but there's a couple that haven't quite been finished up yet like our section 66 Chevy C 10. But don't worry, you guys will see that thing again soon enough. And when you do, well, it'll be road ready
and then there's this thing
37 Ford Project H RT. Now we're going over this thing making sure every nut and bolt is tight and that it performs flawlessly for whoever wins it. But we've also got one more new project for this truck and one that's going to give it a lot more personality and peg the cool meter with some handcrafted automotive jewelry. We'll talk more about that a little bit later and we're also going to remind you guys how this truck got to where it is from where it started.
If you remember we started out with a fiberglass body on a box frame, rolling on giant Mickey Thompson wheels and tires, but that's about all it did. And as good as it looked, it was a long way from a driver
after we had the front end dialed in
and the drive line in place,
the body work was next
and as straight as the gel coat was, it still was not up to the standard we wanted to set with this bill. So the time consuming process of blocking filling seams,
gapping the doors
and final fitting, all of the panels was drawn out over several weeks.
Now, that body work kept all three of us plenty busy, but it's no secret that we had lots of good help along the way because these frame rails, well, they didn't get looking that smooth on their own
bay. One customs stepped up and offered to smooth and finish the frame for us while we had some other stuff going on. And
what they gave back to us was quality, craftsmanship,
smooth welds blocked primer and perfect semi gloss paint. We're now the foundation of this hot rod truck and that fit perfectly with the plans that we had for paint and body prep and that meant priming
and blocking
and priming and blocking and blocking and blocking and fitting until the body was mocked up, fit perfectly and was finally ready for a new coat of paint.
Now, we're all proud of this paint job and you guys know that that doesn't just happen by accident
and the paint doesn't just fall out of the gun.
But one of the things we were able to do is show you some insight into what it takes to plan a paint job like this and to execute it afterwards,
before the first drop of paint was in the cup, we sat down for a planning session and me, Tommy Ryan and Steve Longacre tossed around some ideas on form proportion, colors and designs
and with Steve's talents as a graphic artist, we ended up with a killer rendering to go by for the layout of the paint
with a plan to go by the red and black base colors were laid down.
And Brian Bodker from car Crafter customs helped us lay down the flames.
We use the time tested method of Tracy using a pounce bed to transfer a mirror image of the flames onto the other side
and then shaded in the traditional flame colors.
Rick Bacon from muscle car outlined the fire. And after a drop shadow was added to the flame licks, everything was buried in clear coat and then cut and rub to a glass like finish.
Now, we've managed to keep the screwdrivers, belt buckles and jack handles out of the paint so far. But there's still a ton of work to do before we give this thing away. And even with all this pretty paint on it, well, it was still a hollow shell of a truck. So it was time to pay attention to the interior
and it needed to be outstanding.
We had already spent some time picking out a seat style
and sadly, the armchair lost out.
But once we decided on a comfortable design that fit the truck,
we focused on driver controls and layout
and then we carried the whole truck over to B and B auto trim.
Steve Gifford and his crew started with the layer of insulation from de I to make sure the road noise was held to a minimum.
Then the process of making the headliner and trim panels was started,
followed by the custom center console
door panels,
recovered seats from a nineties vintage Pontiac.
Some cool accents in detail,
followed by several cows worth of hides stitched together to finish it off the centerpiece to any interior is the dash
and this truck already had a cool design.
So with our gauges laid out,
Steve and the guys over at advanced plating chromed, the wrap around fiberglass dash and door trim for a seriously cool look.
A lot of time and energy was put into this truck
and we thank everybody at B and B for their hard work
and they did a good job
up. Next. Details, details, details and we've got plenty of them. And later Ron Coll
is in the kitchen cooking up something inspired by this hot rod. Stick around.
Hey, welcome back to trucks. Today, we're giving you a little insight on all the progress that's been made on project H RT. In between the shows you've seen like the brake system.
Tommy Ben up, some 316 stainless steel brake line held everything in place, using these T clamps were made for you
and we sent it through the frame rail utilizing Russell fittings. Now, if you guys are
this kind of work at home, make sure you use steel fittings, not aluminum, it just won't hold up to the extreme pressures of a hydraulic brake system.
Then to finish things off, we install these color match crown flex lines.
Now to keep this thing from running hot, we're using the all aluminum radiator from B
who incorporated for hoses. We're using the Earl's former flex with the chrome ends.
Now, it doesn't matter how much measuring test fitting or mocking up that you do on a build, there's always going to be stuff that has to be adjusted after reassembly, for instance, take a look at our running board here. There's not enough tire clearance. This doesn't allow any lateral movement in the axle or tire swell, but it's ok because we can
along the line that I've marked this is a thick running board and our fender edge starts right here. So we got lots of room.
I guess what I'm trying to say is that it takes a long time to debug a vehicle. So in the immortal words of my good friend Randy Este,
it ain't messed up so you can't fix it anymore.
Now, on a truck this night, we wanted to make sure it was still a driver and part of that is making sure the driver and passenger are comfortable. So we're installing a vintage air compact gen two system. It tucks nicely up behind our chrome dash. It should handle climate control. No sweat,
get it no sweat
for fuel delivery. We're using 38 inch braided stainless fuel line and is connected at the top of the rail with more tea clamps to keep it away from anything that moves nice and safe and it's feeding an ante Brock electric fuel pump that's internally regulated. There's a filter behind the carburetor. And since this is a carbureted application, it's nice and clean since we don't have a reason for a return line
at the tank. Reasoning.
Dash six stainless connection.
Yeah. And if you guys ever wonder what the dash six and dash 12, all those numbers mean. Well, it was a system developed by the US military based on 16th of an inch. So if you got a half inch, that's 8/16 the dash eight line,
you've got a quarter inch. Well, it's 4/16. So you got a dash four. It's really kind of simple. Now, we didn't have a whole lot of room to work with as far as a fuel tank. So we took some careful measurements and sent them over to Rick and Hector at Rick's Hot Rod Shop and they crafted up this great looking stainless steel tank. It's fully baffled, has a nice brushed finish and comes with a fuel level sender now to get some gas in this thing, what we'll have to do like we did on project old school and put a fuel filler in the bed floor.
Now, as good as these optimum batteries look, this thing is not going under the hood. It's too clean in there and there's not enough room. So with the street rod, you got to get creative and we found some free real estate back here behind the fender, the wheel's not going to come in contact with it. So we talked to our buddies at Blue Torch fab and they sent us a battery box that's specifically designed to house an
out of a battery with the nitro plate coating we had put on it. It should stay nice looking and rust free
because this guy who owns this truck
now to separate this truck from a lot of the other hot rods out there. We wanted to run a manual transmission, a six speed,
but we didn't want a hard to depress clutch pedal. So we ended up going with a complete hydraulic set up from a cloud like Kevin was talking about with the battery. We didn't want a bunch of stuff in the engine bay or on the firewall cluttering up the nice clean look. So we've got everything mounted down here on the frame rail where it's hidden and out of the way.
Now, this truck is really starting to come together. But like we said, there's one more project that we're gonna do that's really gonna make this engine bay pop and it's gonna be handmade by a master craftsman and it's gonna happen
right before your eyes. So
stick around
when we come back. It's metal forming taught by the master. Stay tuned.
Hey, welcome back to trucks. Well, with project H RT on the home stretch, we wanted to do one more thing to dress it up under the hood. We heard our good buddy, Ron Cove
is here in the area presenting a workshop at metal craft tools. So we dragged him over here to help. Now, those of you who've studied welding or metal
fab.
Well, you probably know Ron as Professor Hammer from his magazine columns. Now, Ron's been working with metal for
more than 40 years and he presents workshops all over the world.
That's right. Kevin. Every year I cross the country from coast to coast presenting workshops primarily on sheet metal fabrication.
I cover both aluminum and steel and the workshops are open to both the beginning and advanced students. And
not only does Ron put on his workshops, he's got a full line of instructional DVD s
covering many
aspects of metal working and welding. That's right, Ryan. For those who can't come to a workshop, I've made 23 DVD S that cover a wide range of metal working processes. It's like having a workshop at home and believe it or not, Ron has a master's degree in metal sculpture. And the project he's got for us today is pretty darn cool. What we're going to sculpt today is an air cleaner and we'll start with the base plate.
So I've made a form from medium density fiberboard. The form has the contoured edge that we want the base of the scoop to have. We're working with aluminum. This is 1/16 of an inch thick and I'm going to soften this metal by a kneeling to make it easier to work.
A kneeling is done with an acetylene torch in two steps.
The first step is applying the soot which becomes a temperature indicator.
Step two is burning off the soot and when the soot is gone, you know, the metal is fully annealed.
That means the friction is changed and lowered between the grains of metal relieving internal stress making it soft.
We're using pins to keep the parts aligned while hammering
and using the vice to hold the form tight against the metal hammer forming allows us to create a curved edge around the base while keeping the center flat
with the base form. It's time to shape the sides. This time by hand using the base as a reference.
These pieces have previously been Anne,
so they're nice and soft and easy to work with
the sides can now be tack welded to the base. Ron's tig welding with aluminum rod.
The rod he's using is 1/16 inch diameter 1100 rod which is pure aluminum
to give the scoop its dome shape on the top. Ron's using an English wheel for metal craft.
The metal gets rolled between the upper and lower wheel stretching it and doming it.
Ron's chosen a lower wheel with the same crown that the top piece needs.
One edge of each top piece gets peaked using a tea dolly mounted in the vice and a slap
hammer
with the top halves formed and checked. You can start to see the design emerge as they get tacked together.
After the break. Ron will finish up our custom intake for project H RT. Don't go away.
Hey, thanks for watching trucks as we get a hands on lesson from Ron
Kell with our final H RT project.
So there's two more pieces left to complete our air cleaner and those are the air intake or nostrils and they look just like this and they're made using another type of a hammer form this time, a metal one,
the nostrils are made with a different hammer form. This time with the flat stock sandwiched in between the wood and metal forms using pins for alignment
with the fixture mounted in the Vice. Ron uses a wooden drift to fold the edges flat against the internal metal form for the corners. He uses a rounded dowel to shape the flange hammering gently gives him the control he needs. So the soft aluminum doesn't split.
Now with your work piece shaped and out of the hammer form, here's a cool tip. You can use quarter inch, fine line tape to get a perfect half inch and quarter inch outside dimension for your final cut.
When it's cut, your finished piece looks exactly like this.
The nostrils are tack welded together at an angle that matches the front of the scoop.
And I made a template that shows the contour it needs to be shaped too.
This is a homemade fixture made from scrap pieces of metal. Any of you could make a project like this and it's perfect for giving a curved shape to the opening of the nostrils.
I think I'm done
with everything tacked together to form the basic shape. Now, it can be finished welded with the same aluminum rod
tig. Welding aluminum takes a lot of finesse, but Ron's had a bit of practice and lays down a flawless beam.
Once the seams are welded, they get metal finished first with a grinder, then they can be filed or sanded, depending on the type of finish that you want.
So, with a couple more hours of clean up work, this is what we've got.
So let's slip this into place and there you go,
man. This looks fantastic, Ron.
And if this looks familiar to some of you guys out there, there's a reason for that. Take a look at this.
This is Greer Black and Prudhomme's famous 1962 front engine dragster with its distinctive air scoop made by Wayne Ewing.
And this car is the inspiration for our handcrafted piece,
Ron. Thanks so much for spending some time with us today and showing our viewers some excellent tips on working with aluminum. Thank you, Kevin. I've had a ball with this project and I really appreciate your help with it. Well, it's going to be a nice finishing touch for project H RT,
but I've got this car at home in the shop. I wanted to do a molded in hood scoop. What do you think?
Now we've shown you and we've used the edge evolution. Well, this is the edge insight and it takes the place of a lot of different gauges.
Insight monitors up to 100 different vehicle parameters and instead of taking hours to install like all those individual gauges. Well, it's a simple plug in and just takes a couple of minutes.
The insight is a scan tool capable of data logging, which means it'll read vehicle information while you're driving which you can later upload to a computer and analyze the data. It's also capable of performance testing, things like 0 to 60 or top speed or RPM. The inside is internet up update
and available for most Ford Dodge and Chevy late model diesel trucks. You can pick one up for right around 330.
Now, one of the things I always wanted to do to this truck that we never got around to was take care of this ratty looking bed. So to make sure it doesn't get any worse and looks a whole lot better. We send it over to
LINX after Linex preps the surface to create some mechanical tooth.
They spray the bed liner in the color of your choice.
Now, Linex sprays their bed liner at a higher temperature and a higher pressure
causing it to dry within 3 to 5 seconds, eliminating runs or puddling.
Now, we chose to go with the Linex extra. It's their newest coating that will keep its like new gloss without fading due to its UV radiation protection. Plus it's bonded with Kevlar, which we all know is very, very tough. We got our truck Linex for just over 600 bucks.
If you're looking for a thorough, easy to carry set of drill bits, then check out us drills, ultimate index set of bits.
This 29 piece fractional index set is made up of bits 1/16 of an inch to half inch by 64th, they're all 135 degrees split point drills and start even on a rounded surface without center punching, they've got three flats on a shank to eliminate spinning in the chuck and are made from a high Molly
Beum tool steel with a nitro carbonized coating.
The unbreakable case is water tight and waterproof and it comes with a clip so you can hang it on your tool box or on your belt. Us. Drill's ultimate index kit is us made and it starts at about 100 and 30 bucks. Now, if you've got any questions about this product or anything else you've seen on our shows, go to Power Block tv.com and check it out. Thanks for watching. See you guys next week.