Video Transcript
[Anthony] You're watching Powernation.
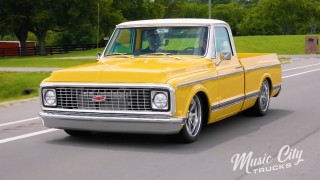
[Mike] Today on Music City Trucks our C-10 makes a transformation from paw-paw's pickup to custom cruiser. We get Cream Puff into the booth and make way for an explosion of color. [Anthony] Plus, bring in a couple of trucks that have influenced our passion for old Iron. [ Music ]
[Anthony] Well, we're on the road again. [Mike] On the road to the prep booth. -What does that mean? -Well bodywork. -And sanding? -Sanding, and sanding, and more sanding. We just love doing sanding. -Well hey guys, welcome to Music City Trucks. And as you can see, we got our old project Cream Puff in the prep booth today and out of the shop. -So take a look at it. It's the last time you're going to see it in the red and white colors. We make a big transformation to what? -What do you think, yellow and white? -It's kind of a throwback to the original color, but this is going to have a little kick to it. -A little sparkle, maybe a little pearl in it. But before we can get to that pretty paint we've got to get to sanding. So let's get to it. [ Music ]
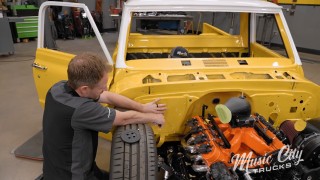
[ sander humming ] -Now we're not taking this truck down to the bare metal. So the preexisting paint, we need to scuff it up. So I'm going to use a 180 on my d/a before we hit it was my high build primer. [ sander humming ] Now I'm going to keep sanding until I see that shine gone from the surface. That lets me know there's enough tooth for the primer to stick. -With Mike busy plugging away on the outside of our cab, I'm going to go ahead and start working on the inside, and I'm going to start here with the jam. Now I've already removed our weatherstripping adhesive. Which you know, if you've ever done, it could be a real pain in the a#$, but I found the best way to do it is with a wire brush and then go ahead and wipe it with a little bit of that specially adhesive remover and it takes a right off. Takes some elbow grease but you get it done. So the way I'm going to tackle this. I'm going to hit the tight spots with a little bit of red scotchbrite and then the longer flat spots I'm going to hit either long block or I'm going to d/a it. All we're trying to do is get some tooth for that primer to stick to. So let's get to it. [ Music ]
[ compressed air hissing ] [ Music ]
Some things I'm good at. Taping and papering is not one of them. -Oh man, you've gotta do your X-pattern on the inside. -I ain't doing no X-pattern. I'm going to do a whatever shape this is pattern on the outside. -Cross it up here. [ Music ]
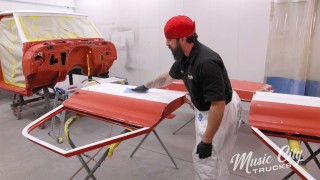
That'll do donkey. That'll do. -So we already hit this with some wax and grease remover. Now I'm just wiping it down with a tack cloth and we'll be ready to shoot. -So the first thing we're going to spray is this high build primer. It's almost like a sprayable filler. It's going to fill in some minor imperfections. Get us a good base to get going. This stuff mixes at a 4 to 1 ratio between the primer itself and the catalyst. Get it mixed up and get it sprayed. -Choose a high build primer that's appropriate for your project's material. Whether it's steel, fiberglass, maybe plastic. When using a polyester high build primer like the one on this project you got to use a large fluid nozzle on your spray gun. In our case the material recommends a 2.0 nozzle or larger. You're basically spraying a milkshake. I'll apply the primer by laying down thin even coats to avoid runs or sags while still filling surface imperfections. Allow each coat to dry fully according to the manufacturer's instructions as drying times vary based on the product and the conditions. We're going to spray three coats to make sure we have full coverage. [ spray gun hissing ] [ Music ]
-With all our parts in our high build primer it's time for my favorite part of it, which is hitting it with the long block. Up next, we share a pair of C-10s that sparked our love for these old trucks.
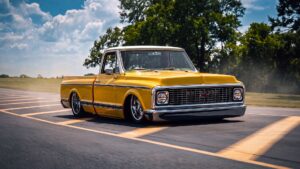
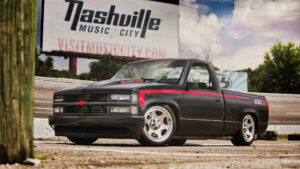
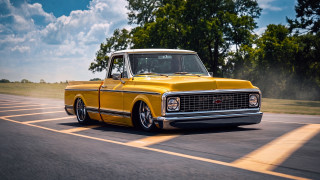
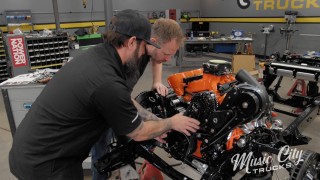
[Anthony] As you can see, we're out of that prep booth and we're back in the shop cause I don't know about you but I'm over sanding. You can probably also see that we got a couple of different C-10s that we want to tell you about. [Mike] So here at Music City Trucks you guys see us working on a lot of cool projects and that passion stems from a love of these trucks on a personal level as these are our personal trucks. Anthony's '65, and my '70 here. So we wanted to take a minute. Kind of bring these in and share some of the details about these projects. -You want to check yours out first? -Yeah, let's take a look around. -Let's see what you got going on with this little peach. -I don't know about you, but growing up, you go to the car shows and hear all the old timers say, I wish I had my first hot rod back. That first car and that kind of stuck with me. So this is my first car, the first one. Driving it to high school. So this year would be 25 years now that I've had this thing. But yeah, the first one I've done everything I could to hold on to that. -Not many people can say they still have their first ride. -So it's been through a lot of different transformations. It started out, when I had it, it had just a small block 350 in it, turbo 350, 3.07 gear in the back. And it did fine driving around to high school and stuff, but then I got that itch to take it to the dragstrip. So I changed it up a little bit. We made it from a column shift to the floor shift automatic. I did some different tires and stuff in the back. It made it more of a drag racing application and it worked really well. Won a lot of races with that. Then life changes, you move around and stuff. So I've changed it to where it's at now. I've got LS3. It's got power steering, air conditioning, bench seat. So now the kids can fit in there. So it's gone through a lot of different stages of life. But I try to keep it cause guys always want to have that first hot rod. -Now I feel like you've got the reliability. You can prop your girls in there and you just go get some ice cream or do whatever you want and now it's gonna make it back. -We love going down to the ice cream shop. But let me show you under the hood here. -What you got under the hood? -So right now all this actually came out of a 2012 Camaro. It was a junk project that I was able to take all of the drivetrain out of. So the engine, transmission, all the wiring harness, everything, it ran outside of the car. So I took all that stuff and put it in here. So I haven't touched the engine. It's all the same internally and that's probably my next step. You're always thinking, hey, what are we going to do next? But maybe a little bit more aggressive cam. Get it to sound a little bit better, but man it's so fun. It's got the variable valve timing. Driving around, whether it's part throttle, full throttle, it's just there. -It's in its happy place. -So we got the six-two in it right now. You know it started out with the 350, the old school small block Chevy with the carburetor, and then I upgraded and went with a 383. I built my own. My first one is a 383 I built for it and that picked it up a lot at the track. But we ended up I won a round of a race. I'd just won second or third round. I was picking up my ticket at the time booth and all of a sudden I hear this knock, knock, knock. So I was like, oh man, this can't be good, right? We get it back and the balancer is doing this number as it's running. I drove my truck to the track. I didn't trailer it that time. So I'm still running. I'm still in the race and I can still make money, but it might hurt it if I stand on the gas one more time. So I just drove it home and pulled the engine out, and the crankshaft on the number one rod journal had started to crack like three quarters away. So that was a used crank from a blower engine. So I think what happened is that blower drive on the front of the crankshaft weakened it and probably cracked it a little bit. You couldn't see it, but once I started thrashing on it it weakened it up. So when the 383 broke crankshaft that's when we swapped it over to the LS platform. -To old reliable. -You know, put the power steering in it. It's got the air conditioning. Went with the cruiser aspect at that point. -I'm sure it'll still roast the tires pretty good. -Oh it's crazy. You just stand on the gas and it goes. Still incorporated the line lock in it as well. So with the kids pull up. Daddy, what are you doing? Just hold on! Rrrrrrrr, take off right there. -Those are the best memories right there. -Every time mommy comes down the road you see those black marks and say, daddy left those marks. -You're gonna be getting in trouble. -But yeah, just functionality, reliability, that's kind of where we're at with the stage of this project right now. Let's take a look at the inside real quick and that's about it with this thing. So on the inside you know the main thing is clean and comfortable. -Two of the most important things. -So when I first got it it had the factory bench seat in it. It was nice. Then I upgraded to bucket seats. Try to get that little sportier feel. Had the floor shifter in it. Now with the kids I went back to the bench seat in there. So we can do cruises, parades, things like that. -I feel like pickup trucks, they need a bench seat. -It just fits it. But then I added the air conditioning to it. Then on the dash we've got the digital dash there. It hooks up to the computer. So all the information comes up to that. -That's a Dakota? -That's a Dakota where you can change all the colors and whatnot. So it looks great. It works, functional. But I tell you what. Yours on the other hand, to the extreme. -The labor of love isn't it. -Some may call it a labor of love, but for Anthony it's just an obsession.
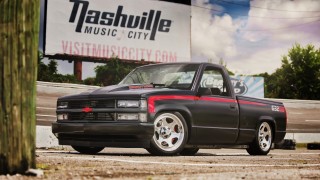
[Mike] So I've seen pictures of this thing, but in person for the first time what are we looking at? [Anthony] Well, this is my '65 C-10. The never ending project, so it seems. We're almost there though. So it's an original short bed, big window truck. I found it at an almond orchard in Visalia, California. Old farm truck. Thing was pretty beat. I got a good deal on it, but it needed everything. So originally I wasn't going to do that. I was just gonna get it on the road. Put a 383 in it. Lower it a little bit and be going to Ink and Iron eight months after I bought it. But yeah as you can see, it's about 12 years now. So it kind of snowballed and ran away from me. But it's almost there and we're almost done. -Well since we're at the front what's underneath the hood. -So it's got an LS3 in it. It was actually built by Bill Meropolis of Meropolis Racing. He lived on my street. So it actually made it very convenient because he had his full machine shop and a dyno at his house on my street. So, it's basically a CT-525 with a different cam, his own custom grind. I told him, when I originally wanted the small block, I want it lumpy. I want it to sound good. He's all, I'll get you this LS3 and I'll make it sound as lumpy or better than a 383 will sound. It made about 600 horsepower on the dyno. That was calibrated. I ended up putting the injection on it. I wanted the reliability and not have to deal with all the jets and everything that comes the carburetors. -Whose inner fenders are these? -So these are from Domo. So these are Dell's fenders. You can order them online. I think he still makes them. -They look so much better than the stock one. The stock one has very rough edges. -I got the Porterbilt hood hinges in there. So I had to get rid of that stuff anyway. They just look funny when you fabricate stuff to clean them up a little bit. So these are just a way cleaner way to go. -And walking up here, I got to watch where I step because it's so low. -It does get low, and that's thanks to up front I got Porterbilt like we're running on our C-10. So it's got one of their version six drop members in it. It works great. Everything's lined up. -So airbag system all around. -It's full Airride. So it's got the E-level like we're going to put on our truck. You know, you set whatever height you want. You have three different presets you can set it to, and then it adjusts on the fly. So you're driving down the road and it's off. It'll adjust and keep the truck level at all times. -It's slick. I mean having a clean engine bay is just top of the page for me on having things that you look at for the truck. -And that was important to me too. I was going to paint it and all that but it's an aluminum LS3. So why cover it up? -And then what about the transmission? -This truck was originally a four speed truck? So it had the high hump in it already and I wanted to keep that because I want to be banging gears in it. And so I hit up Bob Hamlin at Hamlin Motorsports and he built me a TKO-600. Went through it so it'll handle the RPM of this because the earlier ones had issues with handling the high RPM. It's a blast. The interior, I actually just got the seat done. And this was actually our boys up at Auto Customs in Kentucky they just finished this up for me. Gill from Speed and Design did the carpet in it. Who's doing the door panels and the kick panels is Guy Designs out of Texas. So Kevin over there is helping me with that. He does some really nice work. -Now the piece where all the AC ducts. You made that, right? -Yeah, I made that. So I made it out of cardboard, and then I had somebody that had a water jet. He put it in a CAD file, cut it out for me, and I took it back and put it on a finger break. We had a ten foot Chicago break, and I just broke it in that, and then just installed it. -I mean looking at the carpet, the edges, how that all blends together. It's perfect. I mean, there's no overlap, there's no humps, there's no wrinkles. It's definitely show level on what you've done with this truck. -I appreciate that man. -But then as we look at the back of the truck. You know the first thing he's got the bed. It's up so high. I guess that's necessity. When you lower these things, you gotta have that clearance underneath there. When you got that bed up so high how do you work on everything? -Well you just lift this hatch right here. Make it nice and easy. The way I did it here. So I built everything back here. I built the four link. I had a friend that helped me out with the geometry on it, and then I just kind of went for it and, this is what I ended up with. So yeah, my shock towers are pretty high. So I had to raise the bed of the floor to compensate for that. -It's almost 12 or 16 inches. -Yeah, it's up here that's for sure. I only have what, you know, five inches of usable bed, which I'm never going to put anything in this anyway. So it didn't matter to me. It's basically a car at this point. -You've got the tailgate latches moved in over here to the back. -I think these are from Mark-A, which all the trim in it, the trim on the outside, the bed strips, everything was Mar-K. [ Music ] You got rid of the chains originally. They had those chains to hold the tailgate up. So that cleans all the back in the bumper, you know, stand back and look at the bumper. How tight it is to the truck, how nice those lines are. The gaps. It's really clean. I built this truck at my house. It was two car garage, but I had a washer dryer there and all my tools. And this thing sitting in there. So basically it was a one car garage, and I built this whole truck on jack stand. -Did the whole thing. -All the metalwork, everything in that is in that little garage. It was just so much sheet metal work in this. Basically all the sheet metal I had to replace. I did cab corners, I did rockers, tighten all the gaps, did all that stuff, put the bed latches and all that stuff. And then on the bumper I ended up making bumper brackets for it because this is actually a bumper off your year of truck. Off the '67 through '72. The stock bumpers that came on this always look upside down. They just look funny to me. You can flip them. But still I think this is a much cleaner looking bumper on these trucks. -I mean, from front to back this is definitely a showpiece. You know I understand why you don't drive it that much because I wouldn't want to get it dirty after all that labor you put into it and everything. -I'll drive it around my town. I'll drive it to a few shows, but other than that, no. I don't want to keep cleaning it. -Speaking of the cleaning, I think it's time for us to get dirty back over in the prep booth. That thing ain't gonna get done by itself. -You don't want to send it to a body shop? -I wish we could. We've got to get some more primer and sanding and primer and more sanding, and then we'll get to the paint sometime. -I can't wait. We head to the booth seeking pearl perfection.
[Mike] Four, to one, to two, right there. Well all right. We've got all of our body panels ready to paint. Now that process included sanding them down. Hit them with the high build primer. Sanding that down in the 2K primer, and we finally sanded that nice and smooth and we're ready for paint. That step is going to be our sealer, paint, and clear. Now all these chemicals you see here are from House of Kolor. It's always a good idea when you're painting all your chemicals to be from the same company. That provides a good, consistent finish there. Now for our color we're going with the House of Kolor Shimrin-2 system. Now this stuff is really unique and lets you personalize your color touch to your personality. You can mix up many different of these effects packs with their different carrier bases to get that color you're looking for. I think we've got a good combination with our yellow and white you'll have to see later on. So now that we've got this stuff ready to go let's mix up some sealer. Anthony will get it laid down and we'll move over to the paint. -A sealer solves several common issues. It fills in light scratches. It reduces the appearance of minor imperfections, and it improves paint adhesion. This helps prevent the topcoat from running and ensures a smoother, more even finish. -While Anthony's spraying our sealer I'm going to go ahead and mix up our paint. The name of our paint color is called Snowstorm, and it starts out with our S2-02 Carrier Base, the Celestial White. And then the effects pack. Well, this one is striking gold effects. Now the cool thing about this stuff here is when you crack it open it's not really full all the way. So what you do is you can see it's a little bit low there. Then you'll take your effects pack here, shake it up really good. All right, crack our seal. [ Music ] And dump this in here. All of it real nice. Let all of it get out of there. Let me get all that pearl. Okay, you can see kind of that effect there. Now we'll close this back up and put it on the shaker. We get that all mixed up really nice. All right with it mixed up. Let's check it out here. Give it a little stir. Oh you can see that light reflecting on that pearl coming out. That looks good. Now we got to hit it with some reducer and get it in the gun so he can spray it out. Rock 'n roll. -Now that we're in the paint booth, the first thing I'm going to do is make sure my gun is spraying correctly. I like to have a piece of paper on the wall for this, making sure my air pressure, fluid knob, and fan are all working in perfect harmony. I'll adjust each to ensure I have a nice, even spray pattern from top to bottom and side to side. Then we can start laying down our pearl paint. -With the base coat laid down it's time to hit it with the clear coat. Now this stuff mixes a 3 to 1 to 1 ratio. Three parts of our clear, one part catalyst, and one part reducer. With our white laid down it's time to get to the yellow. The name of this one is going to be Galactic Sand, that consists of the Lunar Yellow along with the effects pack right here, this Brass Pearl. So we'll get this opened up and we got to mix this up as well just like the white. -For their pearl paints, House of Kolor recommends a 70 percent overlap, meaning each pass will cover the previous pass by 70 percent, ensuring complete coverage and mitigating the risk of tiger stripes and blotching. Each paint and primer you're spraying will have a different overlap recommendation. So following manufacturer's instruction is critical. Well as you can see, we've peeled all the paper and all the tape off this cab, and man it's looking pretty good. -I think you did a great job laying down that paint. -Not bad for a welder! -It looks great. I think we get this thing outside the sun is going to hit this. Make that pearl really pop. -Oh yeah, once this thing's outside in the sun is going to come to life. -So with a cab, I think this was our most difficult component to paint with the white on the top, the yellow on the inside, the yellow on the outside. So I'm glad we got that knocked out and it looks good. Now we just got to do the rest of the pieces there. -What do you say we get this thing out of the booth and get some more pieces in here? -We'll get those in here. Get them painted. You'll see that next time on. - Music City Trucks.
Show Full Transcript
[Mike] Today on Music City Trucks our C-10 makes a transformation from paw-paw's pickup to custom cruiser. We get Cream Puff into the booth and make way for an explosion of color. [Anthony] Plus, bring in a couple of trucks that have influenced our passion for old Iron. [ Music ]
[Anthony] Well, we're on the road again. [Mike] On the road to the prep booth. -What does that mean? -Well bodywork. -And sanding? -Sanding, and sanding, and more sanding. We just love doing sanding. -Well hey guys, welcome to Music City Trucks. And as you can see, we got our old project Cream Puff in the prep booth today and out of the shop. -So take a look at it. It's the last time you're going to see it in the red and white colors. We make a big transformation to what? -What do you think, yellow and white? -It's kind of a throwback to the original color, but this is going to have a little kick to it. -A little sparkle, maybe a little pearl in it. But before we can get to that pretty paint we've got to get to sanding. So let's get to it. [ Music ]
[ sander humming ] -Now we're not taking this truck down to the bare metal. So the preexisting paint, we need to scuff it up. So I'm going to use a 180 on my d/a before we hit it was my high build primer. [ sander humming ] Now I'm going to keep sanding until I see that shine gone from the surface. That lets me know there's enough tooth for the primer to stick. -With Mike busy plugging away on the outside of our cab, I'm going to go ahead and start working on the inside, and I'm going to start here with the jam. Now I've already removed our weatherstripping adhesive. Which you know, if you've ever done, it could be a real pain in the a#$, but I found the best way to do it is with a wire brush and then go ahead and wipe it with a little bit of that specially adhesive remover and it takes a right off. Takes some elbow grease but you get it done. So the way I'm going to tackle this. I'm going to hit the tight spots with a little bit of red scotchbrite and then the longer flat spots I'm going to hit either long block or I'm going to d/a it. All we're trying to do is get some tooth for that primer to stick to. So let's get to it. [ Music ]
[ compressed air hissing ] [ Music ]
Some things I'm good at. Taping and papering is not one of them. -Oh man, you've gotta do your X-pattern on the inside. -I ain't doing no X-pattern. I'm going to do a whatever shape this is pattern on the outside. -Cross it up here. [ Music ]
That'll do donkey. That'll do. -So we already hit this with some wax and grease remover. Now I'm just wiping it down with a tack cloth and we'll be ready to shoot. -So the first thing we're going to spray is this high build primer. It's almost like a sprayable filler. It's going to fill in some minor imperfections. Get us a good base to get going. This stuff mixes at a 4 to 1 ratio between the primer itself and the catalyst. Get it mixed up and get it sprayed. -Choose a high build primer that's appropriate for your project's material. Whether it's steel, fiberglass, maybe plastic. When using a polyester high build primer like the one on this project you got to use a large fluid nozzle on your spray gun. In our case the material recommends a 2.0 nozzle or larger. You're basically spraying a milkshake. I'll apply the primer by laying down thin even coats to avoid runs or sags while still filling surface imperfections. Allow each coat to dry fully according to the manufacturer's instructions as drying times vary based on the product and the conditions. We're going to spray three coats to make sure we have full coverage. [ spray gun hissing ] [ Music ]
-With all our parts in our high build primer it's time for my favorite part of it, which is hitting it with the long block. Up next, we share a pair of C-10s that sparked our love for these old trucks.
[Anthony] As you can see, we're out of that prep booth and we're back in the shop cause I don't know about you but I'm over sanding. You can probably also see that we got a couple of different C-10s that we want to tell you about. [Mike] So here at Music City Trucks you guys see us working on a lot of cool projects and that passion stems from a love of these trucks on a personal level as these are our personal trucks. Anthony's '65, and my '70 here. So we wanted to take a minute. Kind of bring these in and share some of the details about these projects. -You want to check yours out first? -Yeah, let's take a look around. -Let's see what you got going on with this little peach. -I don't know about you, but growing up, you go to the car shows and hear all the old timers say, I wish I had my first hot rod back. That first car and that kind of stuck with me. So this is my first car, the first one. Driving it to high school. So this year would be 25 years now that I've had this thing. But yeah, the first one I've done everything I could to hold on to that. -Not many people can say they still have their first ride. -So it's been through a lot of different transformations. It started out, when I had it, it had just a small block 350 in it, turbo 350, 3.07 gear in the back. And it did fine driving around to high school and stuff, but then I got that itch to take it to the dragstrip. So I changed it up a little bit. We made it from a column shift to the floor shift automatic. I did some different tires and stuff in the back. It made it more of a drag racing application and it worked really well. Won a lot of races with that. Then life changes, you move around and stuff. So I've changed it to where it's at now. I've got LS3. It's got power steering, air conditioning, bench seat. So now the kids can fit in there. So it's gone through a lot of different stages of life. But I try to keep it cause guys always want to have that first hot rod. -Now I feel like you've got the reliability. You can prop your girls in there and you just go get some ice cream or do whatever you want and now it's gonna make it back. -We love going down to the ice cream shop. But let me show you under the hood here. -What you got under the hood? -So right now all this actually came out of a 2012 Camaro. It was a junk project that I was able to take all of the drivetrain out of. So the engine, transmission, all the wiring harness, everything, it ran outside of the car. So I took all that stuff and put it in here. So I haven't touched the engine. It's all the same internally and that's probably my next step. You're always thinking, hey, what are we going to do next? But maybe a little bit more aggressive cam. Get it to sound a little bit better, but man it's so fun. It's got the variable valve timing. Driving around, whether it's part throttle, full throttle, it's just there. -It's in its happy place. -So we got the six-two in it right now. You know it started out with the 350, the old school small block Chevy with the carburetor, and then I upgraded and went with a 383. I built my own. My first one is a 383 I built for it and that picked it up a lot at the track. But we ended up I won a round of a race. I'd just won second or third round. I was picking up my ticket at the time booth and all of a sudden I hear this knock, knock, knock. So I was like, oh man, this can't be good, right? We get it back and the balancer is doing this number as it's running. I drove my truck to the track. I didn't trailer it that time. So I'm still running. I'm still in the race and I can still make money, but it might hurt it if I stand on the gas one more time. So I just drove it home and pulled the engine out, and the crankshaft on the number one rod journal had started to crack like three quarters away. So that was a used crank from a blower engine. So I think what happened is that blower drive on the front of the crankshaft weakened it and probably cracked it a little bit. You couldn't see it, but once I started thrashing on it it weakened it up. So when the 383 broke crankshaft that's when we swapped it over to the LS platform. -To old reliable. -You know, put the power steering in it. It's got the air conditioning. Went with the cruiser aspect at that point. -I'm sure it'll still roast the tires pretty good. -Oh it's crazy. You just stand on the gas and it goes. Still incorporated the line lock in it as well. So with the kids pull up. Daddy, what are you doing? Just hold on! Rrrrrrrr, take off right there. -Those are the best memories right there. -Every time mommy comes down the road you see those black marks and say, daddy left those marks. -You're gonna be getting in trouble. -But yeah, just functionality, reliability, that's kind of where we're at with the stage of this project right now. Let's take a look at the inside real quick and that's about it with this thing. So on the inside you know the main thing is clean and comfortable. -Two of the most important things. -So when I first got it it had the factory bench seat in it. It was nice. Then I upgraded to bucket seats. Try to get that little sportier feel. Had the floor shifter in it. Now with the kids I went back to the bench seat in there. So we can do cruises, parades, things like that. -I feel like pickup trucks, they need a bench seat. -It just fits it. But then I added the air conditioning to it. Then on the dash we've got the digital dash there. It hooks up to the computer. So all the information comes up to that. -That's a Dakota? -That's a Dakota where you can change all the colors and whatnot. So it looks great. It works, functional. But I tell you what. Yours on the other hand, to the extreme. -The labor of love isn't it. -Some may call it a labor of love, but for Anthony it's just an obsession.
[Mike] So I've seen pictures of this thing, but in person for the first time what are we looking at? [Anthony] Well, this is my '65 C-10. The never ending project, so it seems. We're almost there though. So it's an original short bed, big window truck. I found it at an almond orchard in Visalia, California. Old farm truck. Thing was pretty beat. I got a good deal on it, but it needed everything. So originally I wasn't going to do that. I was just gonna get it on the road. Put a 383 in it. Lower it a little bit and be going to Ink and Iron eight months after I bought it. But yeah as you can see, it's about 12 years now. So it kind of snowballed and ran away from me. But it's almost there and we're almost done. -Well since we're at the front what's underneath the hood. -So it's got an LS3 in it. It was actually built by Bill Meropolis of Meropolis Racing. He lived on my street. So it actually made it very convenient because he had his full machine shop and a dyno at his house on my street. So, it's basically a CT-525 with a different cam, his own custom grind. I told him, when I originally wanted the small block, I want it lumpy. I want it to sound good. He's all, I'll get you this LS3 and I'll make it sound as lumpy or better than a 383 will sound. It made about 600 horsepower on the dyno. That was calibrated. I ended up putting the injection on it. I wanted the reliability and not have to deal with all the jets and everything that comes the carburetors. -Whose inner fenders are these? -So these are from Domo. So these are Dell's fenders. You can order them online. I think he still makes them. -They look so much better than the stock one. The stock one has very rough edges. -I got the Porterbilt hood hinges in there. So I had to get rid of that stuff anyway. They just look funny when you fabricate stuff to clean them up a little bit. So these are just a way cleaner way to go. -And walking up here, I got to watch where I step because it's so low. -It does get low, and that's thanks to up front I got Porterbilt like we're running on our C-10. So it's got one of their version six drop members in it. It works great. Everything's lined up. -So airbag system all around. -It's full Airride. So it's got the E-level like we're going to put on our truck. You know, you set whatever height you want. You have three different presets you can set it to, and then it adjusts on the fly. So you're driving down the road and it's off. It'll adjust and keep the truck level at all times. -It's slick. I mean having a clean engine bay is just top of the page for me on having things that you look at for the truck. -And that was important to me too. I was going to paint it and all that but it's an aluminum LS3. So why cover it up? -And then what about the transmission? -This truck was originally a four speed truck? So it had the high hump in it already and I wanted to keep that because I want to be banging gears in it. And so I hit up Bob Hamlin at Hamlin Motorsports and he built me a TKO-600. Went through it so it'll handle the RPM of this because the earlier ones had issues with handling the high RPM. It's a blast. The interior, I actually just got the seat done. And this was actually our boys up at Auto Customs in Kentucky they just finished this up for me. Gill from Speed and Design did the carpet in it. Who's doing the door panels and the kick panels is Guy Designs out of Texas. So Kevin over there is helping me with that. He does some really nice work. -Now the piece where all the AC ducts. You made that, right? -Yeah, I made that. So I made it out of cardboard, and then I had somebody that had a water jet. He put it in a CAD file, cut it out for me, and I took it back and put it on a finger break. We had a ten foot Chicago break, and I just broke it in that, and then just installed it. -I mean looking at the carpet, the edges, how that all blends together. It's perfect. I mean, there's no overlap, there's no humps, there's no wrinkles. It's definitely show level on what you've done with this truck. -I appreciate that man. -But then as we look at the back of the truck. You know the first thing he's got the bed. It's up so high. I guess that's necessity. When you lower these things, you gotta have that clearance underneath there. When you got that bed up so high how do you work on everything? -Well you just lift this hatch right here. Make it nice and easy. The way I did it here. So I built everything back here. I built the four link. I had a friend that helped me out with the geometry on it, and then I just kind of went for it and, this is what I ended up with. So yeah, my shock towers are pretty high. So I had to raise the bed of the floor to compensate for that. -It's almost 12 or 16 inches. -Yeah, it's up here that's for sure. I only have what, you know, five inches of usable bed, which I'm never going to put anything in this anyway. So it didn't matter to me. It's basically a car at this point. -You've got the tailgate latches moved in over here to the back. -I think these are from Mark-A, which all the trim in it, the trim on the outside, the bed strips, everything was Mar-K. [ Music ] You got rid of the chains originally. They had those chains to hold the tailgate up. So that cleans all the back in the bumper, you know, stand back and look at the bumper. How tight it is to the truck, how nice those lines are. The gaps. It's really clean. I built this truck at my house. It was two car garage, but I had a washer dryer there and all my tools. And this thing sitting in there. So basically it was a one car garage, and I built this whole truck on jack stand. -Did the whole thing. -All the metalwork, everything in that is in that little garage. It was just so much sheet metal work in this. Basically all the sheet metal I had to replace. I did cab corners, I did rockers, tighten all the gaps, did all that stuff, put the bed latches and all that stuff. And then on the bumper I ended up making bumper brackets for it because this is actually a bumper off your year of truck. Off the '67 through '72. The stock bumpers that came on this always look upside down. They just look funny to me. You can flip them. But still I think this is a much cleaner looking bumper on these trucks. -I mean, from front to back this is definitely a showpiece. You know I understand why you don't drive it that much because I wouldn't want to get it dirty after all that labor you put into it and everything. -I'll drive it around my town. I'll drive it to a few shows, but other than that, no. I don't want to keep cleaning it. -Speaking of the cleaning, I think it's time for us to get dirty back over in the prep booth. That thing ain't gonna get done by itself. -You don't want to send it to a body shop? -I wish we could. We've got to get some more primer and sanding and primer and more sanding, and then we'll get to the paint sometime. -I can't wait. We head to the booth seeking pearl perfection.
[Mike] Four, to one, to two, right there. Well all right. We've got all of our body panels ready to paint. Now that process included sanding them down. Hit them with the high build primer. Sanding that down in the 2K primer, and we finally sanded that nice and smooth and we're ready for paint. That step is going to be our sealer, paint, and clear. Now all these chemicals you see here are from House of Kolor. It's always a good idea when you're painting all your chemicals to be from the same company. That provides a good, consistent finish there. Now for our color we're going with the House of Kolor Shimrin-2 system. Now this stuff is really unique and lets you personalize your color touch to your personality. You can mix up many different of these effects packs with their different carrier bases to get that color you're looking for. I think we've got a good combination with our yellow and white you'll have to see later on. So now that we've got this stuff ready to go let's mix up some sealer. Anthony will get it laid down and we'll move over to the paint. -A sealer solves several common issues. It fills in light scratches. It reduces the appearance of minor imperfections, and it improves paint adhesion. This helps prevent the topcoat from running and ensures a smoother, more even finish. -While Anthony's spraying our sealer I'm going to go ahead and mix up our paint. The name of our paint color is called Snowstorm, and it starts out with our S2-02 Carrier Base, the Celestial White. And then the effects pack. Well, this one is striking gold effects. Now the cool thing about this stuff here is when you crack it open it's not really full all the way. So what you do is you can see it's a little bit low there. Then you'll take your effects pack here, shake it up really good. All right, crack our seal. [ Music ] And dump this in here. All of it real nice. Let all of it get out of there. Let me get all that pearl. Okay, you can see kind of that effect there. Now we'll close this back up and put it on the shaker. We get that all mixed up really nice. All right with it mixed up. Let's check it out here. Give it a little stir. Oh you can see that light reflecting on that pearl coming out. That looks good. Now we got to hit it with some reducer and get it in the gun so he can spray it out. Rock 'n roll. -Now that we're in the paint booth, the first thing I'm going to do is make sure my gun is spraying correctly. I like to have a piece of paper on the wall for this, making sure my air pressure, fluid knob, and fan are all working in perfect harmony. I'll adjust each to ensure I have a nice, even spray pattern from top to bottom and side to side. Then we can start laying down our pearl paint. -With the base coat laid down it's time to hit it with the clear coat. Now this stuff mixes a 3 to 1 to 1 ratio. Three parts of our clear, one part catalyst, and one part reducer. With our white laid down it's time to get to the yellow. The name of this one is going to be Galactic Sand, that consists of the Lunar Yellow along with the effects pack right here, this Brass Pearl. So we'll get this opened up and we got to mix this up as well just like the white. -For their pearl paints, House of Kolor recommends a 70 percent overlap, meaning each pass will cover the previous pass by 70 percent, ensuring complete coverage and mitigating the risk of tiger stripes and blotching. Each paint and primer you're spraying will have a different overlap recommendation. So following manufacturer's instruction is critical. Well as you can see, we've peeled all the paper and all the tape off this cab, and man it's looking pretty good. -I think you did a great job laying down that paint. -Not bad for a welder! -It looks great. I think we get this thing outside the sun is going to hit this. Make that pearl really pop. -Oh yeah, once this thing's outside in the sun is going to come to life. -So with a cab, I think this was our most difficult component to paint with the white on the top, the yellow on the inside, the yellow on the outside. So I'm glad we got that knocked out and it looks good. Now we just got to do the rest of the pieces there. -What do you say we get this thing out of the booth and get some more pieces in here? -We'll get those in here. Get them painted. You'll see that next time on. - Music City Trucks.