Video Transcript
[Anthony] You're
watching Powernation!
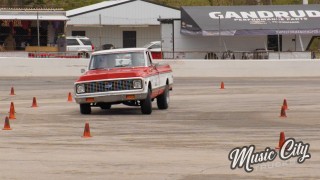
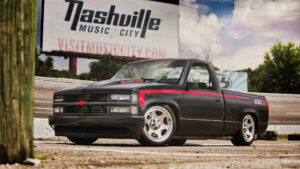
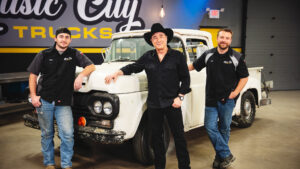
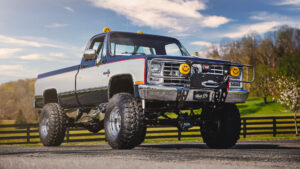
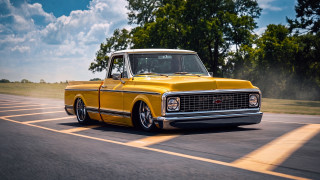
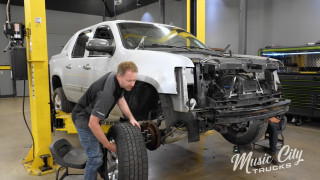
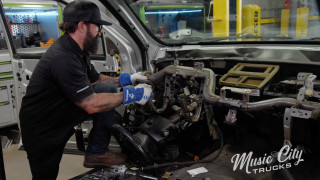
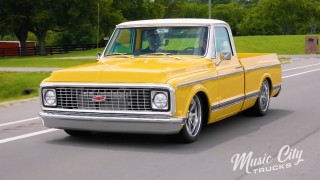
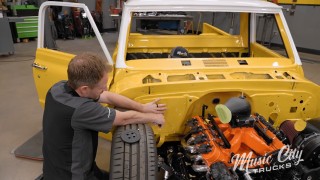
[Anthony] Today on Music City Trucks our super Cheyenne is in the shop and we start tearing her apart making way for new suspension components, getting our C-10 one step closer to the ground. We'll also show you a new metal fabricating tool with a do it all welder. [ Music ] [Mike] Hey guys, welcome to Music City Trucks. Today we got our creampuff of a C-10 back in the shop. If you remember last time we got the inside all stripped apart and off to the interior shop. Today we're focusing on the outside and get it tore apart before we can get some cool stuff bolted on. [Anthony] Some of the coolest stuff that's going on this truck come from a little company called PB Fab. They're one of the o-gs in the C-10 air ride game and they sent us over one of their front drop members along with their rear drop member and everything we need in between to get this truck sitting and handling right. Before we can do that we've got to get this thing ripped apart. Where do you want to start? [Mike] Let's get the hood off. [Anthony] Alright. See what we got here. [ ratchets clicking ] [Mike] Hey yo, don't scratch the paint! [ ratchets clicking ] [Mike] Is this what they mean when they say use your head? [Anthony] Yes, it is. Where you at? [Mike] Almost there. [Anthony] Nice work. Where to hoss? [Mike] First flat, down towards you. [ Music ]
[ ratchet clicking ] [Mike] We need more power. [Anthony] I need an extension. Look at you using your head. [ impact driver humming ] [ Music ]
[Mike] He might want that one. [Anthony] I'll take that. [ Music ]
[ impact driver humming ] [Mike] Lets loosen everybody first. [Anthony] How's it going over here? [Mike] Just trying to get the bumper off.
[ impact driver humming ] [ Music ] [Anthony] Coming out. Very nice. [ Music ] [Mike] I don't know about you but I think they intentionally designed this radiator as a tool and parts catcher. [Anthony] It's a great socket holder. [Mike] Put your tools right there! [Anthony] There's no better spot for them. [Mike] For some reason they advertise them as radiators though. I would say part holder. [Anthony] Water filled holder. [ Music ] [ impact driver humming ] [Anthony] Do me a favor. Spin that bottom one. [ impact driver humming ] [Anthony] Yep! [ Music ]
Watch the clip, watch the clip! [Mike] Got it? And away she goes. [ impact driver humming ]
Oh yeah. [Anthony] You got your mop? [Mike] Actually it's isle 72. Draining coolant's always messy. No way around it. I guess if there wasn't any in it. [Anthony] We got nuts on some and some that are captive. [Mike] We'll get the battery off here. [ Music ]
[Anthony] Third time's a charm buddy. [ Music ]
[ impact driver humming ] [Mike] Ready? [Anthony] Sure. [ Music ] [ impact driver humming ] [Mike] Next we've got to crack open our a/c system to get the radiator support off. We've already evacuated the system. There's no refrigerant left in it. It was empty to begin with. So I put a little bit of vacuum. So I'm gonna spray some Deep Creep on these fittings to help loosen them up so we can break those loose. [ Music ]
Oh yeah! Break it right loose. [ Music ] That one and there's that one. Now the radiator support. [Anthony] Off she goes? [Mike] Yep. Yahoo! [ Music ] [Anthony] How you doing over there? [Mike] Just busting some nuts off here. [Anthony] Up next we put our C-10 to bed. [Mike] Beautiful.
[Anthony] This puppy's making two man power at the wheels. [Mike] Get it up on the lift and get that bed off there. [ Music ]
[ metal clanging ] [ Music ]
[Anthony] Going up. [ lift – mechanical humming ] [ Music ]
Before we go ahead and knock these nuts off this bed we're gonna spray a little bit of this SeaFoam Deep Creep. Nice little spritz here and a little spritz there. It's gonna really help get this stuff off. We are Deep Creeped and we're ready to rock 'n roll. [Mike] Of course she's gonna spin. [Anthony] Don't let it. One down. Three to go. [ Music ]
Whoops, I'll leave those there. How you doing over there? [Mike] Just busting some nuts off here. [ Anthony laughing ] [ impact driver humming ] [Mike] They need these bolts to be about a mile longer. [Anthony] I don't know why they didn't make them 15 inches. [Mike] Not only could you double nut these you could triple or quadruple nut them. [Anthony] Safety first. [ impact driver humming ] [ Music ]
Very slowly going down. [Mike] Bingo! [Anthony] Ready for some separation? [Mike] Yeah, get it up there. [Anthony] I'm gonna try not to put it through the back glass. No promises. [ crane - mechanical humming ] How we looking on wire situation? [Mike] You're all clear. [Anthony] You want to go back? [Mike] Yep! [ Music ]
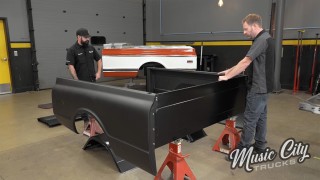
[Anthony] Forgot we got a long bed this time. [Mike] And that's all the hoist is gonna give us. [Anthony] Are we clear? [Mike] Not of the bumper. Keep going. There you go. We've landed. [Anthony] Now that we got the bed off our old crème puff C-10 we can finally see what we've got to work with here. Overall it looks pretty good. There is some rough welds there on that exhaust system. [Mike] There's custom exhaust and this is just bad. It sticks together but we're gonna get rid of all that. [Anthony] In the garbage it goes. What do you say we get this cab off first? Let's do it. Having multiple welders is a thing of the past. We'll show you a new multipurpose option for your shop.
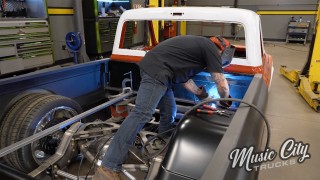
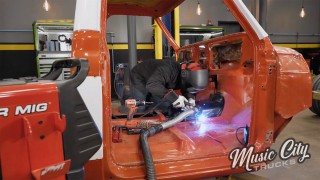
[ welder buzzing ] [Anthony] Hey guys, you can see we're burning some metal over here today. We've got a familiar face in the shop. We have Gabby from Forney Industries and she has an awesome new machine she wants to show us. [Gabby] So we have our 190 AC/DC MP machine here. As you can see we're welding some aluminum. So this the first multi process machine that Forney has come out with that has aluminum tig welding. So AC tig welding. It's really nice to have that versatility. A lot of times what happens is you buy a welder. You'll buy this MP machine. You'll hope you can do all the processes and all the materials and you find out that you can't necessarily tig weld aluminum. You may be able to mig weld aluminum but tig welding aluminum is that weak spot in most of those multi process machines. With this machine we do offer that. We also offer quite a few different sub processes to that or more advanced settings. The more advanced settings on the tig side. For our AC we do have our AC frequency that we can adjust as well as our balance. That can help with our cleaning action and also the penetration that we're getting on our weld. Over here we have our settings for pulse and our pulse percent on. Our pulse is gonna be set to zero when it's off. If we would like to add pulse we can turn this up. What the pulse setting is gonna do is help with our heat input. It's going to give us a little bit more lead way for warping and different things like that, thinner materials. It allows us to have a little more control over that stuff. [Anthony] You normally don't see pulse in a machine like this. [Gabby] Typically you're just gonna have the standard settings. You're not gonna be able to adjust anything. It is nice to have those options there for sure. And of course it does DC tig as well. High frequency DC lift tig. If you need to not use the high frequency because you're working on something. A car that has computer systems and things like that in it you don't want to fry any of those modules. So you want to make sure you remove that from your settings. AC tig only high frequency. You can't lift arc AC tig because the material gets contaminated, your tungsten gets contaminated, and it causes all kinds of problems. [Anthony] You don't want that. [Gabby] As you can see here on the front it's super easy to switch over from process to process. In this instance we're in AC tig right now. If we wanted to switch over and weld some steel or stainless we just click this center button here. Move it down into DC tig HF or lift. Then we have our stick processes. So we have our amperage control on our stick settings and then we move into our mig side of this machine. On this unit we have a manual mig setting. If you want to set your voltage and your wire feed speed based on the knowledge that you have of using other machines or maybe you want to manipulate those settings a little bit more you can come in and set those on manual mig. What's really cool about this machine is we made it easy. So we have these cheater settings. They're called our True Set Mig. True Set Mig is kinda cool cause you're gonna come in here and choose what diameter wire you're using. So whether it's 024, 030, or 035 each one's gonna have a couple of limitations due to the size of wire. So it's going to limit what your ability is. If you see a setting that's not on here it's probably because we don't recommend it. If you want to manipulate the machine you go back into that manual mig and you set it up how you want to. For instance here we have our True Set. We'll move into 030. 030 is a little bit more commonly used. Then we have our settings. We have solid 75/25. We have solid 90/10. So this is our gas mixture, 90 percent Argon, 10 percent CO-2. We have flux core. That turns our solenoid off inside this machine so we have no gas flow. Stainless steel tri mix, stainless steel 98/2. When you actually plug in a spool gun this Amphenol connector it automatically tells the machine hey, we're gonna weld some aluminum and it gives you your aluminum settings. [Anthony] This thing does everything doesn't it? [Gabby] It's pretty cool. Once you choose your wire then you can go in here and choose the thickness of material. Say we're gonna be welding on 3/16ths material. Say we don't like this base setting. We weld and we don't like it. It's kinda cold. Crank it up plus nine. Now it's a little warmer. Maybe it's too hot. We can go negative nine. If we still don't like that setting and want it to be a little hotter or colder we can go to 7/32nds or we can go to 5/32nds. [Anthony] So on the voltage side of things this thing run on 120 and 240? [Gabby] It does. It's a dual voltage machine. So it runs on 120 and 240. On the back side of the unit it has a data plate, which is going to tell you the input voltage, output voltage, amperage, everything you need to know as well as your duty cycle. [Anthony] Well you guys really thought about everything in this machine. The days of having multiple machines in your shop I think they're long gone. All you need is one of these in the shop and you're good to go. Gabby appreciate you coming in the shop today. I hope to see you soon. [Gabby] Always a pleasure, thank you. [Anthony] Coming up we'll install our new front suspension getting our Chevy in the weeds.
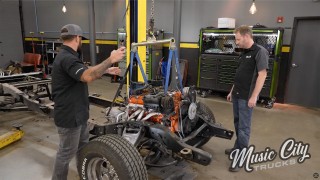
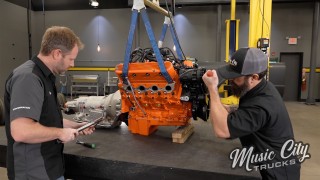
[Mike] You know the guys that built this old exhaust they could use a tip or two from Gabby on their next project. [Anthony] That's the truth. Well we got the cab off, got the driveshaft out. What do you say we yank this thing out? [Mike] Let's go! [ crane – mechanical humming ] [Anthony] Look at that. [Mike] Watch your step. [ Music ]
[ liquid sloshing ]
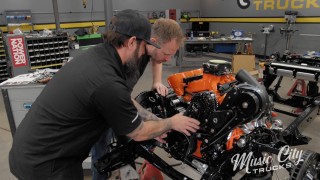
[Anthony] Alright! [ Music ] [Mike] Glad I put that pig mat down there! [ guys laughing ] With our powertrain plucked and more of a mess on the floor it's time to get this thing stripped down further. [Anthony] The beauty of our portable drop member over there is we can yank this whole crossmember out in pretty much one assembly. It's gonna make our lives a little bit easier. What do you say we get to it? [ impact driver humming ] [ Music ]
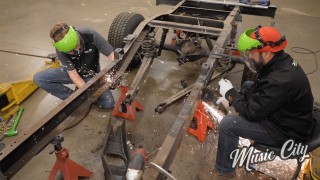
[Mike] Bingo! Got it! [Anthony] It's a wheelie machine now. Out with the old. [Mike] In with the new. With our old suspension stuff out of the way now we've got to prep the frame for our new pieces. We'll finish it off with a little POR-15 to cover the areas that aren't gonna see powder coat. [Anthony] Now that we've got that front end yanked out of our frame we can start installing our drop member. Before we did that we went ahead and sprayed everything that's gonna get sandwiched between other pieces of metal with some POR-15. That way we're not gonna have to deal with any rust after we get this thing powder coated. First step we're gonna do is install this upper half. First things first, we're gonna go ahead and line up these three holes here with our top hat piece. They've already got holes in it. We're gonna get it like that. Knock it over with a hammer. [ hammer banging ] And we're gonna throw a couple of bolts in it to hold it in place.
Now we got those in place what we're gonna have to do is use this as a template and we're gonna drill a couple of seven-sixteenths holes where there isn't any in the frame. We may have to open up a couple more on the side as well but we won't know that until we get there. Let's go ahead and get these drilled up. [Mike] Another cool observation you can see here. These points here, that's where the factory upper control arm mounted and now it's gonna mount up here. So that difference there shows you how much it's gonna lower this frame and help our stance. [Anthony] Gonna get nice and low. [Mike] Now we'll get our additional holes drilled. [ drill humming ] [Anthony] You ready to slap the bad boy up in here? [Mike] Yep. Get our drop member bolted up to those plates. [Anthony] How do we do that again? [Mike] Take your little bolt there to the left. [Anthony] Short inch and a quarter in the middle first. [Mike] Now torque down the middle one to 65 foot pounds. [Anthony] I'll grab a torque wrench. Alrighty. [Mike] You ain't gonna do mine? [Anthony] I think you got it. Now we're leaving these loose cause there's gonna be a plate that slides up underneath these and sandwiches. There it is. Up next we'll get the bag mounts on with our inch and a quarter by seven-sixteenths bolts. Now since we're getting this frame powder coated we're not gonna put the ny-locs on at this point. We're gonna save that until after it's powder coated. That way when it goes through the oven we're not baking the ny-loc off. [Mike] One inner truss coming up. [Anthony] Very nice. Next up we've got our inner truss support. It goes right here and then you've got one bolt that's gonna go through the motor mount as well. [Mike singing] If I had a million dollars. [Anthony] Now that we have all our bolts in and they're loose right now we can go ahead and start tightening them. Now Porterbuilt wants you to do it in a certain order, and that order is we'll go ahead and hit these four first, move to the upper hat, get these eight, and then we'll move to the drop member and get those last two that we left loose. [Mike] About time. [ impact driver humming ] [ Music ]
[ torque wrench clicking ] [Anthony] So we got our drop member in. It's all torqued and ready to rip. We got our bushings pressed into our control arms. Got our lower ball joint in and got our upper ball joint. We're gonna go ahead and get these installed so we can get our spindles on and then move on to the brakes. [Mike] For these spindles we're going with Wilwood's two and a half drop Pro Spindle. These things are super trick. [Anthony] They really are. Those are nice! [Mike] Now this hub assembly is what makes this thing really trick cause it steps into the modern age as most newer cars have something like this. These will help with our stance and steering geometry and allow us to mount our modern brake system. [Anthony] Alright, 100 foot pound. [Mike] To top off those spindles we got these super nice brake kit from EBC. This is their Apollo Series and this one is a 15-inch diameter brake rotor. That's gonna give us a lot more leverage than those stock brake rotors there. Gonna give us a real nice brake system. Gonna get this lug nut on and get this rotor flush with the hub. Then we can get our brake caliper here. This is also from EBC. This matches this kit. This is a six piston caliper and it's filled with their Blue Stuff NDX pads. [ Music ]
The bolts and they're ready to go. Well for mocking up the front suspension, the brakes, I think that's about everything we've got. We do have an upper shock mount we've gotta attach over here on the frame. We've got the sway bar to attach up front. Then all that stuff will come apart and we'll get it painted. I don't know about you but this was pretty easy. [Anthony] I mean PB Fab, their stuff is top notch. They've been around this game a very long time and it shows with this product. It doesn't get much better than this. [Mike] Super easy, good instructions, all the hardware, everything we need. That's it for the front. We've got to tackle the back but that'll be next time on Music City Trucks. [Anthony] See y'all then. [Mike] This thing's pretty cool. They even inscribed Powernation Chevy C-10 on the hub. [Anthony] Where's that? [Mike] Right on the face of the hub. [Anthony] That's pretty cool. Glad you noticed that cause I wouldn't have.
Show Full Transcript
[Anthony] Today on Music City Trucks our super Cheyenne is in the shop and we start tearing her apart making way for new suspension components, getting our C-10 one step closer to the ground. We'll also show you a new metal fabricating tool with a do it all welder. [ Music ] [Mike] Hey guys, welcome to Music City Trucks. Today we got our creampuff of a C-10 back in the shop. If you remember last time we got the inside all stripped apart and off to the interior shop. Today we're focusing on the outside and get it tore apart before we can get some cool stuff bolted on. [Anthony] Some of the coolest stuff that's going on this truck come from a little company called PB Fab. They're one of the o-gs in the C-10 air ride game and they sent us over one of their front drop members along with their rear drop member and everything we need in between to get this truck sitting and handling right. Before we can do that we've got to get this thing ripped apart. Where do you want to start? [Mike] Let's get the hood off. [Anthony] Alright. See what we got here. [ ratchets clicking ] [Mike] Hey yo, don't scratch the paint! [ ratchets clicking ] [Mike] Is this what they mean when they say use your head? [Anthony] Yes, it is. Where you at? [Mike] Almost there. [Anthony] Nice work. Where to hoss? [Mike] First flat, down towards you. [ Music ]
[ ratchet clicking ] [Mike] We need more power. [Anthony] I need an extension. Look at you using your head. [ impact driver humming ] [ Music ]
[Mike] He might want that one. [Anthony] I'll take that. [ Music ]
[ impact driver humming ] [Mike] Lets loosen everybody first. [Anthony] How's it going over here? [Mike] Just trying to get the bumper off.
[ impact driver humming ] [ Music ] [Anthony] Coming out. Very nice. [ Music ] [Mike] I don't know about you but I think they intentionally designed this radiator as a tool and parts catcher. [Anthony] It's a great socket holder. [Mike] Put your tools right there! [Anthony] There's no better spot for them. [Mike] For some reason they advertise them as radiators though. I would say part holder. [Anthony] Water filled holder. [ Music ] [ impact driver humming ] [Anthony] Do me a favor. Spin that bottom one. [ impact driver humming ] [Anthony] Yep! [ Music ]
Watch the clip, watch the clip! [Mike] Got it? And away she goes. [ impact driver humming ]
Oh yeah. [Anthony] You got your mop? [Mike] Actually it's isle 72. Draining coolant's always messy. No way around it. I guess if there wasn't any in it. [Anthony] We got nuts on some and some that are captive. [Mike] We'll get the battery off here. [ Music ]
[Anthony] Third time's a charm buddy. [ Music ]
[ impact driver humming ] [Mike] Ready? [Anthony] Sure. [ Music ] [ impact driver humming ] [Mike] Next we've got to crack open our a/c system to get the radiator support off. We've already evacuated the system. There's no refrigerant left in it. It was empty to begin with. So I put a little bit of vacuum. So I'm gonna spray some Deep Creep on these fittings to help loosen them up so we can break those loose. [ Music ]
Oh yeah! Break it right loose. [ Music ] That one and there's that one. Now the radiator support. [Anthony] Off she goes? [Mike] Yep. Yahoo! [ Music ] [Anthony] How you doing over there? [Mike] Just busting some nuts off here. [Anthony] Up next we put our C-10 to bed. [Mike] Beautiful.
[Anthony] This puppy's making two man power at the wheels. [Mike] Get it up on the lift and get that bed off there. [ Music ]
[ metal clanging ] [ Music ]
[Anthony] Going up. [ lift – mechanical humming ] [ Music ]
Before we go ahead and knock these nuts off this bed we're gonna spray a little bit of this SeaFoam Deep Creep. Nice little spritz here and a little spritz there. It's gonna really help get this stuff off. We are Deep Creeped and we're ready to rock 'n roll. [Mike] Of course she's gonna spin. [Anthony] Don't let it. One down. Three to go. [ Music ]
Whoops, I'll leave those there. How you doing over there? [Mike] Just busting some nuts off here. [ Anthony laughing ] [ impact driver humming ] [Mike] They need these bolts to be about a mile longer. [Anthony] I don't know why they didn't make them 15 inches. [Mike] Not only could you double nut these you could triple or quadruple nut them. [Anthony] Safety first. [ impact driver humming ] [ Music ]
Very slowly going down. [Mike] Bingo! [Anthony] Ready for some separation? [Mike] Yeah, get it up there. [Anthony] I'm gonna try not to put it through the back glass. No promises. [ crane - mechanical humming ] How we looking on wire situation? [Mike] You're all clear. [Anthony] You want to go back? [Mike] Yep! [ Music ]
[Anthony] Forgot we got a long bed this time. [Mike] And that's all the hoist is gonna give us. [Anthony] Are we clear? [Mike] Not of the bumper. Keep going. There you go. We've landed. [Anthony] Now that we got the bed off our old crème puff C-10 we can finally see what we've got to work with here. Overall it looks pretty good. There is some rough welds there on that exhaust system. [Mike] There's custom exhaust and this is just bad. It sticks together but we're gonna get rid of all that. [Anthony] In the garbage it goes. What do you say we get this cab off first? Let's do it. Having multiple welders is a thing of the past. We'll show you a new multipurpose option for your shop.
[ welder buzzing ] [Anthony] Hey guys, you can see we're burning some metal over here today. We've got a familiar face in the shop. We have Gabby from Forney Industries and she has an awesome new machine she wants to show us. [Gabby] So we have our 190 AC/DC MP machine here. As you can see we're welding some aluminum. So this the first multi process machine that Forney has come out with that has aluminum tig welding. So AC tig welding. It's really nice to have that versatility. A lot of times what happens is you buy a welder. You'll buy this MP machine. You'll hope you can do all the processes and all the materials and you find out that you can't necessarily tig weld aluminum. You may be able to mig weld aluminum but tig welding aluminum is that weak spot in most of those multi process machines. With this machine we do offer that. We also offer quite a few different sub processes to that or more advanced settings. The more advanced settings on the tig side. For our AC we do have our AC frequency that we can adjust as well as our balance. That can help with our cleaning action and also the penetration that we're getting on our weld. Over here we have our settings for pulse and our pulse percent on. Our pulse is gonna be set to zero when it's off. If we would like to add pulse we can turn this up. What the pulse setting is gonna do is help with our heat input. It's going to give us a little bit more lead way for warping and different things like that, thinner materials. It allows us to have a little more control over that stuff. [Anthony] You normally don't see pulse in a machine like this. [Gabby] Typically you're just gonna have the standard settings. You're not gonna be able to adjust anything. It is nice to have those options there for sure. And of course it does DC tig as well. High frequency DC lift tig. If you need to not use the high frequency because you're working on something. A car that has computer systems and things like that in it you don't want to fry any of those modules. So you want to make sure you remove that from your settings. AC tig only high frequency. You can't lift arc AC tig because the material gets contaminated, your tungsten gets contaminated, and it causes all kinds of problems. [Anthony] You don't want that. [Gabby] As you can see here on the front it's super easy to switch over from process to process. In this instance we're in AC tig right now. If we wanted to switch over and weld some steel or stainless we just click this center button here. Move it down into DC tig HF or lift. Then we have our stick processes. So we have our amperage control on our stick settings and then we move into our mig side of this machine. On this unit we have a manual mig setting. If you want to set your voltage and your wire feed speed based on the knowledge that you have of using other machines or maybe you want to manipulate those settings a little bit more you can come in and set those on manual mig. What's really cool about this machine is we made it easy. So we have these cheater settings. They're called our True Set Mig. True Set Mig is kinda cool cause you're gonna come in here and choose what diameter wire you're using. So whether it's 024, 030, or 035 each one's gonna have a couple of limitations due to the size of wire. So it's going to limit what your ability is. If you see a setting that's not on here it's probably because we don't recommend it. If you want to manipulate the machine you go back into that manual mig and you set it up how you want to. For instance here we have our True Set. We'll move into 030. 030 is a little bit more commonly used. Then we have our settings. We have solid 75/25. We have solid 90/10. So this is our gas mixture, 90 percent Argon, 10 percent CO-2. We have flux core. That turns our solenoid off inside this machine so we have no gas flow. Stainless steel tri mix, stainless steel 98/2. When you actually plug in a spool gun this Amphenol connector it automatically tells the machine hey, we're gonna weld some aluminum and it gives you your aluminum settings. [Anthony] This thing does everything doesn't it? [Gabby] It's pretty cool. Once you choose your wire then you can go in here and choose the thickness of material. Say we're gonna be welding on 3/16ths material. Say we don't like this base setting. We weld and we don't like it. It's kinda cold. Crank it up plus nine. Now it's a little warmer. Maybe it's too hot. We can go negative nine. If we still don't like that setting and want it to be a little hotter or colder we can go to 7/32nds or we can go to 5/32nds. [Anthony] So on the voltage side of things this thing run on 120 and 240? [Gabby] It does. It's a dual voltage machine. So it runs on 120 and 240. On the back side of the unit it has a data plate, which is going to tell you the input voltage, output voltage, amperage, everything you need to know as well as your duty cycle. [Anthony] Well you guys really thought about everything in this machine. The days of having multiple machines in your shop I think they're long gone. All you need is one of these in the shop and you're good to go. Gabby appreciate you coming in the shop today. I hope to see you soon. [Gabby] Always a pleasure, thank you. [Anthony] Coming up we'll install our new front suspension getting our Chevy in the weeds.
[Mike] You know the guys that built this old exhaust they could use a tip or two from Gabby on their next project. [Anthony] That's the truth. Well we got the cab off, got the driveshaft out. What do you say we yank this thing out? [Mike] Let's go! [ crane – mechanical humming ] [Anthony] Look at that. [Mike] Watch your step. [ Music ]
[ liquid sloshing ]
[Anthony] Alright! [ Music ] [Mike] Glad I put that pig mat down there! [ guys laughing ] With our powertrain plucked and more of a mess on the floor it's time to get this thing stripped down further. [Anthony] The beauty of our portable drop member over there is we can yank this whole crossmember out in pretty much one assembly. It's gonna make our lives a little bit easier. What do you say we get to it? [ impact driver humming ] [ Music ]
[Mike] Bingo! Got it! [Anthony] It's a wheelie machine now. Out with the old. [Mike] In with the new. With our old suspension stuff out of the way now we've got to prep the frame for our new pieces. We'll finish it off with a little POR-15 to cover the areas that aren't gonna see powder coat. [Anthony] Now that we've got that front end yanked out of our frame we can start installing our drop member. Before we did that we went ahead and sprayed everything that's gonna get sandwiched between other pieces of metal with some POR-15. That way we're not gonna have to deal with any rust after we get this thing powder coated. First step we're gonna do is install this upper half. First things first, we're gonna go ahead and line up these three holes here with our top hat piece. They've already got holes in it. We're gonna get it like that. Knock it over with a hammer. [ hammer banging ] And we're gonna throw a couple of bolts in it to hold it in place.
Now we got those in place what we're gonna have to do is use this as a template and we're gonna drill a couple of seven-sixteenths holes where there isn't any in the frame. We may have to open up a couple more on the side as well but we won't know that until we get there. Let's go ahead and get these drilled up. [Mike] Another cool observation you can see here. These points here, that's where the factory upper control arm mounted and now it's gonna mount up here. So that difference there shows you how much it's gonna lower this frame and help our stance. [Anthony] Gonna get nice and low. [Mike] Now we'll get our additional holes drilled. [ drill humming ] [Anthony] You ready to slap the bad boy up in here? [Mike] Yep. Get our drop member bolted up to those plates. [Anthony] How do we do that again? [Mike] Take your little bolt there to the left. [Anthony] Short inch and a quarter in the middle first. [Mike] Now torque down the middle one to 65 foot pounds. [Anthony] I'll grab a torque wrench. Alrighty. [Mike] You ain't gonna do mine? [Anthony] I think you got it. Now we're leaving these loose cause there's gonna be a plate that slides up underneath these and sandwiches. There it is. Up next we'll get the bag mounts on with our inch and a quarter by seven-sixteenths bolts. Now since we're getting this frame powder coated we're not gonna put the ny-locs on at this point. We're gonna save that until after it's powder coated. That way when it goes through the oven we're not baking the ny-loc off. [Mike] One inner truss coming up. [Anthony] Very nice. Next up we've got our inner truss support. It goes right here and then you've got one bolt that's gonna go through the motor mount as well. [Mike singing] If I had a million dollars. [Anthony] Now that we have all our bolts in and they're loose right now we can go ahead and start tightening them. Now Porterbuilt wants you to do it in a certain order, and that order is we'll go ahead and hit these four first, move to the upper hat, get these eight, and then we'll move to the drop member and get those last two that we left loose. [Mike] About time. [ impact driver humming ] [ Music ]
[ torque wrench clicking ] [Anthony] So we got our drop member in. It's all torqued and ready to rip. We got our bushings pressed into our control arms. Got our lower ball joint in and got our upper ball joint. We're gonna go ahead and get these installed so we can get our spindles on and then move on to the brakes. [Mike] For these spindles we're going with Wilwood's two and a half drop Pro Spindle. These things are super trick. [Anthony] They really are. Those are nice! [Mike] Now this hub assembly is what makes this thing really trick cause it steps into the modern age as most newer cars have something like this. These will help with our stance and steering geometry and allow us to mount our modern brake system. [Anthony] Alright, 100 foot pound. [Mike] To top off those spindles we got these super nice brake kit from EBC. This is their Apollo Series and this one is a 15-inch diameter brake rotor. That's gonna give us a lot more leverage than those stock brake rotors there. Gonna give us a real nice brake system. Gonna get this lug nut on and get this rotor flush with the hub. Then we can get our brake caliper here. This is also from EBC. This matches this kit. This is a six piston caliper and it's filled with their Blue Stuff NDX pads. [ Music ]
The bolts and they're ready to go. Well for mocking up the front suspension, the brakes, I think that's about everything we've got. We do have an upper shock mount we've gotta attach over here on the frame. We've got the sway bar to attach up front. Then all that stuff will come apart and we'll get it painted. I don't know about you but this was pretty easy. [Anthony] I mean PB Fab, their stuff is top notch. They've been around this game a very long time and it shows with this product. It doesn't get much better than this. [Mike] Super easy, good instructions, all the hardware, everything we need. That's it for the front. We've got to tackle the back but that'll be next time on Music City Trucks. [Anthony] See y'all then. [Mike] This thing's pretty cool. They even inscribed Powernation Chevy C-10 on the hub. [Anthony] Where's that? [Mike] Right on the face of the hub. [Anthony] That's pretty cool. Glad you noticed that cause I wouldn't have.