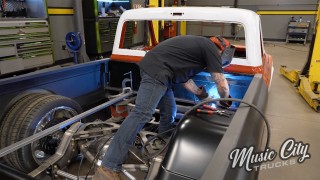
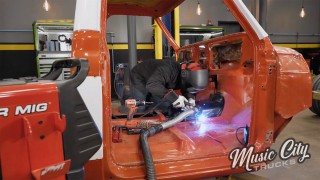
In This Episode
- 0:01 Project Introduction and Chassis Modifications
- 1:27 Stripping Down the Interior and Preparing for Paint
- 2:01 Modifications to the Rear End and Tips on Metal Prep
- 2:10 Getting the Chevy in the Booth for a Smooth Satin Finish
- 2:29 Project Catch-Up and Initial Chassis Work
- 3:02 Stripping Down the Interior and Preparing for Paint (Continued)
- 4:03 Modifications to the Rear End and Tips on Metal Prep (Continued)
- 4:16 Getting the Chevy in the Booth for a Smooth Satin Finish (Continued)
- 4:25 Removing the Stock Bumper and Installing a Roll Pan
- 5:01 Fitting the Roll Pan and Addressing Issues
- 6:05 Finalizing the Roll Pan Installation
- 7:49 Addressing Gaps and Preparing for Further Modifications
- 9:04 Finishing Modifications and Preparing for Paint
- 10:20 Installing Fiberglass Inner Fenders
- 12:01 Cleaning Up Edges and Preparing for Final Glaze
- 12:47 Applying Final Glaze and Preparing for Primer
- 14:03 Mixing and Applying Filler
- 15:00 Sanding the Filler and Preparing for Final Glaze
- 16:00 Applying Final Glaze and Preparing for Primer (Continued)
- 17:33 Sanding and Preparing for Primer
- 18:00 Applying High Build Primer and Guide Coat
- 18:31 Applying 2K Primer and Preparing for Paint
- 19:08 Mixing and Applying Sealer
- 19:46 Applying Single Stage Satin Black Paint
Video Transcript
[Anthony] You're watching Powernation!
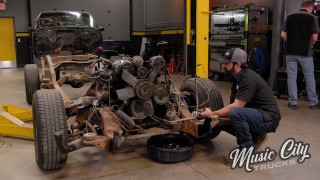
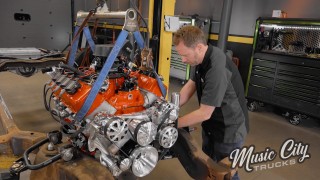
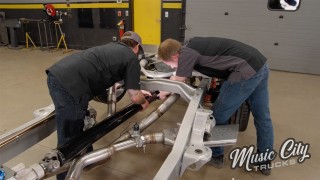
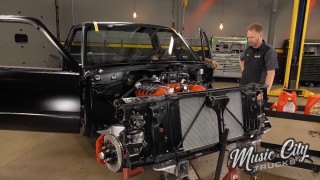
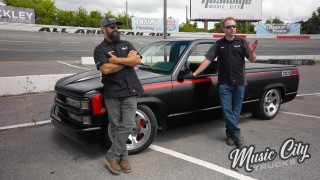
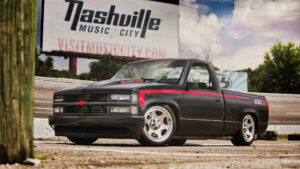
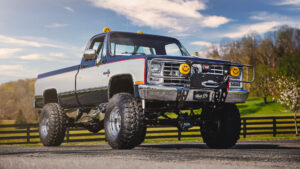
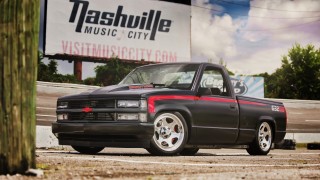
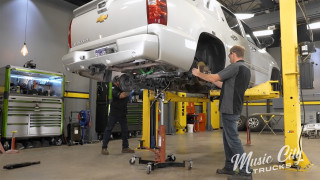
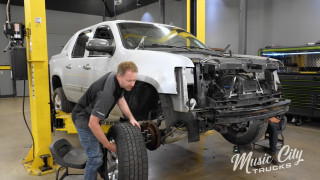
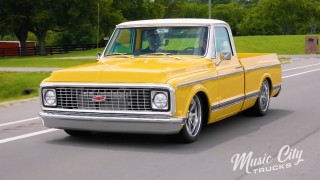
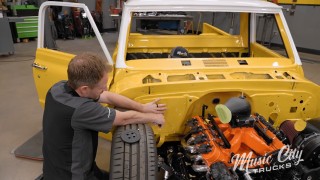
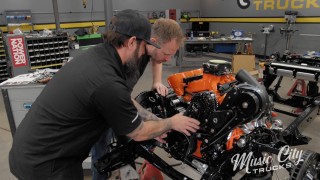
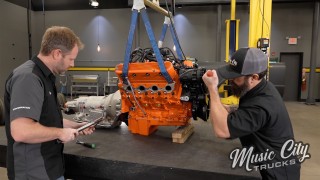
[Mike] Today on Music City Trucks our OBS Chevy is making its biggest transformation. We start stripping down our interior in preparation for paint. [Anthony] We show you a simple modification to make your rear end more stylish. Plus we'll give you some helpful tips on metal prep before painting. Then get our Chevy in the booth for a smooth satin finish. [ Music ] Hey guys, welcome to Music City Trucks. So we got all our heavy lifting done on our chassis but now it's time to move on to the body. [Mike] Yeah, we've got a lot of work to do with this thing. We've got to message a little bit of dents. Do a little color change. If this is the first time you're tuning in on this project let's get you caught up. After a quick shakedown it was obvious that our stock OBS Chevy wasn't gonna cut it. So we got it into the shop and quickly started to dismantle it, taking it down to the bare frame. Once we had a fresh canvas we made a few modifications to accommodate the new upgraded front and rear suspension components and mock them up. [Anthony] Our frame was the next thing to be upgraded with boxing plates to stiffen up our chassis to handle all that power we're gaining from the new big block. Plus we relocated our fuel tank to the rear for better weight distribution. After getting the drivetrain dropped in the chassis it was time to get the body back on and fabricate our custom headers and dual personality exhaust system. [Mike] Now before we can get sanding on our little cab here we've got to get it stripped down and washed up. Pretty much everything you see in here that's blue we've gotta make it black. [ Music ] There's that. [ Music ]
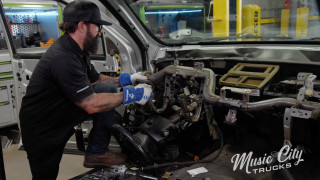
[Anthony] Alright, one down. [ Music ] [Mike] Bingo! Tough part about this plastic is the older it gets the more brittle. You've got to be really careful cause it breaks easy. [ Music ] [Anthony] Hey Mike, you got a trick with these plugs here? [ Music ] [Mike] No, I don't know how you get these out! [ Music ] You mean like that? [Anthony] Yes, how'd you do it? [Mike] Here, use this. [Anthony] There's a reason I like older cars. It's cause they don't have these little plastic clips like this does. [ Music ] [Mike] Bingo! [ Music ] Three hours later. [ Music ]
[ plastic popping ] [Mike] There it is. And bingo. Pull our carpet out here. What kind of surprises do we have? [ Music ]
Voila! [ Music ] [Mike] Oh man! [Anthony] That's gonna be $20 bucks. [Mike] Look at that roof. Twist it, pull it, spin it, bop it, outta here. [ Music ]
[ Mike robot voice ] Data link connector. [ Music ] [ clanging ] [ Music ]
[Mike] Woo, dashing effort here. [Anthony] We give our OBS a little nip tuck for a cleaner look.
[Mike] Hey guys, welcome back. Well I got the inside of the cab all stripped out. On the outside I've just got to heat up this trim and get it ripped off. On the back of the truck Anthony's got a few modifications for you. [Anthony] As you guys may already know, we've removed the stock bumper. So we have a big space here we've got to fill and in order to do that we're gonna be sticking in one of these roll pans to try to keep it that '90s sport trucks theme we're going with. You know sometimes this aftermarket sheet metal just doesn't fit right. So we've got to get this up here and see what we're working with. Let's see what we're looking like here. Not too bad. It's a good idea whenever you're trying to fit up panels, especially by yourself, is to get some kind of fastener in it to hold it in place. You can use Clecos or you can use tech screws. I like using tech screws on stuff. It's a little bit heavier and seems to hold better than a Cleco but Clecos work as well. [ drill humming ] So now that we have the roll pan up here and it's fastened we can go ahead and see what we got to work with. I can already tell that we're gonna have some issues in this area. I'm trying to keep this piece intact. I really don't want to be messing with that since it matches our body line pretty good. The only thing I've got to do here is get this to shim out a little bit. Get this body line and the roll pan to sit flush. The way I'm gonna do that is stick a couple of washers behind it and try to get that thing sitting flush. So let's go ahead and get that done. [ Music ]
[ drill humming ] [ Music ]
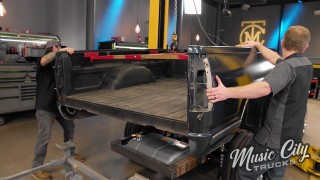
[ drill humming ] Alrighty! It looks like we're pretty good here. I got the roll pan flush with the bedside here exactly where I wanted to. So this top line continues around the bed into the roll pan. The next critical step whenever messing with bumpers, roll pans, or anything you've gotta put the tailgate on because if you do all this, get the tailgate, you go to open it and it hits the bumper or roll pan you're gonna be back to square one. So let's go ahead, grab that tailgate, and get it on. [ Music ] Hey Mike you think you can give me a hand getting this tailgate up here? [Mike] Yep, we'll get it up there. [Anthony] Lets see what we got here. [Mike] Slot this side in. [ metal clanging ] [ Music ]
[Mike] Take a look there. [Anthony] Looks pretty even. [Mike] Clears over here on this side. [Anthony] Let's make sure we're good on the down. [ Music ] Honestly I'm pleasantly surprised with this. I was expecting a lot worse. [Mike] Looks good. [Anthony] Yeah it looks good. Looks like the only place we're really gonna have to metal work is right here. What I'm gonna do. I'm gonna end up taking a little sliver out of this. Rolling this back under so it lines up nice and flush with the bottom of the bedside here. The first thing I've gotta do is get the tailgate off. You good? [Mike] Yep, go ahead. [Anthony] Looks like we have a little gap here on this flange. So we're gonna go put it in the break, re-bend it, get this sitting flush, and then we'll be good to go. [ Music ]
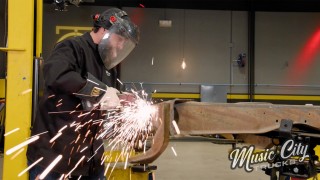
Alright, so we got the roll pan back on the truck. It actually is fitting pretty good up here. Our body line matches real good right here. It's flush with the bedside. I don't think I'm gonna have to do much on this side but there is an issue down here. It's running a little low. So I'm gonna show you. We'll mark this with a Sharpie. We'll take a slice out of it. Get it to roll back under and match this bedside real good. Let's get this thing marked out. So the first mark I'm gonna make is my stop point to where it lines back up flush on the bedside up here. Then we'll just make a mark right here for our cut line. So we got our roll pan off the truck. It's time to start slicing and dicing. The way I'm gonna do it is I've got my line here. I'm gonna cut on the bottom of the line. So hopefully that'll give me enough of a cut to get this rolled in so it'll tuck up nice and tight with the bedside. I'm using an end grinder with a cut off wheel. Following the radius and we should be good. That looks like it should be pretty good. Yo Mike! [Mike] What! [Anthony] Can you give me a hand over here? Thank you sir. Go ahead and grab your channel locks right there. What we're gonna do is grab it like that. Pry this back. I'm gonna put a tack here. We're gonna work it out towards the edge. Let it overhang just a bit. That looks nice. Tacking away. [Mike] Closing my eyes. [ Music ] [Anthony] I think we're pretty good there. What do you say we get this on the truck and see what we're working with. [Mike] I think that'll be perfect. [ drill humming ] Alright, what are we looking like there Mike? [Mike] Yeah this side looks really good. [Anthony] We're good on this side as well. Only thing left to do is pop this thing off, put it on the table, weld it up. Then we can get it back on the truck, start sanding everything, and we should be good to go. You want to see about getting this tailgate back on here. Coming up, as soon as I get my grinder fired up we're gonna finish up the modifications on this fender and get it ready for paint. [ grinder buzzing ]
[Mike] Welcome back. I know you've been out to a car show and you walk around and see a lot of cool rides and there's some things that stick out to you. For me it's a clean engine bay and we're gonna carry over that attention to detail on our truck. You can see our factory inner fenders here have seen some better days with the rust and the extra holes and the brackets for the factory components. So to clean that up we're gonna install these fiberglass inner fenders here from Slosh Tubs. They make a really nice piece that goes inside the truck and gives you that clean engine bay. So to get those installed we're gonna take our template here, mark on our fender, and start trimming it out.
Alright, lay that up there and we've got to cut out this section down here to make room for that inner fender there. So we'll just draw our line. [ Music ]
Then on the bottom here it's easy. Just lay your Sharpie right against that lip and follow it right across there. Connect our dots here. Now we have our fender off the truck so you can see it a little bit better but these are designed to where you can install them with the fender on the truck still assembled. [ saw buzzing ] [ Music ]
Now we'll take a flap disc and a file to clean up the edges. [ Music ] Alright, get this set in here. Four bolts, we'll get that attached and then we've just got to get our filler panel all cleaned up nice and tight. On our passenger side I've already got that one done. As you can see it turned out really nice. Now we've just got to blow it apart and get it prepped for paint. [Anthony] So while Mike's finishing up our inner fenders in the shop I'm over here in the prep booth getting this thing Scotchbrited. Now this truck's pretty straight to begin with. So we're not taking it to bare metal but there is a couple of problem areas that I'm gonna rely on my bearded brother over here Brian Allen. He's a Powernation teammate. He's gonna give us a hand. [Brian] Alright guys. So this is one of those problem areas that Anthony was just talking about when he was talking about the cab. Something has hit this. Put a pretty good crease in. We've already ground this down to bare metal, welded some studs on it, and we pulled it with a slide hammer. Once we did that a little hammer and dolly action on the back side. Next step, make sure everything is down to bare metal, feather the edges, and apply some filler. Let's get started. [ sander buzzing ] Now that we've got this feathered out, everything's down to bare metal, we're ready to mix some filler and get to wiping. A couple of things to note. When you open a can like this guys make sure you get it good and mixed. The resin will settle to the top and all the material will settle to the bottom. Finally got all this mixed up. Let's get some on the board and we'll go ahead and get our activator put on. [ Music ] I like to do a little at a time. Some people try to scoop out a softball at a time but I prefer a little. Couple of key things too guys to note. Your hardener itself needs to be kneaded. All the liquids will settle to the bottom of the tube. If you don't knead it together that's like when you squeeze the mustard bottle and all the liquid comes out and no mustard. So this particular brand of filler we're using requires a single row across the entire pool of filler. [ Music ] A couple of things to remember when mixing your filler. Number one, we don't want to aerate it. You want to spoon it or knead it into itself. We don't want to stir it like you're stirring cake batter. I was always shown and prefer this method to fold it into itself. We're looking for color uniformity right here. We want everything the same color. As you can see it still has some marbling. So we're gonna continue to mix it. Everything's mixed. Let's go ahead and get some applied to our panel. Couple things to note. Spread it how you want it to look. I'm gonna put it on and smooth it out over my entire area at once. Don't want it super thick, not for my first coat, but I want it uniform. Any excess I can be put back on my board and reuse it. Multiple wipes, multiple directions. [ Music ] Now that our filler's hardened up I'm gonna sand it with some 80 grit. Me personally I like to cut it when it's the consistency of block cheese. I do like to go a little more fresh than most people. So let's get started. Couple of things. Block selection is super big right now. I didn't choose a smaller block because I would only sand one area at a time. This will cause it to have lines. It'll cut inconsistencies in my panel that I'm trying to sand flat. Always pick your tool that extends past your repair area. Another thing, never sand in a straight line. This is only gonna cut the width of your block. So you'll cut lines in your filler work. Always cross hatch your pattern and cut multiple directions. A couple of things to look for while we're sanding too. You see I've already hit metal here. Notice this is still unsanded and dark right here in the middle. So that tells me these spots are still low. But remember what I was talking about earlier? I like to do thin, multiple wipes. [ sand block scraping ] [ Music ]
[Brian] We got our filler work completed. Everything's ready to go. Last step's some final glaze. Make sure you knead your hardener. [ Music ] We're gonna mix this the same way guys. Fold it into itself. We're looking for that consistent blue color. We've already blew this off. Make sure everything is clean before you start. You don't want to contaminate your wipe. This is super thin. It's like icing on a cake guys. Trying to make it as consistent and as even of a wipe as you can. It sands really easy and it don't take long. We don't use this to build up. We use it for finishing. Now that our glaze is dry I'm gonna go ahead and hit it with some 80 grit and then we're gonna hit it with 180 and it'll be ready for primer. [ sand block scraping ] [Anthony] How you looking over here Brian? [Brian] Looking good man. [Anthony] Well a couple more spots on this left right? Couple on that cab and we're about ready to shoot some primer. [Brian] I've got a couple of high spots that need taken care of, some d-a'ing, it's ready to go in the booth. [Anthony] We're almost there. [Mike] We smooth out the edges before shining up our Chevy.
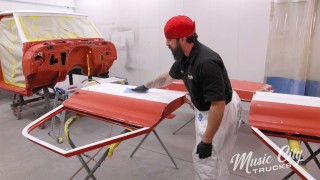
[Anthony] Hey guys, welcome back. As you can see the truck's now Pepto Bismol pink. It's not the color we're running. It's actually a high build primer that doubles as a guide coat. So what we're gonna do first is hit it with 120, move to 180, and we're gonna get it in the booth. So let's get to it. When sanding you'll want to use a long sanding block for the flat areas so you're not leaving any high spots or ridges. You could also use a pneumatic long block like we did, which is another great tool for sanding. It'll save you a lot of time and it's a whole lot easier on your body. [Mike] Once we're done sanding with 120 grit we'll hit it with a little more guide coat and follow it up with our 180 grit. [Anthony] Next up is our 2K primer. When spraying any of the primers or paints that you're gonna be using you want to make sure you follow the manufacturer's instructions. We'll be spraying two medium wet coats allowing 10 to 15 minutes flash time between each coat. [Mike] After our primer is cured we'll wet sand using 400 grit to get a super smooth surface. [Anthony] Let's get this thing in there. [Mike] Before rolling our body into the paint booth and masking off the unpainted areas before our final wipe down. While Brian and Anthony have been getting this thing ready for sealer and paint I've been in here mixing up all of our concoctions. Everything we've used so far has been from Summit Racing from sandpaper, to primers, to even this nice paint we're getting ready to put down. If you need any paint and body supplies check out Summit Racing. They've got everything you need in a checklist form to make sure you've got all your bases covered from the bare metal all the way up to that nice paint. They'll get you hooked up. So let's get some of this sealer mixed up and laid down. [ Music ] [Anthony] When spraying the sealer I like to use a 75 percent overlap just to make sure I'm getting good coverage. [Mike] Once Anthony has a sealer applied I'll mix up some of our Summit Racing Hot Rod Black single stage paint and activator and get it into the gun. This has our color and protective layer combined in the product. It's a great economical option for beginners because it requires fewer steps and less time to apply. Single stage is also very durable when applied and maintained properly. [Brian] As you see we're spraying single stage satin black. So depending whether you spray a single stage solid color or a metallic color will depend on 75 percent to 50 percent overlap. We chose 75 percent because it is a satin finish. Want to make sure everything is uniform and the wetness stays uniform as well for an after sheen finish. We did two medium wet coats on this application here. If you're spraying a metallic color you may want to do an orientation coat and two medium wet coats afterwards but this is a satin finish. So we chose two medium wet coats. [Anthony] As you can see we got our bed and our cab all in our satin black and boy it looks real good doesn't it Mike? [Mike] I'll tell you what. That satin finish, that's exactly what we were looking for. All that hard work with the sanding, the primer, more sanding, and laying down this color. It turned out exactly what we were looking for. Brian thanks again for all your help, your knowledge, helping us put this paint down, and laying that paint down. It turned out really well. [Brian] Any time guys. I appreciate it. [Mike] Now we've got to get this thing back in the studio and try to get it assembled. That'll be next time on Music City Trucks.
Show Full Transcript
[Mike] Today on Music City Trucks our OBS Chevy is making its biggest transformation. We start stripping down our interior in preparation for paint. [Anthony] We show you a simple modification to make your rear end more stylish. Plus we'll give you some helpful tips on metal prep before painting. Then get our Chevy in the booth for a smooth satin finish. [ Music ] Hey guys, welcome to Music City Trucks. So we got all our heavy lifting done on our chassis but now it's time to move on to the body. [Mike] Yeah, we've got a lot of work to do with this thing. We've got to message a little bit of dents. Do a little color change. If this is the first time you're tuning in on this project let's get you caught up. After a quick shakedown it was obvious that our stock OBS Chevy wasn't gonna cut it. So we got it into the shop and quickly started to dismantle it, taking it down to the bare frame. Once we had a fresh canvas we made a few modifications to accommodate the new upgraded front and rear suspension components and mock them up. [Anthony] Our frame was the next thing to be upgraded with boxing plates to stiffen up our chassis to handle all that power we're gaining from the new big block. Plus we relocated our fuel tank to the rear for better weight distribution. After getting the drivetrain dropped in the chassis it was time to get the body back on and fabricate our custom headers and dual personality exhaust system. [Mike] Now before we can get sanding on our little cab here we've got to get it stripped down and washed up. Pretty much everything you see in here that's blue we've gotta make it black. [ Music ] There's that. [ Music ]
[Anthony] Alright, one down. [ Music ] [Mike] Bingo! Tough part about this plastic is the older it gets the more brittle. You've got to be really careful cause it breaks easy. [ Music ] [Anthony] Hey Mike, you got a trick with these plugs here? [ Music ] [Mike] No, I don't know how you get these out! [ Music ] You mean like that? [Anthony] Yes, how'd you do it? [Mike] Here, use this. [Anthony] There's a reason I like older cars. It's cause they don't have these little plastic clips like this does. [ Music ] [Mike] Bingo! [ Music ] Three hours later. [ Music ]
[ plastic popping ] [Mike] There it is. And bingo. Pull our carpet out here. What kind of surprises do we have? [ Music ]
Voila! [ Music ] [Mike] Oh man! [Anthony] That's gonna be $20 bucks. [Mike] Look at that roof. Twist it, pull it, spin it, bop it, outta here. [ Music ]
[ Mike robot voice ] Data link connector. [ Music ] [ clanging ] [ Music ]
[Mike] Woo, dashing effort here. [Anthony] We give our OBS a little nip tuck for a cleaner look.
[Mike] Hey guys, welcome back. Well I got the inside of the cab all stripped out. On the outside I've just got to heat up this trim and get it ripped off. On the back of the truck Anthony's got a few modifications for you. [Anthony] As you guys may already know, we've removed the stock bumper. So we have a big space here we've got to fill and in order to do that we're gonna be sticking in one of these roll pans to try to keep it that '90s sport trucks theme we're going with. You know sometimes this aftermarket sheet metal just doesn't fit right. So we've got to get this up here and see what we're working with. Let's see what we're looking like here. Not too bad. It's a good idea whenever you're trying to fit up panels, especially by yourself, is to get some kind of fastener in it to hold it in place. You can use Clecos or you can use tech screws. I like using tech screws on stuff. It's a little bit heavier and seems to hold better than a Cleco but Clecos work as well. [ drill humming ] So now that we have the roll pan up here and it's fastened we can go ahead and see what we got to work with. I can already tell that we're gonna have some issues in this area. I'm trying to keep this piece intact. I really don't want to be messing with that since it matches our body line pretty good. The only thing I've got to do here is get this to shim out a little bit. Get this body line and the roll pan to sit flush. The way I'm gonna do that is stick a couple of washers behind it and try to get that thing sitting flush. So let's go ahead and get that done. [ Music ]
[ drill humming ] [ Music ]
[ drill humming ] Alrighty! It looks like we're pretty good here. I got the roll pan flush with the bedside here exactly where I wanted to. So this top line continues around the bed into the roll pan. The next critical step whenever messing with bumpers, roll pans, or anything you've gotta put the tailgate on because if you do all this, get the tailgate, you go to open it and it hits the bumper or roll pan you're gonna be back to square one. So let's go ahead, grab that tailgate, and get it on. [ Music ] Hey Mike you think you can give me a hand getting this tailgate up here? [Mike] Yep, we'll get it up there. [Anthony] Lets see what we got here. [Mike] Slot this side in. [ metal clanging ] [ Music ]
[Mike] Take a look there. [Anthony] Looks pretty even. [Mike] Clears over here on this side. [Anthony] Let's make sure we're good on the down. [ Music ] Honestly I'm pleasantly surprised with this. I was expecting a lot worse. [Mike] Looks good. [Anthony] Yeah it looks good. Looks like the only place we're really gonna have to metal work is right here. What I'm gonna do. I'm gonna end up taking a little sliver out of this. Rolling this back under so it lines up nice and flush with the bottom of the bedside here. The first thing I've gotta do is get the tailgate off. You good? [Mike] Yep, go ahead. [Anthony] Looks like we have a little gap here on this flange. So we're gonna go put it in the break, re-bend it, get this sitting flush, and then we'll be good to go. [ Music ]
Alright, so we got the roll pan back on the truck. It actually is fitting pretty good up here. Our body line matches real good right here. It's flush with the bedside. I don't think I'm gonna have to do much on this side but there is an issue down here. It's running a little low. So I'm gonna show you. We'll mark this with a Sharpie. We'll take a slice out of it. Get it to roll back under and match this bedside real good. Let's get this thing marked out. So the first mark I'm gonna make is my stop point to where it lines back up flush on the bedside up here. Then we'll just make a mark right here for our cut line. So we got our roll pan off the truck. It's time to start slicing and dicing. The way I'm gonna do it is I've got my line here. I'm gonna cut on the bottom of the line. So hopefully that'll give me enough of a cut to get this rolled in so it'll tuck up nice and tight with the bedside. I'm using an end grinder with a cut off wheel. Following the radius and we should be good. That looks like it should be pretty good. Yo Mike! [Mike] What! [Anthony] Can you give me a hand over here? Thank you sir. Go ahead and grab your channel locks right there. What we're gonna do is grab it like that. Pry this back. I'm gonna put a tack here. We're gonna work it out towards the edge. Let it overhang just a bit. That looks nice. Tacking away. [Mike] Closing my eyes. [ Music ] [Anthony] I think we're pretty good there. What do you say we get this on the truck and see what we're working with. [Mike] I think that'll be perfect. [ drill humming ] Alright, what are we looking like there Mike? [Mike] Yeah this side looks really good. [Anthony] We're good on this side as well. Only thing left to do is pop this thing off, put it on the table, weld it up. Then we can get it back on the truck, start sanding everything, and we should be good to go. You want to see about getting this tailgate back on here. Coming up, as soon as I get my grinder fired up we're gonna finish up the modifications on this fender and get it ready for paint. [ grinder buzzing ]
[Mike] Welcome back. I know you've been out to a car show and you walk around and see a lot of cool rides and there's some things that stick out to you. For me it's a clean engine bay and we're gonna carry over that attention to detail on our truck. You can see our factory inner fenders here have seen some better days with the rust and the extra holes and the brackets for the factory components. So to clean that up we're gonna install these fiberglass inner fenders here from Slosh Tubs. They make a really nice piece that goes inside the truck and gives you that clean engine bay. So to get those installed we're gonna take our template here, mark on our fender, and start trimming it out.
Alright, lay that up there and we've got to cut out this section down here to make room for that inner fender there. So we'll just draw our line. [ Music ]
Then on the bottom here it's easy. Just lay your Sharpie right against that lip and follow it right across there. Connect our dots here. Now we have our fender off the truck so you can see it a little bit better but these are designed to where you can install them with the fender on the truck still assembled. [ saw buzzing ] [ Music ]
Now we'll take a flap disc and a file to clean up the edges. [ Music ] Alright, get this set in here. Four bolts, we'll get that attached and then we've just got to get our filler panel all cleaned up nice and tight. On our passenger side I've already got that one done. As you can see it turned out really nice. Now we've just got to blow it apart and get it prepped for paint. [Anthony] So while Mike's finishing up our inner fenders in the shop I'm over here in the prep booth getting this thing Scotchbrited. Now this truck's pretty straight to begin with. So we're not taking it to bare metal but there is a couple of problem areas that I'm gonna rely on my bearded brother over here Brian Allen. He's a Powernation teammate. He's gonna give us a hand. [Brian] Alright guys. So this is one of those problem areas that Anthony was just talking about when he was talking about the cab. Something has hit this. Put a pretty good crease in. We've already ground this down to bare metal, welded some studs on it, and we pulled it with a slide hammer. Once we did that a little hammer and dolly action on the back side. Next step, make sure everything is down to bare metal, feather the edges, and apply some filler. Let's get started. [ sander buzzing ] Now that we've got this feathered out, everything's down to bare metal, we're ready to mix some filler and get to wiping. A couple of things to note. When you open a can like this guys make sure you get it good and mixed. The resin will settle to the top and all the material will settle to the bottom. Finally got all this mixed up. Let's get some on the board and we'll go ahead and get our activator put on. [ Music ] I like to do a little at a time. Some people try to scoop out a softball at a time but I prefer a little. Couple of key things too guys to note. Your hardener itself needs to be kneaded. All the liquids will settle to the bottom of the tube. If you don't knead it together that's like when you squeeze the mustard bottle and all the liquid comes out and no mustard. So this particular brand of filler we're using requires a single row across the entire pool of filler. [ Music ] A couple of things to remember when mixing your filler. Number one, we don't want to aerate it. You want to spoon it or knead it into itself. We don't want to stir it like you're stirring cake batter. I was always shown and prefer this method to fold it into itself. We're looking for color uniformity right here. We want everything the same color. As you can see it still has some marbling. So we're gonna continue to mix it. Everything's mixed. Let's go ahead and get some applied to our panel. Couple things to note. Spread it how you want it to look. I'm gonna put it on and smooth it out over my entire area at once. Don't want it super thick, not for my first coat, but I want it uniform. Any excess I can be put back on my board and reuse it. Multiple wipes, multiple directions. [ Music ] Now that our filler's hardened up I'm gonna sand it with some 80 grit. Me personally I like to cut it when it's the consistency of block cheese. I do like to go a little more fresh than most people. So let's get started. Couple of things. Block selection is super big right now. I didn't choose a smaller block because I would only sand one area at a time. This will cause it to have lines. It'll cut inconsistencies in my panel that I'm trying to sand flat. Always pick your tool that extends past your repair area. Another thing, never sand in a straight line. This is only gonna cut the width of your block. So you'll cut lines in your filler work. Always cross hatch your pattern and cut multiple directions. A couple of things to look for while we're sanding too. You see I've already hit metal here. Notice this is still unsanded and dark right here in the middle. So that tells me these spots are still low. But remember what I was talking about earlier? I like to do thin, multiple wipes. [ sand block scraping ] [ Music ]
[Brian] We got our filler work completed. Everything's ready to go. Last step's some final glaze. Make sure you knead your hardener. [ Music ] We're gonna mix this the same way guys. Fold it into itself. We're looking for that consistent blue color. We've already blew this off. Make sure everything is clean before you start. You don't want to contaminate your wipe. This is super thin. It's like icing on a cake guys. Trying to make it as consistent and as even of a wipe as you can. It sands really easy and it don't take long. We don't use this to build up. We use it for finishing. Now that our glaze is dry I'm gonna go ahead and hit it with some 80 grit and then we're gonna hit it with 180 and it'll be ready for primer. [ sand block scraping ] [Anthony] How you looking over here Brian? [Brian] Looking good man. [Anthony] Well a couple more spots on this left right? Couple on that cab and we're about ready to shoot some primer. [Brian] I've got a couple of high spots that need taken care of, some d-a'ing, it's ready to go in the booth. [Anthony] We're almost there. [Mike] We smooth out the edges before shining up our Chevy.
[Anthony] Hey guys, welcome back. As you can see the truck's now Pepto Bismol pink. It's not the color we're running. It's actually a high build primer that doubles as a guide coat. So what we're gonna do first is hit it with 120, move to 180, and we're gonna get it in the booth. So let's get to it. When sanding you'll want to use a long sanding block for the flat areas so you're not leaving any high spots or ridges. You could also use a pneumatic long block like we did, which is another great tool for sanding. It'll save you a lot of time and it's a whole lot easier on your body. [Mike] Once we're done sanding with 120 grit we'll hit it with a little more guide coat and follow it up with our 180 grit. [Anthony] Next up is our 2K primer. When spraying any of the primers or paints that you're gonna be using you want to make sure you follow the manufacturer's instructions. We'll be spraying two medium wet coats allowing 10 to 15 minutes flash time between each coat. [Mike] After our primer is cured we'll wet sand using 400 grit to get a super smooth surface. [Anthony] Let's get this thing in there. [Mike] Before rolling our body into the paint booth and masking off the unpainted areas before our final wipe down. While Brian and Anthony have been getting this thing ready for sealer and paint I've been in here mixing up all of our concoctions. Everything we've used so far has been from Summit Racing from sandpaper, to primers, to even this nice paint we're getting ready to put down. If you need any paint and body supplies check out Summit Racing. They've got everything you need in a checklist form to make sure you've got all your bases covered from the bare metal all the way up to that nice paint. They'll get you hooked up. So let's get some of this sealer mixed up and laid down. [ Music ] [Anthony] When spraying the sealer I like to use a 75 percent overlap just to make sure I'm getting good coverage. [Mike] Once Anthony has a sealer applied I'll mix up some of our Summit Racing Hot Rod Black single stage paint and activator and get it into the gun. This has our color and protective layer combined in the product. It's a great economical option for beginners because it requires fewer steps and less time to apply. Single stage is also very durable when applied and maintained properly. [Brian] As you see we're spraying single stage satin black. So depending whether you spray a single stage solid color or a metallic color will depend on 75 percent to 50 percent overlap. We chose 75 percent because it is a satin finish. Want to make sure everything is uniform and the wetness stays uniform as well for an after sheen finish. We did two medium wet coats on this application here. If you're spraying a metallic color you may want to do an orientation coat and two medium wet coats afterwards but this is a satin finish. So we chose two medium wet coats. [Anthony] As you can see we got our bed and our cab all in our satin black and boy it looks real good doesn't it Mike? [Mike] I'll tell you what. That satin finish, that's exactly what we were looking for. All that hard work with the sanding, the primer, more sanding, and laying down this color. It turned out exactly what we were looking for. Brian thanks again for all your help, your knowledge, helping us put this paint down, and laying that paint down. It turned out really well. [Brian] Any time guys. I appreciate it. [Mike] Now we've got to get this thing back in the studio and try to get it assembled. That'll be next time on Music City Trucks.