Engine Power Featured Projects
Engine Power Builds
Want more content like this?
Join the PowerNation Email NewsletterParts Used In This Episode
ARP
ARP Rod Bolts
Sunnen Products Company
Sunnen SV-15 Honing Machine
The Industrial Depot
Tools, Hardware, Shop Supplies
Video Transcript
(Pat)>> You're watching Powernation!
(Frankie)>> From old reliable to wow! We've got big plans for this small block Chevy.
(Pat)>> Today on Engine Power we bring our backyard build into the shop to give it a slew of power upgrades. [ Music ]
(Frankie)>> Hey everybody! Here in Engine Power we have one of our old favorites back, and it's probably pretty recognizable to you. It's a small block Chevy 350 that was pretty unique because it never even came into the shop. We did all the work out back in our parking lot just like you guys would at home. Now we accidentally picked the hottest day of the year to do that, but after a long day of thrashing we even started it up right out on the pavement.
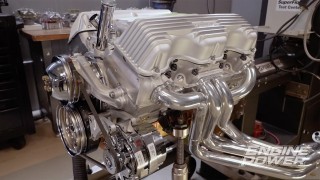
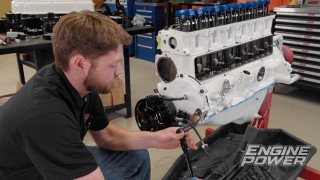
(Pat)>> After all of that fun we brought it back into the shop, hooked it to the dyno to see how it runs. Now quite frankly it did rather well. We have a very distinctive looking setup. So, you would probably remember both the dyno session and the build, but just in case you don't have a look at this. Frankie told me he got a good deal on a throttle body injection small block along with some parts that had been ordered for the seller's engine build. Tearing into an engine is kind of like opening a Christmas present. Sometimes it's great, sometimes it's terrible, and sometimes like this small block it's pretty good. We did hit a couple of snags along the way such as underneath the valve cover.
(Frankie)>> Whoa, look at that! A couple of the oil shrouders are broken. I actually saw that, one of those on the other head, but there's a couple in this head that are broken.
(Pat)>> I have never seen that before. [ Music ]
(Frankie)>> Oh, just some water and some oil, and some oil water. I don't see any chunks though.
(Pat)>> That's not total milkshake. It's kinda dirty. [ Music ]
(Frankie)>> Nasty!
(Pat)>> This is a horrible job. That's what cardboard's for. [ Music ]
(Frankie)>> After cleaning the cylinder heads by hand we installed new seals and valve springs designed for a hydraulic roller cam. Then we freshened up the cylinder bores using a 320-grit ball hone. This establishes a new finish for the fresh piston rings to seat on. We used engine oil as a lubricant and turned the hone at about 300 r-p-m to achieve roughly a 45-degree included angle on the cross hatch.
(Pat)>> To measure main bearing clearance we used Plasti-gauge. After torquing the caps down and removing them we checked the compressed plastic against the gauge. We had about two thousandths clearance. [ Music ] The crankshaft is ten thousandths under and is part of a kit that includes bearings. The mains are torqued to 65-pound feet. [ Music ]
(Frankie)>> A new cam was included in our engine purchase. It's a hydraulic roller from Comp with a fairly sporty grind. A new double roller timing set came next. [ Music ] We reused the pistons, but since the rings are a wear item they were replaced with a set of o-e-m style pieces. [ Music ]
(Pat)>> There's no way we'll build an engine without degreeing the cam. It came in at 106 degrees of intake centerline, which is four degrees advanced. [ Music ] A fresh oil pump and pickup assembly went in. [ Music ] Retrofit hydraulic lifters were part of the cam kit. [ Music ] I wish that crew would come and do our work that normally does it.
(Frankie)>> The ninjas? The midnight ninjas, yeah! The heads were torqued in three equal steps to 65-pound feet. The push rods were part of the cam kit and are shorter than the originals. [ Music ]
(Pat)>> We had a dual plane Weiand Speed Warrior intake in our shop. It's a great choice for this engine. [ Music ] A Street Demon carb was next, followed by our derby headers. Here we go! Solid!
(Frankie)>> Borrowed those from the guys down in Carcass.
(Pat)>> I knew we'd get use out of them one day.
(Frankie)>> Then we ran fuel and electrical lines and fired this small block up. [ Music ] [ engine starting ] [ engine revving ]
(Pat)>> When we got the engine back into the shop it went straight into the dyno cell. Smooth! Good oil pressure. [ engine revving ]
(Frankie)>> Look at that! Woo!
(Pat)>> I cannot wait to see what the timing is right there cause that actually made decent power.
(Frankie)>> That's not bad.
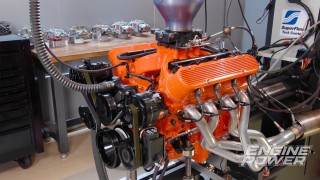
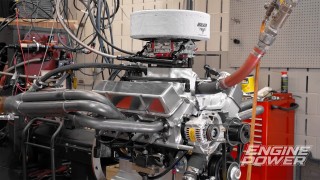
(Pat)>> The Chevy put out 276 horsepower at 4,800 r-p-m and 345-pound feet of torque at 3,200 r-p-m. Coming up, static compression is important, but dynamic compression tells the full story.
(Pat)>> We are back on the small block Chevy 350 backyard build. We have a bunch of parts in house to upgrade this power plant, and it will get a bit power increase over the modest driveway build you've seen here before. Last time we did this it was like 600 degrees out.
(Frankie)>> By that time it was all dark, remember? It was only 90 degrees.
(Pat)>> The teardown begins by removing these notoriously obnoxious derby headers.
(Frankie)>> Takes a little bit of work, huh?
(Pat)>> I'm still working on it. I was very happy with how it ran. And since this engine is getting better induction and an upgraded rotating assembly it has to come completely apart. [ drill humming ] [ Music ]
(Pat)>> Even though this small block didn't make crazy power the spark plugs indicate that the engine had a great tune-up in it. This side's the same way. Not bad for a parking lot hone job. She sealed up nice.
(Frankie)>> It didn't make a ton of power, but when it was dyno'ed it ran really good. It didn't smoke, didn't miss. Can't complain for being built in the parking lot. [ Music ]
(Pat)>> Stuck down.
(Frankie)>> There you go.
(Pat)>> Power it off there.
(Frankie)>> Still looks good!
(Pat)>> A brand new engine sorta, kinda, not really. [ drill humming ] [ Music ]
(Pat)>> Come back here.
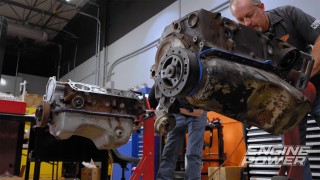
(Frankie)>> Since we won't be reusing the cylinder heads or valvetrain we'll skip removing the rockers and push rods and jump straight to unbolting the heads. [ Music ]
(Pat)>> Nice!
(Frankie)>> Wow, the chambers look good, not wet. Looks like it was running really nice.
(Pat)>> The chambers are all dry. The cylinders are dry. I wasn't expecting a race engine, but the cylinders look decent. If you don't see anything that's migrating oil wise up into the chamber it was running fine.
(Frankie)>> For the way it looked before it looks just as good now. It wasn't perfect when we started. It's not perfect now but it still looks good, and there wasn't any major problems. It looks like ran really nice, and we know that it did cause we dyno'ed it.
(Pat)>> We're not gonna use these lifters again I don't think, are we?
(Frankie)>> Now but I'll think we'll keep them just in case. There's probably nothing wrong with them. So, we can keep them for another project, and hydraulic roller. So don't need to keep them in order or anything.
(Pat)>> Brand new, everything looks fantastic. I'll take it!
(Frankie)>> The great part about a one-piece oil pan gasket. If you don't go too heavy on the silicone when installing it, you can generally reuse them later. This one looks really clean and was only installed last year. So, we'll reuse it. [ Music ]
(Pat)>> This o-e replacement balancer worked great for the first build, but since we're upping the power we'll replace it with an s-f-i approved piece. [ Music ]
(Frankie)>> Before the bolts can come out the locking plate tabs must be bent back out of the way. [ Music ]
(Pat)>> Because the engine has a hydraulic roller cam a cam shaft thrust button was used to keep the cam located. We'll save it to use on the new cam shaft. [ Music ] Look at that, brand new!
(Frankie)>> They basically are. Always protect the crankshaft by covering the rod bolts before removing the connecting rods.
(Pat)>> Oh yeah!
(Frankie)>> Looks pretty good, yeah! Those look pretty good for used pistons. [ Music ] And I mean really used pistons.
(Pat)>> Hey!
(Frankie)>> What?
(Pat)>> We've got to keep going here.
(Frankie)>> Just reminiscing man.
(Pat)>> You're living in the past. Live in the now. [ Music ] A shame to tear this one down, but we are doing it for a good reason.
(Frankie)>> Yeah, more power is always a good reason, but it looks really, really nice. So that's a good sign. Small block Chevy builds are a dime a dozen, and we have done our fair share. So, with this one we're gonna do something that is a little bit different. We haven't covered that much, and you might not have seen but it's universal to all engines, and that is cover dynamic compression ratio. Normally the rule back in the day was that 11:1 static compression ratio was the limit for pump gas, but there's a few more factors that go into the actual octane rating your fuel needs, and the bigger one is dynamic compression ratio. Static compression ratio uses the distance between the piston at bottom dead center and top dead center during its calculation, but dynamic compression ratio factors in when the intake valve closes because no air can actually be compressed inside the cylinder until both valves are closed. Because it's based off when the intake valve closes, cam size and intake centerline placement are huge factors. For our engine we're gonna run a static compression ratio that you would normally think is not possible on pump gas, but because of our dynamic compression ratio it's gonna run just fine.
(Pat)>> Spoken like a true engine builder.
(Frankie)>> I try sometimes. Up next, we prep the small block to receive forged pistons and upgraded cylinder heads.
(Pat)>> The purpose of this build is to show you that the octane rating of your fuel is not determined solely by static compression ratio. We are retaining the stock block and stock crankshaft because they will be sufficient for our power level, but we are upgrading the rest of the internal components with things we picked up from Summit Racing Equipment, and that's gonna help us make that happen. It all starts with the connecting rods. They are from Scat, and they are a 43-40 material with an I-beam design. They are 5.700 center to center length like a stock small block Chevy with a 9.027 wrist pin, but this one contains a bushing so we can run floating wrist pens. We're getting rid of the press fit. They are also retained by 87-40 ARP rod bolts. Those rods will be swinging around some Icon forged pistons. These are a 26-18 alloy and have a sixteenth, sixteenth, three-sixteenths ring pack. They also have a 9.027 wrist pin, but these pistons have something that you normally don't see us have, and that is a 13cc effective dome. That will help us get our static compression ratio up to where we want it for this build. Filling up those ring grooves are a set of Total Seal rings. These are a special set of rings that have a top ring that is gas ported. We want that benefit of gas porting, but we didn't have any gas ports in the pistons themselves. So, we will really benefit from their extra sealing ability. Also, we are gonna do some special stuff with the camshafts. You see two camshafts sitting here, which is odd, but one is a large one and one is a not so large one, and they are both a Track Max from Trick Flow. The camshaft is what affects dynamic compression. So, depending on where the cam is and how big it is that determines our dynamic compression. The smaller of the two has a duration at 50 thousandths lift of 230 degrees on the intake, 234 degrees on the exhaust, and they are on a 110-degree lobe separation. The larger one is a 246 at 50 on the intake, 254 on the exhaust on a 112 degree. Both cam shafts will work for our application, but that is strictly dependent on where the intake centerline falls on the camshaft. So, we have a billet timing set with a nine position keyway on the crank side to help adjust it where we want it. On the induction side we're keeping it simple and we're keeping it classy. These are Trick Flow's Super 23-degree series fast as cast 195cc intake port heads. These do not have any c-n-c'ing done. The port is cast to the right shape so they flow great. They have a 2.020 intake, 1.600 exhaust. They're both swirl polished stainless, and they're housed in a 62cc chamber. They also have a 1.460 diameter spring setup for our hydraulic rollers, and for the top of the induction we are gonna keep the r-p-m range in a manageable spot. So, we have a Trick Flow Street Burner dual plane intake manifold. Like always we're holding everything together with ARP fasteners. Before we can install any of these parts, we have some work to do. Namely get the crankshaft rebalanced and do a bunch of prep work on the block, like make our pistons fit. So off to the races.
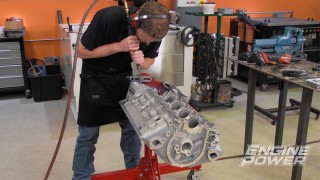
(Frankie)>> A solid carbide tip scraper might set you back $30 dollars or more, but it makes quick work of removing old gasket material without damaging the surface. We'll punch out the cam bearings before deburring and cleaning the engine. This prevents metal shavings from getting behind the bearings during machining. We'll also remove the oil gallery threaded and pressed in plugs so the galleries can be cleaned before assembly. [ Music ]
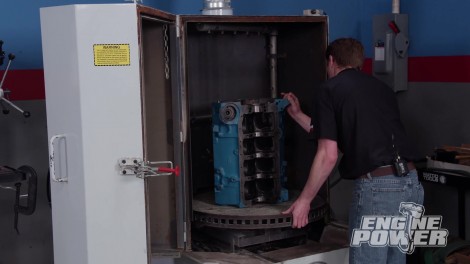
(Pat)>> Using a metal file we'll gently deburr the block and main caps. It doesn't take much. We're only removing a tiny amount of metal to round off sharp edges, which could cut you. It also helps remove stress risers where cracks could start. This takes a bit of time but it's very satisfying when you're done. We'll run the engine in the jet washer to remove the metal shavings. We don't want them getting into the cylinder hone. Up next, setting the correct piston skirt clearance helps make sure your engine runs right and runs long.
(Frankie)>> We are all about horsepower here and that means increasing cylinder pressure. We've been talking about how that correlates the fuel octane you need, but it also determines what kind of spark plug you need to run. Now there's a bunch of different styles and manufacturers of spark plug, but in today's Summit Tech Tip we are gonna be talking about spark plug heat range. Now the heat range determines how much heat is transferred from the spark plug itself through the threads into the cylinder head and onto the cooling system. A hotter spark plug has less contact between the porcelain and the threads of the plug. So, it will transfer less heat, while a colder plug has more contact between the porcelain and the threads and will transfer more heat. Here's an example of a cold spark plug and a hot spark plug, and you can see the difference in how much contact the porcelain has with the threads. A spark plug that is too cold will not retain enough heat to burn off carbon deposits, and can eventually foul, while a spark plug that is too hot can become a potential point for pre-ignition, which is when the fuel/air mixture is lit long before we want it to and is completely different from detonation but very harmful to the internal components of the engine. Every manufacturer has a different heat range that correlates to how much heat the spark plug will transfer, but if you know the style and size of the spark plug you're going to be using it's pretty easy to cross reference heat ranges between brands. Just like everything else in engine building this is application specific to how much power you're going to make. So, you definitely need to know the heat ranges of the manufacturer you're going to be working with. Something to think about when you're trying to make more power. If you need help finding the right plug for your application reach out to the experts at Summit Racing Equipment.
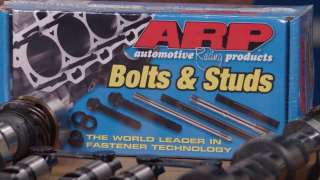
(Pat)>> There isn't anything that bolts on the inside or outside of an engine that can't benefit from a high quality fastener, and that's why you see a lot of ARP around here. We wanted to upgrade the fasteners in our engine, and that includes the main. So, we ordered up one of their main bolt kits. This one has 87-40 chro-moly fasteners that have 180,000 p-s-I of tensile strength. That far exceeds the tensile strength of an o-e-m bolt and even a grade eight. The kits come with everything you need including lube and detailed instructions. The instructions are very important because since these are not an o-e-m fastener they take a higher torque valve. You can't just look at an o-e-m book and get the torque. You have to follow the instructions to get it right. We are gonna get the mains torqued on and then get it in the hone. We apply Ultra Torque Lube onto the bolt heads and on the threads themselves. You'll notice there's no lube under the washer. This is a critical step that ensures torqued accuracy. Lubrication under the washer can overstress the fastener, even at the correct torque value, because the washer acts like a bearing if lubed on both sides. The bolts are torqued to 70-pound feet. With our block fixtured up in Sunnen SV-15 it's time to set one of the most critical clearances in an engine, piston skirt clearance. Now that is dependent on a couple of different things, and this is like everything else, it's application specific. It depends on what the piston is made out of and what you're going to be doing with the engine because the exact same piston design has to do a whole bunch of different things related to heat. So, it can be used in a variety of applications. This handy dandy sheet is included with the pistons to give you a guideline of where to set your clearance depending on what you're doing. From street naturally aspirated all the way through to marine supercharge, and the clearances will vary quite a bit because this is a 26-18 alloy and it has a high rate of expansion, and that will vary in clearance from a minimum of three and a half thousandths, all the way up to nine thousandths on some applications. That sounds like a lot of clearance because it is. Engines that generate a lot of cylinder pressure generate a lot of heat, and when that heat is made the piston swells faster than the block can keep up with it. So, if you don't have that additional clearance, you run the risk of damaging both the cylinder and the piston itself. For our application, which is essentially an r&d engine, we're gonna set the piston clearance at six thousandths, and that clearance is determined by the manufacturer as well. The piston manufacturer determines where they want the skirt measured for proper clearance, and these have a mark where you put the anvils of your micrometer to get the accurate measurement. Our skirts are measuring 4.056 and two-tenths. That means with our additional clearance our final bore size will be 4.062 and two-ten thousandths. It's a little bit bigger than the final 4.060 cause the block is 40 over. I have a lot of honing I have to do. I have to rough the cylinders out, put the torque plate on, and run them out to final size. So, the next time you see this it'll be ready to assemble. For more information on anything you've seen today please visit our website.

Show Full Transcript
(Frankie)>> From old reliable to wow! We've got big plans for this small block Chevy.
(Pat)>> Today on Engine Power we bring our backyard build into the shop to give it a slew of power upgrades. [ Music ]
(Frankie)>> Hey everybody! Here in Engine Power we have one of our old favorites back, and it's probably pretty recognizable to you. It's a small block Chevy 350 that was pretty unique because it never even came into the shop. We did all the work out back in our parking lot just like you guys would at home. Now we accidentally picked the hottest day of the year to do that, but after a long day of thrashing we even started it up right out on the pavement.
(Pat)>> After all of that fun we brought it back into the shop, hooked it to the dyno to see how it runs. Now quite frankly it did rather well. We have a very distinctive looking setup. So, you would probably remember both the dyno session and the build, but just in case you don't have a look at this. Frankie told me he got a good deal on a throttle body injection small block along with some parts that had been ordered for the seller's engine build. Tearing into an engine is kind of like opening a Christmas present. Sometimes it's great, sometimes it's terrible, and sometimes like this small block it's pretty good. We did hit a couple of snags along the way such as underneath the valve cover.
(Frankie)>> Whoa, look at that! A couple of the oil shrouders are broken. I actually saw that, one of those on the other head, but there's a couple in this head that are broken.
(Pat)>> I have never seen that before. [ Music ]
(Frankie)>> Oh, just some water and some oil, and some oil water. I don't see any chunks though.
(Pat)>> That's not total milkshake. It's kinda dirty. [ Music ]
(Frankie)>> Nasty!
(Pat)>> This is a horrible job. That's what cardboard's for. [ Music ]
(Frankie)>> After cleaning the cylinder heads by hand we installed new seals and valve springs designed for a hydraulic roller cam. Then we freshened up the cylinder bores using a 320-grit ball hone. This establishes a new finish for the fresh piston rings to seat on. We used engine oil as a lubricant and turned the hone at about 300 r-p-m to achieve roughly a 45-degree included angle on the cross hatch.
(Pat)>> To measure main bearing clearance we used Plasti-gauge. After torquing the caps down and removing them we checked the compressed plastic against the gauge. We had about two thousandths clearance. [ Music ] The crankshaft is ten thousandths under and is part of a kit that includes bearings. The mains are torqued to 65-pound feet. [ Music ]
(Frankie)>> A new cam was included in our engine purchase. It's a hydraulic roller from Comp with a fairly sporty grind. A new double roller timing set came next. [ Music ] We reused the pistons, but since the rings are a wear item they were replaced with a set of o-e-m style pieces. [ Music ]
(Pat)>> There's no way we'll build an engine without degreeing the cam. It came in at 106 degrees of intake centerline, which is four degrees advanced. [ Music ] A fresh oil pump and pickup assembly went in. [ Music ] Retrofit hydraulic lifters were part of the cam kit. [ Music ] I wish that crew would come and do our work that normally does it.
(Frankie)>> The ninjas? The midnight ninjas, yeah! The heads were torqued in three equal steps to 65-pound feet. The push rods were part of the cam kit and are shorter than the originals. [ Music ]
(Pat)>> We had a dual plane Weiand Speed Warrior intake in our shop. It's a great choice for this engine. [ Music ] A Street Demon carb was next, followed by our derby headers. Here we go! Solid!
(Frankie)>> Borrowed those from the guys down in Carcass.
(Pat)>> I knew we'd get use out of them one day.
(Frankie)>> Then we ran fuel and electrical lines and fired this small block up. [ Music ] [ engine starting ] [ engine revving ]
(Pat)>> When we got the engine back into the shop it went straight into the dyno cell. Smooth! Good oil pressure. [ engine revving ]
(Frankie)>> Look at that! Woo!
(Pat)>> I cannot wait to see what the timing is right there cause that actually made decent power.
(Frankie)>> That's not bad.
(Pat)>> The Chevy put out 276 horsepower at 4,800 r-p-m and 345-pound feet of torque at 3,200 r-p-m. Coming up, static compression is important, but dynamic compression tells the full story.
(Pat)>> We are back on the small block Chevy 350 backyard build. We have a bunch of parts in house to upgrade this power plant, and it will get a bit power increase over the modest driveway build you've seen here before. Last time we did this it was like 600 degrees out.
(Frankie)>> By that time it was all dark, remember? It was only 90 degrees.
(Pat)>> The teardown begins by removing these notoriously obnoxious derby headers.
(Frankie)>> Takes a little bit of work, huh?
(Pat)>> I'm still working on it. I was very happy with how it ran. And since this engine is getting better induction and an upgraded rotating assembly it has to come completely apart. [ drill humming ] [ Music ]
(Pat)>> Even though this small block didn't make crazy power the spark plugs indicate that the engine had a great tune-up in it. This side's the same way. Not bad for a parking lot hone job. She sealed up nice.
(Frankie)>> It didn't make a ton of power, but when it was dyno'ed it ran really good. It didn't smoke, didn't miss. Can't complain for being built in the parking lot. [ Music ]
(Pat)>> Stuck down.
(Frankie)>> There you go.
(Pat)>> Power it off there.
(Frankie)>> Still looks good!
(Pat)>> A brand new engine sorta, kinda, not really. [ drill humming ] [ Music ]
(Pat)>> Come back here.
(Frankie)>> Since we won't be reusing the cylinder heads or valvetrain we'll skip removing the rockers and push rods and jump straight to unbolting the heads. [ Music ]
(Pat)>> Nice!
(Frankie)>> Wow, the chambers look good, not wet. Looks like it was running really nice.
(Pat)>> The chambers are all dry. The cylinders are dry. I wasn't expecting a race engine, but the cylinders look decent. If you don't see anything that's migrating oil wise up into the chamber it was running fine.
(Frankie)>> For the way it looked before it looks just as good now. It wasn't perfect when we started. It's not perfect now but it still looks good, and there wasn't any major problems. It looks like ran really nice, and we know that it did cause we dyno'ed it.
(Pat)>> We're not gonna use these lifters again I don't think, are we?
(Frankie)>> Now but I'll think we'll keep them just in case. There's probably nothing wrong with them. So, we can keep them for another project, and hydraulic roller. So don't need to keep them in order or anything.
(Pat)>> Brand new, everything looks fantastic. I'll take it!
(Frankie)>> The great part about a one-piece oil pan gasket. If you don't go too heavy on the silicone when installing it, you can generally reuse them later. This one looks really clean and was only installed last year. So, we'll reuse it. [ Music ]
(Pat)>> This o-e replacement balancer worked great for the first build, but since we're upping the power we'll replace it with an s-f-i approved piece. [ Music ]
(Frankie)>> Before the bolts can come out the locking plate tabs must be bent back out of the way. [ Music ]
(Pat)>> Because the engine has a hydraulic roller cam a cam shaft thrust button was used to keep the cam located. We'll save it to use on the new cam shaft. [ Music ] Look at that, brand new!
(Frankie)>> They basically are. Always protect the crankshaft by covering the rod bolts before removing the connecting rods.
(Pat)>> Oh yeah!
(Frankie)>> Looks pretty good, yeah! Those look pretty good for used pistons. [ Music ] And I mean really used pistons.
(Pat)>> Hey!
(Frankie)>> What?
(Pat)>> We've got to keep going here.
(Frankie)>> Just reminiscing man.
(Pat)>> You're living in the past. Live in the now. [ Music ] A shame to tear this one down, but we are doing it for a good reason.
(Frankie)>> Yeah, more power is always a good reason, but it looks really, really nice. So that's a good sign. Small block Chevy builds are a dime a dozen, and we have done our fair share. So, with this one we're gonna do something that is a little bit different. We haven't covered that much, and you might not have seen but it's universal to all engines, and that is cover dynamic compression ratio. Normally the rule back in the day was that 11:1 static compression ratio was the limit for pump gas, but there's a few more factors that go into the actual octane rating your fuel needs, and the bigger one is dynamic compression ratio. Static compression ratio uses the distance between the piston at bottom dead center and top dead center during its calculation, but dynamic compression ratio factors in when the intake valve closes because no air can actually be compressed inside the cylinder until both valves are closed. Because it's based off when the intake valve closes, cam size and intake centerline placement are huge factors. For our engine we're gonna run a static compression ratio that you would normally think is not possible on pump gas, but because of our dynamic compression ratio it's gonna run just fine.
(Pat)>> Spoken like a true engine builder.
(Frankie)>> I try sometimes. Up next, we prep the small block to receive forged pistons and upgraded cylinder heads.
(Pat)>> The purpose of this build is to show you that the octane rating of your fuel is not determined solely by static compression ratio. We are retaining the stock block and stock crankshaft because they will be sufficient for our power level, but we are upgrading the rest of the internal components with things we picked up from Summit Racing Equipment, and that's gonna help us make that happen. It all starts with the connecting rods. They are from Scat, and they are a 43-40 material with an I-beam design. They are 5.700 center to center length like a stock small block Chevy with a 9.027 wrist pin, but this one contains a bushing so we can run floating wrist pens. We're getting rid of the press fit. They are also retained by 87-40 ARP rod bolts. Those rods will be swinging around some Icon forged pistons. These are a 26-18 alloy and have a sixteenth, sixteenth, three-sixteenths ring pack. They also have a 9.027 wrist pin, but these pistons have something that you normally don't see us have, and that is a 13cc effective dome. That will help us get our static compression ratio up to where we want it for this build. Filling up those ring grooves are a set of Total Seal rings. These are a special set of rings that have a top ring that is gas ported. We want that benefit of gas porting, but we didn't have any gas ports in the pistons themselves. So, we will really benefit from their extra sealing ability. Also, we are gonna do some special stuff with the camshafts. You see two camshafts sitting here, which is odd, but one is a large one and one is a not so large one, and they are both a Track Max from Trick Flow. The camshaft is what affects dynamic compression. So, depending on where the cam is and how big it is that determines our dynamic compression. The smaller of the two has a duration at 50 thousandths lift of 230 degrees on the intake, 234 degrees on the exhaust, and they are on a 110-degree lobe separation. The larger one is a 246 at 50 on the intake, 254 on the exhaust on a 112 degree. Both cam shafts will work for our application, but that is strictly dependent on where the intake centerline falls on the camshaft. So, we have a billet timing set with a nine position keyway on the crank side to help adjust it where we want it. On the induction side we're keeping it simple and we're keeping it classy. These are Trick Flow's Super 23-degree series fast as cast 195cc intake port heads. These do not have any c-n-c'ing done. The port is cast to the right shape so they flow great. They have a 2.020 intake, 1.600 exhaust. They're both swirl polished stainless, and they're housed in a 62cc chamber. They also have a 1.460 diameter spring setup for our hydraulic rollers, and for the top of the induction we are gonna keep the r-p-m range in a manageable spot. So, we have a Trick Flow Street Burner dual plane intake manifold. Like always we're holding everything together with ARP fasteners. Before we can install any of these parts, we have some work to do. Namely get the crankshaft rebalanced and do a bunch of prep work on the block, like make our pistons fit. So off to the races.
(Frankie)>> A solid carbide tip scraper might set you back $30 dollars or more, but it makes quick work of removing old gasket material without damaging the surface. We'll punch out the cam bearings before deburring and cleaning the engine. This prevents metal shavings from getting behind the bearings during machining. We'll also remove the oil gallery threaded and pressed in plugs so the galleries can be cleaned before assembly. [ Music ]
(Pat)>> Using a metal file we'll gently deburr the block and main caps. It doesn't take much. We're only removing a tiny amount of metal to round off sharp edges, which could cut you. It also helps remove stress risers where cracks could start. This takes a bit of time but it's very satisfying when you're done. We'll run the engine in the jet washer to remove the metal shavings. We don't want them getting into the cylinder hone. Up next, setting the correct piston skirt clearance helps make sure your engine runs right and runs long.
(Frankie)>> We are all about horsepower here and that means increasing cylinder pressure. We've been talking about how that correlates the fuel octane you need, but it also determines what kind of spark plug you need to run. Now there's a bunch of different styles and manufacturers of spark plug, but in today's Summit Tech Tip we are gonna be talking about spark plug heat range. Now the heat range determines how much heat is transferred from the spark plug itself through the threads into the cylinder head and onto the cooling system. A hotter spark plug has less contact between the porcelain and the threads of the plug. So, it will transfer less heat, while a colder plug has more contact between the porcelain and the threads and will transfer more heat. Here's an example of a cold spark plug and a hot spark plug, and you can see the difference in how much contact the porcelain has with the threads. A spark plug that is too cold will not retain enough heat to burn off carbon deposits, and can eventually foul, while a spark plug that is too hot can become a potential point for pre-ignition, which is when the fuel/air mixture is lit long before we want it to and is completely different from detonation but very harmful to the internal components of the engine. Every manufacturer has a different heat range that correlates to how much heat the spark plug will transfer, but if you know the style and size of the spark plug you're going to be using it's pretty easy to cross reference heat ranges between brands. Just like everything else in engine building this is application specific to how much power you're going to make. So, you definitely need to know the heat ranges of the manufacturer you're going to be working with. Something to think about when you're trying to make more power. If you need help finding the right plug for your application reach out to the experts at Summit Racing Equipment.
(Pat)>> There isn't anything that bolts on the inside or outside of an engine that can't benefit from a high quality fastener, and that's why you see a lot of ARP around here. We wanted to upgrade the fasteners in our engine, and that includes the main. So, we ordered up one of their main bolt kits. This one has 87-40 chro-moly fasteners that have 180,000 p-s-I of tensile strength. That far exceeds the tensile strength of an o-e-m bolt and even a grade eight. The kits come with everything you need including lube and detailed instructions. The instructions are very important because since these are not an o-e-m fastener they take a higher torque valve. You can't just look at an o-e-m book and get the torque. You have to follow the instructions to get it right. We are gonna get the mains torqued on and then get it in the hone. We apply Ultra Torque Lube onto the bolt heads and on the threads themselves. You'll notice there's no lube under the washer. This is a critical step that ensures torqued accuracy. Lubrication under the washer can overstress the fastener, even at the correct torque value, because the washer acts like a bearing if lubed on both sides. The bolts are torqued to 70-pound feet. With our block fixtured up in Sunnen SV-15 it's time to set one of the most critical clearances in an engine, piston skirt clearance. Now that is dependent on a couple of different things, and this is like everything else, it's application specific. It depends on what the piston is made out of and what you're going to be doing with the engine because the exact same piston design has to do a whole bunch of different things related to heat. So, it can be used in a variety of applications. This handy dandy sheet is included with the pistons to give you a guideline of where to set your clearance depending on what you're doing. From street naturally aspirated all the way through to marine supercharge, and the clearances will vary quite a bit because this is a 26-18 alloy and it has a high rate of expansion, and that will vary in clearance from a minimum of three and a half thousandths, all the way up to nine thousandths on some applications. That sounds like a lot of clearance because it is. Engines that generate a lot of cylinder pressure generate a lot of heat, and when that heat is made the piston swells faster than the block can keep up with it. So, if you don't have that additional clearance, you run the risk of damaging both the cylinder and the piston itself. For our application, which is essentially an r&d engine, we're gonna set the piston clearance at six thousandths, and that clearance is determined by the manufacturer as well. The piston manufacturer determines where they want the skirt measured for proper clearance, and these have a mark where you put the anvils of your micrometer to get the accurate measurement. Our skirts are measuring 4.056 and two-tenths. That means with our additional clearance our final bore size will be 4.062 and two-ten thousandths. It's a little bit bigger than the final 4.060 cause the block is 40 over. I have a lot of honing I have to do. I have to rough the cylinders out, put the torque plate on, and run them out to final size. So, the next time you see this it'll be ready to assemble. For more information on anything you've seen today please visit our website.