Video Transcript
You're watching Power Nation.
Welcome back to Dirt and Trails,
everybody,
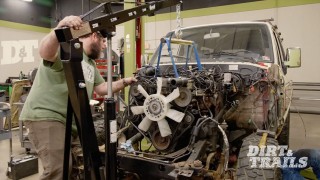
where today we are carrying on with our 1969 Jeep M715 Kaiser project we have dubbed the Spartan.
That's right.
And as you can see,
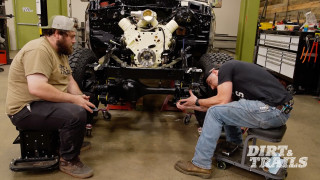
it is still in quite a few piles of parts, but we are gonna start putting an end to that today by getting the engine and transmission back in their home, and we've got some custom work we're doing.
I mean, it's gonna be a real busy day.
Yeah, but we gotta get to work first, so
welcome to Dirt and Trails.
All right,
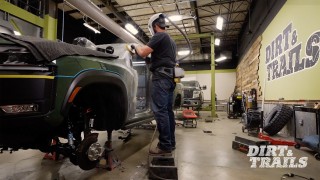
while Chris is getting going on our frame over here, I am going to be working on customizing our core support,
more specifically,
our lighting package inside of the core support itself.
So,
you can see the original setup here with the headlight and the turn signal,
and it worked fine, but
we broke one of the turn signal lenses while we were taking everything apart.
So rather than try to find a replacement for something that old and.
That
basic,
figured that's a good opportunity for us to try and do something a little bit different, you know.
So
you can see what it was over here and you can see what the new idea is
over here.
Obviously, it's quite a bit different, starting with the turn signal itself being moved from over here
down
to here.
Above that, we've got a Holly retro bright headlight that's gonna maintain that old.
Cool look but give us modern levels of brightness and performance.
Next to that, we've got a Baja Designs LP6 in place of the original turn signal
that's gonna act as one of our forward facing spotlights to make sure we've got
maximum visibility at all times, no matter what it is we're trying to take a look at.
Now
to make
this side look like that side,
we've got quite a bit of work to do. So
let's get started.
Step one, we've got to get all of this old stuff disassembled.
All right.
So, as far as the parts we're actually using,
these are lights from a C10.
So, even though it looks like it's gonna fit top to bottom, we are still gonna have to trim a little bit there, but
we're not gonna do that until we start fitting it in
by getting this panel out of the way and taking some material out this direction.
All right, that's looking pretty good there
and looking down the line that is
pretty dang close to the other side.
Now that we've got this fitted in,
we can move along and get
the actual housing for our light put into place and as you can see right now that's obviously not gonna happen
because we've got a whole bunch of parts of this that are in our way
primarily this tab right here on the bottom
and
this whole section here on the top.
So the way we're gonna fix that
is we're gonna.
Do something similar to what I did to the other light housing for the other side.
We're gonna take the center section of this out so that we can manipulate these tabs to where we need them so that they can bolt into the back of this core support,
but before we do that, I'm gonna go ahead and bend this tab over. You've probably gotten used to watching the fancy fab work that Chris does.
I do things a little bit differently.
I like to call it caveman fabrication.
Fabricated.
And now
we clamp this in,
mark it out, and get cut.
All right, now because this is so thin,
I'm leaving just a little bit in this corner
so that when I start getting close to the edge of this one it doesn't have a chance to start moving around over here
because right now
still got a little bit of rigidity to it so
that's gonna help save us from having this thing come flying back at me.
See,
just like that if I hadn't had that on there,
well, that sharp little corner could've come flying hit me somewhere,
and it's nice and hot.
I don't like getting burned.
And
it pops right off when you're done.
There we go.
All right,
now we're moving right along.
All right,
that's looking pretty well lined up, so I'm gonna get these two screws put in,
we'll make sure both sides match, and then we can move along and start getting our spotlight in.
All right, now that we've got our turn signals installed and fitted, we're gonna move on and get our other spotlight installed, and it's gonna be done with this Baja Designs LP6.
Now you can see I've got some tape on here that's gonna protect the surface on the front of this light while we're sliding it in and out, doing all of our fitment in the core support.
I'm gonna start snaking this thing in,
and then once we get it lined up, we'll be ready to mark out and drill for our holes.
So you can see we're running into some issues here trying to get this tilted and straight, and that's because there's a part on this side that I did not have to worry about over there,
this bracket right in here.
So what I'm gonna have to do
is come in, I'm gonna trim this and the other side out,
and while I'm at it, I'm gonna go ahead and knock this nut out as well, cause I know that's gonna have to disappear based on what I did to the other side.
OK, you can go again.
So I ended up just taking that entire bracket out.
Now we've got plenty of room. I've already done the rest of our fitting and made the last mark to drill our last hole and get this light installed.
I
shifty over there.
Now,
before I drop the headlight into this bucket,
I do have to open up this hole a little bit,
just enough
so that this pigtail
can fit through it.
Now, these retro bright lights do have tabs on the side
that are gonna line up
in the bucket itself,
and that's gonna actually orient this thing correctly and keep it
fixed in place.
All right,
there's 12,
and 3.
Now that all the work is actually done, I've got to pull it all back out because for the sake of doing it right, I'm gonna take the brackets,
clean up the edges the rest of the way,
get them sandblasted,
painted, that way, we don't have to worry about rust or anything like that.
So,
I'm gonna get going on all that boring stuff, and the next time you guys see this thing is when we reinstall it on that truck.
With the custom core support complete,
Chris moves on to reinforce our frame after finding some unpleasant surprises.
Some custom AC ducting in here.
All right folks,
while Eric was over on the other side, getting that core support all grafted in with those new lights,
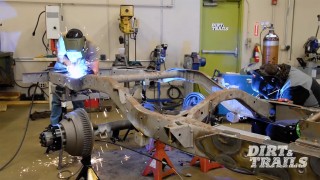
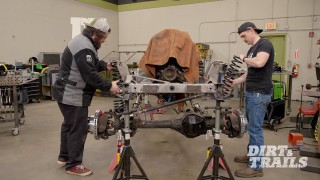
I've been over here leveling out the frame, getting ready to put the final touches into
patching it.
I have patched some of these panels up,
but I left this side here
so we can go through it together.
All right, I wanna show you guys something real quick.
If you see stuff like this,
this is just rust that over the years has just packed itself together.
This has to come off,
all right?
Just use a hammer and a chisel,
and it should come out with a little bit of gumption,
and then carry on from there.
So this is where the patch panel's supposed to come in and weld into,
but as you can see,
there's um.
Some custom AC ducting in here,
which isn't gonna help us at all.
So,
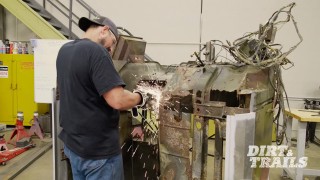
I'm gonna cut this out completely,
and then the patch panel is going to just
overlay over this,
and we'll keep rocking and rolling.
Now with all that cut out of the way, I'm gonna head over to the table,
start cutting out
the patch panel. I'm gonna rough it out with the zip disc,
then head over to the bandsaw,
dial it in,
and get ready to start actually
filling this back in.
I'm on the top here where I got this one clamp, it is fitting exactly where I want.
I'm gonna put on a few more clamps,
make one final check to make sure that everything's where I want it,
and then from there,
weld it all out, and then the patch
repairs are gonna be done on this frame.
Now,
I am content with the way everything is.
I made an adjustment before I actually started
tacking it in.
I have a nice trough down here,
a nice one up here.
I got good fitment up here.
So
we're gonna go full send.
There we go.
All right,
now that all the welding is done, I'm gonna go over everything,
make sure that there's no weld BBs that are stuck to it. If there are,
I'm just gonna come back with the wire wheel,
knock them off, and move on.
After this,
do a little bit of clean up and I'm gonna check in with Eric and see what we got to do next.
The frame's finally patched up.
Now we get to marry the engine to the transmission and get the assembly ready to move back into its home.
Yeah,
shove it.
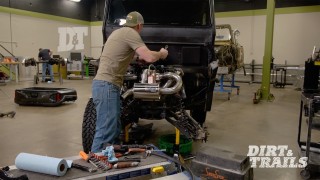
Moving right along with getting this Kayser put back together, I've got our engine up on the table so that we can get our clutch installed and get the transmission put back on so that we can move the whole assembly over and get it dropped back into its home on that frame.
Now,
to get this clutch installed, if you don't remember taking it apart,
it's a little bit different than what you're used to. And we're actually not starting with any of this on the table.
We're gonna come down here and grab our bell housing
because this has to go on before
any of this can. So,
With the heavy thing in my one hand, I'm gonna move
the rest of the heavy things with my other because I'm not that smart.
We're gonna make some room.
And we're gonna get this
put back up on here.
Now,
before I actually bolt it in,
I am gonna take
a thread chaser and make sure all of these holes are nice and clean.
That way, we're not gonna run into any issues getting
everything installed.
And this is running down by hand, which is a good sign. That means there's not really any resistance in there, so there's not a whole lot to clean out.
Now,
the reason we have to put the bell housing on before we could put on everything else is because the bell housing bolts here
are actually covered up by the flywheel and,
well, that's just not easy to get to at all. So,
this has to go in place and then the clutch gets assembled inside of it.
Now that we've got this installed, we're gonna take our flywheel,
we'll get that put on the studs on the back of our crank
and continue installing from there.
Let's get this put in
There we go.
Anytime you're doing a clutch, it's always important to make sure you get a good
torque on there, make sure it's the spec.
So you can see now
that
while I'm trying to torque this bolt,
it's turning the engine over.
That's a good thing because that means that everything inside of this engine is still moving really well, but it's a bad thing because those aren't torqued yet. So I'm gonna go grab a flywheel holder and we'll finish this up.
Now our flywheel holder tool isn't anything special. Just position it
in the teeth of your flywheel
opposite of the direction you need to turn,
and there we go.
Now that we've got our flywheel torque down,
it's time to get the rest of our clutch installed,
meaning we've got to get our friction disc and our pressure plate in.
You always want the side with the springs facing towards your transmission.
All we're doing for right now is we're just gonna get two bolts put in
because that's gonna allow me to
stop struggling to hold this thing up because it's a little heavy.
At this point we'll take our alignment tool,
pop that right in there.
So,
just like the flywheel, I'm gonna run around and get all of these snugged up and get the pressure plate against the flywheel.
Then we'll go around and do one final round of torquing.
So now that they're all snugged up,
we are back to one and we are gonna actually torque it to spec in the same order that we just snugged it down.
There we go.
So now that we have the rest of our clutch assembled inside the bell housing,
it's time to get the throw-out bearing put in.
Now,
because of the way our throwout bearing has to ride,
it has to sit above this.
So to make sure we get it right, I'm just gonna
reassemble real quick.
Right.
All right,
so we know we're gonna be going in like that,
which means that our set screw needs to be on the bottom.
Which means that
our set screw hole has to be on the bottom.
I'm just gonna take a little bit of grease,
just a light coat on the end.
Just make sure to spread that grease along as we go.
We'll get it all the way through
and work it a little bit,
make sure it's nice and smooth,
got no weird noises or nothing.
Good enough.
I'll let this
rest right there.
Make sure we put our other retainer spring back in here
till it lands like so.
It's gonna help retain this whole deal
on
our cross shaft.
So we can see
that's landed right where it needs to be.
Now, you'll remember, we checked the position of our set screw hole in the cross shaft before we put it in, and we're gonna put this
directly at the bottom
with the flywheel in place.
And we'll tighten our set screw,
and then we'll check it.
So what we're looking for
is
where our linkage connects to.
It's not being allowed to move any further back and forth than that.
That means that our set screw is where it needs to be and it's stopping that movement.
We can look straight down the middle and see that we are still lined up to the center of our crankshaft and sitting right where it needs to.
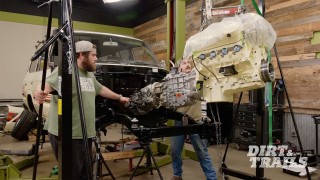
So our next step is gonna be to get the transmission installed.
You know,
it's not very big,
but it's pretty heavy.
All right.
All this down.
And where we're at now
is trying to get these splines
lined up.
And in an effort to
make this a little easier to do by myself,
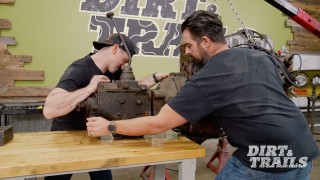
what I've done is I've put the transmission in gear.
That's gonna allow me
to use the output shaft to rotate the input shaft and get it lined up.
Chris,
you can come give me a hand. yep.
Got our spines in.
Yeah,
shove it.
And you can see how easily that dropped in and it's threading in there
that tells us that we're lined up good.
Well, with all 4 of those tightened down,
we now have a married engine and transmission once again
and as soon as Chris is done with that frame over there,
we can go ahead and drop it in.
Whoa,
whoa, whoa.
Slow buddy,
we finally reached the moment that we've all been waiting for
time to mount the engine.
Now that these two are back together as a happy couple, we are one step closer to getting it back on the frame,
but there are some mounting things that have to be figured out first, and Chris is gonna take care of that.
But before we get this thing off the table to move it over there,
we're gonna add a little bit of extra support.
I think Chris has a ratchet strap ready to go.
I'll make sure it's in gear so that the thing can't spin.
Now that we've got this thing strapped up, we'll go ahead and
drop it off of our table.
Get it over the truck and
Chris can have his way with it.
All right,
now that we have our motor and transmission sitting on this side of the house, we need to start getting it ready to get back into the frame.
Before we do that,
I need to uh make some adjustments to these motor mounts.
Come on down.
There's supposed to be a plate that goes across here that actually connects the motor
to the frame side.
All I'm gonna do is I'm gonna take a piece of
1/4 inch flat bar,
bolt it in like this,
with 2 more holes to bolt it up like that,
and then
our motor mounts are ready to receive
the rate of the motor.
Now I need to do a little bit of prep work to these plates here before I go welding things in.
Reason for that,
let's say
I was gonna take this stud
and weld it right here.
As you can see,
I have nowhere for the weld to go except for on top of this plate.
So, what I'm gonna do instead
is I have this bolt set to the proper height.
And coupled with the fact that I have put a slight chaffer into this hole here,
what that's going to allow me to do is one,
push up on the stud and it is going to stay flat.
I'll be able to then
put a lot more weld in here and leave that weld there,
so that when I do go to bolt this up, I don't have to worry about anything
pushing that motor mount out of the way.
I'm gonna go grab the welder,
we'll get this sorted out
and send it home.
Now I'm just gonna take this over to the belt sander,
sand those down,
we're ready to keep on moving.
Now that we have our plates mounted to the mortar mount,
let's
carry on with the assembly.
me.
Now that we have our engine mounts bolted up,
Eric was kind enough to go and grab the forklift, so if he could just come on in with that, we'll get this thing slung
and put it in its forever home.
All right,
so I'm gonna swing a little wide left just from the angle it's at and then uh whoa whoa whoa,
what
slow buddy.
Straight in.
Yeah
Down.
Stop.
Go down.
Tick off.
We're there.
Now that Chris has got this engine and transmission mounted on our frame,
I've gone ahead and started getting some updates done so that it's ready to be fired up again.
Now that includes getting a new oil line installed here on the back as well as getting our oil pressure line ready for our gauge once we get to that point.
Now,
up to the front, we've got a few fittings installed into our fuel pressure regulator. It's gonna allow us to run our.
Fuel
up from the bottom
out over the top into the carburetor.
Now to make sure we're getting the right amount of fuel,
we've got a gauge here on the front. It's gonna make sure that we're not getting too much or too little pressure.
But now that all of this is installed,
I'm looking at our ignition coil here, and that is just a little bit closer than I would like
because
this is fuel components here and that is the last place you would want. Want a stray spark to land if we ever had that happen.
So I think what I'm gonna do is I'm gonna take our ignition coil from here.
I'm gonna go ahead and move it to right here.
That's gonna get it far enough away from here that we're not gonna have to worry about it.
The wire is gonna go ahead and route up and over.
It'll be nice and clear and have no worries,
but unfortunately,
we are
just about out of time for today,
so
I'll see you next time.
Show Full Transcript
Welcome back to Dirt and Trails,
everybody,
where today we are carrying on with our 1969 Jeep M715 Kaiser project we have dubbed the Spartan.
That's right.
And as you can see,
it is still in quite a few piles of parts, but we are gonna start putting an end to that today by getting the engine and transmission back in their home, and we've got some custom work we're doing.
I mean, it's gonna be a real busy day.
Yeah, but we gotta get to work first, so
welcome to Dirt and Trails.
All right,
while Chris is getting going on our frame over here, I am going to be working on customizing our core support,
more specifically,
our lighting package inside of the core support itself.
So,
you can see the original setup here with the headlight and the turn signal,
and it worked fine, but
we broke one of the turn signal lenses while we were taking everything apart.
So rather than try to find a replacement for something that old and.
That
basic,
figured that's a good opportunity for us to try and do something a little bit different, you know.
So
you can see what it was over here and you can see what the new idea is
over here.
Obviously, it's quite a bit different, starting with the turn signal itself being moved from over here
down
to here.
Above that, we've got a Holly retro bright headlight that's gonna maintain that old.
Cool look but give us modern levels of brightness and performance.
Next to that, we've got a Baja Designs LP6 in place of the original turn signal
that's gonna act as one of our forward facing spotlights to make sure we've got
maximum visibility at all times, no matter what it is we're trying to take a look at.
Now
to make
this side look like that side,
we've got quite a bit of work to do. So
let's get started.
Step one, we've got to get all of this old stuff disassembled.
All right.
So, as far as the parts we're actually using,
these are lights from a C10.
So, even though it looks like it's gonna fit top to bottom, we are still gonna have to trim a little bit there, but
we're not gonna do that until we start fitting it in
by getting this panel out of the way and taking some material out this direction.
All right, that's looking pretty good there
and looking down the line that is
pretty dang close to the other side.
Now that we've got this fitted in,
we can move along and get
the actual housing for our light put into place and as you can see right now that's obviously not gonna happen
because we've got a whole bunch of parts of this that are in our way
primarily this tab right here on the bottom
and
this whole section here on the top.
So the way we're gonna fix that
is we're gonna.
Do something similar to what I did to the other light housing for the other side.
We're gonna take the center section of this out so that we can manipulate these tabs to where we need them so that they can bolt into the back of this core support,
but before we do that, I'm gonna go ahead and bend this tab over. You've probably gotten used to watching the fancy fab work that Chris does.
I do things a little bit differently.
I like to call it caveman fabrication.
Fabricated.
And now
we clamp this in,
mark it out, and get cut.
All right, now because this is so thin,
I'm leaving just a little bit in this corner
so that when I start getting close to the edge of this one it doesn't have a chance to start moving around over here
because right now
still got a little bit of rigidity to it so
that's gonna help save us from having this thing come flying back at me.
See,
just like that if I hadn't had that on there,
well, that sharp little corner could've come flying hit me somewhere,
and it's nice and hot.
I don't like getting burned.
And
it pops right off when you're done.
There we go.
All right,
now we're moving right along.
All right,
that's looking pretty well lined up, so I'm gonna get these two screws put in,
we'll make sure both sides match, and then we can move along and start getting our spotlight in.
All right, now that we've got our turn signals installed and fitted, we're gonna move on and get our other spotlight installed, and it's gonna be done with this Baja Designs LP6.
Now you can see I've got some tape on here that's gonna protect the surface on the front of this light while we're sliding it in and out, doing all of our fitment in the core support.
I'm gonna start snaking this thing in,
and then once we get it lined up, we'll be ready to mark out and drill for our holes.
So you can see we're running into some issues here trying to get this tilted and straight, and that's because there's a part on this side that I did not have to worry about over there,
this bracket right in here.
So what I'm gonna have to do
is come in, I'm gonna trim this and the other side out,
and while I'm at it, I'm gonna go ahead and knock this nut out as well, cause I know that's gonna have to disappear based on what I did to the other side.
OK, you can go again.
So I ended up just taking that entire bracket out.
Now we've got plenty of room. I've already done the rest of our fitting and made the last mark to drill our last hole and get this light installed.
I
shifty over there.
Now,
before I drop the headlight into this bucket,
I do have to open up this hole a little bit,
just enough
so that this pigtail
can fit through it.
Now, these retro bright lights do have tabs on the side
that are gonna line up
in the bucket itself,
and that's gonna actually orient this thing correctly and keep it
fixed in place.
All right,
there's 12,
and 3.
Now that all the work is actually done, I've got to pull it all back out because for the sake of doing it right, I'm gonna take the brackets,
clean up the edges the rest of the way,
get them sandblasted,
painted, that way, we don't have to worry about rust or anything like that.
So,
I'm gonna get going on all that boring stuff, and the next time you guys see this thing is when we reinstall it on that truck.
With the custom core support complete,
Chris moves on to reinforce our frame after finding some unpleasant surprises.
Some custom AC ducting in here.
All right folks,
while Eric was over on the other side, getting that core support all grafted in with those new lights,
I've been over here leveling out the frame, getting ready to put the final touches into
patching it.
I have patched some of these panels up,
but I left this side here
so we can go through it together.
All right, I wanna show you guys something real quick.
If you see stuff like this,
this is just rust that over the years has just packed itself together.
This has to come off,
all right?
Just use a hammer and a chisel,
and it should come out with a little bit of gumption,
and then carry on from there.
So this is where the patch panel's supposed to come in and weld into,
but as you can see,
there's um.
Some custom AC ducting in here,
which isn't gonna help us at all.
So,
I'm gonna cut this out completely,
and then the patch panel is going to just
overlay over this,
and we'll keep rocking and rolling.
Now with all that cut out of the way, I'm gonna head over to the table,
start cutting out
the patch panel. I'm gonna rough it out with the zip disc,
then head over to the bandsaw,
dial it in,
and get ready to start actually
filling this back in.
I'm on the top here where I got this one clamp, it is fitting exactly where I want.
I'm gonna put on a few more clamps,
make one final check to make sure that everything's where I want it,
and then from there,
weld it all out, and then the patch
repairs are gonna be done on this frame.
Now,
I am content with the way everything is.
I made an adjustment before I actually started
tacking it in.
I have a nice trough down here,
a nice one up here.
I got good fitment up here.
So
we're gonna go full send.
There we go.
All right,
now that all the welding is done, I'm gonna go over everything,
make sure that there's no weld BBs that are stuck to it. If there are,
I'm just gonna come back with the wire wheel,
knock them off, and move on.
After this,
do a little bit of clean up and I'm gonna check in with Eric and see what we got to do next.
The frame's finally patched up.
Now we get to marry the engine to the transmission and get the assembly ready to move back into its home.
Yeah,
shove it.
Moving right along with getting this Kayser put back together, I've got our engine up on the table so that we can get our clutch installed and get the transmission put back on so that we can move the whole assembly over and get it dropped back into its home on that frame.
Now,
to get this clutch installed, if you don't remember taking it apart,
it's a little bit different than what you're used to. And we're actually not starting with any of this on the table.
We're gonna come down here and grab our bell housing
because this has to go on before
any of this can. So,
With the heavy thing in my one hand, I'm gonna move
the rest of the heavy things with my other because I'm not that smart.
We're gonna make some room.
And we're gonna get this
put back up on here.
Now,
before I actually bolt it in,
I am gonna take
a thread chaser and make sure all of these holes are nice and clean.
That way, we're not gonna run into any issues getting
everything installed.
And this is running down by hand, which is a good sign. That means there's not really any resistance in there, so there's not a whole lot to clean out.
Now,
the reason we have to put the bell housing on before we could put on everything else is because the bell housing bolts here
are actually covered up by the flywheel and,
well, that's just not easy to get to at all. So,
this has to go in place and then the clutch gets assembled inside of it.
Now that we've got this installed, we're gonna take our flywheel,
we'll get that put on the studs on the back of our crank
and continue installing from there.
Let's get this put in
There we go.
Anytime you're doing a clutch, it's always important to make sure you get a good
torque on there, make sure it's the spec.
So you can see now
that
while I'm trying to torque this bolt,
it's turning the engine over.
That's a good thing because that means that everything inside of this engine is still moving really well, but it's a bad thing because those aren't torqued yet. So I'm gonna go grab a flywheel holder and we'll finish this up.
Now our flywheel holder tool isn't anything special. Just position it
in the teeth of your flywheel
opposite of the direction you need to turn,
and there we go.
Now that we've got our flywheel torque down,
it's time to get the rest of our clutch installed,
meaning we've got to get our friction disc and our pressure plate in.
You always want the side with the springs facing towards your transmission.
All we're doing for right now is we're just gonna get two bolts put in
because that's gonna allow me to
stop struggling to hold this thing up because it's a little heavy.
At this point we'll take our alignment tool,
pop that right in there.
So,
just like the flywheel, I'm gonna run around and get all of these snugged up and get the pressure plate against the flywheel.
Then we'll go around and do one final round of torquing.
So now that they're all snugged up,
we are back to one and we are gonna actually torque it to spec in the same order that we just snugged it down.
There we go.
So now that we have the rest of our clutch assembled inside the bell housing,
it's time to get the throw-out bearing put in.
Now,
because of the way our throwout bearing has to ride,
it has to sit above this.
So to make sure we get it right, I'm just gonna
reassemble real quick.
Right.
All right,
so we know we're gonna be going in like that,
which means that our set screw needs to be on the bottom.
Which means that
our set screw hole has to be on the bottom.
I'm just gonna take a little bit of grease,
just a light coat on the end.
Just make sure to spread that grease along as we go.
We'll get it all the way through
and work it a little bit,
make sure it's nice and smooth,
got no weird noises or nothing.
Good enough.
I'll let this
rest right there.
Make sure we put our other retainer spring back in here
till it lands like so.
It's gonna help retain this whole deal
on
our cross shaft.
So we can see
that's landed right where it needs to be.
Now, you'll remember, we checked the position of our set screw hole in the cross shaft before we put it in, and we're gonna put this
directly at the bottom
with the flywheel in place.
And we'll tighten our set screw,
and then we'll check it.
So what we're looking for
is
where our linkage connects to.
It's not being allowed to move any further back and forth than that.
That means that our set screw is where it needs to be and it's stopping that movement.
We can look straight down the middle and see that we are still lined up to the center of our crankshaft and sitting right where it needs to.
So our next step is gonna be to get the transmission installed.
You know,
it's not very big,
but it's pretty heavy.
All right.
All this down.
And where we're at now
is trying to get these splines
lined up.
And in an effort to
make this a little easier to do by myself,
what I've done is I've put the transmission in gear.
That's gonna allow me
to use the output shaft to rotate the input shaft and get it lined up.
Chris,
you can come give me a hand. yep.
Got our spines in.
Yeah,
shove it.
And you can see how easily that dropped in and it's threading in there
that tells us that we're lined up good.
Well, with all 4 of those tightened down,
we now have a married engine and transmission once again
and as soon as Chris is done with that frame over there,
we can go ahead and drop it in.
Whoa,
whoa, whoa.
Slow buddy,
we finally reached the moment that we've all been waiting for
time to mount the engine.
Now that these two are back together as a happy couple, we are one step closer to getting it back on the frame,
but there are some mounting things that have to be figured out first, and Chris is gonna take care of that.
But before we get this thing off the table to move it over there,
we're gonna add a little bit of extra support.
I think Chris has a ratchet strap ready to go.
I'll make sure it's in gear so that the thing can't spin.
Now that we've got this thing strapped up, we'll go ahead and
drop it off of our table.
Get it over the truck and
Chris can have his way with it.
All right,
now that we have our motor and transmission sitting on this side of the house, we need to start getting it ready to get back into the frame.
Before we do that,
I need to uh make some adjustments to these motor mounts.
Come on down.
There's supposed to be a plate that goes across here that actually connects the motor
to the frame side.
All I'm gonna do is I'm gonna take a piece of
1/4 inch flat bar,
bolt it in like this,
with 2 more holes to bolt it up like that,
and then
our motor mounts are ready to receive
the rate of the motor.
Now I need to do a little bit of prep work to these plates here before I go welding things in.
Reason for that,
let's say
I was gonna take this stud
and weld it right here.
As you can see,
I have nowhere for the weld to go except for on top of this plate.
So, what I'm gonna do instead
is I have this bolt set to the proper height.
And coupled with the fact that I have put a slight chaffer into this hole here,
what that's going to allow me to do is one,
push up on the stud and it is going to stay flat.
I'll be able to then
put a lot more weld in here and leave that weld there,
so that when I do go to bolt this up, I don't have to worry about anything
pushing that motor mount out of the way.
I'm gonna go grab the welder,
we'll get this sorted out
and send it home.
Now I'm just gonna take this over to the belt sander,
sand those down,
we're ready to keep on moving.
Now that we have our plates mounted to the mortar mount,
let's
carry on with the assembly.
me.
Now that we have our engine mounts bolted up,
Eric was kind enough to go and grab the forklift, so if he could just come on in with that, we'll get this thing slung
and put it in its forever home.
All right,
so I'm gonna swing a little wide left just from the angle it's at and then uh whoa whoa whoa,
what
slow buddy.
Straight in.
Yeah
Down.
Stop.
Go down.
Tick off.
We're there.
Now that Chris has got this engine and transmission mounted on our frame,
I've gone ahead and started getting some updates done so that it's ready to be fired up again.
Now that includes getting a new oil line installed here on the back as well as getting our oil pressure line ready for our gauge once we get to that point.
Now,
up to the front, we've got a few fittings installed into our fuel pressure regulator. It's gonna allow us to run our.
Fuel
up from the bottom
out over the top into the carburetor.
Now to make sure we're getting the right amount of fuel,
we've got a gauge here on the front. It's gonna make sure that we're not getting too much or too little pressure.
But now that all of this is installed,
I'm looking at our ignition coil here, and that is just a little bit closer than I would like
because
this is fuel components here and that is the last place you would want. Want a stray spark to land if we ever had that happen.
So I think what I'm gonna do is I'm gonna take our ignition coil from here.
I'm gonna go ahead and move it to right here.
That's gonna get it far enough away from here that we're not gonna have to worry about it.
The wire is gonna go ahead and route up and over.
It'll be nice and clear and have no worries,
but unfortunately,
we are
just about out of time for today,
so
I'll see you next time.