Video Transcript
[Eric] You're watching Powernation!
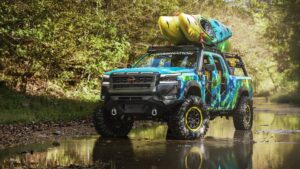
[Eric] Today on Dirt and Trials our 2025 Nissan Frontier dubbed Rapid Runner takes on the trails of Tennessee. [Chris] But before that it gets oversized and accessorized with more lift, bigger tires, custom tube doors, and a boatload of Nismo goodies. [Eric] After wrapping things up and making the last few finishing touches we're gonna take a ride down to the river and make sure this one of a kind custom truck is ready to make a splash out at SEMA. [ Music ]
The last thing we've got to do before we're finally ready to get some new wheels and tires on this thing and get it back on the ground is get our brakes installed. We want to make sure to capitalize on the bigger brakes we got from the Titan and get the most stopping power possible cause this little thing's gonna be pretty big. We called up the guys over at EBC and we've got us a set of extra duty plus brake pads. These things are great. They're formulated specifically for trucks and suvs. They've got EBC's break-in coating. So during that first 500 or so miles you're still gonna get smooth braking performance. Plus it's gonna help a lot with actually getting them broken in. On top of those pads we also have a set of GD rotors. We've got these for front and rear as well. They've got nice dimpling here around the outside as well as slots. That's gonna help with keeping the temperature down and getting that dust out of there. Let's get this stuff installed. [ Music ]
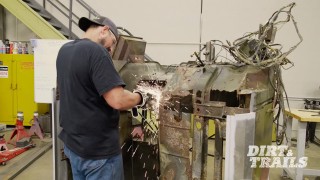
If you want to make sure your brakes are gonna perform properly and quietly like they're supposed to you always want to make sure to get some grease on there. These pads have what's called a screecher or a squealer tab. It's good to have those because that's gonna give you an audible indicator that your brakes are starting to get low. These pads are specifically formulated for trucks and suvs. They are a high friction compound, which is gonna generate more braking power on its own. If you're ever in a situation where a lot of heat build-up is gonna start causing you issues these pads are gonna be a lot better off than your standard ones. If you're doing a Titan swap on your Frontier, whether it's a full swap like we've done here, a partial swap, or even if you're just doing some work to your stock Frontier with its original components, EBC's got your covered whether it's the ED Plus for off roading and hauling or if you're into racing or anything else like that they've got options for all of it. So no matter what it is you're doing make sure you check them out. [Chris] Now that we are done all the sheet metal work we can move on to something a tad more interesting, tube doors. So I have the doors roughly laid out here. This is the B-pillar side, this is the A-pillar side. The top bar is gonna be dead flat. We're gonna keep it simple. The bottom however I need to put a bend in there. This way it looks interesting. Thing I'm gonna do and I have to keep in mind is whatever I bend this block at I need to bend this block in the opposite direction so both sides stay parallel. Let's head over to the bender and start bending some tubes. As you can see I have nothing in front of the block, which means the material consumed is gonna be behind the block. I put my pin in for the correct corresponding die. We put in our roller. Make sure your roller is corresponding to the proper die. This one's an inch and a half, which is laser engraved straight from the plant. So you know this is the right size. There is a bunch of slop in the machine. We need to take that up. I'll actually look down the back of the die. When you look down the back of the die you can see daylight between the die and the tube. That's all you have to do is a couple of quick little bumps. If you really want to dial it in get yourself a degree tube. Make sure you zero it out. What I want to do is go to 10 degrees. [ mechanical humming ]
Why did I go to 13? I said I was gonna do 10? Metal always wants to go back to where it started, at least a little bit. It's called spring back. You have to take that into account. So I went to 3 degrees extra. Once I take the stress off of that it's gonna spring back a little bit and we'll be good to go. Flip it all around and do it again. [ mechanical humming ] Now we have our two bends parallel to each other in the opposite direction. Now we're gonna take this over to the truck. Test fit it. See how it is and then from there keep making adjustments as needed. We have these bent to 10 degrees and you can see we're pretty low. What I'm gonna do is bend it to 20, see where we're at, and honestly I think that's gonna get us really close to where we're gonna be. [ mechanical humming ] This is roughly how everything is gonna look. I can live that. I like it. Gonna make some notes, copy it. Actually I'm gonna lay one tube on top of the other so I know they're exact. [Eric] Coming up, we'll keep rolling right along and cut even more metal off this Nissan to fit some big tires.
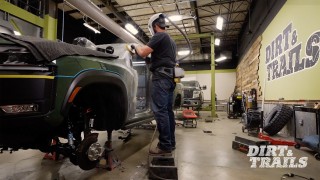
[Eric] I've got all of our EBC brake components installed. So all that's left to get the brakes finished up completely is to build some new lines. But that's pretty quick and easy. And there's some other stuff that I am way more excited to get on this truck. That being our brand new wheels and tires, and we've got some fresh 17 by nine wheels from Nismo. These are a brand new design they just came out with, and we've got them wrapped up in some Yokohama Geolander XMTs in 37 by 12.5. Now we're going to get this thing back down on all fours and see just how big this little truck is actually going to be. [ drill humming ] [ Music ] Now we'll go get the other three of these big old things installed, and then we can get this thing down on the ground and see just how it's actually going to sit. [ Music ] [ drill humming ] Now that we have our top bar bolted in place, what I'm going to do is I'm actually going to align the top bar with our locking mechanism here that you got from Summit Racing. From there, I'll box everything in and I'm going to go tig weld on the table. Now I lined this up to match with this surface here. What I want is to have a nice reveal like this, so that I can box in the back end completely. [ welder crackling ] The next part is going to be the cap/angle piece here, which is going to start boxing it all in. [ welder crackling ] Now I'm going to head over to the table. Grind down some of these tacks. Fire up the tig welder. Send it. [ grinder buzzing ] [Eric] While Chris has been getting the tube doors figured out I have been making some room for these tires to actually fit cause as you can see, it's not a whole lot of room right there. Also, we're adding on fender flares to get a little bit of tire coverage, and that's going to take up a little bit more room this way. We need to keep that in mind while we're taking all of our measurements, making all of our cuts. But thankfully I've already got the other side finished up and I was able to use a cut off from that side. Do the same thing here as we did on the other side. That does look pretty close. You do the same thing here. [ air saw buzzing ] [ Music ] [ grinder buzzing ] This is one of the fender flares that we're going to be using on this Frontier. This is a pocket style fender flare. You see, it's got the conventional holes around the outside. It is a classic style for a fender flare that we think is going to look just fine on this truck. Now, this is fitted for a 2025 Frontier, but the mounting positions didn't quite line up. So the best way to start is you want to try and figure out exactly where your midpoint is. Just kinda eyeball it. What we're going to do is we're going to mount all the rest of the way around, come in here with a heat gun. Get this nice and warm and then just massage it into place so it fits around this contour. Then we'll figure out where we need to put that hole to get it bolted in. [ Music ] Just like that, we've got all four of our fender flares installed. But before the wrap can go on we do still have one more hole we've got to drill. And that's going to be to get this new Nismo snorkel installed just to make sure that if we do end up in a river with our kayaks this thing is going to survive. Now it's going to sit, as most snorkels do, on an A-pillar. Something like that. Now normally you would want to make sure that your positioning was correct so that your door could still open. But in our case, obviously that's not really an issue because this door is never going to open again. But as you can see we've already got everything laid out and positioned so that the back end of our snorkel is going to end up just at the back of this fender right where it's supposed to be. So if the door was still functional it would still have room to swing out. But that not withstanding, everything is already laid out, marked, and I've already done a center punch here. So we're going to go ahead and punch our pilot hole. Then we'll grab the hole saw and make a big hole. [ saw buzzing ] So now that that's cut, obviously it's still not the cleanest hole. So I'm gonna go grab a file, get this cleaned up, and then we can slap our template on here, get the holes drilled for our bolts. [ drill humming ]
All right, that's going to be the last hole that I've got to drill before the wrap can go on. So I'm going to get these deburred once I get all this stuff off of here. You guys go see what Chris do. [Chris] Now that we have this door all welded up, let's see how she fits.
What do you think? [Eric] That looks pretty good. But it's actually perfect timing for you to get away from this thing and go work in your corner over there because this thing's about to get wrapped. [Chris] I think you guys are going to like what we have in store. [Eric] Oh, you got it this time. [Chris] I did, I did. I practiced. Up next, we wrap this truck up, get a handle on our custom tube doors, and add more lift.
[Chris] One of the directives that we got from Nissan for this project was that the looks had to fit with all the other parts going onto it. So of course who'd we call but Graphic Effects to come and install this in your face colorful wrap that's going to ensure that no one can look away when they see this thing coming down the trail. As always, they knocked it out of the park and it is looking crazy and we love it. Plus this wrap is going to tie in perfectly with all the other colors going on here. [Eric] Well that does it for getting our last fender flare put back on. And even though this truck is obviously wrapped up now it's not quite finished. Before we move on I do want to give a big thanks to the guys from Graphic Effects because I think they did an absolutely amazing job on this truck. And you know, it's colorful, it's crazy but I think it fits. [Chirs] It does. I mean they did an amazing job and I'm happy with it. It looks great. Next up what we're going to do is start installing the lights on our roof rack. Nismo sent us not only the roof rack but the 40 inch single row light bar as well, which is great because in this application it is ever so slightly lower than the bars that are going to be holding our kayaks. Next up that we have to do is install the smaller lights these guys here into the pockets along the sides of the roof rack. And what those are for is just lighting up the campsite. When you're at night, you don't want to trip over stuff. So let's get to it. [ Music ]
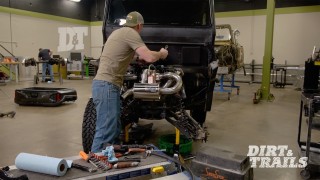
[Eric] Moving right along with getting our Frontier ready to get back on the trail I am getting our old air intake taken out. This is our last piece of the airbox here and that can go away because we're going to be installing this nice, fancy carbon fiber cold air intake that we got from the guys over at Nismo. Now this thing is pretty cool. I've already taken everything from the factory intake that we needed which is going to be our connector to the throttle, body mass airflow sensor and all the hardware here. As well as this seal going into the fender. And there's one really cool feature that I've never personally seen before and that is this magnetic lid that's going to make access to the filter for service and maintenance and replacements that much easier. Not dealing with any screws or anything like that. You just snap it right back into place and you're ready to go. This thing bolts right in place. You can see it fits perfect. Plug in our mass airflow. [ Music ] Real good. [ Music ] Cherry on top, beautiful. [Chris] You know I'm not saying this is heavy Eric, but it would have been really nice having a hand bringing this over. [Eric] This was your idea? I don't know what you're talking about. Yep. [Chris] Down nice and gentle. Nice and easy. Well if you want I can take care of dialing in this roof rack if you want to hop on to something else. [Eric] That sounds good. So while Chris is doing that I'm going to hop down here and we're going to go ahead and get our snorkel installed. We can lay it out against the A-pillar. Get our bracket set. We do still have to add a support here from A-pillar and I think you've got that done don't you? [Chris] Yes I do. [Eric] Well I guess while you're doing that I'm going to hop back down in that wheel well. Get the inner fender liner put back in and we're moving right along. [Chris] Sounds good. Now that we have our tube doors back from paint it's time to assemble them. [ hammer banging ] There we go. Now we just need to adjust up here. Success! These here are handles that you can get for the front or rear of your kayak. What I'm going to do is drill a hole in the top, come down through, hook up onto the actual lock mechanism inside. So when we want to open the doors instead of having to reach up and in we grab here, pull up, door unlocks and off we go. [ Music ]
[Eric] Now we do still have one more issue we've got to solve before we can try to take this thing out. I think we've got a pretty good solution for that. [Chris] Correct. We are going to be running with a two inch body lift that we got from Z1 Off Road. It's made out of UMHW that is U/V stabilized and that is going to lift the whole body up off the chassis by two inches. What that's going to do is give us just a little extra clearance on our 37 inch tall tires that we have been running into clearance issues up front. [Eric] And while we're doing this I want to give a huge shout out to the team over at CoverCraft for having our needs covered with these custom waterproof seat covers that are going to match our wheel accents and really bring out the interior of this truck. So you've got even more to look at as if there wasn't enough already. Now that we've got our seat covers installed we're going to continue accessorizing Rapid Runner with a whole bunch of gear that we got from the team over at Nismo. That's going to include these two power cubes and a solar panel. So we've basically got two little solar generators here. We've got a rack shower. That's going to bolt right onto the side of our bed rack. We're going to be able to fill that up. It's got an internal pump and a hose. So we'll be able to clean ourselves our gear or whatever else we need to out on the trail. Got backpacks to hold all of our personal stuff. Ratchet and bungee straps for tying down all the gear on the outside. Couple of coolers here with their drop in cutting board and storage rack. So we've got room for all of our food, drinks and whatever else. And of course we've got to accessorize ourselves. We got these nice Nismo sun hats and sunglasses. So once we're out on the water we're going to be nice and comfortable. So we're going to get started getting this rack shower installed and we are just right there ready to get this thing going. Stick around cause Rapid Runner is done and ready for fun. So we're taking it out for its maiden voyage on land and sea. There it is!
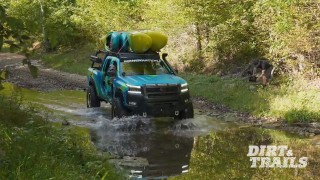
[Eric] We are finally out here. We've got Rapid Runner finished up. We figured now that this thing's finished up we got to go out and test it. So we are on our way to Dirt Devil off highway vehicle trail here in Tennessee and we're going to see just what this thing can do. [Chris] The suspension is done. The doors are done. We got everything done to the nines and I am stoked to be out here. Been a long road. [Eric] That's a bit of an understatement, but we're finally out here and we've got four kayaks up on top of here and we need to find some water to drop them into. So grab them keys and let's go. Honestly if you would have told me that I could take components off of a full size truck and bolt them into a midsize truck and not only have it be functional but look this good I would have called you crazy but I mean here we are. Nissan's gone and done it. It is a strange feeling being in something that's not a Jeep without doors on it. Starting to see a little water in that creek over there. We do got to find a good place to drop in though because I'm itching to try out those kayaks for Jackson. [Chris] That is beautiful. As we turn the corner just looking down and seeing the road and the creek bed. That is gorgeous. [Eric] What was that? [Chris] Massive pothole that we just went straight through and then over a log. [Eric] Oh, I didn't feel it. [Chris] Neither did I. [Eric] Dang somebody knows how to set up a suspension. I wonder who did that. It rides very stable on this trail. I am extremely impressed with the ride quality. [Chris] This is like riding on a cloud. [Eric] It feels like we're still driving this thing on the road. That's the craziest part. You're not feeling any of these potholes or bumps or anything. I mean this thing is just stuck to the ground. It's crawling the ruts pretty good. [Chris] Yeah. [Eric] I'm not gonna say that putting this thing together was easy or simple by any means but I'm glad that we did it. And I'm glad we did it the way we did because this thing turned out amazing. First real test for this thing here. Let's see what she does. [ Chris laughing ] Dude, it didn't even care. It did not care. All right, find some more water. Let's do this again. Oh, man. [Chris] Why do I find that so funny? I don't know. [Eric] It's a good thing we got waterproof everything. Yeah. Oh, this is a good one. Come on, come on, yes, yeah! [Chris] I'm soaked! [Eric] No. [Chris] It never gets to old.
[Eric] That last one I felt it. I was like, oh this is going to be really uncomfortable for the whole rest of the day.
[Chris] Well, this Frontier that we did the Nissan Titan swap on was actually amazing. Every creek crossing, every puddle, every pothole it handled amazing. [Eric] Not only did it handle it but it absolutely loved it. The truck is still running great. We haven't experienced any issues from the beating we've given it so far. I mean the best part is that wasn't even the point of coming out here today. The point was to get ourselves to a spot like this, no matter what it took to get there, so that we could drop in these nirvanas that we got from Jackson Kayak and have a little bit of fun. I think probably about time to do that. It looks like as good a spot as any. [Chris] These are lighter than I expected. [Eric] Oh, I'm facing the wrong way. [Chris] Before we leave that we need to get a photo taken. [Eric] I can't believe someone lives on this trail.
Show Full Transcript
[Eric] Today on Dirt and Trials our 2025 Nissan Frontier dubbed Rapid Runner takes on the trails of Tennessee. [Chris] But before that it gets oversized and accessorized with more lift, bigger tires, custom tube doors, and a boatload of Nismo goodies. [Eric] After wrapping things up and making the last few finishing touches we're gonna take a ride down to the river and make sure this one of a kind custom truck is ready to make a splash out at SEMA. [ Music ]
The last thing we've got to do before we're finally ready to get some new wheels and tires on this thing and get it back on the ground is get our brakes installed. We want to make sure to capitalize on the bigger brakes we got from the Titan and get the most stopping power possible cause this little thing's gonna be pretty big. We called up the guys over at EBC and we've got us a set of extra duty plus brake pads. These things are great. They're formulated specifically for trucks and suvs. They've got EBC's break-in coating. So during that first 500 or so miles you're still gonna get smooth braking performance. Plus it's gonna help a lot with actually getting them broken in. On top of those pads we also have a set of GD rotors. We've got these for front and rear as well. They've got nice dimpling here around the outside as well as slots. That's gonna help with keeping the temperature down and getting that dust out of there. Let's get this stuff installed. [ Music ]
If you want to make sure your brakes are gonna perform properly and quietly like they're supposed to you always want to make sure to get some grease on there. These pads have what's called a screecher or a squealer tab. It's good to have those because that's gonna give you an audible indicator that your brakes are starting to get low. These pads are specifically formulated for trucks and suvs. They are a high friction compound, which is gonna generate more braking power on its own. If you're ever in a situation where a lot of heat build-up is gonna start causing you issues these pads are gonna be a lot better off than your standard ones. If you're doing a Titan swap on your Frontier, whether it's a full swap like we've done here, a partial swap, or even if you're just doing some work to your stock Frontier with its original components, EBC's got your covered whether it's the ED Plus for off roading and hauling or if you're into racing or anything else like that they've got options for all of it. So no matter what it is you're doing make sure you check them out. [Chris] Now that we are done all the sheet metal work we can move on to something a tad more interesting, tube doors. So I have the doors roughly laid out here. This is the B-pillar side, this is the A-pillar side. The top bar is gonna be dead flat. We're gonna keep it simple. The bottom however I need to put a bend in there. This way it looks interesting. Thing I'm gonna do and I have to keep in mind is whatever I bend this block at I need to bend this block in the opposite direction so both sides stay parallel. Let's head over to the bender and start bending some tubes. As you can see I have nothing in front of the block, which means the material consumed is gonna be behind the block. I put my pin in for the correct corresponding die. We put in our roller. Make sure your roller is corresponding to the proper die. This one's an inch and a half, which is laser engraved straight from the plant. So you know this is the right size. There is a bunch of slop in the machine. We need to take that up. I'll actually look down the back of the die. When you look down the back of the die you can see daylight between the die and the tube. That's all you have to do is a couple of quick little bumps. If you really want to dial it in get yourself a degree tube. Make sure you zero it out. What I want to do is go to 10 degrees. [ mechanical humming ]
Why did I go to 13? I said I was gonna do 10? Metal always wants to go back to where it started, at least a little bit. It's called spring back. You have to take that into account. So I went to 3 degrees extra. Once I take the stress off of that it's gonna spring back a little bit and we'll be good to go. Flip it all around and do it again. [ mechanical humming ] Now we have our two bends parallel to each other in the opposite direction. Now we're gonna take this over to the truck. Test fit it. See how it is and then from there keep making adjustments as needed. We have these bent to 10 degrees and you can see we're pretty low. What I'm gonna do is bend it to 20, see where we're at, and honestly I think that's gonna get us really close to where we're gonna be. [ mechanical humming ] This is roughly how everything is gonna look. I can live that. I like it. Gonna make some notes, copy it. Actually I'm gonna lay one tube on top of the other so I know they're exact. [Eric] Coming up, we'll keep rolling right along and cut even more metal off this Nissan to fit some big tires.
[Eric] I've got all of our EBC brake components installed. So all that's left to get the brakes finished up completely is to build some new lines. But that's pretty quick and easy. And there's some other stuff that I am way more excited to get on this truck. That being our brand new wheels and tires, and we've got some fresh 17 by nine wheels from Nismo. These are a brand new design they just came out with, and we've got them wrapped up in some Yokohama Geolander XMTs in 37 by 12.5. Now we're going to get this thing back down on all fours and see just how big this little truck is actually going to be. [ drill humming ] [ Music ] Now we'll go get the other three of these big old things installed, and then we can get this thing down on the ground and see just how it's actually going to sit. [ Music ] [ drill humming ] Now that we have our top bar bolted in place, what I'm going to do is I'm actually going to align the top bar with our locking mechanism here that you got from Summit Racing. From there, I'll box everything in and I'm going to go tig weld on the table. Now I lined this up to match with this surface here. What I want is to have a nice reveal like this, so that I can box in the back end completely. [ welder crackling ] The next part is going to be the cap/angle piece here, which is going to start boxing it all in. [ welder crackling ] Now I'm going to head over to the table. Grind down some of these tacks. Fire up the tig welder. Send it. [ grinder buzzing ] [Eric] While Chris has been getting the tube doors figured out I have been making some room for these tires to actually fit cause as you can see, it's not a whole lot of room right there. Also, we're adding on fender flares to get a little bit of tire coverage, and that's going to take up a little bit more room this way. We need to keep that in mind while we're taking all of our measurements, making all of our cuts. But thankfully I've already got the other side finished up and I was able to use a cut off from that side. Do the same thing here as we did on the other side. That does look pretty close. You do the same thing here. [ air saw buzzing ] [ Music ] [ grinder buzzing ] This is one of the fender flares that we're going to be using on this Frontier. This is a pocket style fender flare. You see, it's got the conventional holes around the outside. It is a classic style for a fender flare that we think is going to look just fine on this truck. Now, this is fitted for a 2025 Frontier, but the mounting positions didn't quite line up. So the best way to start is you want to try and figure out exactly where your midpoint is. Just kinda eyeball it. What we're going to do is we're going to mount all the rest of the way around, come in here with a heat gun. Get this nice and warm and then just massage it into place so it fits around this contour. Then we'll figure out where we need to put that hole to get it bolted in. [ Music ] Just like that, we've got all four of our fender flares installed. But before the wrap can go on we do still have one more hole we've got to drill. And that's going to be to get this new Nismo snorkel installed just to make sure that if we do end up in a river with our kayaks this thing is going to survive. Now it's going to sit, as most snorkels do, on an A-pillar. Something like that. Now normally you would want to make sure that your positioning was correct so that your door could still open. But in our case, obviously that's not really an issue because this door is never going to open again. But as you can see we've already got everything laid out and positioned so that the back end of our snorkel is going to end up just at the back of this fender right where it's supposed to be. So if the door was still functional it would still have room to swing out. But that not withstanding, everything is already laid out, marked, and I've already done a center punch here. So we're going to go ahead and punch our pilot hole. Then we'll grab the hole saw and make a big hole. [ saw buzzing ] So now that that's cut, obviously it's still not the cleanest hole. So I'm gonna go grab a file, get this cleaned up, and then we can slap our template on here, get the holes drilled for our bolts. [ drill humming ]
All right, that's going to be the last hole that I've got to drill before the wrap can go on. So I'm going to get these deburred once I get all this stuff off of here. You guys go see what Chris do. [Chris] Now that we have this door all welded up, let's see how she fits.
What do you think? [Eric] That looks pretty good. But it's actually perfect timing for you to get away from this thing and go work in your corner over there because this thing's about to get wrapped. [Chris] I think you guys are going to like what we have in store. [Eric] Oh, you got it this time. [Chris] I did, I did. I practiced. Up next, we wrap this truck up, get a handle on our custom tube doors, and add more lift.
[Chris] One of the directives that we got from Nissan for this project was that the looks had to fit with all the other parts going onto it. So of course who'd we call but Graphic Effects to come and install this in your face colorful wrap that's going to ensure that no one can look away when they see this thing coming down the trail. As always, they knocked it out of the park and it is looking crazy and we love it. Plus this wrap is going to tie in perfectly with all the other colors going on here. [Eric] Well that does it for getting our last fender flare put back on. And even though this truck is obviously wrapped up now it's not quite finished. Before we move on I do want to give a big thanks to the guys from Graphic Effects because I think they did an absolutely amazing job on this truck. And you know, it's colorful, it's crazy but I think it fits. [Chirs] It does. I mean they did an amazing job and I'm happy with it. It looks great. Next up what we're going to do is start installing the lights on our roof rack. Nismo sent us not only the roof rack but the 40 inch single row light bar as well, which is great because in this application it is ever so slightly lower than the bars that are going to be holding our kayaks. Next up that we have to do is install the smaller lights these guys here into the pockets along the sides of the roof rack. And what those are for is just lighting up the campsite. When you're at night, you don't want to trip over stuff. So let's get to it. [ Music ]
[Eric] Moving right along with getting our Frontier ready to get back on the trail I am getting our old air intake taken out. This is our last piece of the airbox here and that can go away because we're going to be installing this nice, fancy carbon fiber cold air intake that we got from the guys over at Nismo. Now this thing is pretty cool. I've already taken everything from the factory intake that we needed which is going to be our connector to the throttle, body mass airflow sensor and all the hardware here. As well as this seal going into the fender. And there's one really cool feature that I've never personally seen before and that is this magnetic lid that's going to make access to the filter for service and maintenance and replacements that much easier. Not dealing with any screws or anything like that. You just snap it right back into place and you're ready to go. This thing bolts right in place. You can see it fits perfect. Plug in our mass airflow. [ Music ] Real good. [ Music ] Cherry on top, beautiful. [Chris] You know I'm not saying this is heavy Eric, but it would have been really nice having a hand bringing this over. [Eric] This was your idea? I don't know what you're talking about. Yep. [Chris] Down nice and gentle. Nice and easy. Well if you want I can take care of dialing in this roof rack if you want to hop on to something else. [Eric] That sounds good. So while Chris is doing that I'm going to hop down here and we're going to go ahead and get our snorkel installed. We can lay it out against the A-pillar. Get our bracket set. We do still have to add a support here from A-pillar and I think you've got that done don't you? [Chris] Yes I do. [Eric] Well I guess while you're doing that I'm going to hop back down in that wheel well. Get the inner fender liner put back in and we're moving right along. [Chris] Sounds good. Now that we have our tube doors back from paint it's time to assemble them. [ hammer banging ] There we go. Now we just need to adjust up here. Success! These here are handles that you can get for the front or rear of your kayak. What I'm going to do is drill a hole in the top, come down through, hook up onto the actual lock mechanism inside. So when we want to open the doors instead of having to reach up and in we grab here, pull up, door unlocks and off we go. [ Music ]
[Eric] Now we do still have one more issue we've got to solve before we can try to take this thing out. I think we've got a pretty good solution for that. [Chris] Correct. We are going to be running with a two inch body lift that we got from Z1 Off Road. It's made out of UMHW that is U/V stabilized and that is going to lift the whole body up off the chassis by two inches. What that's going to do is give us just a little extra clearance on our 37 inch tall tires that we have been running into clearance issues up front. [Eric] And while we're doing this I want to give a huge shout out to the team over at CoverCraft for having our needs covered with these custom waterproof seat covers that are going to match our wheel accents and really bring out the interior of this truck. So you've got even more to look at as if there wasn't enough already. Now that we've got our seat covers installed we're going to continue accessorizing Rapid Runner with a whole bunch of gear that we got from the team over at Nismo. That's going to include these two power cubes and a solar panel. So we've basically got two little solar generators here. We've got a rack shower. That's going to bolt right onto the side of our bed rack. We're going to be able to fill that up. It's got an internal pump and a hose. So we'll be able to clean ourselves our gear or whatever else we need to out on the trail. Got backpacks to hold all of our personal stuff. Ratchet and bungee straps for tying down all the gear on the outside. Couple of coolers here with their drop in cutting board and storage rack. So we've got room for all of our food, drinks and whatever else. And of course we've got to accessorize ourselves. We got these nice Nismo sun hats and sunglasses. So once we're out on the water we're going to be nice and comfortable. So we're going to get started getting this rack shower installed and we are just right there ready to get this thing going. Stick around cause Rapid Runner is done and ready for fun. So we're taking it out for its maiden voyage on land and sea. There it is!
[Eric] We are finally out here. We've got Rapid Runner finished up. We figured now that this thing's finished up we got to go out and test it. So we are on our way to Dirt Devil off highway vehicle trail here in Tennessee and we're going to see just what this thing can do. [Chris] The suspension is done. The doors are done. We got everything done to the nines and I am stoked to be out here. Been a long road. [Eric] That's a bit of an understatement, but we're finally out here and we've got four kayaks up on top of here and we need to find some water to drop them into. So grab them keys and let's go. Honestly if you would have told me that I could take components off of a full size truck and bolt them into a midsize truck and not only have it be functional but look this good I would have called you crazy but I mean here we are. Nissan's gone and done it. It is a strange feeling being in something that's not a Jeep without doors on it. Starting to see a little water in that creek over there. We do got to find a good place to drop in though because I'm itching to try out those kayaks for Jackson. [Chris] That is beautiful. As we turn the corner just looking down and seeing the road and the creek bed. That is gorgeous. [Eric] What was that? [Chris] Massive pothole that we just went straight through and then over a log. [Eric] Oh, I didn't feel it. [Chris] Neither did I. [Eric] Dang somebody knows how to set up a suspension. I wonder who did that. It rides very stable on this trail. I am extremely impressed with the ride quality. [Chris] This is like riding on a cloud. [Eric] It feels like we're still driving this thing on the road. That's the craziest part. You're not feeling any of these potholes or bumps or anything. I mean this thing is just stuck to the ground. It's crawling the ruts pretty good. [Chris] Yeah. [Eric] I'm not gonna say that putting this thing together was easy or simple by any means but I'm glad that we did it. And I'm glad we did it the way we did because this thing turned out amazing. First real test for this thing here. Let's see what she does. [ Chris laughing ] Dude, it didn't even care. It did not care. All right, find some more water. Let's do this again. Oh, man. [Chris] Why do I find that so funny? I don't know. [Eric] It's a good thing we got waterproof everything. Yeah. Oh, this is a good one. Come on, come on, yes, yeah! [Chris] I'm soaked! [Eric] No. [Chris] It never gets to old.
[Eric] That last one I felt it. I was like, oh this is going to be really uncomfortable for the whole rest of the day.
[Chris] Well, this Frontier that we did the Nissan Titan swap on was actually amazing. Every creek crossing, every puddle, every pothole it handled amazing. [Eric] Not only did it handle it but it absolutely loved it. The truck is still running great. We haven't experienced any issues from the beating we've given it so far. I mean the best part is that wasn't even the point of coming out here today. The point was to get ourselves to a spot like this, no matter what it took to get there, so that we could drop in these nirvanas that we got from Jackson Kayak and have a little bit of fun. I think probably about time to do that. It looks like as good a spot as any. [Chris] These are lighter than I expected. [Eric] Oh, I'm facing the wrong way. [Chris] Before we leave that we need to get a photo taken. [Eric] I can't believe someone lives on this trail.