
In This Episode
- 0:00 Introduction to Project Rapid Run
- 2:02 Removing Door Panels and Electronics
- 5:02 Cutting and Modifying Doors
- 8:01 Using Nissan Titan Components for Suspension
- 10:02 Removing and Replacing Front Suspension Components
- 13:02 Modifying Rear Suspension and Installing New Components
- 16:02 Fiberglass Work and Expert Opinion
- 19:02 Finalizing Modifications and Preparing for Testing
Video Transcript
[Eric] You're watching Powernation.
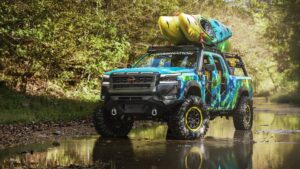
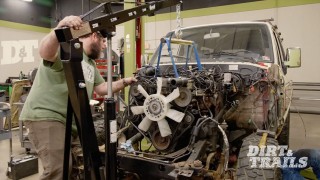
[Eric] This truck may look familiar and that's because last season Music City Trucks brought it in and turned into Project Trailgater. [Chris] Now that we got our hands on it we're gonna turn this thing into something totally amazing. [Eric] We are bringing it back to SEMA this year but we've only got a month to turn this thing into the ultimate river running kayak hauler. [Chris] Welcome to Dirt and Trails. [ Music ] Can you please give me a full rundown? [Eric] This is a 2025 Nissan Frontier. We got it in last year in conjunction with Nissan. We built it into what we called Project Trailgater. The idea was it was an off road capable truck with all the amenities you would need to have a nice tailgate party. Nismo lift kit, Nismo wheels with the bead locks. We had gutted the back seat. Installed a fridge, a standalone power system, multiple different chargers for the extra batteries. On that bed rack back there we actually had a tv on either side with a sound bar strapped to the back. In the back we actually have a full Decked system with their drawer and two of their half width cargo glides on top of it. The way we're going with it this time that's still gonna be super helpful for gear and access to it. That's what this thing was but it's back now with a whole new design concept and Chris is going to run you guys through every detail. [Chris] Coming down the line you're gonna see some yellow and blue lines. Yellow is laid temporarily or possible bar locations and blue is where I think we're gonna start cutting out the fenders and cutting out sections of the door. We're gonna do some custom flares all the way around. So that is my plan for this. We're gonna have an open air concept inside the cab. We're gonna have some extra body protection outside with the fenders and bumpers. [Eric] We are completely reworking the suspension with a combination of stock and aftermarket Nissan Titan components, Titan front and rear axles, and a set of freshly deisgned Nismo wheels with 37 inch tall tires with a more aggressive tread to tackle any trail. To finish it off we're mounting four kayaks on the rooftop to take the adventure off the trail and into the water when we reach our destination. This is Project Rapid Run. Now after that it's gonna allow us to check out a few other things that we might have to modify. [Chris] One of those things being flares. I'm gonna need to know the exact new width of this vehicle once that Titan swap is done in order to make fender flares that actually fit the build and are functional for it. And we need to fit four kayaks on top of this thing. [Eric] Obviously we've got a ton of work to do. So let's get to it. [Chris] Let's dance. [Eric] Our first step here is gonna be getting our door panels removed and getting everything inside the door taken out. When you start working with plastic paneling, interior parts, and stuff like that it's gonna be a whole different set of tools you're gonna use compared to what you would normally use on the outside of the vehicle. We went ahead and got some Duralast tools that are gonna make sure we get this stuff taken apart and not tear anything up while we're doing it. If you can get your fingers in there that'll usually do it. [ Music ]
Now we're making some progress. [Chris] I'm not saying I beat you again but I beat you again. I already got mine off. [ Music ]
[Eric] Just like that. Two electrical connectors here. They're everywhere. Look, the proper tools, oh my god! [Chris] I was just trying to get in the hole. [Eric] We're gonna have a lot of electronics we've gotta keep track of. [ Music ]
Now that we've got the door panels off we need to move on and get all of our electronics. The window motors, door lock actuators, speakers, and the windows themselves. Gotta get all of that out of here so Chris can get started. [ Music ]
[ drill humming ] [Eric] I did forget to do one thing before we started doing all this and disconnected the battery and that is move this window up into a position where I can get to the bolts that retain the glass onto the actuator. It's not that big of a deal in this case because thankfully I've got plenty of room to get in here with a wrench and loosen them up. For future reference if you're working on something with power windows before you pull that battery make sure you can actually get to all the bolts to remove your glass. [ Music ]
Just like that, window! [Chris] Now that Eric and I have these doors done we are ready to start planning out how and where we're gonna cut these doors. I already have a few lines laid out. Blue tape is tentatively where we're gonna make the cut and the yellow is where we're gonna put back in with some tubing. The doors are completely empty. So I have a blank canvas and I am stoked to do this. Let's get rocking and rolling and get the body saw. Coming up. [Eric] Looking at that if we take and follow that inside line that would give us a lot more room out there. [Chris] Weld the doors not only together but to the cab. [Eric] So we're just adding our own doors? [Chris] Pretty much!
[Chris] Cause if we just take out this section here that'll leave us enough room and give that open air feel and still leave a significant amount of rigidity in the door. [Eric] If we're not making any cuts up here towards the top or anything all of that rigidity is gonna stay in it and all the way down the side too anywhere that it's not cut. [Chris] Like down to the next body line down? [Eric] At the very least yeah. What we really need to cover up is gonna be the door jamb. That does limit us a little bit. The mirror section here would have to stay on because the cab comes up behind it. Looking at that if we take and follow that inside line that would give us a lot more room out there. Definitely gotta take some more out of that door. [Chris] Put in a little filler bar or filler something. Weld the doors not only together but to the cab. Essentially push these blue lines as far out in every direction as possible. Instead of going to here we go down to here. Seal it all off. That now becomes part of the vehicle, and after that we take the tubes and however that works out we just have a very simple, basic tube structure and tube structure is what moves. [Eric] Adding our own doors? [Chris] Pretty much. [ grinder humming ] [ Music ]
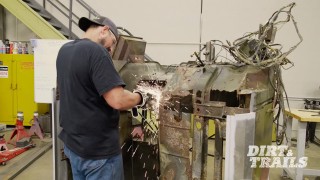
To strip this down I'm using these red surfacing pads we got from Forney and they work great. They're not taking off any material. They're only taking off the paint and the clear coat and I am making great time with these things. They're actually well worth the investment. I have my tig rod and this is one-eighth tig rod. This is huge. Rarely will you actually tig weld with this in an automotive application, at least I haven't. What I'm gonna be using it for is actually a filler rod. I'm gonna have to form it a little bit but it's gonna help fill the gap or bridge the gab between the cab and the door itself. [ Music ]
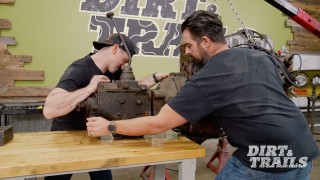
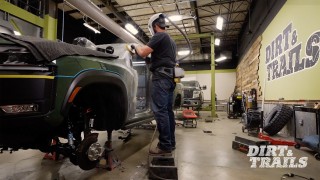
I'm now ready to start cutting out the doors. Also I got a little practice. This is the lack of the door. Also, also. [Eric] We got another Nissan now and there's a good reason to have this one in here but I should probably get down before I tell you guys about it. [Chris] Jump, I will catch you. [ Music ] [Eric] This is a 2017 Nissan Titan Pro-4X. Pretty much every generation of Titan and Frontier there is interchange between the front suspension parts. Now when you do that it gives you roughly three to four inches of lift on your Frontier as well as three inches of track width per side, which that gives you a really good stance for off roading especially if you try to get wild with it like we plan on doing. A majority of the parts we're gonna be using are gonna be coming from our front end here. Also from here we're gonna be using the spindles, the lower control arms, and maybe the shocks and springs depending on how everything sits. We just want to get the control arms and everything in first, check the geometry, and go from there on how we need to proceed with our shocks and springs. From the rear we're gonna be taking this axle and the only reason for that is because of that increased track width in the front we don't want to have to try and make up that difference with wheel spacers cause that's just not safe. I think it's time to get this thing up and start tearing it apart. Get it three or four inches off the ground and we'll make sure she's good. This thing is perfect for what we need. It's got all the parts that we're looking to get and none of them are broken. I'm gonna gather some tools and start getting this tore apart. Chris has some more work to do on the doors. [Chris] I have made miles getting to where we are right now. Let me walk you through where we're at. The front I had a lot of concerns pulling it apart mainly because this was the first door that I worked on but more than anything I want to make sure it stayed rigid. Going back and forth with the team here we decided that the more door that we could remove the better, which turned out to be great because I didn't have a four sided box. Now I just have three. The bottom is open straight to the rocker and I'm going to weld all of that shut. I have quarter inch round bar around the top and the back side closing in the gap and then one-eighth filler rod that I pulled from the warehouse. What that's gonna do is give the body filler and fiberglass we're gonna be using something to adhere to and not just fall into an open void. We want this to look like one smooth section like it came from the factory and we are well on our way to making that happen. Once I was done I moved on to the rear door. First thing that I did was use this section here as a template. So now it's consistency. It's gonna be the same lines on both side and it's gonna make everything progress a little bit faster pace cause right now I want to start making time. Next steps I'm going to trim the inside here. I'm gonna trim the outside and get rid of this intrusion bar because that is the only thing left in our way. [ saw buzzing ] [Eric] Coming up, we want to make sure this axle has at least a little bit of a cradle to rest on. That way we know what way it's gonna try and move itself before taking all the support away. Perfect! [ drill humming ]
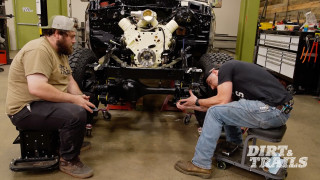
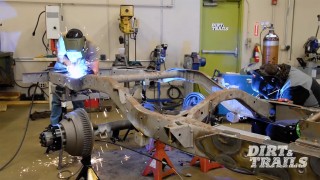
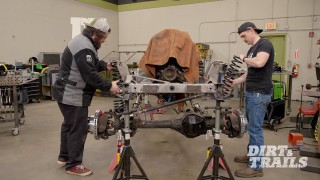
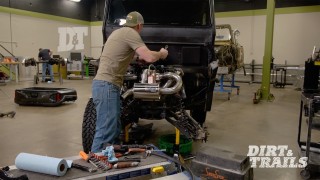
[Eric] Now that we've got this old axle out from our Titan we need to get this old axle out from our Frontier. Stop! Thank you. Loosen them up a little bit to start out with. We want to make sure this axle has at least a little bit of a cradle to rest on. That way we know what way it's gonna try and move itself before taking all the support away. That is all of our U-bolts loose and it does look like this thing is sitting pretty sturdy. Perfect! It's time to move on and start taking care of the front. Get all of this torn out. Get our rotor removed. Move on and get our tie rod end. 22. Get our sway bar link out. I have to get this lower ball joint bolt out of the way. [ drill humming ] And everything is fully disconnected. Take our steering knuckle out of the way. We're gonna go ahead and get our strut here disconnected. All we're gonna do is take a little bit of tension off here. I'm gonna get this c/v axle out, move on, and get that diff out. That'll give me even more room to get these tie rods out of the way. I've been making some progress up here in the front and we have a majority of our new suspension components installed. All we have left to do here is do a little bit of maintenance on some of the other hard parts we pulled out of our Titan. We're gonna get started and replace this ball joint. Any time you're installing used parts from a junkyard, or a donor vehicle, or anything like that it's always a good idea to replace anything that's considered a wear item or is maintenance such as ball joints, bearings, bushings, stuff like that. We actually have an example of all three of those right here in front of me. The best way to take care of that is go ahead and get a hold of some Duralast parts and get some brand new stuff in there so you now you're not gonna have anything to worry about. Starting with our lower control arms here the ball joints didn't have a whole lot of play in them but there was a little bit and it didn't come off of a truck with 100,000 miles on it. So we're gonna go ahead and replace those. Now we can get our ball joint tool assembled. If you don't have a ball joint press of your own, which is understandable cause they can get expensive, you can get one from AutoZone as a rental any time you need to do a job like this. The one that we've got has pretty much every adapter under the sun. So I've already picked out the ones that we need to get this finished up. Going to slip this right over our stud. Thread this down by hand until it gets snugged up. I'm gonna run and grab our new ball joint and get that installed. This is our new Duralast ball joint. You can see it came with a new snap ring ready to be installed. It's got a nice knurling there that's gonna help it bite into this control arm. I went ahead and got it scuffed up with a red scuffing pad so that all that old rust or any other build up that was in there is out of the way. We'll have an easier time getting this new one in. Now that we've got the right adapters to get our ball joint installed it's pretty much the reverse of the removal except this time we're going to have a receiver cup here on the top. What that's gonna do is allow the ball joint to push up into here without hitting our screw. Set that in. Get this set up with the end of the screw in that indent of our adapter. Once again try and make sure it is centered as much as it can be. Give it a little bit of tension by hand with a ratchet. We got the tool just to the point where it was stopped. Now we can check this and make sure it's still even. Just like that we've got our brand new Duralast ball joint installed. With our ball joints installed we're gonna move on and get this brand new Duralast hub assembly installed into our steering knuckle. To do that we've got to get this old one out starting by getting these three bolts removed. [ impact driver humming ] I'm gonna go ahead and heat this up, spray some penetrating oil in there, and then take it to the press just so I'm not fighting with it like I did the other one. This is our old hub assembly that I removed from our steering knuckle. As you can see it did not have the easiest time getting out of there. But we've got our new one here ready to go and I went ahead and cleaned up all of our mating surfaces here on the steering knuckle. So this should go in nice and easy. You'll probably notice it looks exactly the same as the old one and that's because it's supposed to. Duralast parts are designed for OE form, fit, and function. That way you know when you install them it's gonna fit right in and do its job. [ impact driver humming ] I have our brand new hub assembly installed along with a new wheel speed sensor that was included with the part. This is a five position adjustable shackle from LOJ Conversions. It's super solid construction. This is super thick, sturdy. It's gonna be nice and solid for when we get this thing off road. So let's get this in. [ Music ]
Just like that. [ Music ]
For right now we're using the old U-bolts as a safety mechanism and to allow us to adjust this thing into place easier. They will get replaced after we get this fully installed. [ Music ]
What's cool is Nissan actually used the same flange on the Titan axle and the Frontier axle. So the Frontier driveshaft here is bolting right in just like our front end components did. Before you say anything, yes, I know you don't tighten in a circle but this is finger tight and it's just for fitment. Get off my back. That's where we're at now. We're gonna make some minor adjustments here. Go ahead and get these things welded in and this will be ready to go. [Chris] Coming up, while Eric has been working on the suspension I've been making miles getting all this sheet metal work done but what I really want to show you is the fiberglass work that I started on the other side. I've got a lot to do and I want to make sure I'm getting it done right the first time around. So I brought Brian over from Detroit. I just wanted an expert opinion on this.
[Chris] While Eric has been working on the suspension I've been making miles getting all this sheet metal work done. As you can see there's not a lot remaining of the doors and everything that is remaining I have welded to the cab of the truck. What I really want to show you is the fiberglass work that I started on the other side. So I brought Brian over from Detroit. I just wanted an expert opinion on this fiberglass work. I've got a lot to do and I want to make sure I'm getting it done right the first time around. What's your initial take? [Brian] First of all, for lack of experience with this product and this is out of your standard wheelhouse it looks phenomenal. You wiped it just as slick as I asked you to do that. Trying to give you some direction okay. We did put fiberglass filler over this. It's gonna take up a majority of your gap and get things closer to being round or level, whichever way you want to look at it. It looks good man. We'll knock the top off of this with some 80 grit paper. There's a bunch of different ways we can do that. We'll talk about a couple of tools here in a second. Once we do that it's either ready for another application of fiberglass filler over that or we could go straight to body filler from there. Right now phenomenal job. Let's talk about what we can use. 80 grit, like on a buffer or grinder, this is an eight inch pad. The only problem with this is if you're not experienced with the tool you will cut flat spots in it as we go. So you definitely have to keep the tool moving the entire time. If it was me I would use an air file. That's this right here. It's an oscillating board that goes back and forth like this. It's easier and it cuts a lot faster. You just round your corners just like this. To knock the top off from there. Obviously we add the only manual block if you choose to do that. It gives you a good shoulder workout while you're doing it. [Chris] We'll have Eric do that one. [Brian] Definitely! It looks great. Let's get started man. Let's knock the top off of it. [Chris] I'll get an air line. [ grinder humming ] [ Music ]
[ sander humming ] [ Music ]
[Eric] That's some pretty good progress. All we've got left before this thing's ready to get back on the ground is get some brakes, wheels, and tires on it and we're there. [Chris] I got the fiberglass done on the other side. All the tin work's done for the most part. I can't wait to show you this thing when it's wrapped up. Catch you next time.
Show Full Transcript
[Eric] This truck may look familiar and that's because last season Music City Trucks brought it in and turned into Project Trailgater. [Chris] Now that we got our hands on it we're gonna turn this thing into something totally amazing. [Eric] We are bringing it back to SEMA this year but we've only got a month to turn this thing into the ultimate river running kayak hauler. [Chris] Welcome to Dirt and Trails. [ Music ] Can you please give me a full rundown? [Eric] This is a 2025 Nissan Frontier. We got it in last year in conjunction with Nissan. We built it into what we called Project Trailgater. The idea was it was an off road capable truck with all the amenities you would need to have a nice tailgate party. Nismo lift kit, Nismo wheels with the bead locks. We had gutted the back seat. Installed a fridge, a standalone power system, multiple different chargers for the extra batteries. On that bed rack back there we actually had a tv on either side with a sound bar strapped to the back. In the back we actually have a full Decked system with their drawer and two of their half width cargo glides on top of it. The way we're going with it this time that's still gonna be super helpful for gear and access to it. That's what this thing was but it's back now with a whole new design concept and Chris is going to run you guys through every detail. [Chris] Coming down the line you're gonna see some yellow and blue lines. Yellow is laid temporarily or possible bar locations and blue is where I think we're gonna start cutting out the fenders and cutting out sections of the door. We're gonna do some custom flares all the way around. So that is my plan for this. We're gonna have an open air concept inside the cab. We're gonna have some extra body protection outside with the fenders and bumpers. [Eric] We are completely reworking the suspension with a combination of stock and aftermarket Nissan Titan components, Titan front and rear axles, and a set of freshly deisgned Nismo wheels with 37 inch tall tires with a more aggressive tread to tackle any trail. To finish it off we're mounting four kayaks on the rooftop to take the adventure off the trail and into the water when we reach our destination. This is Project Rapid Run. Now after that it's gonna allow us to check out a few other things that we might have to modify. [Chris] One of those things being flares. I'm gonna need to know the exact new width of this vehicle once that Titan swap is done in order to make fender flares that actually fit the build and are functional for it. And we need to fit four kayaks on top of this thing. [Eric] Obviously we've got a ton of work to do. So let's get to it. [Chris] Let's dance. [Eric] Our first step here is gonna be getting our door panels removed and getting everything inside the door taken out. When you start working with plastic paneling, interior parts, and stuff like that it's gonna be a whole different set of tools you're gonna use compared to what you would normally use on the outside of the vehicle. We went ahead and got some Duralast tools that are gonna make sure we get this stuff taken apart and not tear anything up while we're doing it. If you can get your fingers in there that'll usually do it. [ Music ]
Now we're making some progress. [Chris] I'm not saying I beat you again but I beat you again. I already got mine off. [ Music ]
[Eric] Just like that. Two electrical connectors here. They're everywhere. Look, the proper tools, oh my god! [Chris] I was just trying to get in the hole. [Eric] We're gonna have a lot of electronics we've gotta keep track of. [ Music ]
Now that we've got the door panels off we need to move on and get all of our electronics. The window motors, door lock actuators, speakers, and the windows themselves. Gotta get all of that out of here so Chris can get started. [ Music ]
[ drill humming ] [Eric] I did forget to do one thing before we started doing all this and disconnected the battery and that is move this window up into a position where I can get to the bolts that retain the glass onto the actuator. It's not that big of a deal in this case because thankfully I've got plenty of room to get in here with a wrench and loosen them up. For future reference if you're working on something with power windows before you pull that battery make sure you can actually get to all the bolts to remove your glass. [ Music ]
Just like that, window! [Chris] Now that Eric and I have these doors done we are ready to start planning out how and where we're gonna cut these doors. I already have a few lines laid out. Blue tape is tentatively where we're gonna make the cut and the yellow is where we're gonna put back in with some tubing. The doors are completely empty. So I have a blank canvas and I am stoked to do this. Let's get rocking and rolling and get the body saw. Coming up. [Eric] Looking at that if we take and follow that inside line that would give us a lot more room out there. [Chris] Weld the doors not only together but to the cab. [Eric] So we're just adding our own doors? [Chris] Pretty much!
[Chris] Cause if we just take out this section here that'll leave us enough room and give that open air feel and still leave a significant amount of rigidity in the door. [Eric] If we're not making any cuts up here towards the top or anything all of that rigidity is gonna stay in it and all the way down the side too anywhere that it's not cut. [Chris] Like down to the next body line down? [Eric] At the very least yeah. What we really need to cover up is gonna be the door jamb. That does limit us a little bit. The mirror section here would have to stay on because the cab comes up behind it. Looking at that if we take and follow that inside line that would give us a lot more room out there. Definitely gotta take some more out of that door. [Chris] Put in a little filler bar or filler something. Weld the doors not only together but to the cab. Essentially push these blue lines as far out in every direction as possible. Instead of going to here we go down to here. Seal it all off. That now becomes part of the vehicle, and after that we take the tubes and however that works out we just have a very simple, basic tube structure and tube structure is what moves. [Eric] Adding our own doors? [Chris] Pretty much. [ grinder humming ] [ Music ]
To strip this down I'm using these red surfacing pads we got from Forney and they work great. They're not taking off any material. They're only taking off the paint and the clear coat and I am making great time with these things. They're actually well worth the investment. I have my tig rod and this is one-eighth tig rod. This is huge. Rarely will you actually tig weld with this in an automotive application, at least I haven't. What I'm gonna be using it for is actually a filler rod. I'm gonna have to form it a little bit but it's gonna help fill the gap or bridge the gab between the cab and the door itself. [ Music ]
I'm now ready to start cutting out the doors. Also I got a little practice. This is the lack of the door. Also, also. [Eric] We got another Nissan now and there's a good reason to have this one in here but I should probably get down before I tell you guys about it. [Chris] Jump, I will catch you. [ Music ] [Eric] This is a 2017 Nissan Titan Pro-4X. Pretty much every generation of Titan and Frontier there is interchange between the front suspension parts. Now when you do that it gives you roughly three to four inches of lift on your Frontier as well as three inches of track width per side, which that gives you a really good stance for off roading especially if you try to get wild with it like we plan on doing. A majority of the parts we're gonna be using are gonna be coming from our front end here. Also from here we're gonna be using the spindles, the lower control arms, and maybe the shocks and springs depending on how everything sits. We just want to get the control arms and everything in first, check the geometry, and go from there on how we need to proceed with our shocks and springs. From the rear we're gonna be taking this axle and the only reason for that is because of that increased track width in the front we don't want to have to try and make up that difference with wheel spacers cause that's just not safe. I think it's time to get this thing up and start tearing it apart. Get it three or four inches off the ground and we'll make sure she's good. This thing is perfect for what we need. It's got all the parts that we're looking to get and none of them are broken. I'm gonna gather some tools and start getting this tore apart. Chris has some more work to do on the doors. [Chris] I have made miles getting to where we are right now. Let me walk you through where we're at. The front I had a lot of concerns pulling it apart mainly because this was the first door that I worked on but more than anything I want to make sure it stayed rigid. Going back and forth with the team here we decided that the more door that we could remove the better, which turned out to be great because I didn't have a four sided box. Now I just have three. The bottom is open straight to the rocker and I'm going to weld all of that shut. I have quarter inch round bar around the top and the back side closing in the gap and then one-eighth filler rod that I pulled from the warehouse. What that's gonna do is give the body filler and fiberglass we're gonna be using something to adhere to and not just fall into an open void. We want this to look like one smooth section like it came from the factory and we are well on our way to making that happen. Once I was done I moved on to the rear door. First thing that I did was use this section here as a template. So now it's consistency. It's gonna be the same lines on both side and it's gonna make everything progress a little bit faster pace cause right now I want to start making time. Next steps I'm going to trim the inside here. I'm gonna trim the outside and get rid of this intrusion bar because that is the only thing left in our way. [ saw buzzing ] [Eric] Coming up, we want to make sure this axle has at least a little bit of a cradle to rest on. That way we know what way it's gonna try and move itself before taking all the support away. Perfect! [ drill humming ]
[Eric] Now that we've got this old axle out from our Titan we need to get this old axle out from our Frontier. Stop! Thank you. Loosen them up a little bit to start out with. We want to make sure this axle has at least a little bit of a cradle to rest on. That way we know what way it's gonna try and move itself before taking all the support away. That is all of our U-bolts loose and it does look like this thing is sitting pretty sturdy. Perfect! It's time to move on and start taking care of the front. Get all of this torn out. Get our rotor removed. Move on and get our tie rod end. 22. Get our sway bar link out. I have to get this lower ball joint bolt out of the way. [ drill humming ] And everything is fully disconnected. Take our steering knuckle out of the way. We're gonna go ahead and get our strut here disconnected. All we're gonna do is take a little bit of tension off here. I'm gonna get this c/v axle out, move on, and get that diff out. That'll give me even more room to get these tie rods out of the way. I've been making some progress up here in the front and we have a majority of our new suspension components installed. All we have left to do here is do a little bit of maintenance on some of the other hard parts we pulled out of our Titan. We're gonna get started and replace this ball joint. Any time you're installing used parts from a junkyard, or a donor vehicle, or anything like that it's always a good idea to replace anything that's considered a wear item or is maintenance such as ball joints, bearings, bushings, stuff like that. We actually have an example of all three of those right here in front of me. The best way to take care of that is go ahead and get a hold of some Duralast parts and get some brand new stuff in there so you now you're not gonna have anything to worry about. Starting with our lower control arms here the ball joints didn't have a whole lot of play in them but there was a little bit and it didn't come off of a truck with 100,000 miles on it. So we're gonna go ahead and replace those. Now we can get our ball joint tool assembled. If you don't have a ball joint press of your own, which is understandable cause they can get expensive, you can get one from AutoZone as a rental any time you need to do a job like this. The one that we've got has pretty much every adapter under the sun. So I've already picked out the ones that we need to get this finished up. Going to slip this right over our stud. Thread this down by hand until it gets snugged up. I'm gonna run and grab our new ball joint and get that installed. This is our new Duralast ball joint. You can see it came with a new snap ring ready to be installed. It's got a nice knurling there that's gonna help it bite into this control arm. I went ahead and got it scuffed up with a red scuffing pad so that all that old rust or any other build up that was in there is out of the way. We'll have an easier time getting this new one in. Now that we've got the right adapters to get our ball joint installed it's pretty much the reverse of the removal except this time we're going to have a receiver cup here on the top. What that's gonna do is allow the ball joint to push up into here without hitting our screw. Set that in. Get this set up with the end of the screw in that indent of our adapter. Once again try and make sure it is centered as much as it can be. Give it a little bit of tension by hand with a ratchet. We got the tool just to the point where it was stopped. Now we can check this and make sure it's still even. Just like that we've got our brand new Duralast ball joint installed. With our ball joints installed we're gonna move on and get this brand new Duralast hub assembly installed into our steering knuckle. To do that we've got to get this old one out starting by getting these three bolts removed. [ impact driver humming ] I'm gonna go ahead and heat this up, spray some penetrating oil in there, and then take it to the press just so I'm not fighting with it like I did the other one. This is our old hub assembly that I removed from our steering knuckle. As you can see it did not have the easiest time getting out of there. But we've got our new one here ready to go and I went ahead and cleaned up all of our mating surfaces here on the steering knuckle. So this should go in nice and easy. You'll probably notice it looks exactly the same as the old one and that's because it's supposed to. Duralast parts are designed for OE form, fit, and function. That way you know when you install them it's gonna fit right in and do its job. [ impact driver humming ] I have our brand new hub assembly installed along with a new wheel speed sensor that was included with the part. This is a five position adjustable shackle from LOJ Conversions. It's super solid construction. This is super thick, sturdy. It's gonna be nice and solid for when we get this thing off road. So let's get this in. [ Music ]
Just like that. [ Music ]
For right now we're using the old U-bolts as a safety mechanism and to allow us to adjust this thing into place easier. They will get replaced after we get this fully installed. [ Music ]
What's cool is Nissan actually used the same flange on the Titan axle and the Frontier axle. So the Frontier driveshaft here is bolting right in just like our front end components did. Before you say anything, yes, I know you don't tighten in a circle but this is finger tight and it's just for fitment. Get off my back. That's where we're at now. We're gonna make some minor adjustments here. Go ahead and get these things welded in and this will be ready to go. [Chris] Coming up, while Eric has been working on the suspension I've been making miles getting all this sheet metal work done but what I really want to show you is the fiberglass work that I started on the other side. I've got a lot to do and I want to make sure I'm getting it done right the first time around. So I brought Brian over from Detroit. I just wanted an expert opinion on this.
[Chris] While Eric has been working on the suspension I've been making miles getting all this sheet metal work done. As you can see there's not a lot remaining of the doors and everything that is remaining I have welded to the cab of the truck. What I really want to show you is the fiberglass work that I started on the other side. So I brought Brian over from Detroit. I just wanted an expert opinion on this fiberglass work. I've got a lot to do and I want to make sure I'm getting it done right the first time around. What's your initial take? [Brian] First of all, for lack of experience with this product and this is out of your standard wheelhouse it looks phenomenal. You wiped it just as slick as I asked you to do that. Trying to give you some direction okay. We did put fiberglass filler over this. It's gonna take up a majority of your gap and get things closer to being round or level, whichever way you want to look at it. It looks good man. We'll knock the top off of this with some 80 grit paper. There's a bunch of different ways we can do that. We'll talk about a couple of tools here in a second. Once we do that it's either ready for another application of fiberglass filler over that or we could go straight to body filler from there. Right now phenomenal job. Let's talk about what we can use. 80 grit, like on a buffer or grinder, this is an eight inch pad. The only problem with this is if you're not experienced with the tool you will cut flat spots in it as we go. So you definitely have to keep the tool moving the entire time. If it was me I would use an air file. That's this right here. It's an oscillating board that goes back and forth like this. It's easier and it cuts a lot faster. You just round your corners just like this. To knock the top off from there. Obviously we add the only manual block if you choose to do that. It gives you a good shoulder workout while you're doing it. [Chris] We'll have Eric do that one. [Brian] Definitely! It looks great. Let's get started man. Let's knock the top off of it. [Chris] I'll get an air line. [ grinder humming ] [ Music ]
[ sander humming ] [ Music ]
[Eric] That's some pretty good progress. All we've got left before this thing's ready to get back on the ground is get some brakes, wheels, and tires on it and we're there. [Chris] I got the fiberglass done on the other side. All the tin work's done for the most part. I can't wait to show you this thing when it's wrapped up. Catch you next time.