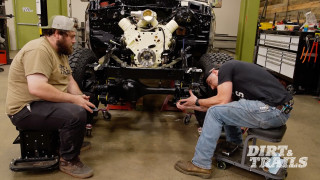
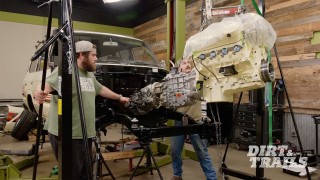
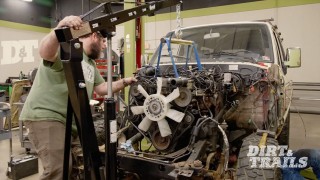
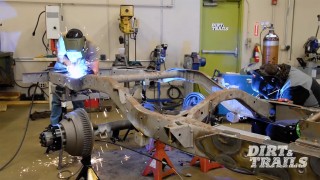

In This Episode
Video Transcript
[Chris] You're watching Powernation!
[Eric] Coming up on today's episode of Dirt and Trials. [Chris] Who puts a @#$% nut there? Now you can see we have our rocker planel. Planel? [ metal clanging ] [ Music ]
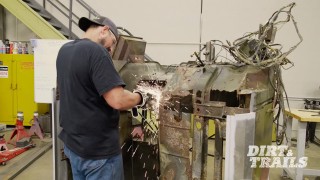
[Chris] Today Project Spartan is getting an all new diamond plate floor to go with the factory doghouse. In order to do that though I need to make sure this cab is nice and sturdy. I'm going to move these braces I put in earlier to the inside of the door jamb so that when I go to work on the cab corners and rocker panels I can gap it properly, it'll have more strength, and it'll be a better end product. Another reason we are moving these steel bars inboard and adding the doors on is because no matter what vehicle you're working on when you start removing this much material everything becomes fragile. The more rigidity I can put into this project right now it is gonna give me better odds of having the fit and fitment that I want as we continue to add more material to the build. We want to get this done as fast as possible. So we went out and bought some J-10 cab corners and rockers. The front part of the cab is good enough I can just bend some material we have in house, weld it on, and off we go. We have our cab corner, inner door, and the actual rocker. These rockers are galvanized. Make sure you're wearing the proper respirator. I'm gonna fit it. I'm gonna use Clecos. Get everything where I want it, and then and only then will I start cutting, grinding, tacking. [ saw buzzing ]
So now start trimming off of here, bringing the panel up, getting into alignment with this. Then I'll square up the back here and get that ready. Then once this is all good here I'll start taking off the front and getting it ready so that this lip can wrap around. [ welder crackling ] I've test fitted the new rocker. This mess of a rocker has to come out because it is in the way. [ saw buzzing ] [ Music ]
In no world does quarter inch bar or three-sixteenths angle iron deserve a place on sheet metal. We've got quarter inch bar, three-sixteenths angle that was weld glued. This is not a weld. These are all weld faults. How do you do that? To sheet metal. In this application there is no world where you need this type of material on sheet metal. You don't need it. Whoever did this if they went oh, I'm a welder. No, no you're not. No you're not. Let's do it! Just do it! [ saw buzzing ] [ welder crackling ] As you can see now we have the rocker panel tacked in place. It's giving rigidity back into the cab. It's a really big step getting this in here. I've got to do a little bit of hammer work in here but I'm happy with it. [ hammer tapping ] Now if this closes. Everything seems to be okay. Now we are moving on to the inside, the floor. We're gonna flip it up and lay it on its back. [Eric] You said we're going by the straps? [Chris] Yes sir. I'm anticipating this being front heavy. [Eric] Yeah, we're probably gonna have to lean back quite a bit. Right there? [Chris] Right there. [Eric] That sounded like glass. Are we replacing this windshield? [Chris] We can. You know what it was? You hit your beloved window wiper switch. [Eric] Oh not the manual wiper! Okay, we're good. That was a close call. [Chris] And down. [Eric] You don't want to put no blocks or nothing? It's folding. [Chris] Yeah, up. I tried to tell you and you wouldn't listen. [Eric] What did I tell him. [ Music ] Basically it needs to come off of the blocks directly on to the flat part of the cab, which it definitely rolled up a little bit. [Chris] I'd really like for these not to roll underneath it. No way to know except to do it. Let's do it. [Eric] It's hitting the jack stand a little bit on that side. Don't we have some six by six chunks or eight by eights or something like that. You are hanging up there. [Chris] You're gonna have to go back. Time to get this thing rolled over. [Eric] Either we try and put one fork in there and I don't think they're gonna be wide enough to get around the cab. Or we try and put them both together and at that point I think they'll be too wide to fit into the hole in the tunnel. [ metal clanging ]
I did not think it was that wobbly. It doesn't look that bad on this side. This side might need some work. [ Music ]
[Chris] Okay! Coming up, come on. The reason we tipped this up like this is to give me access to the structure on the bottom here. I want to save this tunnel. If you notice we have all these bolt holes and I'm gonna use that cover as a locator plate.
[Eric] Two, three. [ metal clanging ]
[Brian] Sounded like everything was right where it needed to be. [Eric] That's exactly what we wanted. That is perfect. [Chris] The reason we tipped this up like this is to give me access to the structure on the bottom here. Right off the top we have the firewall, and this is what's left of the floor, and we have a seam right there. When I finally do go to actually remove the floor and this structure that's where I'm gonna cut. I want to save this tunnel. If I start cutting a little bit here, a little bit down there, it's gonna be a pain to put back together but if I cut here it's a known point. When it goes back together everything looks the same. If you notice we have all these bolt holes all the way around. I'm not gonna be using all of it. Just this center section like I said, and I'm gonna use that cover as a locator plate. [ reciprocating saw buzzing ] [ metal clanging ] Now that we have the remainder of the floor removed we've got a whole lot of old school air conditioning going on. I know right off the hop the easiest thing for me to do is start building these corners up. It's an actual major tie-in point for the floor, the structure, the door, all that stuff. Then from there I'm actually gonna start working on the ribbing that was gonna be structural for the floor. [ welder crackling ] I left this part up here. Why? It was perfectly good and nothing's wrong with it. As you've seen before, removed the rest. I bent up all of this channel here on our brake that we have. It's 18 gauge and I am mimicking the factory design. We have our main structure here. This side here is going to have a piece of diamond plate on it or tread plate, and that's gonna act as the floor pan itself. It's gonna be stronger than stock. Let's get to work. [ saw buzzing ] [ hammer tapping ] [ welder crackling ] [ Music ]
[ welder crackling ] Today we are going to be talking about welding wire. Not just a normal conversation about welding wire. That is today's Summit Tech Tip. [ Music ] The best way to look and think about welding wire is as a recipe. Whether it's aluminum, stainless, normal steel, flux core, it is all a recipe of different ingredients, different powders, put into the mix and then drawn out into electrode rods. So we are gonna go from top to bottom on how to decode steel electrode rod specifications. You usually see things like ER70S-6, ER70S-2, ER80, ER110. If you notice all across all types of wire, aluminum, stainless, welding rod, it all starts with E or ER. So ER, electrode rod. Next up is your number measured in tens of thousandths of tensile strength. So if it's 60 it's 60,000 psi for tensile strength. That's the breaking point. Then after that you have a letter. Either S, T, or C. "S" stands for solid wire, which is your usual tig wire or welding wire for the mig application that you'll see in your day to day welding. After that you have "T", which is flux core as well as "C". Both of these are industrial applications. So stay away from that until you get better with your skills. After that is your number designation, and this is where the cake recipe really comes in. Whether it's two, six, or something else that is the additives that they put into the wire to extract impurities. So when you're looking at your weld and you see little tan or beige islands on top of your weld that's nothing to be worried about. That's the welding wire pulling impurities to the top making sure you have a stronger weld and that was your Summit Tech Tip. [Eric] Coming up. [Chris] As we can see, our bend line is slightly higher. I'm honestly just gonna go like this. Passenger and driver's side floors welded in their forever home we're gonna start moving on to the transmission tunnel.
[Chris] After some serious measurements with a highly calibrated eyeball I realized that this worn down zip disc is the closest thing we have to the right radius. I'm not joking. I'm just gonna eyeball it. How can we do this? How am I gonna go about doing? This is the tool that I ended up making. All I did was took two pieces of inch and three quarter square tubing. Cut those on the end. Inch and five-eighths DOM, 120 wall. That's what we're gonna bend against. I'm gonna take a piece of quarter inch flat bar. Put it across the back and just use a set of clamps. For those of you at home going, that must be nice having a fab table. Once you get it all measured square to whatever table you have at home you tack weld pieces of scrap to it. So you know once the material's back in and butts up against it you're in the same exact spot over and over again. As we can see our bend line is slightly higher, which is exactly what we wanted. [ saw buzzing ] [ Music ]
We're gonna start cutting metal away here now. First thing I want to do is put a bend in this side over here. I'm gonna do a one inch cut in, bend it, and from there on it's gonna be rinse and repeat. [ hammer banging metal ] [ Music ]
I'm gonna follow this bend up here. I'd say it terminates roughly here. I'm just gonna go like this. [ grinder buzzing ] Right now I'm approaching that final ten percent to really dial it in. I've got a little bit of hammering and dolly work to do there, little grinding down here, but for the most part it's more of what you guys have already seen. So next time you see this I'm gonna have this done, that done. It's gonna look a whole lot different. Now that we have the passenger and driver's side floors welded in their forever home we're gonna move on to the transmission tunnel, which. [ Music ]
It's holding on by a hope and a prayer. Good thing is all I really care about is this form section right here. Reason I want to try and save that is because for the time being we're gonna be putting the stock motor and transmission back into it and we know they once lived underneath here. It's gonna save a ton of work trying to build a new tunnel. So I'm gonna take the doghouse off, bolt it up to the firewall, and get going. It should just bolt right in. [ Music ]
Now that we have this in here let me explain why I put the cover for the doghouse on first and didn't just sit there and start measuring. First off, a lot of this is rusted and rotted out. So if I started pulling measurements from here I could be landing in no man's land. As you can see, there's chunks of this thing you could put your hand through. I don't want to be sitting there saying I can cut here and then weld it because clearly I can't. What I'm gonna do is cut off about a third on each side. What that's gonna do is bring it down to a manageable piece. Then what I'll be able to do is directly transfer from here onto the existing floor because I did leave myself a substantial amount that I know I need to cut off over here. What I don't want to do is have to create big patch panels and then it just won't look as good. So this is the right way. [ saw buzzing ] [ Music ]
Now what I'm gonna do is take this, bolt it up to the cab, and get ready to start grafting it in. [ Music ]
We are done cutting the diamond plate and I am now gonna start trimming up the last of this original tunnel and bringing those two lines to bare. Coming up, now that I have the floor, tunnel, and rockers all welded in I need to get this horizontal. So this goof is gonna give me a hand. [Eric] I'm here, just been a little busy. [Chris] Up. [Eric] You going for the hook?
[Chris] There's a spot here where there's more overlap of the old tunnel than the new. I'm just gonna come back with the body saw and trim that out so it fits nice and tight. Also another point. The reason I'm using a body saw for this and not a zip disc. A body saw is substantially thinner than a zip disc. Also it's a lot more precise and I can really get in. These turns here, going from this to like a 45 and around and up, and this big arch right here. With the body saw no problem. Just take my time and it's like cutting hot butter. Hey junior, this is gonna get allowed again. Allowed? This is gonna get loud. [Greg] No, we're not gonna allow it again. [Chris] Ha, ha, ha! [ body saw buzzing ] [ welder crackling ] [ hammer banging metal ] Now that I have the floor, tunnel, and rockers all welded in I need to get this horizontal. So this goof is gonna give me a hand. [Eric] I'm still here, just been a little busy. [Chris] You are gonna be coming in. Watch out for the blower box and the master cylinder. Once you get through I'll let you know when to stop. I'll connect you with the ratchet strap and then we'll put tension on it. Up. [Eric] You going for the hook? That'll help us from rolling it too much on the cab corners. Still got one of them that's got to get reshaped a little bit. I don't know what happened there. [ hammer banging metal ] We ain't even gotta lower it back down. [ hammer banging metal ]
[Chris] Essentially what we'll do now is I'll come up, you'll come down, we'll find the happy medium, set it onto those jack stands, re-jig, and come up with a different plan. [ Music ]
Come down on yours. [Eric] Going down. [ Music ]
You going on the cab support? [ Music ]
[Chris] Going down. [ Music ]
Come in and when you're in location just shift the forks to your right. [Eric] It doesn't help that at this height the boom is right in my eye line. [Chris] Just watch. I'll take care of the forks. You watch your boom and the side of the cab. [ Music ]
Turn to your left and forward. [ Music ]
[Eric] Wait, we're doing my thing? I was right? That's what's gonna work not the. [ Music ]
If that don't do it I don't know what will. [ Music ]
Told you so. [Chris] Hold there. You're good. Let's move the frame under. [ Music ]
A little more, little more. [Eric] There's tension off. [Chris] Done, we're there. Don't go down any further. [Eric] Tricky part now. [Chris] I would wait. I'll climb up and undo everything and then go from there. [ Music ] [Eric] Let's take a look around. [Chris] Lower it faster. [Eric] It's still moving. [Chris] I'm getting tools. [Eric] No that is actually as fast as it goes. [Chris] I know. I'm just being a smart ass. [Eric] I'm trying to remember where it sat before. I think it was just a little lower than that. [Chris] Honestly if you put it back on locks I think that's about it. Or right there. [Eric] I was gonna say. What did we end up going with for a tire size on this? [Chris] 37-13 and a half R-17. [Eric] You got a tape measure handy. [Chris] Side of the fab box. [Eric] Side of my toolbox. It's closer. [ mechanical humming ] [Eric] Right about there? [Chris] Close enough yeah. Now that we have everything torn down we are at the stage where we can start building things back up. [Eric] Next time you see this thing there's gonna be quite a bit more work done to it. It's gonna look quite a bit different. Catch you next time!
Show Full Transcript
[Eric] Coming up on today's episode of Dirt and Trials. [Chris] Who puts a @#$% nut there? Now you can see we have our rocker planel. Planel? [ metal clanging ] [ Music ]
[Chris] Today Project Spartan is getting an all new diamond plate floor to go with the factory doghouse. In order to do that though I need to make sure this cab is nice and sturdy. I'm going to move these braces I put in earlier to the inside of the door jamb so that when I go to work on the cab corners and rocker panels I can gap it properly, it'll have more strength, and it'll be a better end product. Another reason we are moving these steel bars inboard and adding the doors on is because no matter what vehicle you're working on when you start removing this much material everything becomes fragile. The more rigidity I can put into this project right now it is gonna give me better odds of having the fit and fitment that I want as we continue to add more material to the build. We want to get this done as fast as possible. So we went out and bought some J-10 cab corners and rockers. The front part of the cab is good enough I can just bend some material we have in house, weld it on, and off we go. We have our cab corner, inner door, and the actual rocker. These rockers are galvanized. Make sure you're wearing the proper respirator. I'm gonna fit it. I'm gonna use Clecos. Get everything where I want it, and then and only then will I start cutting, grinding, tacking. [ saw buzzing ]
So now start trimming off of here, bringing the panel up, getting into alignment with this. Then I'll square up the back here and get that ready. Then once this is all good here I'll start taking off the front and getting it ready so that this lip can wrap around. [ welder crackling ] I've test fitted the new rocker. This mess of a rocker has to come out because it is in the way. [ saw buzzing ] [ Music ]
In no world does quarter inch bar or three-sixteenths angle iron deserve a place on sheet metal. We've got quarter inch bar, three-sixteenths angle that was weld glued. This is not a weld. These are all weld faults. How do you do that? To sheet metal. In this application there is no world where you need this type of material on sheet metal. You don't need it. Whoever did this if they went oh, I'm a welder. No, no you're not. No you're not. Let's do it! Just do it! [ saw buzzing ] [ welder crackling ] As you can see now we have the rocker panel tacked in place. It's giving rigidity back into the cab. It's a really big step getting this in here. I've got to do a little bit of hammer work in here but I'm happy with it. [ hammer tapping ] Now if this closes. Everything seems to be okay. Now we are moving on to the inside, the floor. We're gonna flip it up and lay it on its back. [Eric] You said we're going by the straps? [Chris] Yes sir. I'm anticipating this being front heavy. [Eric] Yeah, we're probably gonna have to lean back quite a bit. Right there? [Chris] Right there. [Eric] That sounded like glass. Are we replacing this windshield? [Chris] We can. You know what it was? You hit your beloved window wiper switch. [Eric] Oh not the manual wiper! Okay, we're good. That was a close call. [Chris] And down. [Eric] You don't want to put no blocks or nothing? It's folding. [Chris] Yeah, up. I tried to tell you and you wouldn't listen. [Eric] What did I tell him. [ Music ] Basically it needs to come off of the blocks directly on to the flat part of the cab, which it definitely rolled up a little bit. [Chris] I'd really like for these not to roll underneath it. No way to know except to do it. Let's do it. [Eric] It's hitting the jack stand a little bit on that side. Don't we have some six by six chunks or eight by eights or something like that. You are hanging up there. [Chris] You're gonna have to go back. Time to get this thing rolled over. [Eric] Either we try and put one fork in there and I don't think they're gonna be wide enough to get around the cab. Or we try and put them both together and at that point I think they'll be too wide to fit into the hole in the tunnel. [ metal clanging ]
I did not think it was that wobbly. It doesn't look that bad on this side. This side might need some work. [ Music ]
[Chris] Okay! Coming up, come on. The reason we tipped this up like this is to give me access to the structure on the bottom here. I want to save this tunnel. If you notice we have all these bolt holes and I'm gonna use that cover as a locator plate.
[Eric] Two, three. [ metal clanging ]
[Brian] Sounded like everything was right where it needed to be. [Eric] That's exactly what we wanted. That is perfect. [Chris] The reason we tipped this up like this is to give me access to the structure on the bottom here. Right off the top we have the firewall, and this is what's left of the floor, and we have a seam right there. When I finally do go to actually remove the floor and this structure that's where I'm gonna cut. I want to save this tunnel. If I start cutting a little bit here, a little bit down there, it's gonna be a pain to put back together but if I cut here it's a known point. When it goes back together everything looks the same. If you notice we have all these bolt holes all the way around. I'm not gonna be using all of it. Just this center section like I said, and I'm gonna use that cover as a locator plate. [ reciprocating saw buzzing ] [ metal clanging ] Now that we have the remainder of the floor removed we've got a whole lot of old school air conditioning going on. I know right off the hop the easiest thing for me to do is start building these corners up. It's an actual major tie-in point for the floor, the structure, the door, all that stuff. Then from there I'm actually gonna start working on the ribbing that was gonna be structural for the floor. [ welder crackling ] I left this part up here. Why? It was perfectly good and nothing's wrong with it. As you've seen before, removed the rest. I bent up all of this channel here on our brake that we have. It's 18 gauge and I am mimicking the factory design. We have our main structure here. This side here is going to have a piece of diamond plate on it or tread plate, and that's gonna act as the floor pan itself. It's gonna be stronger than stock. Let's get to work. [ saw buzzing ] [ hammer tapping ] [ welder crackling ] [ Music ]
[ welder crackling ] Today we are going to be talking about welding wire. Not just a normal conversation about welding wire. That is today's Summit Tech Tip. [ Music ] The best way to look and think about welding wire is as a recipe. Whether it's aluminum, stainless, normal steel, flux core, it is all a recipe of different ingredients, different powders, put into the mix and then drawn out into electrode rods. So we are gonna go from top to bottom on how to decode steel electrode rod specifications. You usually see things like ER70S-6, ER70S-2, ER80, ER110. If you notice all across all types of wire, aluminum, stainless, welding rod, it all starts with E or ER. So ER, electrode rod. Next up is your number measured in tens of thousandths of tensile strength. So if it's 60 it's 60,000 psi for tensile strength. That's the breaking point. Then after that you have a letter. Either S, T, or C. "S" stands for solid wire, which is your usual tig wire or welding wire for the mig application that you'll see in your day to day welding. After that you have "T", which is flux core as well as "C". Both of these are industrial applications. So stay away from that until you get better with your skills. After that is your number designation, and this is where the cake recipe really comes in. Whether it's two, six, or something else that is the additives that they put into the wire to extract impurities. So when you're looking at your weld and you see little tan or beige islands on top of your weld that's nothing to be worried about. That's the welding wire pulling impurities to the top making sure you have a stronger weld and that was your Summit Tech Tip. [Eric] Coming up. [Chris] As we can see, our bend line is slightly higher. I'm honestly just gonna go like this. Passenger and driver's side floors welded in their forever home we're gonna start moving on to the transmission tunnel.
[Chris] After some serious measurements with a highly calibrated eyeball I realized that this worn down zip disc is the closest thing we have to the right radius. I'm not joking. I'm just gonna eyeball it. How can we do this? How am I gonna go about doing? This is the tool that I ended up making. All I did was took two pieces of inch and three quarter square tubing. Cut those on the end. Inch and five-eighths DOM, 120 wall. That's what we're gonna bend against. I'm gonna take a piece of quarter inch flat bar. Put it across the back and just use a set of clamps. For those of you at home going, that must be nice having a fab table. Once you get it all measured square to whatever table you have at home you tack weld pieces of scrap to it. So you know once the material's back in and butts up against it you're in the same exact spot over and over again. As we can see our bend line is slightly higher, which is exactly what we wanted. [ saw buzzing ] [ Music ]
We're gonna start cutting metal away here now. First thing I want to do is put a bend in this side over here. I'm gonna do a one inch cut in, bend it, and from there on it's gonna be rinse and repeat. [ hammer banging metal ] [ Music ]
I'm gonna follow this bend up here. I'd say it terminates roughly here. I'm just gonna go like this. [ grinder buzzing ] Right now I'm approaching that final ten percent to really dial it in. I've got a little bit of hammering and dolly work to do there, little grinding down here, but for the most part it's more of what you guys have already seen. So next time you see this I'm gonna have this done, that done. It's gonna look a whole lot different. Now that we have the passenger and driver's side floors welded in their forever home we're gonna move on to the transmission tunnel, which. [ Music ]
It's holding on by a hope and a prayer. Good thing is all I really care about is this form section right here. Reason I want to try and save that is because for the time being we're gonna be putting the stock motor and transmission back into it and we know they once lived underneath here. It's gonna save a ton of work trying to build a new tunnel. So I'm gonna take the doghouse off, bolt it up to the firewall, and get going. It should just bolt right in. [ Music ]
Now that we have this in here let me explain why I put the cover for the doghouse on first and didn't just sit there and start measuring. First off, a lot of this is rusted and rotted out. So if I started pulling measurements from here I could be landing in no man's land. As you can see, there's chunks of this thing you could put your hand through. I don't want to be sitting there saying I can cut here and then weld it because clearly I can't. What I'm gonna do is cut off about a third on each side. What that's gonna do is bring it down to a manageable piece. Then what I'll be able to do is directly transfer from here onto the existing floor because I did leave myself a substantial amount that I know I need to cut off over here. What I don't want to do is have to create big patch panels and then it just won't look as good. So this is the right way. [ saw buzzing ] [ Music ]
Now what I'm gonna do is take this, bolt it up to the cab, and get ready to start grafting it in. [ Music ]
We are done cutting the diamond plate and I am now gonna start trimming up the last of this original tunnel and bringing those two lines to bare. Coming up, now that I have the floor, tunnel, and rockers all welded in I need to get this horizontal. So this goof is gonna give me a hand. [Eric] I'm here, just been a little busy. [Chris] Up. [Eric] You going for the hook?
[Chris] There's a spot here where there's more overlap of the old tunnel than the new. I'm just gonna come back with the body saw and trim that out so it fits nice and tight. Also another point. The reason I'm using a body saw for this and not a zip disc. A body saw is substantially thinner than a zip disc. Also it's a lot more precise and I can really get in. These turns here, going from this to like a 45 and around and up, and this big arch right here. With the body saw no problem. Just take my time and it's like cutting hot butter. Hey junior, this is gonna get allowed again. Allowed? This is gonna get loud. [Greg] No, we're not gonna allow it again. [Chris] Ha, ha, ha! [ body saw buzzing ] [ welder crackling ] [ hammer banging metal ] Now that I have the floor, tunnel, and rockers all welded in I need to get this horizontal. So this goof is gonna give me a hand. [Eric] I'm still here, just been a little busy. [Chris] You are gonna be coming in. Watch out for the blower box and the master cylinder. Once you get through I'll let you know when to stop. I'll connect you with the ratchet strap and then we'll put tension on it. Up. [Eric] You going for the hook? That'll help us from rolling it too much on the cab corners. Still got one of them that's got to get reshaped a little bit. I don't know what happened there. [ hammer banging metal ] We ain't even gotta lower it back down. [ hammer banging metal ]
[Chris] Essentially what we'll do now is I'll come up, you'll come down, we'll find the happy medium, set it onto those jack stands, re-jig, and come up with a different plan. [ Music ]
Come down on yours. [Eric] Going down. [ Music ]
You going on the cab support? [ Music ]
[Chris] Going down. [ Music ]
Come in and when you're in location just shift the forks to your right. [Eric] It doesn't help that at this height the boom is right in my eye line. [Chris] Just watch. I'll take care of the forks. You watch your boom and the side of the cab. [ Music ]
Turn to your left and forward. [ Music ]
[Eric] Wait, we're doing my thing? I was right? That's what's gonna work not the. [ Music ]
If that don't do it I don't know what will. [ Music ]
Told you so. [Chris] Hold there. You're good. Let's move the frame under. [ Music ]
A little more, little more. [Eric] There's tension off. [Chris] Done, we're there. Don't go down any further. [Eric] Tricky part now. [Chris] I would wait. I'll climb up and undo everything and then go from there. [ Music ] [Eric] Let's take a look around. [Chris] Lower it faster. [Eric] It's still moving. [Chris] I'm getting tools. [Eric] No that is actually as fast as it goes. [Chris] I know. I'm just being a smart ass. [Eric] I'm trying to remember where it sat before. I think it was just a little lower than that. [Chris] Honestly if you put it back on locks I think that's about it. Or right there. [Eric] I was gonna say. What did we end up going with for a tire size on this? [Chris] 37-13 and a half R-17. [Eric] You got a tape measure handy. [Chris] Side of the fab box. [Eric] Side of my toolbox. It's closer. [ mechanical humming ] [Eric] Right about there? [Chris] Close enough yeah. Now that we have everything torn down we are at the stage where we can start building things back up. [Eric] Next time you see this thing there's gonna be quite a bit more work done to it. It's gonna look quite a bit different. Catch you next time!