
In This Episode
- 0:01 Introduction to the episode
- 0:32 Review of Project Spartan's progress
- 1:13 Discussion on Polaris General modifications
- 2:00 Working on the front axles
- 4:25 Disassembling and cleaning parts
- 6:28 Testing the UTV
- 7:01 Removing the wheel and tire
- 8:01 Replacing the clutch and belt
- 9:15 Installing new tires
- 10:00 Rebuilding an axle for the Jeep Kaiser
- 15:02 Installing a turbo kit
- 18:01 Finalizing the UTV build
Video Transcript
[Chris] You're watching Powernation!
[Chris] Today on Dirt and Trails we got Project Spartan back in the shop. We're going to be putting some axles on it and getting it ready to go back on the floor. [Eric] And we've got a 2019 Polaris General in here for some modifications. Make it a little more effective on and off the road. This is Dirt and Trails. [ Music ]
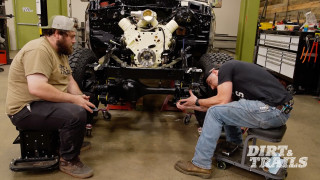
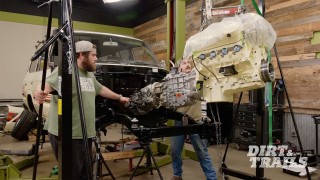
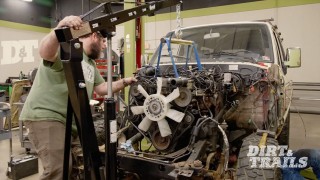
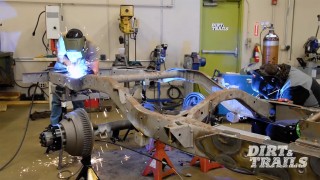
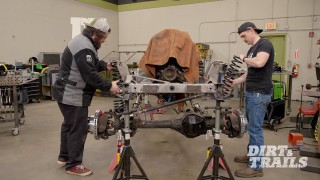
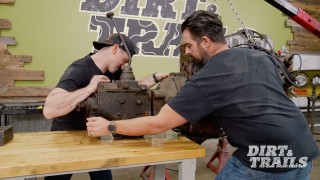
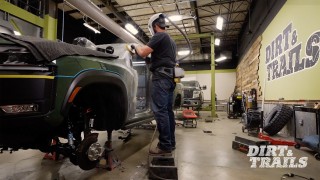
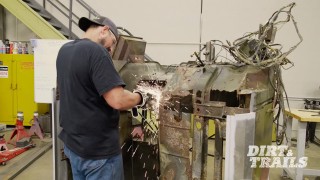
This is Project Spartan, our M715 Jeep Kaiser recovery vehicle, and we've already done a bunch of work on this thing but it has been a while. We've had a project in between and any time you run into a situation like that it's never a bad idea to just kind of refresh yourself before you get started again. So where'd we leave off on this thing? -Well, this frame has been completely stripped down, both mechanically and literally. We've had it sandblasted. Also the cab, we've completely redone the floor, the trans tunnel, the corners, the rockers, pretty much everything except for the outer sheet metal. -Now, I think you've got almost everything ready. If you want to go finish up over there, I'm going to tell these guys what we've got going on here. -Have fun. -So what this is, is a 2019 Polaris General. It's a 1000cc two seater UTV. And you guys might remember back in episode one of this show, you actually saw it pull Leadfoot out of that mud puddle when it was still in stock form. Now we've noticed that this thing has some issues we'd like to address, starting with our tires. Now, are there ways that we could make room to fit these tires without them slamming into the floor every time we hit a bump? Yes, there is, but rather than spend that time and money, we're actually just going to go down in tire size because that is also going to give us the opportunity to re-tune that clutch and get it dialed in to a bigger than stock tire. We're also going to throw in a new belt because the one that's there is just done for. In addition to that, we're going to see how quick we can make this thing with a turbo kit, a tuner, and a Pedal Commander. -Welcome to my side of the house and today we are going to be diving into the front axles like Eric said. These are going to be going under the front of our Kaiser. Now, we got this out of a scrapyard. This came from an '08 F-250 and we have no idea if it was even serviced. So to kick things off we're going to use some Deep Creep in every nut, bolt, ball joint, screw. Everything that can come off of this we want to take it off. But I'm going to soak it down with some Deep Creep first. Get it nice and loosened up while I'm getting the rest of my tools ready, and then make some noise. Now, some of the things that I love about Deep Creep is its foaming action here. It'll sit there, go on, and work its way in through the threads and help break up all the rust, grime, paint that was in there from the factory, and just the general corrosion connecting things that aren't supposed to be connected. It aims really well with this little tube that they bring with it. So for spots like this here you can spray it in behind there and will actually soak down through the bolt and in behind the rotor itself. So if you need to soak something down from a distance, Deep Creep's got you covered. These little guys here are almost always the culprits that are going to break off on you. So you want to make sure you get in there and really soak them down. Now I'm going to let that soak in there for about 4 or 5 minutes while I'm getting everything else set up, and then we'll be back and we'll start blowing this baby apart. First thing I'm going to do is I'm going to go through and all the cotter pins, I'm going to start pulling all those out. While I'm letting this settle up for the last minute or two I'm going to start hooking up our air lines. And recently Kaeser came in and revamped our entire air system here. We currently have an 80 gallon tank sitting in our shop. We all have tools that we invest our hard earned money into. Last thing you want to be doing is running dirty air through it. Kaeser, one of the things they did when they helped us out was hook up a really nice air dryer, an air purification system as well, so that all of our shops are running the same crisp, clean, pure air. So the tools that you invest your hard earned money into don't get ruined from the inside out. [ impact driver humming ] Now let's start taking some hubs apart. If you look in here, the next bit that I'm going to take out is this brass snap ring. [ hammer tapping ] [ Music ]
There we go. So what I'm doing now is I just took off the nuts holding on my steering linkage and pan hard bar. Now I'm going to take that off.
There. Off with our knuckle. [ Music ]
There we go. One torn apart Dana 60. All right, now that we have the knuckles are all off. This is all torn down. Let's check in. Has anybody seen Eric? Eric? The hell is that kid? [ Music ] Up next, what's Eric doing with the UTV? [Eric] Bye bye.
[ Music ]
[Chris]Hey, what are you doing? We're supposed to be working. [Eric] Hit it! [ UTV engine revving ] -Well, you know, I figured with what we're doing to this thing that we should probably test it out a little bit. We've got to get some baseline times on this thing, right? It's a UTV. The whole point is to have some fun. So that's what I'm doing. -So you came out by yourself and didn't think, hey, maybe Chris wants to have a little bit of fun. -Well hop in. -Thank you. Was that so painful? [ engine revving ] -You're right, She does need a little bit more. -You feel like it's dragging a little bit, right? Like there's more in it. -Yeah. -I think a little bit of boost will bring more out of it. And that unfortunately means we should probably get back to work. -I'll bring her in. -All right. So we're going to be starting with getting our clutch re-tuned and getting that belt out so we can throw our new one in. And before we can do that I think I'm going to do myself a favor and make some more room. Get this bed and this wheel and tire out of the way. [ Music ]
Our next step is going to be to get that wheel and tire removed. That's where Duralast comes in with things like these steel wheel chalks. We're going to put one in front, one behind our front wheel. I'm gonna grab this nice Duralast jack. You can use your hand on the foot pedal and it'll let you get there, get set. Put just a little bit of tension on there before you have to stand back up and start actually raising it. Here's where we're going to see another feature I love about these things and that's the automatic raising. All you do is just hit this handle. It'll bring itself right up. Our next step is going to be to actually get the tire removed. [ impact driver humming ] Now that we've got a little bit of room to work with we're going to start removing this vent tube. We can see we've got our belt and clutch cover right here. That's what we're going to have to get out of the way so that we can see what we're actually working with. Now we're going to get our primary and secondaries removed. Get this belt out of the way. Just like that. [ Music ]
Now to get the primary clutch itself removed we're going to be using this clutch puller tool. It's going to go right there in place of that bolt. [ impact driver humming ] There we go. With the mileage of this machine being right about 4,000, it's about time to do the entire assembly anyways. So to save some time and some parts hunting we decided to just get a whole new assembly for the primary and the secondary. Our first step here is going to be to get our secondary or driven clutch installed. We're going to slip this over the secondary clutch. Now we can get our primary clutch installed. Slip this around the belt onto the shaft. Now our next step is going to be to get this bolt here torqued on our secondary clutch but to do that we have to be able to hold this in place. That's where this clutch holding tool comes in. It's going to allow us some leverage so that we can use our torque wrench and get that tightened down. Then we'll torque our primary bolt. There we go. [ Music ] Get our hose hooked up. Get this tightened up. Just like that we've got a brand new clutch installed, a new belt, and that new clutch is actually tuned to the size of tires that we're about to put on and I think Chris has got them ready to go. So I'm going to go pick them up now. Now we are ready to get our new General Grabber ATXs installed on our UTV. Now we've got these in a 31 by 10.5. This thing is really aggressive. You can tell that by these nice big tread blocks, nice and deep. Plus we've got siping all the way through this tire. You'll also notice that there's these little holes all over in the side of our tread. That's because these tires are studable. They are winter rated. So if you live in an environment where snow is a concern you can use these things to make sure you're still going to get where you need to go. Three more to go. Up next, Chris rebuilds an axle for the Jeep Kaiser.
[Chris] As you can see, I have an entire tables worth of parts that I need to put on to this Dana 60. We got disc brakes, a diff cover, and even these Duralast Gold upper and lower ball joints that we got from the AutoZone Pro website. Now how do we get ahold of them? Well, went onto the website, punched in the exact vehicle that this axle came out of, which was an '08 F-250. And not only did I know that we were going to get the right parts, we got them exactly when they said they were going to be here, which is perfect, because when you're doing stuff like this you need teammates who can do what they say when they say they're going to do it. All right, now we're going to install those ball joints I was just talking about. Now to start off we're going to be removing the snap ring and make sure it's all lined up. Start putting a little bit of lube on. There we go. Now that we have everything pressed out of our knuckles we are ready to start putting things back in. One smooth motion. [ impact driver humming ] All right, we have our knuckle back from getting the ball joints pressed in. First thing I'm going to do. I'm going to start with my snap ring. I'm going to put that in. Next up I'm going to remove this grease plug here. Put a fitting in here and here and then fill this full of grease. All right, now let's go put it on the axle. Line up your holes. Now that we have our knuckle installed we are going to torque them down. We'll get there, eventually. There we go. That's what we're looking for. Put the cotter pin in the top. Now that we have the knuckle reinstalled we are going to carry on with adding more parts back on to this axle. We're going to start with the axle seal itself. Grab your axle and start assembling that. Wipe it down. Take it over the axle, slide it into his forever home. Now that our axle is engaged it's time to put the seal in. What we're going to do is oil up the inside of the knuckle here, the outside of this here, and carefully tap it in. We are going to move on and install our hub. Now before I put the hub on I'm going to cover this in anti-seize. [ Music ]
[ ratchet clicking ] Now let's get to some cleaning and then start assembling parts. Now we're going to start by reinstalling our snap ring. I know that snap ring is not seated and I'm just going to tap it. There! Next up we are going to start greasing the inside and all the other parts that we're going to need to grease so that we can actually finish assembling our hub. We're going to move on to our wave spring and put that guy in. The outer cage goes on like so. You push it in and then rotate slightly. Now I'm going to put a little bit of anti-seize in all the holes. I'm now going to take my gasket and my outer hub and put it in. There we go. Now with that last bolt locked we want to make sure that this hub is actually connecting to the axle. So turn it to locked and if you can spin your hub and see the axle shaft spin you did it right. The next thing we're going to worry about is stopping this Kaiser because it's going to be heavy, especially when we are sitting there and towing things. To do that we are going to be bolting in a set of Z36 truck and tow upgrade kits that we got from PowerStop brakes. Now these are great because they come with stainless hardware as well as drilled and slotted rotors. You need and want drilled and slotted rotors especially when you're doing a lot of heavy towing and recovery so you can evacuate material that builds up between the pads and the rotor as well as to help cool down the rotors themselves. Enough gabbing. Let's get to work. Now there is a left and right to these rotors. So make sure you put the right one on the right side. Now we are going to start assembling our caliper. [ ratchet humming ] [ Music ]
[ ratchet clicking ] Everywhere that the pads are going to ride. So down in through here, up through here, and then the same thing on the insides over here. I'm going to sit there, grease all that as well, and then get ready to start mounting our pads. [ Music ]
And with that our Z36 truck and tow brake upgrade kit that we got from PowerStop Brakes is ready to go into service. Coming up, this UTV gets a boost.
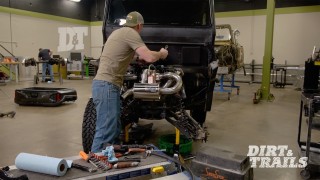
[Eric] All right, so this is the bulk of our turbo kit that we got from the crew over at Force Turbos and we are at the point where we're just about ready to get this bolted on and move along with our install. But before we do that I want to show you what we did to get here. Now it was mostly just getting our plumbing done. We've got our coolant return and feed lines here that run one into the water pump and then one into the hose that we disconnected from the water pump. Now next to that we've got our oil feed line and our oil drain line. Now I'm going to grab a couple of bolts and get this thing stuck on. So there's our coolant feed and return as well as our oil feed put in. Now pull our oil drain out. There we go. One old intake tube. Our next step here is going to be to get this charge pipe installed that's going to connect our turbo into our throttle body. Rotate this into here. I think we'll be good. We're going to go ahead and get this one tightened down. Grab our intake pipe. And this is going from here into our airbox. That's what's going to provide the fresh air into the turbo. Now that we've got all that in one of our last steps we've got to do is we need to swap out these stock injectors for the ones that came with our turbo kit. Get our electrical connectors disconnected here. Squeeze, push and pull. Get that out of there like that. So with our wires out of the way, instead of disconnecting our fuel line we're going to go ahead and just remove our fuel rail. That should allow us to go over. Oh there we go. So it looks like we do have a little bit of fuel but that's okay because we've got rags on hand. But now that this is plugged up we remove the injectors. Something to give yourself a little extra leverage there. This new O-ring is quite a bit bigger than this old one. So we are going to have to move this one over to our new injector real quick. So now I'm going to get these O-rings lubed up. We'll go ahead and pop our injectors in nice and easy just like that. So now we're getting the fuel rail slipped back into place. So now that we've got our fuel rail in I'm going to pull our wiring back over and we'll start getting this popped back into place. That gets our O-2 sensor buttoned up. It's already plugged in. Got our last tire on. We've got this thing back on the ground. And now we are ready to get the bed put on but I'm going to get a hand with that because it'll be a little easier. Hey, what are you doing? [Chris] Well I got the axles done. The diff covers are on. They're painted. All the seals have been replaced. They're good to go. Just getting ready to clean up. -You want to give me a hand with this bed? -Sure. -There we go. Well that just about finishes this up. -Nice. What's next? -Next is computer tuning. -Ooo, your favorite? Where'd he go? How does he do that all the time? I guess I'm doing it. Come on. Now to make sure that this is running properly we are going to be putting it in a tune. Now for those of you who've never done this before it's pretty straightforward. We have our wideband O-2 sensor, our tuner, and we are going to plug straight into the computer like so. Turn your vehicle to the accessories. Once that's on it's going to throw power to the tuner itself. We are going to go here, flash tune, go down to the tune that you want to put in. You should only have one. We have a few because we've been making sure this is done right. Select it. We're good to go. So I'm going to throw the hood on. Keep moving. Now that we have our tune installed we are going to move to the inside of the cab and address the last thing in this whole UTV build and that is any and all remaining throttle lag. We're going to be addressing that with a Pedal Commander that we have here. And if you've never installed one of these don't worry, neither have I, but they are super easy to install. You unplug your throttle. Plug this in line. Mount it to the side of the transmission tunnel with the supplied Velcro, and then you're off to the races. Now when you open up your Pedal Commander this is everything you get in it. You've got the Pedal Commander module itself along with some zap straps, alcohol swab, and some Velcro. These plugs here are what you're going to be plugging in line with your throttle itself. Now that we have power running through it all you got to do is hit the Pedal Commander button and you can see it goes straight to city. Now let's say you are just driving around the city or doing some light trails but you want just a little snap to your throttle. You can go up all the way to four. Yeah, right about there. Make sure it adheres properly. There we go. Now that our cables are tucked away we can take this Pedal Commander and UTV outside and see what it can do. [ Music ] [ engine starting ] [ Music ]
[ engine revving ] [ Music ]
[ Chris laughing ] -Well, that's one way to park that thing. -I tell you that Pedal Commander takes out all the lag and this thing is zippy. -Between the Pedal Commander, the smaller tires, turbo, tuner, it better be faster. It looked and it sounded faster but how does it feel? - Find out for yourself? -All right. [ Music ] [ engine revving ] [ Music ] -Whoo, man, you weren't kidding. This thing is snappy and it is a lot faster than it was before. I mean really front to back, top to bottom, it's more fun which is exactly what we set out to do. I do think though. We're running out of space. So I think maybe we go have a little more fun. -Burnouts for distance? Let's do it.
Show Full Transcript
[Chris] Today on Dirt and Trails we got Project Spartan back in the shop. We're going to be putting some axles on it and getting it ready to go back on the floor. [Eric] And we've got a 2019 Polaris General in here for some modifications. Make it a little more effective on and off the road. This is Dirt and Trails. [ Music ]
This is Project Spartan, our M715 Jeep Kaiser recovery vehicle, and we've already done a bunch of work on this thing but it has been a while. We've had a project in between and any time you run into a situation like that it's never a bad idea to just kind of refresh yourself before you get started again. So where'd we leave off on this thing? -Well, this frame has been completely stripped down, both mechanically and literally. We've had it sandblasted. Also the cab, we've completely redone the floor, the trans tunnel, the corners, the rockers, pretty much everything except for the outer sheet metal. -Now, I think you've got almost everything ready. If you want to go finish up over there, I'm going to tell these guys what we've got going on here. -Have fun. -So what this is, is a 2019 Polaris General. It's a 1000cc two seater UTV. And you guys might remember back in episode one of this show, you actually saw it pull Leadfoot out of that mud puddle when it was still in stock form. Now we've noticed that this thing has some issues we'd like to address, starting with our tires. Now, are there ways that we could make room to fit these tires without them slamming into the floor every time we hit a bump? Yes, there is, but rather than spend that time and money, we're actually just going to go down in tire size because that is also going to give us the opportunity to re-tune that clutch and get it dialed in to a bigger than stock tire. We're also going to throw in a new belt because the one that's there is just done for. In addition to that, we're going to see how quick we can make this thing with a turbo kit, a tuner, and a Pedal Commander. -Welcome to my side of the house and today we are going to be diving into the front axles like Eric said. These are going to be going under the front of our Kaiser. Now, we got this out of a scrapyard. This came from an '08 F-250 and we have no idea if it was even serviced. So to kick things off we're going to use some Deep Creep in every nut, bolt, ball joint, screw. Everything that can come off of this we want to take it off. But I'm going to soak it down with some Deep Creep first. Get it nice and loosened up while I'm getting the rest of my tools ready, and then make some noise. Now, some of the things that I love about Deep Creep is its foaming action here. It'll sit there, go on, and work its way in through the threads and help break up all the rust, grime, paint that was in there from the factory, and just the general corrosion connecting things that aren't supposed to be connected. It aims really well with this little tube that they bring with it. So for spots like this here you can spray it in behind there and will actually soak down through the bolt and in behind the rotor itself. So if you need to soak something down from a distance, Deep Creep's got you covered. These little guys here are almost always the culprits that are going to break off on you. So you want to make sure you get in there and really soak them down. Now I'm going to let that soak in there for about 4 or 5 minutes while I'm getting everything else set up, and then we'll be back and we'll start blowing this baby apart. First thing I'm going to do is I'm going to go through and all the cotter pins, I'm going to start pulling all those out. While I'm letting this settle up for the last minute or two I'm going to start hooking up our air lines. And recently Kaeser came in and revamped our entire air system here. We currently have an 80 gallon tank sitting in our shop. We all have tools that we invest our hard earned money into. Last thing you want to be doing is running dirty air through it. Kaeser, one of the things they did when they helped us out was hook up a really nice air dryer, an air purification system as well, so that all of our shops are running the same crisp, clean, pure air. So the tools that you invest your hard earned money into don't get ruined from the inside out. [ impact driver humming ] Now let's start taking some hubs apart. If you look in here, the next bit that I'm going to take out is this brass snap ring. [ hammer tapping ] [ Music ]
There we go. So what I'm doing now is I just took off the nuts holding on my steering linkage and pan hard bar. Now I'm going to take that off.
There. Off with our knuckle. [ Music ]
There we go. One torn apart Dana 60. All right, now that we have the knuckles are all off. This is all torn down. Let's check in. Has anybody seen Eric? Eric? The hell is that kid? [ Music ] Up next, what's Eric doing with the UTV? [Eric] Bye bye.
[ Music ]
[Chris]Hey, what are you doing? We're supposed to be working. [Eric] Hit it! [ UTV engine revving ] -Well, you know, I figured with what we're doing to this thing that we should probably test it out a little bit. We've got to get some baseline times on this thing, right? It's a UTV. The whole point is to have some fun. So that's what I'm doing. -So you came out by yourself and didn't think, hey, maybe Chris wants to have a little bit of fun. -Well hop in. -Thank you. Was that so painful? [ engine revving ] -You're right, She does need a little bit more. -You feel like it's dragging a little bit, right? Like there's more in it. -Yeah. -I think a little bit of boost will bring more out of it. And that unfortunately means we should probably get back to work. -I'll bring her in. -All right. So we're going to be starting with getting our clutch re-tuned and getting that belt out so we can throw our new one in. And before we can do that I think I'm going to do myself a favor and make some more room. Get this bed and this wheel and tire out of the way. [ Music ]
Our next step is going to be to get that wheel and tire removed. That's where Duralast comes in with things like these steel wheel chalks. We're going to put one in front, one behind our front wheel. I'm gonna grab this nice Duralast jack. You can use your hand on the foot pedal and it'll let you get there, get set. Put just a little bit of tension on there before you have to stand back up and start actually raising it. Here's where we're going to see another feature I love about these things and that's the automatic raising. All you do is just hit this handle. It'll bring itself right up. Our next step is going to be to actually get the tire removed. [ impact driver humming ] Now that we've got a little bit of room to work with we're going to start removing this vent tube. We can see we've got our belt and clutch cover right here. That's what we're going to have to get out of the way so that we can see what we're actually working with. Now we're going to get our primary and secondaries removed. Get this belt out of the way. Just like that. [ Music ]
Now to get the primary clutch itself removed we're going to be using this clutch puller tool. It's going to go right there in place of that bolt. [ impact driver humming ] There we go. With the mileage of this machine being right about 4,000, it's about time to do the entire assembly anyways. So to save some time and some parts hunting we decided to just get a whole new assembly for the primary and the secondary. Our first step here is going to be to get our secondary or driven clutch installed. We're going to slip this over the secondary clutch. Now we can get our primary clutch installed. Slip this around the belt onto the shaft. Now our next step is going to be to get this bolt here torqued on our secondary clutch but to do that we have to be able to hold this in place. That's where this clutch holding tool comes in. It's going to allow us some leverage so that we can use our torque wrench and get that tightened down. Then we'll torque our primary bolt. There we go. [ Music ] Get our hose hooked up. Get this tightened up. Just like that we've got a brand new clutch installed, a new belt, and that new clutch is actually tuned to the size of tires that we're about to put on and I think Chris has got them ready to go. So I'm going to go pick them up now. Now we are ready to get our new General Grabber ATXs installed on our UTV. Now we've got these in a 31 by 10.5. This thing is really aggressive. You can tell that by these nice big tread blocks, nice and deep. Plus we've got siping all the way through this tire. You'll also notice that there's these little holes all over in the side of our tread. That's because these tires are studable. They are winter rated. So if you live in an environment where snow is a concern you can use these things to make sure you're still going to get where you need to go. Three more to go. Up next, Chris rebuilds an axle for the Jeep Kaiser.
[Chris] As you can see, I have an entire tables worth of parts that I need to put on to this Dana 60. We got disc brakes, a diff cover, and even these Duralast Gold upper and lower ball joints that we got from the AutoZone Pro website. Now how do we get ahold of them? Well, went onto the website, punched in the exact vehicle that this axle came out of, which was an '08 F-250. And not only did I know that we were going to get the right parts, we got them exactly when they said they were going to be here, which is perfect, because when you're doing stuff like this you need teammates who can do what they say when they say they're going to do it. All right, now we're going to install those ball joints I was just talking about. Now to start off we're going to be removing the snap ring and make sure it's all lined up. Start putting a little bit of lube on. There we go. Now that we have everything pressed out of our knuckles we are ready to start putting things back in. One smooth motion. [ impact driver humming ] All right, we have our knuckle back from getting the ball joints pressed in. First thing I'm going to do. I'm going to start with my snap ring. I'm going to put that in. Next up I'm going to remove this grease plug here. Put a fitting in here and here and then fill this full of grease. All right, now let's go put it on the axle. Line up your holes. Now that we have our knuckle installed we are going to torque them down. We'll get there, eventually. There we go. That's what we're looking for. Put the cotter pin in the top. Now that we have the knuckle reinstalled we are going to carry on with adding more parts back on to this axle. We're going to start with the axle seal itself. Grab your axle and start assembling that. Wipe it down. Take it over the axle, slide it into his forever home. Now that our axle is engaged it's time to put the seal in. What we're going to do is oil up the inside of the knuckle here, the outside of this here, and carefully tap it in. We are going to move on and install our hub. Now before I put the hub on I'm going to cover this in anti-seize. [ Music ]
[ ratchet clicking ] Now let's get to some cleaning and then start assembling parts. Now we're going to start by reinstalling our snap ring. I know that snap ring is not seated and I'm just going to tap it. There! Next up we are going to start greasing the inside and all the other parts that we're going to need to grease so that we can actually finish assembling our hub. We're going to move on to our wave spring and put that guy in. The outer cage goes on like so. You push it in and then rotate slightly. Now I'm going to put a little bit of anti-seize in all the holes. I'm now going to take my gasket and my outer hub and put it in. There we go. Now with that last bolt locked we want to make sure that this hub is actually connecting to the axle. So turn it to locked and if you can spin your hub and see the axle shaft spin you did it right. The next thing we're going to worry about is stopping this Kaiser because it's going to be heavy, especially when we are sitting there and towing things. To do that we are going to be bolting in a set of Z36 truck and tow upgrade kits that we got from PowerStop brakes. Now these are great because they come with stainless hardware as well as drilled and slotted rotors. You need and want drilled and slotted rotors especially when you're doing a lot of heavy towing and recovery so you can evacuate material that builds up between the pads and the rotor as well as to help cool down the rotors themselves. Enough gabbing. Let's get to work. Now there is a left and right to these rotors. So make sure you put the right one on the right side. Now we are going to start assembling our caliper. [ ratchet humming ] [ Music ]
[ ratchet clicking ] Everywhere that the pads are going to ride. So down in through here, up through here, and then the same thing on the insides over here. I'm going to sit there, grease all that as well, and then get ready to start mounting our pads. [ Music ]
And with that our Z36 truck and tow brake upgrade kit that we got from PowerStop Brakes is ready to go into service. Coming up, this UTV gets a boost.
[Eric] All right, so this is the bulk of our turbo kit that we got from the crew over at Force Turbos and we are at the point where we're just about ready to get this bolted on and move along with our install. But before we do that I want to show you what we did to get here. Now it was mostly just getting our plumbing done. We've got our coolant return and feed lines here that run one into the water pump and then one into the hose that we disconnected from the water pump. Now next to that we've got our oil feed line and our oil drain line. Now I'm going to grab a couple of bolts and get this thing stuck on. So there's our coolant feed and return as well as our oil feed put in. Now pull our oil drain out. There we go. One old intake tube. Our next step here is going to be to get this charge pipe installed that's going to connect our turbo into our throttle body. Rotate this into here. I think we'll be good. We're going to go ahead and get this one tightened down. Grab our intake pipe. And this is going from here into our airbox. That's what's going to provide the fresh air into the turbo. Now that we've got all that in one of our last steps we've got to do is we need to swap out these stock injectors for the ones that came with our turbo kit. Get our electrical connectors disconnected here. Squeeze, push and pull. Get that out of there like that. So with our wires out of the way, instead of disconnecting our fuel line we're going to go ahead and just remove our fuel rail. That should allow us to go over. Oh there we go. So it looks like we do have a little bit of fuel but that's okay because we've got rags on hand. But now that this is plugged up we remove the injectors. Something to give yourself a little extra leverage there. This new O-ring is quite a bit bigger than this old one. So we are going to have to move this one over to our new injector real quick. So now I'm going to get these O-rings lubed up. We'll go ahead and pop our injectors in nice and easy just like that. So now we're getting the fuel rail slipped back into place. So now that we've got our fuel rail in I'm going to pull our wiring back over and we'll start getting this popped back into place. That gets our O-2 sensor buttoned up. It's already plugged in. Got our last tire on. We've got this thing back on the ground. And now we are ready to get the bed put on but I'm going to get a hand with that because it'll be a little easier. Hey, what are you doing? [Chris] Well I got the axles done. The diff covers are on. They're painted. All the seals have been replaced. They're good to go. Just getting ready to clean up. -You want to give me a hand with this bed? -Sure. -There we go. Well that just about finishes this up. -Nice. What's next? -Next is computer tuning. -Ooo, your favorite? Where'd he go? How does he do that all the time? I guess I'm doing it. Come on. Now to make sure that this is running properly we are going to be putting it in a tune. Now for those of you who've never done this before it's pretty straightforward. We have our wideband O-2 sensor, our tuner, and we are going to plug straight into the computer like so. Turn your vehicle to the accessories. Once that's on it's going to throw power to the tuner itself. We are going to go here, flash tune, go down to the tune that you want to put in. You should only have one. We have a few because we've been making sure this is done right. Select it. We're good to go. So I'm going to throw the hood on. Keep moving. Now that we have our tune installed we are going to move to the inside of the cab and address the last thing in this whole UTV build and that is any and all remaining throttle lag. We're going to be addressing that with a Pedal Commander that we have here. And if you've never installed one of these don't worry, neither have I, but they are super easy to install. You unplug your throttle. Plug this in line. Mount it to the side of the transmission tunnel with the supplied Velcro, and then you're off to the races. Now when you open up your Pedal Commander this is everything you get in it. You've got the Pedal Commander module itself along with some zap straps, alcohol swab, and some Velcro. These plugs here are what you're going to be plugging in line with your throttle itself. Now that we have power running through it all you got to do is hit the Pedal Commander button and you can see it goes straight to city. Now let's say you are just driving around the city or doing some light trails but you want just a little snap to your throttle. You can go up all the way to four. Yeah, right about there. Make sure it adheres properly. There we go. Now that our cables are tucked away we can take this Pedal Commander and UTV outside and see what it can do. [ Music ] [ engine starting ] [ Music ]
[ engine revving ] [ Music ]
[ Chris laughing ] -Well, that's one way to park that thing. -I tell you that Pedal Commander takes out all the lag and this thing is zippy. -Between the Pedal Commander, the smaller tires, turbo, tuner, it better be faster. It looked and it sounded faster but how does it feel? - Find out for yourself? -All right. [ Music ] [ engine revving ] [ Music ] -Whoo, man, you weren't kidding. This thing is snappy and it is a lot faster than it was before. I mean really front to back, top to bottom, it's more fun which is exactly what we set out to do. I do think though. We're running out of space. So I think maybe we go have a little more fun. -Burnouts for distance? Let's do it.
Dirt & Trails Featured Projects
Dirt & Trails Builds

Want more content like this?
Join the PowerNation Email NewsletterParts Used In This Episode


Vitalen Auto Performance Inc. DBA Pedal Commander
Throttle Response Controller
Force Turbos
Turbocharger Kit



