
Video Transcript
[Chris] You're watching Powernation!
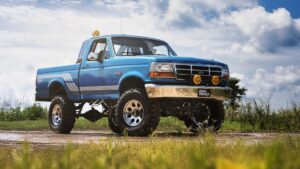
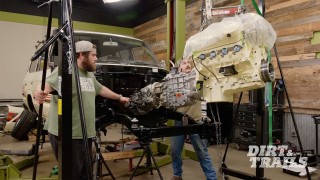
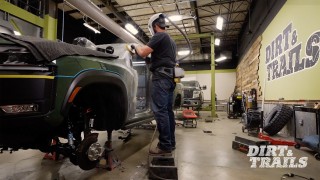
[Eric] Welcome back to Dirt and Trails. We are here with our '94 F-150 we're calling Leadfoot, and today we're measuring for some custom driveshafts, figuring out our fuel, and starting to add some body panels. [Chris] And I get to do a cold air intake and put the exhaust on this thing. I guarantee this is gonna be exhausting. [ Music ]
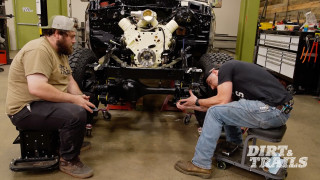
[Eric] Now that we've got our complete drivetrain installed we need to take some measurements and get our custom driveshafts ordered. Now before I actually go and start making these measurements I want to check our angles to make sure those are right. The reason that driveshaft angles are important I'm gonna demonstrate with our original stub shaft out of our front axle. So you can see when it's straight everything's gonna turn nice and easy. Start putting a little bit of angle on it it gets a little more complicated. It you put too much of an angle on it you can run into binding issues, snapping U-joints, all kinds of crazy stuff that you really don't want to deal with especially out on the trial. So I'm just gonna take our angle finder and check it out. So the first angle I want to check out is from this output shaft on the back of our transfer case. You want to make sure you've got your U-joint straps removed and you want to make sure you're not using a side that has a bunch of grime and buildup like this one here. So we're gonna go ahead, stick our angle finder right there. Make sure this is set. Chris you want to come over and write these down so we can keep track of it. Rear output on the transfer case we've got four degrees. [Chris] Do you want a jack so that is vertical? [Eric] I was actually just about to ask. [ Music ] That's got us at three degrees positive. So that's not too bad. There's only a difference of one degree there. I think the bigger issue is the fact that there's such a height difference between these two. I think when we go to order it we order a double cardan on the front side just to be safe. What that is is a coupler that contains two U-joints to help with misalignments like this. It's gonna take a lot of the strain off of the joints. I think that's something we're gonna look into. To do that we would have to remove this yoke and bolt on a plate instead. So we're still gonna take a measurement with this setup just in case. I think at the end of the day we're gonna end up throwing a different output on this and we'll probably go with a double cardan. In our case we've got fixed yokes all the way around on this transfer case. So we're gonna have to order what's called two piece driveshafts. It'll be a little easier to explain if I get out of here. This is actually the original front driveshaft out of this truck. Obviously it's not gonna work for the setup we have now but it is a good example of what a two piece driveshaft is. It's called that because it's two pieces. As you're driving down the road your suspension has travel in it. So your driveshafts are gonna have to change length or position. In the case of a two piece shaft as your suspension travels it's gonna change length to take up for that. In a regular setup with a slip yoke it's gonna take that length up somewhere else in the back of the transmission. The last thing we've gotta do before we can actually get all the information sent out to the driveshaft company to get these things made is we need to know what U-joints we're running. I've actually got four different sizes here in these three U-joints. We've got a 1480 here, 1350, and this is what's known as a conversion joint. It's a 1310 and 1330. You'll notice really the only difference is the cross size. When you're measuring U-joints that's one of the measurements you need to take is the width of the cross. Now you can get that off your yolks. We're gonna do that here in just a minute. The other measurement you need is the cap size, which you also get off your yolk. So let's get back under the truck. I'll show you guys how to get those measurements. Obviously if you've got loose U-joints laying around you can use those to get your sizes. Or if you've got a new axle we know that this is a 1350 in the rear, but you're not always gonna know that. Let's go ahead and just get this out of the way. If you need to take measurements to figure it out here's how you're gonna do it. To get your cross size on this style of yolk you can see it's got a stop right here. Some will actually just have a tab that's gonna serve as the retainer for your U-joint cap. You're gonna measure from the very edge of that to the very edge of the other one. There we've got three and five-eighths, or 3.265. That is gonna tell us our cross size. Next you need your cap size. For that you can either use a tape measure. Just right here. Again from the very edge to the very edge going across. Here we're looking at one and three-sixteenths. Now that we have all the information we need and we know we're gonna change this out for a double cardan and put a larger yolk on the front side of this transfer case I'm gonna go ahead and order those. Then we're gonna double check, verify our measurements once it's installed and from there we can get our driveshafts ordered. [Chris] After the break, a five point harness, which this one is. This will suspend you in your seat if the vehicle's on its roof, which is what you want. It stops you from being a ping pong ball inside the cab.
[Chris] Now we're gonna get the seats installed in our truck here that we got from Simpson Racing Products. Eric actually picked these colors out and the schematic and actually turned out pretty good. So let's get them installed. [ Music ]
Now it's time to move on to the harnesses. Eric chose these three inch wide Simpson Racing Products harnesses and they are a bolt-in style. So what I had to do was grind off a little bit of the paint, weld on a tab onto the cross bar here, and then go from there. Now we're gonna bolt these in and carry on. There are several different types of seatbelts out there, three point, four point, five point. A five point harness, which this one is. You have two over the shoulders, two that connect in the middle with the waist bands, and then one up through the crotch that connect everything together. The reason? Ideally you would go with something like this in an off road application so you stay in your seat in case of a roll over you're not going anywhere. This will suspend you in your seat if the vehicle's on its roof, which is what you want. It stops you from being a ping pong ball inside the cab. Next up the exhaust. I had to make a few changes. This is the original header that I had planned on using and I had to cut off the flange that came with it. The reason was I had to do some elbows and all that other funky jazz to get down between the bell housing, past the starter, past the frame, and it was a pain to get it in and out every single time. Not only that, the amount of bends that I would have had to cut and use that came in our kit wouldn't have allowed me to build out the rest of the exhaust. So I ended up having to change headers. I went with the set of Hedman Headers that we also got from Summit Racing, which ended up pointing us in the right direction right out of the box. So it was a smarter choice. It also worked on the other side as well. Everything's flowing nice and smooth. We're off to the races. The passenger's side is coming down and straight back. The driver's side is gonna come down underneath the transmission and bell housing and then come around and intersect with the passenger side. What that's gonna allow me to do is take the only O-2 sensor that we're using and it's gonna read both banks now instead of just the passenger side. Key point you want to keep in mind is you want this about eight inches behind the header. This way it doesn't get cooked or anything like that. To be honest, the more heat you can throw at these things from what Pat and Frankie says the better reading you're gonna get. So I got more work to do.
I should just use this one. [ Music ]
Coming up. [ metal clanging ] [Chris] I can clearly tell you played zero sports in high school. [Eric] I was too busy working. What'd you do with those shims? [Chris] I don't know! [Eric] This is why we can't have nice things.
[ Music ]
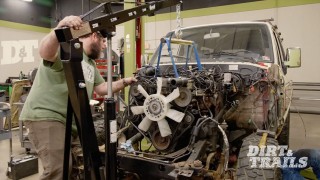
[Eric] Now that we've got the core support on here we've got plenty of room in here. I think we're gonna be able to get away with running a mechanical fan on here, which works for me. We're gonna get a lot better air flow out of that and I don't have to deal with wiring up electric fans. Win-win. [ metal clanging ] [Chris] I can clearly tell you played zero sports in high school. [Eric] Nope, I was too busy working. What we're doing here, putting just the driver's fender on, is Chris has to fabricate an intake because we don't have a whole lot of clearance between that throttle body and the hood. So we need the hood on but he still needs access in there while it's attached. So putting this on is gonna let us install it and he'll still be able to get in there. We've got quite a few adjustments we're gonna have to make here. Also we're gonna have to shim it. What'd you do with those shims? [Chris] I don't know! It has been so long! [Chris] This is why we can't have nice things Chris! Probably should have took the bolts out before we put this thing up here. Alignment wise we're not too far off. Right now we've got to get this intake figured out, which that's all you buddy. [Chris] This is going to be the top end of our intake. This is a turbo hat that I stole from the guys down at Engine Power. They have no idea I have it. Let's put it on before they find out. Could you open the hood please? My plan is to have this sit like that. Then have some tubing come out and have our filter in a box or even just hanging out right about here. I need to start designing our cold air intake. I like to have as straight of a line coming in as possible and have this end of the cone pointing into the corner of the fender and rad support. So I want it to look something like this. Like a big arrow. That's what I want. So where we're gonna start is with our filter and specifically the hole right here. You're not gonna find a piece of tube that big. So I'm gonna have to take a piece of flat bar, wrap it around, and then use a strap to compress it. So my thought cause we've got to have the factory intake here. What I'm gonna do is blow that out as big as we can. [Eric] Do you want to go with a smaller filter? [Chris] No, why would I? [Eric] Take up a little less space. Then you wouldn't have to do so much adapting. [Chris] I'm not worried. [ metal clanging ] [ drill humming ]
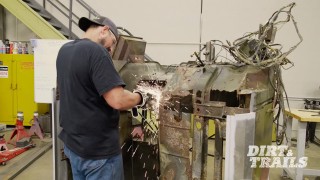
So what I'm doing with this knob and crank assembly is there's a threaded rod and this whole top arm goes through the body and into the machine. The bottom arm is stationary and what it's doing is I have an upper and lower die and it's moving the top die into the bottom die, thereby squishing the material and putting form into it thereby bead rolling it. So my next step I'm gonna do is put this into the break. I'm gonna do all my 90s, and then I'm gonna do my 45s, and then we're going to keep truckin' along. Got the filter in the first chunk here. I'm just checking for clearance. I don't want to put it somewhere where Eric is gonna get hosed. Now that we have one of our main pieces done now we need to start thinking structural. My next part that I'm gonna design is actually the plate that is gonna go on this surface here and there is going to be an inner piece. It's gonna be two pieces. It's gonna be the only piece that I can think of that's going to be welded together. This is what's known as a slip roller. What it does is you have two drive rollers on this one, which is your top and bottom, and this rear one moves up and down. You need to be careful. Make sure that you're moving both sides at the same amount. If not you're gonna start making cork screws. I have everything set up the way I want it to. Now what I'm gonna do is put the material in. Make sure it's square. I know this end is square 100 percent. What I'm doing is putting it at a slight angle and when I feel it catch on the other side I know that's flat. When you go to do this never cut your material to the exact length that you need for your circle. So if you need a complete six inches of material to do your circle don't cut six inches exactly. Cut yourself 10. This is why. See how on the edges here and here it's flat. I have to cut that out to make my circle. I'm not far off. All the way around I'm actually fairly content with that. [ welder buzzing ] [ Music ]
Now I'm just gonna let that cool. Blend it down. Roll it out one last time and we should be good to go. Now that we have this seam welded up I'm gonna go ahead and fit it to its proper backing plate. From there I'm gonna install it into the cold air box. After that into the vehicle. This way the 600 horsepower big block Ford will allow us to have clean, cool air while we're out having fun. [Eric] Coming up, we're gonna take this up into the truck bed and figure out how we're gonna mount it. Alright, now that we're up here we're gonna go ahead and figure out how this thing is gonna get mounted in this bed.
[Eric] There are primarily three things that an engine needs to run. Spark, which came along with the engine. Air, which Chris just finished up. And the last thing is fuel. I'm gonna tackle the third leg of that triangle right here and we're gonna do it using this Summit Racing aluminum 20 gallon EFI fuel cell. It's already baffled. So we don't have to worry about a whole lot of slosh, which we're definitely gonna be doing a lot of tossing this thing around. And it came with a pre-installed zero to 90 ohm sending unit that is gonna jive perfectly with that Summit Racing fuel gauges we've got in the dash. Now to actually get the fuel out of this beautiful fuel cell we're gonna be installing the last piece of our FiTech EFI system. That's gonna be this pump setup. These things are actually pretty straightforward and there is a lot more that comes in the kit. It even includes instructions and all the parts you would need to convert your original fuel tank to an EFI tank to use this pump in it. Since we have the fuel cell and it came with a pre-installed bung for a six bolt fuel pump we're gonna go ahead and just bolt everything right in. Before we can do that we've got to take some measurements. We're gonna be measuring from the bottom of the fuel pump flange. So our measurement needs to be to the top of this flange right here. That's looking just about 10 and three-eighths. Now we're gonna go ahead and snip that off and then we'll do a test fit. That is excellent. Now we're gonna take a look here through the fill hole. Looking inside of there you can see we are just a hair away from the bottom of the tank, which is exactly what we're looking for because once we add in the gasket that's gonna give us the perfect standoff for our pre-filter to sit exactly where it needs to. So that's good to go. I know I don't have them on the table here with me but it's important to note these do come with really good, really detailed instructions on how to do all this and I highly encourage you to use them. Black is our return line. White is gonna be our pressure line. What we're gonna do is make sure we orient toward our line that we actually need to be using. Just to verify that our depth is gonna be correct we're gonna add our pre-filter. Snap this on into place. Pretty good right there. Now mark on our pressure line. Slip our clamp on before we forget. Then we're gonna cut this at a 45 degree angle. Now gonna bring in our heat gun. Once it's softened up. We're not trying to melt it or anything like that. We're just trying to soften it up enough that we can put it over this nipple. Then it'll help create a seal that the hose clamp is gonna guarantee just like so. Now we can go ahead and put our zip ties on. Secure this to the shaft. I'm gonna go ahead and wrap our connector around just one time to shorten it up, take some of that length out, and make sure it stays nice and tight with the rest of the assembly. These things can be kind of a pain but just get that filter snaked in there. Don't forget your return line.
There we go! Now we've just got to decide which direction we want to orient this. We're gonna want it positioned so the lines come off of the side so they can either go straight down through the bed in a bulkhead fitting or with a simple pass through with some grommets on there to keep those lines safe. Take all these guys out so that we can line everything up. You're not going crazy on torquing these things. You just want enough to hold it in. Make sure you get a good seal. Now we're gonna take this up into the truck bed and figure out how we're gonna mount it. Now that we're up here we're gonna go ahead and figure out how this thing is gonna get mounted in this bed. We've got a rough marking of where this needs to sit, and the way I'm thinking is we're gonna use some of this three quarter inch flat strap. I've already got one part made. We're gonna bolt this strap down to the bed. I'm gonna take another section of the same strapping and build a strap that goes off to the back of the tank and then down to the floor just like it does on the sides. [ torch hissing ] [ mechanical humming ] Now that we've got the second leg of our strap bent, measured, and fitted in place I've got it lined up here on the table. Everything's squared up. We're gonna attack these corners. That way we can flip it upside down, weld the bottom, and then grind that smooth, and then weld across the top. That way we don't have to worry about any of this stuff. That to me is looking pretty good right there. The last thing we've got to do to get that fuel cell hooked up to our engine is to get our lines made. What we're gonna be doing that with is some AN line. The fittings on our tank are Dash-6. So we're gonna be working with some Dash-6 lines and more Dash-6 fittings to get it connected there and at the engine. The fittings and the hose we're using both came from Summit Racing. It is Summit Racing brand. So we know it's gonna be high quality and give us no reason at all to worry. First things first, you want to make sure you've got a nice, clean end on your hose that you can work with to get your fitting installed. We're gonna have to do a quick cutoff to make sure to make sure we've got a flush, even, clean end to work with. Now we are ready to get our fitting installed. First things first, we're gonna get the collar put onto the hose. What you're looking for is on the inside you want the end of the hose that you cut to be even with the bottom of these threads in as far as it can go. Once you've got this side of your fitting installed onto the hose you're ready to put in the other half of your hose end. We're gonna do just a little bit of assembly lube on these threads here. This is gonna prevent these threads from galling up or seizing. Make sure you don't have any issues there. Now we're gonna go ahead and get this down as far as we can. Just like that we've got a solid AN connection. It's ready to get fitted onto our fuel tank and run up to our engine. I've got to do a few more to get all of our lines done. I'm gonna finish that up and catch up with you in a minute. [Chris] Now that we have fuel and power all we need to do is mount the starter. You've got that right? [Eric] No, I thought you were gonna get that. [Chris] Remember when I was designing and we were chatting back and forth about which one to get? [Eric] Well it's quitting time anyways. So I guess we'll have to fire this thing up next time. See ya!
Show Full Transcript
[Eric] Welcome back to Dirt and Trails. We are here with our '94 F-150 we're calling Leadfoot, and today we're measuring for some custom driveshafts, figuring out our fuel, and starting to add some body panels. [Chris] And I get to do a cold air intake and put the exhaust on this thing. I guarantee this is gonna be exhausting. [ Music ]
[Eric] Now that we've got our complete drivetrain installed we need to take some measurements and get our custom driveshafts ordered. Now before I actually go and start making these measurements I want to check our angles to make sure those are right. The reason that driveshaft angles are important I'm gonna demonstrate with our original stub shaft out of our front axle. So you can see when it's straight everything's gonna turn nice and easy. Start putting a little bit of angle on it it gets a little more complicated. It you put too much of an angle on it you can run into binding issues, snapping U-joints, all kinds of crazy stuff that you really don't want to deal with especially out on the trial. So I'm just gonna take our angle finder and check it out. So the first angle I want to check out is from this output shaft on the back of our transfer case. You want to make sure you've got your U-joint straps removed and you want to make sure you're not using a side that has a bunch of grime and buildup like this one here. So we're gonna go ahead, stick our angle finder right there. Make sure this is set. Chris you want to come over and write these down so we can keep track of it. Rear output on the transfer case we've got four degrees. [Chris] Do you want a jack so that is vertical? [Eric] I was actually just about to ask. [ Music ] That's got us at three degrees positive. So that's not too bad. There's only a difference of one degree there. I think the bigger issue is the fact that there's such a height difference between these two. I think when we go to order it we order a double cardan on the front side just to be safe. What that is is a coupler that contains two U-joints to help with misalignments like this. It's gonna take a lot of the strain off of the joints. I think that's something we're gonna look into. To do that we would have to remove this yoke and bolt on a plate instead. So we're still gonna take a measurement with this setup just in case. I think at the end of the day we're gonna end up throwing a different output on this and we'll probably go with a double cardan. In our case we've got fixed yokes all the way around on this transfer case. So we're gonna have to order what's called two piece driveshafts. It'll be a little easier to explain if I get out of here. This is actually the original front driveshaft out of this truck. Obviously it's not gonna work for the setup we have now but it is a good example of what a two piece driveshaft is. It's called that because it's two pieces. As you're driving down the road your suspension has travel in it. So your driveshafts are gonna have to change length or position. In the case of a two piece shaft as your suspension travels it's gonna change length to take up for that. In a regular setup with a slip yoke it's gonna take that length up somewhere else in the back of the transmission. The last thing we've gotta do before we can actually get all the information sent out to the driveshaft company to get these things made is we need to know what U-joints we're running. I've actually got four different sizes here in these three U-joints. We've got a 1480 here, 1350, and this is what's known as a conversion joint. It's a 1310 and 1330. You'll notice really the only difference is the cross size. When you're measuring U-joints that's one of the measurements you need to take is the width of the cross. Now you can get that off your yolks. We're gonna do that here in just a minute. The other measurement you need is the cap size, which you also get off your yolk. So let's get back under the truck. I'll show you guys how to get those measurements. Obviously if you've got loose U-joints laying around you can use those to get your sizes. Or if you've got a new axle we know that this is a 1350 in the rear, but you're not always gonna know that. Let's go ahead and just get this out of the way. If you need to take measurements to figure it out here's how you're gonna do it. To get your cross size on this style of yolk you can see it's got a stop right here. Some will actually just have a tab that's gonna serve as the retainer for your U-joint cap. You're gonna measure from the very edge of that to the very edge of the other one. There we've got three and five-eighths, or 3.265. That is gonna tell us our cross size. Next you need your cap size. For that you can either use a tape measure. Just right here. Again from the very edge to the very edge going across. Here we're looking at one and three-sixteenths. Now that we have all the information we need and we know we're gonna change this out for a double cardan and put a larger yolk on the front side of this transfer case I'm gonna go ahead and order those. Then we're gonna double check, verify our measurements once it's installed and from there we can get our driveshafts ordered. [Chris] After the break, a five point harness, which this one is. This will suspend you in your seat if the vehicle's on its roof, which is what you want. It stops you from being a ping pong ball inside the cab.
[Chris] Now we're gonna get the seats installed in our truck here that we got from Simpson Racing Products. Eric actually picked these colors out and the schematic and actually turned out pretty good. So let's get them installed. [ Music ]
Now it's time to move on to the harnesses. Eric chose these three inch wide Simpson Racing Products harnesses and they are a bolt-in style. So what I had to do was grind off a little bit of the paint, weld on a tab onto the cross bar here, and then go from there. Now we're gonna bolt these in and carry on. There are several different types of seatbelts out there, three point, four point, five point. A five point harness, which this one is. You have two over the shoulders, two that connect in the middle with the waist bands, and then one up through the crotch that connect everything together. The reason? Ideally you would go with something like this in an off road application so you stay in your seat in case of a roll over you're not going anywhere. This will suspend you in your seat if the vehicle's on its roof, which is what you want. It stops you from being a ping pong ball inside the cab. Next up the exhaust. I had to make a few changes. This is the original header that I had planned on using and I had to cut off the flange that came with it. The reason was I had to do some elbows and all that other funky jazz to get down between the bell housing, past the starter, past the frame, and it was a pain to get it in and out every single time. Not only that, the amount of bends that I would have had to cut and use that came in our kit wouldn't have allowed me to build out the rest of the exhaust. So I ended up having to change headers. I went with the set of Hedman Headers that we also got from Summit Racing, which ended up pointing us in the right direction right out of the box. So it was a smarter choice. It also worked on the other side as well. Everything's flowing nice and smooth. We're off to the races. The passenger's side is coming down and straight back. The driver's side is gonna come down underneath the transmission and bell housing and then come around and intersect with the passenger side. What that's gonna allow me to do is take the only O-2 sensor that we're using and it's gonna read both banks now instead of just the passenger side. Key point you want to keep in mind is you want this about eight inches behind the header. This way it doesn't get cooked or anything like that. To be honest, the more heat you can throw at these things from what Pat and Frankie says the better reading you're gonna get. So I got more work to do.
I should just use this one. [ Music ]
Coming up. [ metal clanging ] [Chris] I can clearly tell you played zero sports in high school. [Eric] I was too busy working. What'd you do with those shims? [Chris] I don't know! [Eric] This is why we can't have nice things.
[ Music ]
[Eric] Now that we've got the core support on here we've got plenty of room in here. I think we're gonna be able to get away with running a mechanical fan on here, which works for me. We're gonna get a lot better air flow out of that and I don't have to deal with wiring up electric fans. Win-win. [ metal clanging ] [Chris] I can clearly tell you played zero sports in high school. [Eric] Nope, I was too busy working. What we're doing here, putting just the driver's fender on, is Chris has to fabricate an intake because we don't have a whole lot of clearance between that throttle body and the hood. So we need the hood on but he still needs access in there while it's attached. So putting this on is gonna let us install it and he'll still be able to get in there. We've got quite a few adjustments we're gonna have to make here. Also we're gonna have to shim it. What'd you do with those shims? [Chris] I don't know! It has been so long! [Chris] This is why we can't have nice things Chris! Probably should have took the bolts out before we put this thing up here. Alignment wise we're not too far off. Right now we've got to get this intake figured out, which that's all you buddy. [Chris] This is going to be the top end of our intake. This is a turbo hat that I stole from the guys down at Engine Power. They have no idea I have it. Let's put it on before they find out. Could you open the hood please? My plan is to have this sit like that. Then have some tubing come out and have our filter in a box or even just hanging out right about here. I need to start designing our cold air intake. I like to have as straight of a line coming in as possible and have this end of the cone pointing into the corner of the fender and rad support. So I want it to look something like this. Like a big arrow. That's what I want. So where we're gonna start is with our filter and specifically the hole right here. You're not gonna find a piece of tube that big. So I'm gonna have to take a piece of flat bar, wrap it around, and then use a strap to compress it. So my thought cause we've got to have the factory intake here. What I'm gonna do is blow that out as big as we can. [Eric] Do you want to go with a smaller filter? [Chris] No, why would I? [Eric] Take up a little less space. Then you wouldn't have to do so much adapting. [Chris] I'm not worried. [ metal clanging ] [ drill humming ]
So what I'm doing with this knob and crank assembly is there's a threaded rod and this whole top arm goes through the body and into the machine. The bottom arm is stationary and what it's doing is I have an upper and lower die and it's moving the top die into the bottom die, thereby squishing the material and putting form into it thereby bead rolling it. So my next step I'm gonna do is put this into the break. I'm gonna do all my 90s, and then I'm gonna do my 45s, and then we're going to keep truckin' along. Got the filter in the first chunk here. I'm just checking for clearance. I don't want to put it somewhere where Eric is gonna get hosed. Now that we have one of our main pieces done now we need to start thinking structural. My next part that I'm gonna design is actually the plate that is gonna go on this surface here and there is going to be an inner piece. It's gonna be two pieces. It's gonna be the only piece that I can think of that's going to be welded together. This is what's known as a slip roller. What it does is you have two drive rollers on this one, which is your top and bottom, and this rear one moves up and down. You need to be careful. Make sure that you're moving both sides at the same amount. If not you're gonna start making cork screws. I have everything set up the way I want it to. Now what I'm gonna do is put the material in. Make sure it's square. I know this end is square 100 percent. What I'm doing is putting it at a slight angle and when I feel it catch on the other side I know that's flat. When you go to do this never cut your material to the exact length that you need for your circle. So if you need a complete six inches of material to do your circle don't cut six inches exactly. Cut yourself 10. This is why. See how on the edges here and here it's flat. I have to cut that out to make my circle. I'm not far off. All the way around I'm actually fairly content with that. [ welder buzzing ] [ Music ]
Now I'm just gonna let that cool. Blend it down. Roll it out one last time and we should be good to go. Now that we have this seam welded up I'm gonna go ahead and fit it to its proper backing plate. From there I'm gonna install it into the cold air box. After that into the vehicle. This way the 600 horsepower big block Ford will allow us to have clean, cool air while we're out having fun. [Eric] Coming up, we're gonna take this up into the truck bed and figure out how we're gonna mount it. Alright, now that we're up here we're gonna go ahead and figure out how this thing is gonna get mounted in this bed.
[Eric] There are primarily three things that an engine needs to run. Spark, which came along with the engine. Air, which Chris just finished up. And the last thing is fuel. I'm gonna tackle the third leg of that triangle right here and we're gonna do it using this Summit Racing aluminum 20 gallon EFI fuel cell. It's already baffled. So we don't have to worry about a whole lot of slosh, which we're definitely gonna be doing a lot of tossing this thing around. And it came with a pre-installed zero to 90 ohm sending unit that is gonna jive perfectly with that Summit Racing fuel gauges we've got in the dash. Now to actually get the fuel out of this beautiful fuel cell we're gonna be installing the last piece of our FiTech EFI system. That's gonna be this pump setup. These things are actually pretty straightforward and there is a lot more that comes in the kit. It even includes instructions and all the parts you would need to convert your original fuel tank to an EFI tank to use this pump in it. Since we have the fuel cell and it came with a pre-installed bung for a six bolt fuel pump we're gonna go ahead and just bolt everything right in. Before we can do that we've got to take some measurements. We're gonna be measuring from the bottom of the fuel pump flange. So our measurement needs to be to the top of this flange right here. That's looking just about 10 and three-eighths. Now we're gonna go ahead and snip that off and then we'll do a test fit. That is excellent. Now we're gonna take a look here through the fill hole. Looking inside of there you can see we are just a hair away from the bottom of the tank, which is exactly what we're looking for because once we add in the gasket that's gonna give us the perfect standoff for our pre-filter to sit exactly where it needs to. So that's good to go. I know I don't have them on the table here with me but it's important to note these do come with really good, really detailed instructions on how to do all this and I highly encourage you to use them. Black is our return line. White is gonna be our pressure line. What we're gonna do is make sure we orient toward our line that we actually need to be using. Just to verify that our depth is gonna be correct we're gonna add our pre-filter. Snap this on into place. Pretty good right there. Now mark on our pressure line. Slip our clamp on before we forget. Then we're gonna cut this at a 45 degree angle. Now gonna bring in our heat gun. Once it's softened up. We're not trying to melt it or anything like that. We're just trying to soften it up enough that we can put it over this nipple. Then it'll help create a seal that the hose clamp is gonna guarantee just like so. Now we can go ahead and put our zip ties on. Secure this to the shaft. I'm gonna go ahead and wrap our connector around just one time to shorten it up, take some of that length out, and make sure it stays nice and tight with the rest of the assembly. These things can be kind of a pain but just get that filter snaked in there. Don't forget your return line.
There we go! Now we've just got to decide which direction we want to orient this. We're gonna want it positioned so the lines come off of the side so they can either go straight down through the bed in a bulkhead fitting or with a simple pass through with some grommets on there to keep those lines safe. Take all these guys out so that we can line everything up. You're not going crazy on torquing these things. You just want enough to hold it in. Make sure you get a good seal. Now we're gonna take this up into the truck bed and figure out how we're gonna mount it. Now that we're up here we're gonna go ahead and figure out how this thing is gonna get mounted in this bed. We've got a rough marking of where this needs to sit, and the way I'm thinking is we're gonna use some of this three quarter inch flat strap. I've already got one part made. We're gonna bolt this strap down to the bed. I'm gonna take another section of the same strapping and build a strap that goes off to the back of the tank and then down to the floor just like it does on the sides. [ torch hissing ] [ mechanical humming ] Now that we've got the second leg of our strap bent, measured, and fitted in place I've got it lined up here on the table. Everything's squared up. We're gonna attack these corners. That way we can flip it upside down, weld the bottom, and then grind that smooth, and then weld across the top. That way we don't have to worry about any of this stuff. That to me is looking pretty good right there. The last thing we've got to do to get that fuel cell hooked up to our engine is to get our lines made. What we're gonna be doing that with is some AN line. The fittings on our tank are Dash-6. So we're gonna be working with some Dash-6 lines and more Dash-6 fittings to get it connected there and at the engine. The fittings and the hose we're using both came from Summit Racing. It is Summit Racing brand. So we know it's gonna be high quality and give us no reason at all to worry. First things first, you want to make sure you've got a nice, clean end on your hose that you can work with to get your fitting installed. We're gonna have to do a quick cutoff to make sure to make sure we've got a flush, even, clean end to work with. Now we are ready to get our fitting installed. First things first, we're gonna get the collar put onto the hose. What you're looking for is on the inside you want the end of the hose that you cut to be even with the bottom of these threads in as far as it can go. Once you've got this side of your fitting installed onto the hose you're ready to put in the other half of your hose end. We're gonna do just a little bit of assembly lube on these threads here. This is gonna prevent these threads from galling up or seizing. Make sure you don't have any issues there. Now we're gonna go ahead and get this down as far as we can. Just like that we've got a solid AN connection. It's ready to get fitted onto our fuel tank and run up to our engine. I've got to do a few more to get all of our lines done. I'm gonna finish that up and catch up with you in a minute. [Chris] Now that we have fuel and power all we need to do is mount the starter. You've got that right? [Eric] No, I thought you were gonna get that. [Chris] Remember when I was designing and we were chatting back and forth about which one to get? [Eric] Well it's quitting time anyways. So I guess we'll have to fire this thing up next time. See ya!