
In This Episode
- 0:01 Introduction and Overview
- 0:25 Clean Room and Wiring Setup
- 1:09 Gauge Panel Options and Setup
- 3:20 Fitting and Installing Gauges
- 8:01 Transfer Case and Transmission Work
- 10:05 Transmission Tunnel and Doghouse Fabrication
- 14:03 Wiring System Setup and Installation
- 19:27 FiTech Go-EFI-8 System Reinstallation
- 21:05 Conclusion and Teaser for Next Episode
Video Transcript
[Chris] You are watching Powernation!
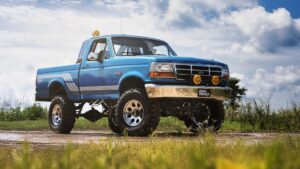
[Eric] We are back this week with our Big Foot inspired '94 F-150 and we are finally moving in to get some new gauges, custom seats, and a whole lot more installed. [Chris] Welcome to Dirt and Trails! [ Music ]
[Eric] This is what we're calling our clean room. It doesn't mean it's gonna stay clean but we're gonna be doing all of our clean work in here such as wiring, plumbing, building AN lines, stuff like that. Over here we've got our wiring table. You can see we've got a whole bunch of spools of nice, high grade Summit Racing brand wiring. I've also got it rigged up with a battery down below hooked up to positive and negative hookups up top controlled by this switch, and we've got a maintainer hooked up to our battery down below. Over here we've got our AN station. Got a whole bunch of fittings up top and a whole bunch of goodies and tools inside. Plus a vice for when we go to actually cut the lines and stuff like that. Before we actually start building out our new gauge panel I want to talk about a few of the options we have on how to make this happen. I'm gonna go over three of them with you guys. So first we have the original cluster, which we can take apart in pieces, which we're gonna be doing no matter what, and we could try and fit a panel in there and then fit our gauges into that. We could take the actual dash panel and try to fit something inside of here. The most complicated option. We could go back to the truck, build a whole new panel to replace this thing, and put the gauges straight into that. Plus adding in any switches or anything like that we may need. I don't think I'm gonna go that route because it's a lot more time, and more material, and effort. So let's get this torn apart and see how well these gauges are gonna fit inside this cluster.
There we have one perfectly intact pressed circuit. If you guys know me you know I'm a huge fan of square body Chevys, which means I am very familiar with that dash design and I'm a big fan of it as well. We're gonna be attempting to recreate that using these gauges we got from Summit Racing. Now these things are actually Summit Racing brand and they are all electric. Come with everything you need to get them installed. Got our speedo, tach, fuel level, water temp, oil pressure, and our voltmeter. That is everything you would need to know in your dash. So we're gonna be getting all of these put in. One of the cool things about these Summit gauges is they have what's called a full dial low warning. With say your fuel or your volt meter if it starts reading low like your alternator's going out or you're almost out of gas you can actually program these things so that the entire face of the gauge will start to flash at you and say hey, something's going on and you need to check it out. Definitely gonna have a lot of trimming to do in here. Things don't have to be sitting exactly where I want them to end up at. This is just to see space wise if we can fit it all inside of this case. As you can see inside of the case itself it looks like we would have room to fit all of the gauges. [ saw buzzing ]
As you can see this thing looks a little bit different than it did before but that's for good reason. So I chopped out the entire back section so that we've got room for the gauges to actually sit in. Before we install them obviously we're gonna need to make a plate to go across the front of this so that they have somewhere to sit but for right now we're just getting our fitment dialed in. So we're gonna put that bezel in right there. Just do another test fit to see if any more clearancing needs to be done. Small gauge in here. We can scoot that over a little more if we need to. Looks like we will definitely have room to get these in here. [Chris] Coming up! [ drill humming ]
[Eric] That looks real good.
[Eric] Now that I'm done clearancing all of our plastic pieces I'm over here in the metal working side of the house because I need to make a plate for the gauges to actually mount to. I'm gonna be using this piece right here as a template and just get a rough outline here. I could use this but I don't want to have to cut these pins off because that's what's gonna help locate everything back where it needs to go and we are going for that factory fit back into our dash. While I'm working on this Chris is out back behind me working on finishing up the crossmember for our transfer case. This outline is gonna be a little bit rough just cause I can't get this piece all the way flat onto our metal but that's okay because leaving a little bit of a gap around the outside gives me a little bit more to work with to make sure we can actually get this thing fitted in properly. Templating off of stuff like this isn't always the easiest but it's a lot easier to take more out than it is to put it back. [ Music ] [ saw buzzing ] [ Music ]
Now we're back at the table and our next step is gonna be to get a couple of holes drilled in this so that we can fit it directly onto the actual housing for our gauges. Since we're just doing it for these alignment pins we might be a little bit off marking this way but that's okay because we can come back and slot those holes out just a little bit and that'll actually give us a little bit of movement to make sure this thing gets fitted perfectly. Now that I've got this plate all fitted and ready to go in between these two pieces of our dash we're gonna go ahead and get that done so that we can start making our marks to install the gauges. At this point you do want to start being a little bit more careful with your plastic because you've got to remember we have cut out a majority of this structure. So especially around the edges it's getting a little bit flimsy. So just keep that in mind. Another thing to keep in mind when you get to this point is you do not want to use the edge of this bezel as your mark because if you drill it to that size the gauge is just gonna fall right through. We're gonna be using these retainers that actually clamp the gauge onto this plate. We're just gonna place the edges of this on the marks that we just made. Then you want to be real careful to not move this while you're making this mark. I went ahead and center punched and got pilot holes drilled for all of our gauges. Now I've got the hole saw setup and we're gonna go ahead and get these knocked out. Any time you're using a hole saw you always want to make sure you pre-drill your pilot holes instead of using your centering bit because it's just gonna make it that much easier to make sure you stay where you're trying to get at. Now aluminum is definitely one of those things where you want to be a little more careful because it's more prone to distortion and pitting, marring, and everything like that because it's so much softer than steel. So take your time when you're doing stuff like this and you'll be just fine. Now this is aluminum. So you don't have to go too crazy. Just nice and easy. [ saw buzzing ] Now that is gonna give us all the information we need off of our dash and it looks real good. [ Music ]
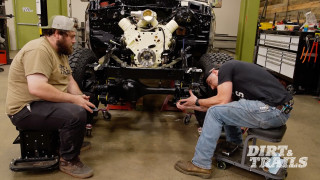
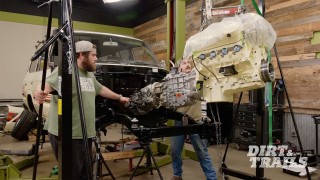
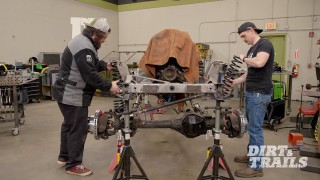
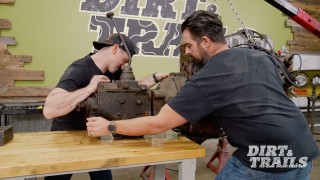
Looking at this now looks like we are gonna have to clearance just a little bit out of this right here. Then like I mentioned earlier a little bit out of our center piece right here, and then the same thing on our outer bezel. That way we've got a better view of our voltmeter. But I think this thing looks awesome and I'm pretty confident we can go ahead and call this finished up. You guys go bug Chris for a little bit. [Chris] While Eric has been doing that I've been over here working on the transfer case. Now I got the transmission in. Now I have to get this transfer case settled home. I think I've got it figured out here. We're gonna do a custom crossmember in this and just hang it completely. I want it to be a little bit lower than the output of the transmission. This way it's not as steep of an angle going from the transfer case back to the rear axle. For the front I actually don't have to worry about that cause it's gonna be rotated ever so slightly. [Eric] After the break. [ welder crackling ] [Chris] Dude, I still have to come in from the top.
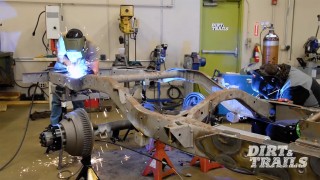
[ welder crackling ] [ Music ] [Chris] Now that we have the brackets permanently welded and located what we're gonna do now is remove this center section of tube and we're gonna replace it with a chunk of plate so we can go up and over the top of the rest of the T-case. That's gonna give us a good alignment with the back end of the transmission and it'll allow us to get a good shock with the driveshaft down to the rear axle. [ Sawzall buzzing ] [ grinder buzzing ] [ Music ]
[ welder crackling ] [ Music ]
Now weld her out and move on to the next bit. [ Music ]
I'd say right about there. [ Music ]
You want to drop one in the back corner? [Chris] Dude I am too old to be climbing all over this stuff. [Eric] So go to the other side. [Chris] Dude, I still have to come in from the top. [Eric] Just go around the other side of the lift post, lean back, and do that. [Chris] How long do you think my reach is? [Eric] Longer than mine. [Chris] This is our doghouse. Also known as the cover for our transmission tunnel because we have a manual. Anyway we need to make a new one because the TR-4050 that we have in this truck is too big and it is also further back. So our hole doesn't line up. So we need to make a new one cause if we don't do that we're just gonna be getting a whole bunch of mud and debris inside. Then Eric's gonna be complaining when we're off road. He does that enough. [Eric] Speaking of complaining, I found a slight issue back here. [Chris] Of course you did. [Eric] I went to make sure I dropped the other catspaw in to make sure we were even in the back and I noticed we still have a little bit of a gap here. [Chris] How much is the gap? [Eric] Maybe a quarter inch. It's between the top of the bushing and the bottom of the cab. [Chris] You're sitting on the crossmember. [Eric] Yeah, floor's resting on there. Just chop it back the rest of the way and do a full tunnel?
[Chris] Yep! [ saw buzzing ] [ Music ]
Dang it! [ saw buzzing ] What I want is the original lip that's around the top there. [Eric] We'll maintain that. [Chris] Push it forward and make it fit. If you could make a patch panel out of that that'd be glorious. [Eric] I'll just trim out back here and we should be able to flip it to the front side and put it right back in. Just for a rough idea to make sure. Just for a rough. I'll wait. [ metal wobbling ]
Would you like a hand? [Chris] Sure! [ Music ] I knew it, I knew it. [Eric] Anyways [ metal wobbling ]
[ saw buzzing ] [ Music ]
[ hammer banging ] [Eric] Looking good over on this side. Everything still lines up. Over here we've got this ear that comes off the top of the transmission case and that is touching right here just a little bit. [ saw buzzing ] Little tight but I think I can go ahead and call that good. [ Music ] [Chris] On the back end of the transmission tunnel it narrows itself in. So what I'm doing is I'm going to recess it in but I need to take out two and a half inches. So I'm actually gonna cut out two and then I'm going to form one. So this is the edge that I need to form. As you can see, it's nice and flat, and all that good stuff. I'm gonna start up here. Go all the way in. You can see how it makes an indentation like that. When I go all the way across what's gonna happen is I'm gonna be able to take this piece here, lay it on top, and it's gonna be recessed down just enough so I can spot weld it along and it's gonna look nice and factory. [ pneumatic punch hissing ] Now what I need to do is start grafting the doghouse into the front section of this. That's gonna be interesting. With a lot of fitting, a lot of tacking I have managed to get the transmission tunnel and the doghouse fitted together the way I want. Now I'm just welding it in place. After the break. [Eric] New rule, we are not adding door bars to anything until all the interior work is done from here on out. Ignition switch located. Headlight switch located. I gotta get out of here again.
[Eric] Now that Chris has this transmission tunnel pretty well buttoned up I can go ahead and get in there and start on our wiring. Let me show you what we're using for that. American Autowire Highway-15 Plus Universal Wiring Kit. Now I've used a ton of American Autowire products here and I absolutely love them, especially for stuff like this, and let me show you why. You know how when you make spaghetti you pretty much always make way too much of it? That's what this factory wiring is like and this is just what was under the dash. It is a disgusting amount of wires and it's not even all of it. There's still some stuff that had to be cut out to get it out of the way. We're gonna be able to make the right amount of spaghetti using the American Autowire kit that we got. It's gonna simplify the entire system down to just what we need for this thing to run, drive, be street legal, and have all the accessories that we're looking to add on. We've got to start with the hub of our entire wiring system and that's gonna be this fuse panel that's gonna control everything else. All of this is labeled along with all of the wires we've got inside this box. They tell you what they're for and they're labeled every few inches all the way from front to back. First things first, we're gonna go ahead and find a place to put this. We've got a little bracket back here that mounted some factory modules that we're not using any more. So I think what I'll do is take this and we'll just stick it right in like so. With just a minimal amount of clearancing off of our plastics in here we'll have plenty of room for the wires on this primary plug to sit and not rub on anything. Then a little bit more clearancing on this side will give us plenty of room to have a full harness going up into all of our connectors here. [ saw buzzing ] [ Music ]
I think we can call that good. So we're gonna go ahead and before we start running the wires we're gonna get some components installed so that we know where those wires are gonna have to go. So there's just a couple of things I want to get installed before I start actually running these wires. It's gonna be our new headlight switch, ignition switch because as you can see I pulled the factory one out, and our new dimmer switch because it's always cooler to have one on the floor than up on the column. Yeah! [ air hammer vibrating ] That'll work. We're still a little bit close but I don't want to take any more out of that. So what I'm gonna do to solve that problem is when I go to screw this in I'll just put a washer underneath of it on either side and that'll give it enough stand-off to be able to plug straight in and have no problems at all. Next up we've got our headlight switch. Just right here next to the steering column is gonna be just fine. We had plenty of room behind that panel. So that's where that headlight switch is gonna end up living. We do have one last thing to install before we get to the actual wires and that is our new ignition switch. These American Autowire switches are pretty slick cause you'll notice this plug is what's gonna handle all the main power in, starter, and all that. We've got two more pins here for ignition hot and two extra pins for accessory power for anything like a radio or other stuff that we might be wanting to add in. So it's just a nice little added feature that comes with these switches. New rule, we are not adding door bars to anything until all the interior work is done from here on out. Like I said, we're not using our factory switch. I could probably find a way to make this work inside of the column but that would be a ton of modifying that I just don't want to do. We're gonna go ahead and mount it up here on the other side of our dash panel. [ drill humming ]
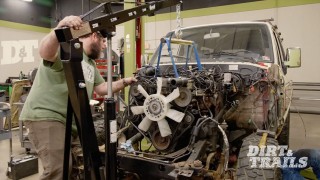
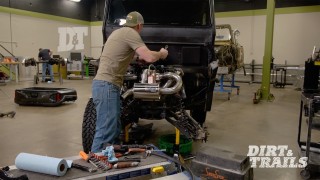
Now there is one thing I did not consider that I had to fix before I could put this in and that is the thickness of this plastic. As you can tell there's not a whole lot of threads to this ignition switch. All I had to do was a little bit of careful work with a sander. Thin that plastic out enough for those threads to grab on. [ grinder buzzing ] That ought to work. So again just verify our positioning. Straight up and down. [ Music ] Let's pop this back in. Ignition switch located. Headlight switch located and neither of them is too far off from the factory positioning. Obviously this is on the dash instead of the column but it's relatively close. With older Ford trucks that's actually a pretty common place for it to be. I don't really see a problem with it. [ sighs ] I've got to get out of here again. Now we got most of our interior wiring finished up and we're ready to start moving our way out into the engine bay but before we can do that we've got to get our FiTech Go-EFI-8 system reinstalled. Now this system was set up by Pat and Frankie. So a lot of the sending units and everything we need on the engine itself is already there. Plus we already have the harness, which we might need to make some modifications to now that we're moving it from a run stand to an actual engine bay. We can deal with that later once we get things like the battery and other supporting components installed. I want to show you guys just how easy it is to get one of these systems connected. Even if you don't have this stuff pre-installed like we have here it doesn't take much to get it there. First things first we're gonna go ahead and get all of the engine stuff reinstalled. Super helpful these plugs only go one way. So you're not really running a risk of getting anything mixed up there. A lot of this we're gonna have to do some rerouting. I just want to make sure we get everything plugged in and make sure we know how much room we've got to work with. Out of this four pin connector we have a black wire that's gonna run to our ignition coil once we get that installed. This blue tack wire, that's there for other applications. Because we're running this style of distributor we're not gonna be using it. Now we've got this yellow wire here, and that's for fan controls. We're not sure if we're running electric or mechanical fan on this yet. So that's just gonna hang out as it sits. This white wire right here is gonna run to our ignition switch for key on. That's everything plugged in except for this six pin connector right here. It's gonna be for our O-2 sensor and that's gonna have to wait until we get our exhaust installed. [Chris] Next up we are going to install some seats. Oh, we're done aren't we? We ran out of time. This is the credits. Well come in next time and we'll hopefully build some more stuff.
Show Full Transcript
[Eric] We are back this week with our Big Foot inspired '94 F-150 and we are finally moving in to get some new gauges, custom seats, and a whole lot more installed. [Chris] Welcome to Dirt and Trails! [ Music ]
[Eric] This is what we're calling our clean room. It doesn't mean it's gonna stay clean but we're gonna be doing all of our clean work in here such as wiring, plumbing, building AN lines, stuff like that. Over here we've got our wiring table. You can see we've got a whole bunch of spools of nice, high grade Summit Racing brand wiring. I've also got it rigged up with a battery down below hooked up to positive and negative hookups up top controlled by this switch, and we've got a maintainer hooked up to our battery down below. Over here we've got our AN station. Got a whole bunch of fittings up top and a whole bunch of goodies and tools inside. Plus a vice for when we go to actually cut the lines and stuff like that. Before we actually start building out our new gauge panel I want to talk about a few of the options we have on how to make this happen. I'm gonna go over three of them with you guys. So first we have the original cluster, which we can take apart in pieces, which we're gonna be doing no matter what, and we could try and fit a panel in there and then fit our gauges into that. We could take the actual dash panel and try to fit something inside of here. The most complicated option. We could go back to the truck, build a whole new panel to replace this thing, and put the gauges straight into that. Plus adding in any switches or anything like that we may need. I don't think I'm gonna go that route because it's a lot more time, and more material, and effort. So let's get this torn apart and see how well these gauges are gonna fit inside this cluster.
There we have one perfectly intact pressed circuit. If you guys know me you know I'm a huge fan of square body Chevys, which means I am very familiar with that dash design and I'm a big fan of it as well. We're gonna be attempting to recreate that using these gauges we got from Summit Racing. Now these things are actually Summit Racing brand and they are all electric. Come with everything you need to get them installed. Got our speedo, tach, fuel level, water temp, oil pressure, and our voltmeter. That is everything you would need to know in your dash. So we're gonna be getting all of these put in. One of the cool things about these Summit gauges is they have what's called a full dial low warning. With say your fuel or your volt meter if it starts reading low like your alternator's going out or you're almost out of gas you can actually program these things so that the entire face of the gauge will start to flash at you and say hey, something's going on and you need to check it out. Definitely gonna have a lot of trimming to do in here. Things don't have to be sitting exactly where I want them to end up at. This is just to see space wise if we can fit it all inside of this case. As you can see inside of the case itself it looks like we would have room to fit all of the gauges. [ saw buzzing ]
As you can see this thing looks a little bit different than it did before but that's for good reason. So I chopped out the entire back section so that we've got room for the gauges to actually sit in. Before we install them obviously we're gonna need to make a plate to go across the front of this so that they have somewhere to sit but for right now we're just getting our fitment dialed in. So we're gonna put that bezel in right there. Just do another test fit to see if any more clearancing needs to be done. Small gauge in here. We can scoot that over a little more if we need to. Looks like we will definitely have room to get these in here. [Chris] Coming up! [ drill humming ]
[Eric] That looks real good.
[Eric] Now that I'm done clearancing all of our plastic pieces I'm over here in the metal working side of the house because I need to make a plate for the gauges to actually mount to. I'm gonna be using this piece right here as a template and just get a rough outline here. I could use this but I don't want to have to cut these pins off because that's what's gonna help locate everything back where it needs to go and we are going for that factory fit back into our dash. While I'm working on this Chris is out back behind me working on finishing up the crossmember for our transfer case. This outline is gonna be a little bit rough just cause I can't get this piece all the way flat onto our metal but that's okay because leaving a little bit of a gap around the outside gives me a little bit more to work with to make sure we can actually get this thing fitted in properly. Templating off of stuff like this isn't always the easiest but it's a lot easier to take more out than it is to put it back. [ Music ] [ saw buzzing ] [ Music ]
Now we're back at the table and our next step is gonna be to get a couple of holes drilled in this so that we can fit it directly onto the actual housing for our gauges. Since we're just doing it for these alignment pins we might be a little bit off marking this way but that's okay because we can come back and slot those holes out just a little bit and that'll actually give us a little bit of movement to make sure this thing gets fitted perfectly. Now that I've got this plate all fitted and ready to go in between these two pieces of our dash we're gonna go ahead and get that done so that we can start making our marks to install the gauges. At this point you do want to start being a little bit more careful with your plastic because you've got to remember we have cut out a majority of this structure. So especially around the edges it's getting a little bit flimsy. So just keep that in mind. Another thing to keep in mind when you get to this point is you do not want to use the edge of this bezel as your mark because if you drill it to that size the gauge is just gonna fall right through. We're gonna be using these retainers that actually clamp the gauge onto this plate. We're just gonna place the edges of this on the marks that we just made. Then you want to be real careful to not move this while you're making this mark. I went ahead and center punched and got pilot holes drilled for all of our gauges. Now I've got the hole saw setup and we're gonna go ahead and get these knocked out. Any time you're using a hole saw you always want to make sure you pre-drill your pilot holes instead of using your centering bit because it's just gonna make it that much easier to make sure you stay where you're trying to get at. Now aluminum is definitely one of those things where you want to be a little more careful because it's more prone to distortion and pitting, marring, and everything like that because it's so much softer than steel. So take your time when you're doing stuff like this and you'll be just fine. Now this is aluminum. So you don't have to go too crazy. Just nice and easy. [ saw buzzing ] Now that is gonna give us all the information we need off of our dash and it looks real good. [ Music ]
Looking at this now looks like we are gonna have to clearance just a little bit out of this right here. Then like I mentioned earlier a little bit out of our center piece right here, and then the same thing on our outer bezel. That way we've got a better view of our voltmeter. But I think this thing looks awesome and I'm pretty confident we can go ahead and call this finished up. You guys go bug Chris for a little bit. [Chris] While Eric has been doing that I've been over here working on the transfer case. Now I got the transmission in. Now I have to get this transfer case settled home. I think I've got it figured out here. We're gonna do a custom crossmember in this and just hang it completely. I want it to be a little bit lower than the output of the transmission. This way it's not as steep of an angle going from the transfer case back to the rear axle. For the front I actually don't have to worry about that cause it's gonna be rotated ever so slightly. [Eric] After the break. [ welder crackling ] [Chris] Dude, I still have to come in from the top.
[ welder crackling ] [ Music ] [Chris] Now that we have the brackets permanently welded and located what we're gonna do now is remove this center section of tube and we're gonna replace it with a chunk of plate so we can go up and over the top of the rest of the T-case. That's gonna give us a good alignment with the back end of the transmission and it'll allow us to get a good shock with the driveshaft down to the rear axle. [ Sawzall buzzing ] [ grinder buzzing ] [ Music ]
[ welder crackling ] [ Music ]
Now weld her out and move on to the next bit. [ Music ]
I'd say right about there. [ Music ]
You want to drop one in the back corner? [Chris] Dude I am too old to be climbing all over this stuff. [Eric] So go to the other side. [Chris] Dude, I still have to come in from the top. [Eric] Just go around the other side of the lift post, lean back, and do that. [Chris] How long do you think my reach is? [Eric] Longer than mine. [Chris] This is our doghouse. Also known as the cover for our transmission tunnel because we have a manual. Anyway we need to make a new one because the TR-4050 that we have in this truck is too big and it is also further back. So our hole doesn't line up. So we need to make a new one cause if we don't do that we're just gonna be getting a whole bunch of mud and debris inside. Then Eric's gonna be complaining when we're off road. He does that enough. [Eric] Speaking of complaining, I found a slight issue back here. [Chris] Of course you did. [Eric] I went to make sure I dropped the other catspaw in to make sure we were even in the back and I noticed we still have a little bit of a gap here. [Chris] How much is the gap? [Eric] Maybe a quarter inch. It's between the top of the bushing and the bottom of the cab. [Chris] You're sitting on the crossmember. [Eric] Yeah, floor's resting on there. Just chop it back the rest of the way and do a full tunnel?
[Chris] Yep! [ saw buzzing ] [ Music ]
Dang it! [ saw buzzing ] What I want is the original lip that's around the top there. [Eric] We'll maintain that. [Chris] Push it forward and make it fit. If you could make a patch panel out of that that'd be glorious. [Eric] I'll just trim out back here and we should be able to flip it to the front side and put it right back in. Just for a rough idea to make sure. Just for a rough. I'll wait. [ metal wobbling ]
Would you like a hand? [Chris] Sure! [ Music ] I knew it, I knew it. [Eric] Anyways [ metal wobbling ]
[ saw buzzing ] [ Music ]
[ hammer banging ] [Eric] Looking good over on this side. Everything still lines up. Over here we've got this ear that comes off the top of the transmission case and that is touching right here just a little bit. [ saw buzzing ] Little tight but I think I can go ahead and call that good. [ Music ] [Chris] On the back end of the transmission tunnel it narrows itself in. So what I'm doing is I'm going to recess it in but I need to take out two and a half inches. So I'm actually gonna cut out two and then I'm going to form one. So this is the edge that I need to form. As you can see, it's nice and flat, and all that good stuff. I'm gonna start up here. Go all the way in. You can see how it makes an indentation like that. When I go all the way across what's gonna happen is I'm gonna be able to take this piece here, lay it on top, and it's gonna be recessed down just enough so I can spot weld it along and it's gonna look nice and factory. [ pneumatic punch hissing ] Now what I need to do is start grafting the doghouse into the front section of this. That's gonna be interesting. With a lot of fitting, a lot of tacking I have managed to get the transmission tunnel and the doghouse fitted together the way I want. Now I'm just welding it in place. After the break. [Eric] New rule, we are not adding door bars to anything until all the interior work is done from here on out. Ignition switch located. Headlight switch located. I gotta get out of here again.
[Eric] Now that Chris has this transmission tunnel pretty well buttoned up I can go ahead and get in there and start on our wiring. Let me show you what we're using for that. American Autowire Highway-15 Plus Universal Wiring Kit. Now I've used a ton of American Autowire products here and I absolutely love them, especially for stuff like this, and let me show you why. You know how when you make spaghetti you pretty much always make way too much of it? That's what this factory wiring is like and this is just what was under the dash. It is a disgusting amount of wires and it's not even all of it. There's still some stuff that had to be cut out to get it out of the way. We're gonna be able to make the right amount of spaghetti using the American Autowire kit that we got. It's gonna simplify the entire system down to just what we need for this thing to run, drive, be street legal, and have all the accessories that we're looking to add on. We've got to start with the hub of our entire wiring system and that's gonna be this fuse panel that's gonna control everything else. All of this is labeled along with all of the wires we've got inside this box. They tell you what they're for and they're labeled every few inches all the way from front to back. First things first, we're gonna go ahead and find a place to put this. We've got a little bracket back here that mounted some factory modules that we're not using any more. So I think what I'll do is take this and we'll just stick it right in like so. With just a minimal amount of clearancing off of our plastics in here we'll have plenty of room for the wires on this primary plug to sit and not rub on anything. Then a little bit more clearancing on this side will give us plenty of room to have a full harness going up into all of our connectors here. [ saw buzzing ] [ Music ]
I think we can call that good. So we're gonna go ahead and before we start running the wires we're gonna get some components installed so that we know where those wires are gonna have to go. So there's just a couple of things I want to get installed before I start actually running these wires. It's gonna be our new headlight switch, ignition switch because as you can see I pulled the factory one out, and our new dimmer switch because it's always cooler to have one on the floor than up on the column. Yeah! [ air hammer vibrating ] That'll work. We're still a little bit close but I don't want to take any more out of that. So what I'm gonna do to solve that problem is when I go to screw this in I'll just put a washer underneath of it on either side and that'll give it enough stand-off to be able to plug straight in and have no problems at all. Next up we've got our headlight switch. Just right here next to the steering column is gonna be just fine. We had plenty of room behind that panel. So that's where that headlight switch is gonna end up living. We do have one last thing to install before we get to the actual wires and that is our new ignition switch. These American Autowire switches are pretty slick cause you'll notice this plug is what's gonna handle all the main power in, starter, and all that. We've got two more pins here for ignition hot and two extra pins for accessory power for anything like a radio or other stuff that we might be wanting to add in. So it's just a nice little added feature that comes with these switches. New rule, we are not adding door bars to anything until all the interior work is done from here on out. Like I said, we're not using our factory switch. I could probably find a way to make this work inside of the column but that would be a ton of modifying that I just don't want to do. We're gonna go ahead and mount it up here on the other side of our dash panel. [ drill humming ]
Now there is one thing I did not consider that I had to fix before I could put this in and that is the thickness of this plastic. As you can tell there's not a whole lot of threads to this ignition switch. All I had to do was a little bit of careful work with a sander. Thin that plastic out enough for those threads to grab on. [ grinder buzzing ] That ought to work. So again just verify our positioning. Straight up and down. [ Music ] Let's pop this back in. Ignition switch located. Headlight switch located and neither of them is too far off from the factory positioning. Obviously this is on the dash instead of the column but it's relatively close. With older Ford trucks that's actually a pretty common place for it to be. I don't really see a problem with it. [ sighs ] I've got to get out of here again. Now we got most of our interior wiring finished up and we're ready to start moving our way out into the engine bay but before we can do that we've got to get our FiTech Go-EFI-8 system reinstalled. Now this system was set up by Pat and Frankie. So a lot of the sending units and everything we need on the engine itself is already there. Plus we already have the harness, which we might need to make some modifications to now that we're moving it from a run stand to an actual engine bay. We can deal with that later once we get things like the battery and other supporting components installed. I want to show you guys just how easy it is to get one of these systems connected. Even if you don't have this stuff pre-installed like we have here it doesn't take much to get it there. First things first we're gonna go ahead and get all of the engine stuff reinstalled. Super helpful these plugs only go one way. So you're not really running a risk of getting anything mixed up there. A lot of this we're gonna have to do some rerouting. I just want to make sure we get everything plugged in and make sure we know how much room we've got to work with. Out of this four pin connector we have a black wire that's gonna run to our ignition coil once we get that installed. This blue tack wire, that's there for other applications. Because we're running this style of distributor we're not gonna be using it. Now we've got this yellow wire here, and that's for fan controls. We're not sure if we're running electric or mechanical fan on this yet. So that's just gonna hang out as it sits. This white wire right here is gonna run to our ignition switch for key on. That's everything plugged in except for this six pin connector right here. It's gonna be for our O-2 sensor and that's gonna have to wait until we get our exhaust installed. [Chris] Next up we are going to install some seats. Oh, we're done aren't we? We ran out of time. This is the credits. Well come in next time and we'll hopefully build some more stuff.