In This Episode
- 0:01 Introduction and Project Overview
- 0:37 Cutting Off Old Motor Mounts
- 0:52 Fabricating Frame Side Motor Mounts
- 1:48 Bending and Welding Motor Mounts
- 3:55 Building Front Side of Motor Mounts
- 5:14 Installing Core Support and Radiator
- 6:27 Welding Motor Mounts
- 7:26 Building Back End of Motor Mounts
- 8:56 Deburring and Chamfering
- 9:23 Installing Rear Engine Mount
- 11:03 Installing Transmission and Transfer Case Mount
- 14:31 Boxing Frame and Installing Plates
- 16:06 Cutting and Shaping Plates
- 17:09 Welding Plates
- 18:31 Applying POR-15 Coating
- 20:00 Installing Adapter Plate and Spacer
- 20:37 Final Assembly and Testing
Video Transcript
[Chris] You're watching Powernation!
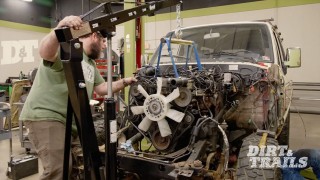
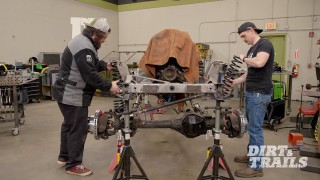
[Eric] Last time you saw us working on Project Leadfoot we went ahead and got our lift kit installed along with a new rear axle and some modifications to the front. [Chris] We also got the roll cage installed and painted that and the axles with some POR-15. [Eric] Today we're gonna be getting our entire drivetrain installed starting with this absolutely beautiful 460 cubic inch big block that we got from Pat and Frankie down in Engine Power. [Chris] All that and more on Dirt and Trails. [ Music ]
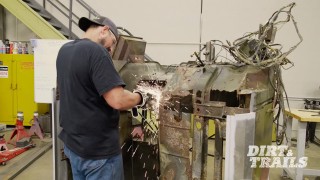
First thing we are gonna do is cut off these old motor mounts and make way for the new ones. [ saw buzzing ] [ Music ]
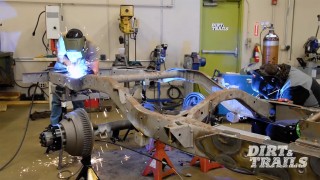
Now that that's off I'm gonna start fabricating the frame side motor mounts to get that 460 mounted. I got my cardboard cad done and as you can see I've got two different patches here. This little guy here is the first way you can do it. Make a patch to fill the hole, weld it in, and you're good to go. What I want to do is make a bigger patch. Reason for that is it's gonna cover the top all the way down the side. So I'm gonna have strength in two different planes and it's gonna give me a larger area to put the motor mounts for the motor. [ saw buzzing ] [ Music ]
[ welder crackling ]
That's better. The material's glowing red. That's exactly when you want to start bending it. So you've got to have everything ready. Now I need a hammer. [ hammer banging ] Now I'm gonna do the same thing down here just below those tacks and just keep working it in cause if I weld it with this tension on it what's gonna happen. It's gonna want to pull against itself and if I'm welding and one of the tacks lets go it's just gonna be a pain in the butt. [ torch hissing ] [ hammer banging ] [ Music ]
There we go. Next up, I'm gonna work in biggest patch to smallest. So now I'm gonna bend on this line here, get everything folded over, tack, tack, tack, and then this guy here should still be up. I'm gonna do that guy last. [ torch hissing ] [ Music ]
Alright, now you need to be careful. When you're throwing this much heat into that plate it's going to want to form easily. I miss hit right here and hit into the hole behind it and the material deformed a little bit. It's not the end of the world. It's not gonna look great but once we get that big block on top of it nobody's gonna see it. [ torch hissing ]
Something that happens when these plates are cooling down is they're gonna wanna spring back into their original position a little bit. That's exactly what happened on the top of this passenger side plate. I thought I could get away without tacking these corners. I was wrong. So I'm gonna come back, heat it up, tack it, and then I can weld that out completely, move over to the driver's side, weld it out. Coming up, what if the whole motor went up a little bit? I'm gonna bring over the welder. I'll tack this in position. You and your snacks.
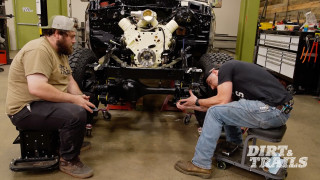
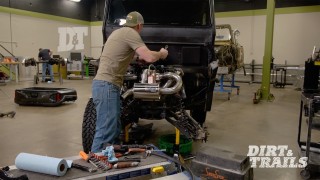
[Chris] Right now I'm gonna be working on the front side of the motor mounts. Why? Because I'm gonna be building off of the K-member that is in there, which is gonna give me lots of strength, lots of stability, and it is going to give me a great starting point to then build the back side of the motor mounts. We'll get to that in a minute. Right now let's talk about the front. I started with just a piece of two inch DOM tubing that I pulled out of the scrap bin. Then what I did was cut a pie slice out like this. Now when you put the bolt in you can actually get in there a little bit with your fingers. More importantly you can see what you're doing. We need to create some legs that come off of this to mount to the K-member. What I'm gonna do is take this plate here and tack it on the ends. What that's gonna do is hold it in place, let me go over there, and make sure that this is at the right angle. [ welder crackling ] How far over do we have to go? [Eric] Where it's sitting now is where it needs to be. I think what happened is once you took the tabs off the motor mount on that side it allowed it to shift cause we were using those tabs to hold it in place. [Chris] What if the whole motor went up a little bit? My hands are good. [ Music ]
[Eric] How's that? [Chris] Right there. [Eric] I don't' want to go any higher than that. So that works out. [Chris] In that case then I'm gonna bring over the welder. I'll take this in position. [Eric] We got this core support and radiator both from Summit Racing. As you can probably tell it is not anything close to what we pulled. But that's okay because this is for a '92 to '96 diesel on the core support and an '83 to '94 diesel with the radiator. This actually bolts into our factory location on our frame. So we don't have to worry about doing any modifying or anything like that to make it fit. The radiator itself is part of Summit Racing's classic OEM radiator line. That is gonna give us top performance cooling all while not having to worry about modifying anything on the core support side. Now these radiators are offered in various styles and sizes to fit your engine bay and your needs. If you're looking for one and you need something that's not gonna break the bank but still give you the best performance possible. Make sure to check them out. For the time being all we need this for is to get it mocked up and make sure we've got clearance for our fans later on. [ welder crackling ] [ Music ] Didn't move! That works because we're still a little bit off kilter this way. But now that we've got that in I think we can use that to hinge down and that'll help lower the top of the engine a little bit too. [Chris] Now that this is done I'm gonna move on to the driver's side. Now that this is all tacked in place you can see I have this big gap right here. I have to fill that. I'm gonna plate that in later on but for right now this is perfect so we can keep the train rolling. You scratched the paint off the bell housing. [Eric] Man we've got to start over. [ welder crackling ] [ Music ]
[Chris] Now that that's done I'm going to just start welding her out and get her done. [ Music ]
Now that we have the front part of the motor mounts built, fabricated, welded in their forever home we're gonna move to the back. That motor, it's pushing out 600 plus horsepower. The torque that's gonna create is going to twist everything. We need to put this into what is called double shear. So if you have a bolt. That's a perfect example right there. Eventually what's gonna happen is that bolt's gonna bend and then everything down the line is gonna get screwed up, pulled out of alignment. You don't want that. You want it in double shear so no matter what it is good to go. Right now we're gonna work on the back end of this and this is how we're gonna start. I have my cardboard and I have the cardboard template from when I made this filler plate. What I think I'm gonna do is go off the bottom of this K-member here. It's wide, super strong, and it's gonna be more than enough beef for what we need. I wish I was shorter. I could just walk out of here. [Eric] After the break. [Chris] Eric loves doing brake lines. So doing this with the stock ones actually is doing him a big favor and it's letting him be more creative. Friends!
[ grinder buzzing ] [ Music ]
[ band saw buzzing ] [ Music ]
[Chris] These drill bits could be used as a deburring tool. So you see how on the top side here I just kiss the surface with the next size up but on the back side we have all these burrs. We don't want that. So you just take this. That's all you do. Just enough to knock the burrs off, chamfer the corner a little bit, and you're rockin' and rolling. [ Music ]
Eric loves doing brake lines. Doing this with the stock ones actually is doing him a big favor and it's letting him be more creative. Friends! There's a lower lip that you can't see on here and I want the bottom of this to sit right in the corner of it. It's the strongest part of this section. So we're gonna utilize that. I think what I'm gonna do is just bend it slightly below the joint itself. While I'm there I like the amount that I have sticking up above the motor mount. So I'm just gonna bend that in the opposite direction. Nothing crazy, like 10 degrees at the most. Then we're gonna get rockin' and rolling. [ Music ]
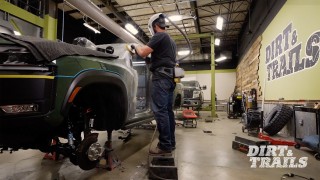
So I finished up the driver's side rear engine mount and I did it as its own assembly over on the table. It's all welded out and ready to go in. I'm gonna tack it in here with the Forney welder. One thing I want to point out. When you're doing stuff like this and you need bushings to be able to go in and out always give yourself a little space. So I use a one-eighth washer on both sides. Now we're gonna move over to the passenger side. It's more or less the same thing however I did have to box the frame a little bit to give me something to mount off of. Platted in the back, simple bend with some material here. Then another simple bend. It is gonna go in here more or less like that, and then I'll weld her all in and we'll be good to go. Where's my helmet? [ welder crackling ] [ Music ]
That side's tacked in. Ready to be welded out. This side's tacked in. I am not ready to weld it out completely yet. I have to do this in steps. This back plate, I want to weld that to the K-member and I've got to do that from the inside. So if I put this in I'm not gonna have enough room. So I'm gonna undo this bolt here, pull out the motor mount, give myself a little bit more real estate. I've got the welder set relatively hot. This way I can do a quick, fast down hand weld. Get it in there nice and hot, good penetration cause penetration is key when you're welding. Then I might do a little stitch on the inside bottom here. Once that's done this guy will go in and we're good to go. [ welder crackling ] Now with the passenger side done I'm gonna move over to the driver's side. Pull out the motor mount, weld it in place, and then keep moving forward from there. [ welder crackling ]
Now I need to let that cool down as well so I can weld the inside cause everywhere I'm gonna rest my hands to get stability is gonna be hot. Welding produces heat in case you didn't know. Now we are moving on to the crossmember for the transmission. These are the frame side mounts for the transmission mount. What's gonna happen is these are gonna get welded out but right now what I need to do is weld this to this like this. This is 120 wall. This here is three-eights. By the time this is ready to start welding, so it has liquified a little bit. This is gonna be on its way out the door and it's gonna be a tough dance to do. So a good cheat is you get yourself a propane torch. Throw some heat into the part first. What I like to do is grind the mill scale off like I have here, and then once that starts turning like a straw color that's when I know this is good to weld. [ Music ]
After the break. [Eric] This adapter plate that came with the kit ended up being just a little bit too narrow. So we had to add in a little bit of extra distance. So I went ahead and made my own spacer plate out of some three-sixteenths steel.
[Chris] Now that we have these made up let me show you where we're actually gonna put them on the truck. I'm gonna have to sit here and plate the frame. Somewhere underneath the cab the transmission mount is gonna live as well as the transfer case mount. The issue is where? We've got 600 horsepower under the hood. The frame needs to be able to take it along with the weight. So what I'm gonna do is crawl underneath. I'm going to plate underneath the entire cab. So when we do go to mount these I've got tons of real estate to put it on wherever I want. [ Music ] [ metal clanging ] [ Music ] So what we need to do is this section of frame is getting boxed in. I need to remove this bracket, which is one of the original crossmembers, this exhaust hanger. Then I'm gonna take some cardboard, put it on there, trace it. Then it's gonna be a bunch of in and out, in and out, testing, fitting, all that good stuff. Then we'll get going from there. Let's go! [ impact driver humming ] [ Music ] I spent a little bit of time under the truck doing a little bit of cardboard cad. I have everything transferred over onto some three-sixteenths plate. Now I'm going to run it through the band saw. Get it all ready to go and then we'll go put it into the vehicle. [ saw buzzing ] [ Music ]
I want to cut out these details here. I'm cutting this out on the band saw. Could I switch over to a plasma cutter? One hundred percent but I'm not gonna do that. What I'm gonna do instead is sit here and cut all the straights. Then over and across and then just keep doing that over and over again. Then I'll come back with the flap wheel and the grinder and bevel it all out. You can cut radiuses and arcs with a band saw but a lot of it depends on the thickness of the blade and how deep it is. So this is a one-sixteenth wide blade at a half inch deep. It's a three inch radius I want to cut. It's just gonna bind up and I'll either break the blade, and this is a brand new blade. I don't want to do that, or it's just gonna bind the blade, which once again isn't what we want. So I'm just gonna slowly take pie cuts out and then smooth it out with the other thing. [ Music ]
[ saw buzzing ]
The thing to remember is this truck is from '94. So nothing is going to be one hundred percent straight. There's a few little bends here but it's nothing that I'm concerned about. This fits nice. So my next step that I'm gonna do is grind clean the inside of the weld. I'm gonna do a two inch weld, an inch gap, two inch weld, inch gap all the way along. What that's gonna do, it's called a stitch weld. It's going to minimize the amount of heat that goes into this. Stop any extra warping, and it'll just speed things up. [ welder crackling ] [ Music ]
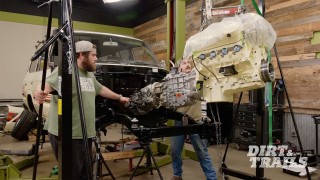
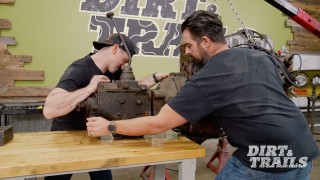
Another point to make is wrap your corners. I'm not talking weld up to the edge and then reposition, and then go over here, and then wrap it, no. If you can sit there and in one motion go all the way around and come down you're gonna have a stronger weld. Reason being the force that it's gonna take to actually pull this plate off is gonna be through the roof to begin with. But in some applications if you don't do that it's gonna be easier for this weld to start cracking at the edge than any other one of these welds. It's gonna look better. It's gonna be stronger. And it's just good practice welding in uncomfortable positions. [ welder crackling ] [Eric] Now that Chris has all this super awesome fab work done to get our engine and transmission mounted in here we're gonna go ahead and protect it with some POR-15. This stuff is a permanent coating. It's gonna make sure it's protected from rust for the life of this truck. This is a three stage process. So you're gonna want to start with their cleaner/degreaser. Wipe everything down. Let it dry. Then you're gonna move on to your metal prep. Now this is an etching compound and what this is gonna do is create a better surface for that POR to bite into so it does become permanent. What you do with this is go ahead and either brush or spray it on. Keep your surface wet for 15 to 20 minutes. Then once that's done you're gonna wash it off with water. Then you're ready to move on and actually get the POR done. While Chris was getting everything on the truck side prepped I was over here getting our transmission ready to be installed to our engine. Normally this is a pretty straightforward process but as you can guess this isn't exactly a factory combination taking a 385-series big block and mating it to a Tremec TR-4050. This adapter plate that came with the kit ended up being just a little bit too narrow. So we had to add in a little bit of extra distance. So I went ahead and made my own spacer plate out of some three-sixteenths steel. Now that we've got everything ready to go. We've got our bell housing run out measured and we know that we're good there. We're gonna leave the clutch and flywheel out for the time being just to get some fitment done because we can go ahead and do the clutch measurements and install once it's in the truck. Our first step here is we've got to get our adapter plate and our spacer installed onto the bell housing. This is pretty straightforward. Since we're only using three-sixteenths plate as our spacer we don't have to worry about the length of the bolts. We're still gonna have plenty of engagement into these threads. [Chris] Hold it there. Come straight. Too fast, too fast. [Eric] Now that this is actually attached all we've got left to do is get those four bolts torqued down, switch our cherry picker to the engine, and test fit it again. [ Music ]
[Chris] Gonna tighten that up ever so slightly. [Eric] I'm gonna start dropping the tail end. [ Music ]
What is this? [Chris] I got sick and tired of trying to do stuff with springs in the way. [Eric] So take the lines out. [Chris] I did take them out, of the way. [Eric] There's a right way, there's a wrong way, and then there's that way. I don't even know what to call that. [Chris] I'm just trying to embrace. [Eric] Let's just get this done. Drop her on down. [ Music ]
We got a ton of work done today but that's all we've got for you guys this week. Catch you next time.
Show Full Transcript
[Eric] Last time you saw us working on Project Leadfoot we went ahead and got our lift kit installed along with a new rear axle and some modifications to the front. [Chris] We also got the roll cage installed and painted that and the axles with some POR-15. [Eric] Today we're gonna be getting our entire drivetrain installed starting with this absolutely beautiful 460 cubic inch big block that we got from Pat and Frankie down in Engine Power. [Chris] All that and more on Dirt and Trails. [ Music ]
First thing we are gonna do is cut off these old motor mounts and make way for the new ones. [ saw buzzing ] [ Music ]
Now that that's off I'm gonna start fabricating the frame side motor mounts to get that 460 mounted. I got my cardboard cad done and as you can see I've got two different patches here. This little guy here is the first way you can do it. Make a patch to fill the hole, weld it in, and you're good to go. What I want to do is make a bigger patch. Reason for that is it's gonna cover the top all the way down the side. So I'm gonna have strength in two different planes and it's gonna give me a larger area to put the motor mounts for the motor. [ saw buzzing ] [ Music ]
[ welder crackling ]
That's better. The material's glowing red. That's exactly when you want to start bending it. So you've got to have everything ready. Now I need a hammer. [ hammer banging ] Now I'm gonna do the same thing down here just below those tacks and just keep working it in cause if I weld it with this tension on it what's gonna happen. It's gonna want to pull against itself and if I'm welding and one of the tacks lets go it's just gonna be a pain in the butt. [ torch hissing ] [ hammer banging ] [ Music ]
There we go. Next up, I'm gonna work in biggest patch to smallest. So now I'm gonna bend on this line here, get everything folded over, tack, tack, tack, and then this guy here should still be up. I'm gonna do that guy last. [ torch hissing ] [ Music ]
Alright, now you need to be careful. When you're throwing this much heat into that plate it's going to want to form easily. I miss hit right here and hit into the hole behind it and the material deformed a little bit. It's not the end of the world. It's not gonna look great but once we get that big block on top of it nobody's gonna see it. [ torch hissing ]
Something that happens when these plates are cooling down is they're gonna wanna spring back into their original position a little bit. That's exactly what happened on the top of this passenger side plate. I thought I could get away without tacking these corners. I was wrong. So I'm gonna come back, heat it up, tack it, and then I can weld that out completely, move over to the driver's side, weld it out. Coming up, what if the whole motor went up a little bit? I'm gonna bring over the welder. I'll tack this in position. You and your snacks.
[Chris] Right now I'm gonna be working on the front side of the motor mounts. Why? Because I'm gonna be building off of the K-member that is in there, which is gonna give me lots of strength, lots of stability, and it is going to give me a great starting point to then build the back side of the motor mounts. We'll get to that in a minute. Right now let's talk about the front. I started with just a piece of two inch DOM tubing that I pulled out of the scrap bin. Then what I did was cut a pie slice out like this. Now when you put the bolt in you can actually get in there a little bit with your fingers. More importantly you can see what you're doing. We need to create some legs that come off of this to mount to the K-member. What I'm gonna do is take this plate here and tack it on the ends. What that's gonna do is hold it in place, let me go over there, and make sure that this is at the right angle. [ welder crackling ] How far over do we have to go? [Eric] Where it's sitting now is where it needs to be. I think what happened is once you took the tabs off the motor mount on that side it allowed it to shift cause we were using those tabs to hold it in place. [Chris] What if the whole motor went up a little bit? My hands are good. [ Music ]
[Eric] How's that? [Chris] Right there. [Eric] I don't' want to go any higher than that. So that works out. [Chris] In that case then I'm gonna bring over the welder. I'll take this in position. [Eric] We got this core support and radiator both from Summit Racing. As you can probably tell it is not anything close to what we pulled. But that's okay because this is for a '92 to '96 diesel on the core support and an '83 to '94 diesel with the radiator. This actually bolts into our factory location on our frame. So we don't have to worry about doing any modifying or anything like that to make it fit. The radiator itself is part of Summit Racing's classic OEM radiator line. That is gonna give us top performance cooling all while not having to worry about modifying anything on the core support side. Now these radiators are offered in various styles and sizes to fit your engine bay and your needs. If you're looking for one and you need something that's not gonna break the bank but still give you the best performance possible. Make sure to check them out. For the time being all we need this for is to get it mocked up and make sure we've got clearance for our fans later on. [ welder crackling ] [ Music ] Didn't move! That works because we're still a little bit off kilter this way. But now that we've got that in I think we can use that to hinge down and that'll help lower the top of the engine a little bit too. [Chris] Now that this is done I'm gonna move on to the driver's side. Now that this is all tacked in place you can see I have this big gap right here. I have to fill that. I'm gonna plate that in later on but for right now this is perfect so we can keep the train rolling. You scratched the paint off the bell housing. [Eric] Man we've got to start over. [ welder crackling ] [ Music ]
[Chris] Now that that's done I'm going to just start welding her out and get her done. [ Music ]
Now that we have the front part of the motor mounts built, fabricated, welded in their forever home we're gonna move to the back. That motor, it's pushing out 600 plus horsepower. The torque that's gonna create is going to twist everything. We need to put this into what is called double shear. So if you have a bolt. That's a perfect example right there. Eventually what's gonna happen is that bolt's gonna bend and then everything down the line is gonna get screwed up, pulled out of alignment. You don't want that. You want it in double shear so no matter what it is good to go. Right now we're gonna work on the back end of this and this is how we're gonna start. I have my cardboard and I have the cardboard template from when I made this filler plate. What I think I'm gonna do is go off the bottom of this K-member here. It's wide, super strong, and it's gonna be more than enough beef for what we need. I wish I was shorter. I could just walk out of here. [Eric] After the break. [Chris] Eric loves doing brake lines. So doing this with the stock ones actually is doing him a big favor and it's letting him be more creative. Friends!
[ grinder buzzing ] [ Music ]
[ band saw buzzing ] [ Music ]
[Chris] These drill bits could be used as a deburring tool. So you see how on the top side here I just kiss the surface with the next size up but on the back side we have all these burrs. We don't want that. So you just take this. That's all you do. Just enough to knock the burrs off, chamfer the corner a little bit, and you're rockin' and rolling. [ Music ]
Eric loves doing brake lines. Doing this with the stock ones actually is doing him a big favor and it's letting him be more creative. Friends! There's a lower lip that you can't see on here and I want the bottom of this to sit right in the corner of it. It's the strongest part of this section. So we're gonna utilize that. I think what I'm gonna do is just bend it slightly below the joint itself. While I'm there I like the amount that I have sticking up above the motor mount. So I'm just gonna bend that in the opposite direction. Nothing crazy, like 10 degrees at the most. Then we're gonna get rockin' and rolling. [ Music ]
So I finished up the driver's side rear engine mount and I did it as its own assembly over on the table. It's all welded out and ready to go in. I'm gonna tack it in here with the Forney welder. One thing I want to point out. When you're doing stuff like this and you need bushings to be able to go in and out always give yourself a little space. So I use a one-eighth washer on both sides. Now we're gonna move over to the passenger side. It's more or less the same thing however I did have to box the frame a little bit to give me something to mount off of. Platted in the back, simple bend with some material here. Then another simple bend. It is gonna go in here more or less like that, and then I'll weld her all in and we'll be good to go. Where's my helmet? [ welder crackling ] [ Music ]
That side's tacked in. Ready to be welded out. This side's tacked in. I am not ready to weld it out completely yet. I have to do this in steps. This back plate, I want to weld that to the K-member and I've got to do that from the inside. So if I put this in I'm not gonna have enough room. So I'm gonna undo this bolt here, pull out the motor mount, give myself a little bit more real estate. I've got the welder set relatively hot. This way I can do a quick, fast down hand weld. Get it in there nice and hot, good penetration cause penetration is key when you're welding. Then I might do a little stitch on the inside bottom here. Once that's done this guy will go in and we're good to go. [ welder crackling ] Now with the passenger side done I'm gonna move over to the driver's side. Pull out the motor mount, weld it in place, and then keep moving forward from there. [ welder crackling ]
Now I need to let that cool down as well so I can weld the inside cause everywhere I'm gonna rest my hands to get stability is gonna be hot. Welding produces heat in case you didn't know. Now we are moving on to the crossmember for the transmission. These are the frame side mounts for the transmission mount. What's gonna happen is these are gonna get welded out but right now what I need to do is weld this to this like this. This is 120 wall. This here is three-eights. By the time this is ready to start welding, so it has liquified a little bit. This is gonna be on its way out the door and it's gonna be a tough dance to do. So a good cheat is you get yourself a propane torch. Throw some heat into the part first. What I like to do is grind the mill scale off like I have here, and then once that starts turning like a straw color that's when I know this is good to weld. [ Music ]
After the break. [Eric] This adapter plate that came with the kit ended up being just a little bit too narrow. So we had to add in a little bit of extra distance. So I went ahead and made my own spacer plate out of some three-sixteenths steel.
[Chris] Now that we have these made up let me show you where we're actually gonna put them on the truck. I'm gonna have to sit here and plate the frame. Somewhere underneath the cab the transmission mount is gonna live as well as the transfer case mount. The issue is where? We've got 600 horsepower under the hood. The frame needs to be able to take it along with the weight. So what I'm gonna do is crawl underneath. I'm going to plate underneath the entire cab. So when we do go to mount these I've got tons of real estate to put it on wherever I want. [ Music ] [ metal clanging ] [ Music ] So what we need to do is this section of frame is getting boxed in. I need to remove this bracket, which is one of the original crossmembers, this exhaust hanger. Then I'm gonna take some cardboard, put it on there, trace it. Then it's gonna be a bunch of in and out, in and out, testing, fitting, all that good stuff. Then we'll get going from there. Let's go! [ impact driver humming ] [ Music ] I spent a little bit of time under the truck doing a little bit of cardboard cad. I have everything transferred over onto some three-sixteenths plate. Now I'm going to run it through the band saw. Get it all ready to go and then we'll go put it into the vehicle. [ saw buzzing ] [ Music ]
I want to cut out these details here. I'm cutting this out on the band saw. Could I switch over to a plasma cutter? One hundred percent but I'm not gonna do that. What I'm gonna do instead is sit here and cut all the straights. Then over and across and then just keep doing that over and over again. Then I'll come back with the flap wheel and the grinder and bevel it all out. You can cut radiuses and arcs with a band saw but a lot of it depends on the thickness of the blade and how deep it is. So this is a one-sixteenth wide blade at a half inch deep. It's a three inch radius I want to cut. It's just gonna bind up and I'll either break the blade, and this is a brand new blade. I don't want to do that, or it's just gonna bind the blade, which once again isn't what we want. So I'm just gonna slowly take pie cuts out and then smooth it out with the other thing. [ Music ]
[ saw buzzing ]
The thing to remember is this truck is from '94. So nothing is going to be one hundred percent straight. There's a few little bends here but it's nothing that I'm concerned about. This fits nice. So my next step that I'm gonna do is grind clean the inside of the weld. I'm gonna do a two inch weld, an inch gap, two inch weld, inch gap all the way along. What that's gonna do, it's called a stitch weld. It's going to minimize the amount of heat that goes into this. Stop any extra warping, and it'll just speed things up. [ welder crackling ] [ Music ]
Another point to make is wrap your corners. I'm not talking weld up to the edge and then reposition, and then go over here, and then wrap it, no. If you can sit there and in one motion go all the way around and come down you're gonna have a stronger weld. Reason being the force that it's gonna take to actually pull this plate off is gonna be through the roof to begin with. But in some applications if you don't do that it's gonna be easier for this weld to start cracking at the edge than any other one of these welds. It's gonna look better. It's gonna be stronger. And it's just good practice welding in uncomfortable positions. [ welder crackling ] [Eric] Now that Chris has all this super awesome fab work done to get our engine and transmission mounted in here we're gonna go ahead and protect it with some POR-15. This stuff is a permanent coating. It's gonna make sure it's protected from rust for the life of this truck. This is a three stage process. So you're gonna want to start with their cleaner/degreaser. Wipe everything down. Let it dry. Then you're gonna move on to your metal prep. Now this is an etching compound and what this is gonna do is create a better surface for that POR to bite into so it does become permanent. What you do with this is go ahead and either brush or spray it on. Keep your surface wet for 15 to 20 minutes. Then once that's done you're gonna wash it off with water. Then you're ready to move on and actually get the POR done. While Chris was getting everything on the truck side prepped I was over here getting our transmission ready to be installed to our engine. Normally this is a pretty straightforward process but as you can guess this isn't exactly a factory combination taking a 385-series big block and mating it to a Tremec TR-4050. This adapter plate that came with the kit ended up being just a little bit too narrow. So we had to add in a little bit of extra distance. So I went ahead and made my own spacer plate out of some three-sixteenths steel. Now that we've got everything ready to go. We've got our bell housing run out measured and we know that we're good there. We're gonna leave the clutch and flywheel out for the time being just to get some fitment done because we can go ahead and do the clutch measurements and install once it's in the truck. Our first step here is we've got to get our adapter plate and our spacer installed onto the bell housing. This is pretty straightforward. Since we're only using three-sixteenths plate as our spacer we don't have to worry about the length of the bolts. We're still gonna have plenty of engagement into these threads. [Chris] Hold it there. Come straight. Too fast, too fast. [Eric] Now that this is actually attached all we've got left to do is get those four bolts torqued down, switch our cherry picker to the engine, and test fit it again. [ Music ]
[Chris] Gonna tighten that up ever so slightly. [Eric] I'm gonna start dropping the tail end. [ Music ]
What is this? [Chris] I got sick and tired of trying to do stuff with springs in the way. [Eric] So take the lines out. [Chris] I did take them out, of the way. [Eric] There's a right way, there's a wrong way, and then there's that way. I don't even know what to call that. [Chris] I'm just trying to embrace. [Eric] Let's just get this done. Drop her on down. [ Music ]
We got a ton of work done today but that's all we've got for you guys this week. Catch you next time.