In This Episode
- 0:01 Introduction to the '94 F-150 project
- 0:37 Prep work on Rhodes Racing roll cage
- 3:29 Cutting and fitting the driver's side box
- 5:01 Installing the hoop and continuing the project
- 6:15 Modifying the roll cage for better fit
- 8:53 Finalizing the roll cage and handing it off
- 9:40 Installing the new rear axle
- 14:20 Modifying and installing the front suspension components
- 17:03 Installing the new Dana 50 housing and gear set
- 18:50 Installing EBC brakes and rotors
- 20:11 Installing the Super Lift Super Runner steering linkage
- 21:04 Finalizing the project with wheels and tires
Video Transcript
[Eric] You're watching Powernation.
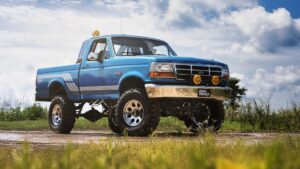
[Eric] This is our '94 F-150 project that we are calling Ledfoot. Today I'm gonna be tackling our axles and suspension, getting that front end modified, get the new rear end put in, and adding a six inch lift. [Chris] I'm gonna be putting in the roll cage so we can install things like a five point harness, suspension seats, and just make it so we can have a little bit more fun off road. Welcome to Dirt and Trails. [ Music ]
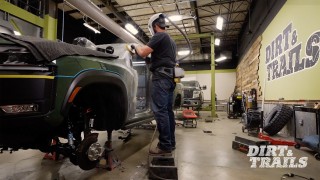
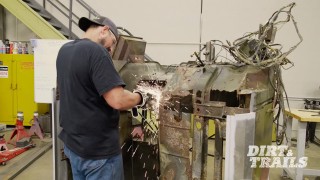
Now we are gonna start the prep work on our Rhodes Racing roll cage that we got from Summit Racing, and the first thing we're gonna do is prep the ends of these tubes. So you can see how the cut is 90 degrees to the side of the tubing. I'm gonna knock out all the slag on the inside with a carbide burr and the outsides I'm gonna put a chamfer on it with the belt sander and that'll give me more room for the weld just to wet out at the toes and it is just gonna look perfect. [ sander humming ] [ Music ]
I've beveled the edges for a larger surface area. Why am I doing it with these ones here? When I'm sitting there and welding this out down through here I have a nice trough for the weld to sit in and I'm gonna get good consistency the entire way across, good penetration. What happens when I put a third plate in? I'm gonna have three things trying to occupy the same point in space. By knocking off those corners I'll be able to put a little tack in there, and then when I go to weld I'll weld right over that tack and everything's gonna become smooth, and consistent, and it is going to be a much stronger weld. [ Music ]
So we have this angle here that we have to deal with. I don't want to come north of this top plate here. So I'm going to roll out that bottom a little bit. Now that I have a rough line to start with I am honestly just gonna trim close to it and keep doing the same thing over, and over, and over again until I get the fit that I want and go from there. [ Music ]
Right now we have a very close general shape to what I want. What I'm gonna do is now that I have the general shape laid out I'm going to do the same thing that I did for this here. I'm gonna draw a line on the back side. That's gonna give me the shape and then we're good to go. [ Music ] Now that I have all of the paper templates transferred over onto the steel plates that were provided with the kit. I am actually just gonna cut it out on the band saw. I am going to go as close as I can to the line as possible. Then get to the line on the belt sander, put it in, final check, and then tack weld it together. [ Music ]
[ sander humming ] [ Music ]
Now I am done tacking up the driver's side box. I'm gonna install the hoop and carry on from there. Don't worry about the paint. [ Music ]
[ welder crackling ] [ Music ]
Coming up, I have everything already done and I went to go put this bar here in place and because I'm abnormally tall it's not hard for me to get in but in order for Eric to get in we're gonna need a trampoline.
[Chris] I have everything already done. I went to go put this bar here in place and because I'm abnormally tall it's not hard for me to get in but in order for Eric to get in we're gonna need a trampoline. I'm gonna be nice for once and I'm gonna put a little bend into this so it's easier to get in and out. After that it's Eric's problem. [Eric] Foot placement I'm alright with this but I'm still right up against this cage. I'm still straight up and down. Plus I'm already short on room to the ceiling. We're gonna have to get these seats real low and I think maybe move the cage back just a little bit. We've got room for that right? [Chris] More than enough. We have this whole pocket here. So I'm gonna cut these tacks. I'm gonna forget about this for now. I'm gonna trim the boxes so I can push them further back into this space here. Once this is relocated we can get some potential lean back. Then I'll worry about this here. [ saw buzzing ] [ Music ]
Oh that's heavier than I thought. [ Music ]
Perfect, I got it. [ Music ] [ saw buzzing ] [ Music ]
[ welder crackling ] [ Music ] I can weld to that, I can weld to that. Look at that. Tighter than a beaver's dam. [ welder crackling ] [ Music ]
For creature comforts and function I'm gonna put a bend here roughly about 10 to 15 degrees, lowering this down. This way while we're riding and everybody's having fun elbows can go out and nobody gets hurt. So let's go over to the bender. [ Music ]
[ bender humming ]
Perfect! So I know this doesn't look like a big change to some of you guys but this little variation here is gonna take your projects from here to here. What I need to do now though is reenforce this bend here. I'm gonna do that and then once that's done I'm gonna recreate it on the other side. After that we are ready to rock 'n roll welding this thing out and then welding it into the cab. [ welder crackling ] [ Music ]
Now that we have our hoop and all the accoutrement that go with it I'm gonna weld it out. I need to think how am I gonna weld this out because I do not want start/stops here in the center. One, I don't like it. Two, it's not gonna be as strong. So what I'm gonna do is weld here and down and around and I'll have it lifted up off the table as much as possible so I can try and get this all in one go. Then I'm gonna come across here and tie in that start/stop with this here. [ welder crackling ] [ Music ]
Alright, roll cage is done. I'm now gonna hand this off to Eric. This looks sweet but I'm starving. Eric! Eric, I need you! [Eric] Coming up. [Chris] Tilt back. [ drill humming ] [ welder crackling ]
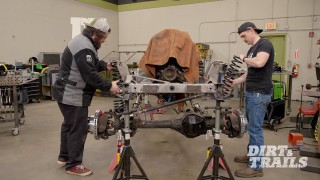
[Chris] So now that we have the frame sitting on the jack stands I need to point something out. This wood cribbing is only going to be used while we do the suspension work to get the frame and the cab up off the ground. This setup would not take the full weight of the vehicle. So once the wheels and tires are finally bolted back up underneath this is gonna go back down to planet Earth and all of this is gonna get put back away. [Eric] This is our old 8.8 rear axle. Now from the factory these things are pretty solid but with what we're doing to this truck we need something a little beefier, which is why we got this nice, fancy nine inch from Quick Performance. As you can see this axle is missing a few things that it needs to be installed under our truck, which is why we still have the old axle because there's some measurements we need to take and transfer onto our new one. So we're gonna be starting by getting our center line measurement from leaf spring to leaf spring. That's gonna give us our spacing that we need to be able to get the spring perches installed in the right place. Or at the very least a rough idea of where they're gonna need to be. So now I'm gonna bring Chris in so I can make sure I get a dead center measurement from side to side. [Chris] You want center of the pin? I'm on it. [Eric] We are looking at call that nine-sixteenths. What we're gonna do from here is we want to find a dead center point on this axle based off of this measurement. Now that we found the center of this new axle we can take the measurement from spring to spring off the old axle and use that to figure out where these spring perches need to be placed. Looking at this axle housing you would think that this fill plug should be the center of the entire assembly but it is not. That's why it's so important you can see. Our actual center point is probably about three quarters of an inch off from where you would assume it would be on this fill plug, which is why it's so important to measure, measure, measure, and make sure you get everything right. That is four and fifteen-sixteenths. So now that we know those marks are accurate to each other and even from the center we can roll this thing under the truck, get the leaf springs in, and start getting it fitted for good. Oop, oop! [ axle hits the wall ] It rolled a little better than I expected to. Before I can place the axle under the truck I'm gonna go ahead and get some new shackles and the new leaf springs that came with our six inch BDS lift kit that we got from Summit Racing. You can see our spring doesn't quite reach to this front hanger. What I'm gonna do is take a C-clamp right here. That's gonna squeeze the springs together and spread those I's out so it actually reaches and we can get this bolted in. [ Music ]
Just like that. The reason that this method works is putting these clamps on here essentially simulates a load being put on the spring. It's not the easiest thing in the world to do but it is one of the easiest ways to get new leaf springs fitted, especially if you've got really stiff lift springs like we've got here. [ impact driver humming ] [ metal clanging ] The only part that I care about right now off of this old axle is gonna be these factory blocks, and that's because I went through the lift kit installation instructions and it specifies to reuse these. So we're gonna snatch them both out and have them ready to go. The stud hole in our spring perch is not quite as big as the stud on the bottom of the spring itself. So what I'm gonna do is go ahead and measure that pin and then drill that out so that the size match. We can get those on and carry on. [ drill humming ] [ Music ]
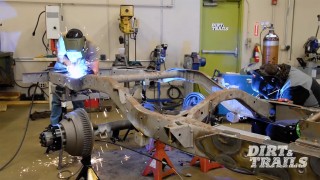
Double check, oh yeah! That is perfect! Send it. [Chris] Watch your fingers. [Eric] Right there. [ Music ] Let's go ahead and… [ Music ] There we got that side in. Go ahead. [Chris] Do you need this to come forward a little bit? [Eric] Just a touch. [ Music ] There we go. Give her a little pump. Little more. I think we've got just a little bit of tension on our block here. I think for right now since this has to come back out it should be okay. We can always come back with a wrench or ratchet and tighten them up a little more later on. Now that we've got our angle set and all of our measurements are where we want them I'm gonna go ahead and get these perches tacked on. [ welder crackling ] [ Music ]
Now that is gonna be the last of our mockup done here in the back. All that's left is one more shock tab getting tacked in, verify all of our measurements, and then until we can get the weight of the vehicle on this axle we are finished up back here. Time to move on with the front. [Chris] After the break. [Eric] Now it is finally time to get this big honking coil spring installed.
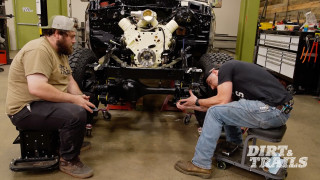
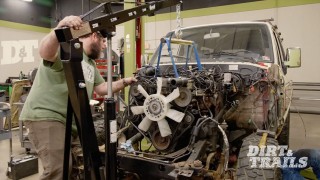
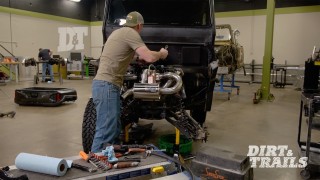
[Eric] I spent all morning getting the front end of this truck torn apart, which means that we now have our steering linkage, brakes, axle, and suspension all down on the floor ready to get tossed for the most part. We're gonna save a few things and reuse them but a majority of it's gonna go away. During the teardown we had a couple of casualties. A few tools, some parts, but that's to be expected when you're taking apart 31 years worth of mother nature trying to keep stuff stuck together. What I want to talk about now is all these new parts we've got over here. To get that axle reinstalled we've got brand new internal components from Torque King 4x4 that's gonna cover everything. I mean everything from the diff all the way out to the hubs. Once we've got that done and got our axle reinstalled we can move on and top it off with the rest of our BDS lift kit that we got from Summit Racing. Then we'll round it out with a new set of EBC pads and rotors. Now I'm super excited to get this done, get the truck back on the ground and see how it's gonna sit. So let's get to it. Our first step here is gonna be to get our new radius arms installed. As you can see there is quite a bit of difference between these new ones and the old ones that we pulled out. Now because of that size difference we've got to move the bracket a lot further back, about a foot. That's gonna put it back here compared to the old one sitting up here. [ ratchet clicking ]
Our C-clamp is a little bit close right here. So what I'm gonna do is get these three holes drilled. Get the bolts in. Then I'll be able to take this out of the way. Get that drilled and bolt installed. [ drill humming ] [ Music ]
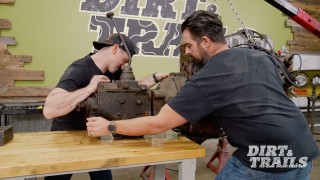
Okay now it'll go in there. Before I can actually install this drop bracket we've got this template that came as part of the instructions in the kit that'll show us exactly where we need to drill new holes to replace the bracket we just cut out. Now that we've got the axle in place go ahead and get this pivot bracket torqued down. [ Music ] Now it is finally time to get this big honkin' coil spring installed. Now that we've got our spring in the last thing we've got to do over here is get this shock installed. Then we can call the lift on the passenger's side finished up. It's important to keep in mind here that we are just doing this for mockup. Once everything goes on we're gonna get the truck back on the ground, make sure everything's fitting right and sitting right. Then we'll go ahead and take it back off, get some paint done, and then do our final install. Looking at our housings you'll notice there really isn't a whole lot of difference between them. They look a little bit different. The ribs are placed differently but what really matters is that the mounting, the flange on the front, and the bolts on the side are in the exact same place and same configuration, which is what's gonna allow us to put this Dana 50 housing into a Dana 44 axle. The real difference comes in when you look at the ring gears. The factory Dana 44 ring gear is eight and a half inches in diameter and it was running a 3.73 gear ratio. That in and of itself is a problem because our new rear axle has a 4.10 ratio. So we've got a 4.10 ratio gear set and a nine inch ring gear compared to the old eight and a half, and that's gonna make it that much easier for this thing to handle more power and turn some bigger tires. In addition to all the actual parts that Torque King was able to give us they also provided a majority of the tools needed to get this stuff installed. Also they gave us all the fluids needed like grease, rtv, and thread locker. Plus all the technical manuals we needed to get things like our backlash and torque specs all done right. It's time to go ahead and get our brand new EBC Brakes on. This is EBC's S-5-K Yellowstuff pad and GD Rotor Kit. You'll notice these rotors are drilled and slotted, and that's gonna help with heat dissipation so that when we are going hard on this thing we don't have to worry about it. I do want to talk about these pads real quick. These pads are a low dust, low noise, high friction compound that's gonna increase our stopping power up to 30 percent. So as long as you follow the proper break-in procedure these things are gonna give you a nice, long life. With the rotor on we'll get our outer bearing installed. We can go ahead and get our spindle nuts installed. We've got our torque wrench set to 20 foot pounds. With that we've got our brake discs buttoned up. Our last step before we can get this thing back on the ground is gonna be to get our steering linkage done. This isn't just any ole steering linkage and it's not just any ole install. This is coming at you with a Summit Tech Tip. Our center link here is way below where it needs to be to connect with this pitman arm. So let's go ahead and bring that up. As we bring that up we'll notice that our wheels would be pulling in way too close together and there is nowhere near enough adjustment in these tie rods to make up for that. That's gonna cause all kinds of weird problems. Mostly bump steer, alignment issues, and all of the tire wear problems that come with alignment issues. This is our solution to all those problems. This is a Super Lift Super Runner steering linkage that we got from Summit Racing. As you can see, the linkages themselves are already a lot beefier than anything that we pulled out. I could try to explain to you guys how this thing works but I think it'd be a lot easier to get it installed and demonstrate it. The first step to getting this installed is to drill a couple of holes in our driver's side axle pivot bracket so that we can get our idler arm mounted. After the idler arm is installed we can go ahead and get our new center link in. [ Music ] From there it's time to get the tie rods in and make a rough adjustment to get our toe at least close to where it needs to be. Now that it's installed these tie rods are much beefier than what we pulled out and it corrected some geometry issues that we would have had if we kept a factory style steering linkage. Now that this is done we're just about ready to get this thing on the ground. We're installing a set of 17 inch Pro Comp wheels that we got from Summit Racing wrapped up with some 35 by 12.5 inch wide Super Swamper SSR's that we got from Interco. [ Music ]
[ impact wrench humming ] [ Music ]
I have been waiting to get these wheels and tires on here, and I think they look awesome. [Chris] They do. We've got to put the motor in next, transmission, all that good stuff. We're well on our way. [Eric] We do still have to get the roll cage painted. Pull the axles and paint those. Unfortunately we're all out of time for today. [Chris] See you next time.
Show Full Transcript
[Eric] This is our '94 F-150 project that we are calling Ledfoot. Today I'm gonna be tackling our axles and suspension, getting that front end modified, get the new rear end put in, and adding a six inch lift. [Chris] I'm gonna be putting in the roll cage so we can install things like a five point harness, suspension seats, and just make it so we can have a little bit more fun off road. Welcome to Dirt and Trails. [ Music ]
Now we are gonna start the prep work on our Rhodes Racing roll cage that we got from Summit Racing, and the first thing we're gonna do is prep the ends of these tubes. So you can see how the cut is 90 degrees to the side of the tubing. I'm gonna knock out all the slag on the inside with a carbide burr and the outsides I'm gonna put a chamfer on it with the belt sander and that'll give me more room for the weld just to wet out at the toes and it is just gonna look perfect. [ sander humming ] [ Music ]
I've beveled the edges for a larger surface area. Why am I doing it with these ones here? When I'm sitting there and welding this out down through here I have a nice trough for the weld to sit in and I'm gonna get good consistency the entire way across, good penetration. What happens when I put a third plate in? I'm gonna have three things trying to occupy the same point in space. By knocking off those corners I'll be able to put a little tack in there, and then when I go to weld I'll weld right over that tack and everything's gonna become smooth, and consistent, and it is going to be a much stronger weld. [ Music ]
So we have this angle here that we have to deal with. I don't want to come north of this top plate here. So I'm going to roll out that bottom a little bit. Now that I have a rough line to start with I am honestly just gonna trim close to it and keep doing the same thing over, and over, and over again until I get the fit that I want and go from there. [ Music ]
Right now we have a very close general shape to what I want. What I'm gonna do is now that I have the general shape laid out I'm going to do the same thing that I did for this here. I'm gonna draw a line on the back side. That's gonna give me the shape and then we're good to go. [ Music ] Now that I have all of the paper templates transferred over onto the steel plates that were provided with the kit. I am actually just gonna cut it out on the band saw. I am going to go as close as I can to the line as possible. Then get to the line on the belt sander, put it in, final check, and then tack weld it together. [ Music ]
[ sander humming ] [ Music ]
Now I am done tacking up the driver's side box. I'm gonna install the hoop and carry on from there. Don't worry about the paint. [ Music ]
[ welder crackling ] [ Music ]
Coming up, I have everything already done and I went to go put this bar here in place and because I'm abnormally tall it's not hard for me to get in but in order for Eric to get in we're gonna need a trampoline.
[Chris] I have everything already done. I went to go put this bar here in place and because I'm abnormally tall it's not hard for me to get in but in order for Eric to get in we're gonna need a trampoline. I'm gonna be nice for once and I'm gonna put a little bend into this so it's easier to get in and out. After that it's Eric's problem. [Eric] Foot placement I'm alright with this but I'm still right up against this cage. I'm still straight up and down. Plus I'm already short on room to the ceiling. We're gonna have to get these seats real low and I think maybe move the cage back just a little bit. We've got room for that right? [Chris] More than enough. We have this whole pocket here. So I'm gonna cut these tacks. I'm gonna forget about this for now. I'm gonna trim the boxes so I can push them further back into this space here. Once this is relocated we can get some potential lean back. Then I'll worry about this here. [ saw buzzing ] [ Music ]
Oh that's heavier than I thought. [ Music ]
Perfect, I got it. [ Music ] [ saw buzzing ] [ Music ]
[ welder crackling ] [ Music ] I can weld to that, I can weld to that. Look at that. Tighter than a beaver's dam. [ welder crackling ] [ Music ]
For creature comforts and function I'm gonna put a bend here roughly about 10 to 15 degrees, lowering this down. This way while we're riding and everybody's having fun elbows can go out and nobody gets hurt. So let's go over to the bender. [ Music ]
[ bender humming ]
Perfect! So I know this doesn't look like a big change to some of you guys but this little variation here is gonna take your projects from here to here. What I need to do now though is reenforce this bend here. I'm gonna do that and then once that's done I'm gonna recreate it on the other side. After that we are ready to rock 'n roll welding this thing out and then welding it into the cab. [ welder crackling ] [ Music ]
Now that we have our hoop and all the accoutrement that go with it I'm gonna weld it out. I need to think how am I gonna weld this out because I do not want start/stops here in the center. One, I don't like it. Two, it's not gonna be as strong. So what I'm gonna do is weld here and down and around and I'll have it lifted up off the table as much as possible so I can try and get this all in one go. Then I'm gonna come across here and tie in that start/stop with this here. [ welder crackling ] [ Music ]
Alright, roll cage is done. I'm now gonna hand this off to Eric. This looks sweet but I'm starving. Eric! Eric, I need you! [Eric] Coming up. [Chris] Tilt back. [ drill humming ] [ welder crackling ]
[Chris] So now that we have the frame sitting on the jack stands I need to point something out. This wood cribbing is only going to be used while we do the suspension work to get the frame and the cab up off the ground. This setup would not take the full weight of the vehicle. So once the wheels and tires are finally bolted back up underneath this is gonna go back down to planet Earth and all of this is gonna get put back away. [Eric] This is our old 8.8 rear axle. Now from the factory these things are pretty solid but with what we're doing to this truck we need something a little beefier, which is why we got this nice, fancy nine inch from Quick Performance. As you can see this axle is missing a few things that it needs to be installed under our truck, which is why we still have the old axle because there's some measurements we need to take and transfer onto our new one. So we're gonna be starting by getting our center line measurement from leaf spring to leaf spring. That's gonna give us our spacing that we need to be able to get the spring perches installed in the right place. Or at the very least a rough idea of where they're gonna need to be. So now I'm gonna bring Chris in so I can make sure I get a dead center measurement from side to side. [Chris] You want center of the pin? I'm on it. [Eric] We are looking at call that nine-sixteenths. What we're gonna do from here is we want to find a dead center point on this axle based off of this measurement. Now that we found the center of this new axle we can take the measurement from spring to spring off the old axle and use that to figure out where these spring perches need to be placed. Looking at this axle housing you would think that this fill plug should be the center of the entire assembly but it is not. That's why it's so important you can see. Our actual center point is probably about three quarters of an inch off from where you would assume it would be on this fill plug, which is why it's so important to measure, measure, measure, and make sure you get everything right. That is four and fifteen-sixteenths. So now that we know those marks are accurate to each other and even from the center we can roll this thing under the truck, get the leaf springs in, and start getting it fitted for good. Oop, oop! [ axle hits the wall ] It rolled a little better than I expected to. Before I can place the axle under the truck I'm gonna go ahead and get some new shackles and the new leaf springs that came with our six inch BDS lift kit that we got from Summit Racing. You can see our spring doesn't quite reach to this front hanger. What I'm gonna do is take a C-clamp right here. That's gonna squeeze the springs together and spread those I's out so it actually reaches and we can get this bolted in. [ Music ]
Just like that. The reason that this method works is putting these clamps on here essentially simulates a load being put on the spring. It's not the easiest thing in the world to do but it is one of the easiest ways to get new leaf springs fitted, especially if you've got really stiff lift springs like we've got here. [ impact driver humming ] [ metal clanging ] The only part that I care about right now off of this old axle is gonna be these factory blocks, and that's because I went through the lift kit installation instructions and it specifies to reuse these. So we're gonna snatch them both out and have them ready to go. The stud hole in our spring perch is not quite as big as the stud on the bottom of the spring itself. So what I'm gonna do is go ahead and measure that pin and then drill that out so that the size match. We can get those on and carry on. [ drill humming ] [ Music ]
Double check, oh yeah! That is perfect! Send it. [Chris] Watch your fingers. [Eric] Right there. [ Music ] Let's go ahead and… [ Music ] There we got that side in. Go ahead. [Chris] Do you need this to come forward a little bit? [Eric] Just a touch. [ Music ] There we go. Give her a little pump. Little more. I think we've got just a little bit of tension on our block here. I think for right now since this has to come back out it should be okay. We can always come back with a wrench or ratchet and tighten them up a little more later on. Now that we've got our angle set and all of our measurements are where we want them I'm gonna go ahead and get these perches tacked on. [ welder crackling ] [ Music ]
Now that is gonna be the last of our mockup done here in the back. All that's left is one more shock tab getting tacked in, verify all of our measurements, and then until we can get the weight of the vehicle on this axle we are finished up back here. Time to move on with the front. [Chris] After the break. [Eric] Now it is finally time to get this big honking coil spring installed.
[Eric] I spent all morning getting the front end of this truck torn apart, which means that we now have our steering linkage, brakes, axle, and suspension all down on the floor ready to get tossed for the most part. We're gonna save a few things and reuse them but a majority of it's gonna go away. During the teardown we had a couple of casualties. A few tools, some parts, but that's to be expected when you're taking apart 31 years worth of mother nature trying to keep stuff stuck together. What I want to talk about now is all these new parts we've got over here. To get that axle reinstalled we've got brand new internal components from Torque King 4x4 that's gonna cover everything. I mean everything from the diff all the way out to the hubs. Once we've got that done and got our axle reinstalled we can move on and top it off with the rest of our BDS lift kit that we got from Summit Racing. Then we'll round it out with a new set of EBC pads and rotors. Now I'm super excited to get this done, get the truck back on the ground and see how it's gonna sit. So let's get to it. Our first step here is gonna be to get our new radius arms installed. As you can see there is quite a bit of difference between these new ones and the old ones that we pulled out. Now because of that size difference we've got to move the bracket a lot further back, about a foot. That's gonna put it back here compared to the old one sitting up here. [ ratchet clicking ]
Our C-clamp is a little bit close right here. So what I'm gonna do is get these three holes drilled. Get the bolts in. Then I'll be able to take this out of the way. Get that drilled and bolt installed. [ drill humming ] [ Music ]
Okay now it'll go in there. Before I can actually install this drop bracket we've got this template that came as part of the instructions in the kit that'll show us exactly where we need to drill new holes to replace the bracket we just cut out. Now that we've got the axle in place go ahead and get this pivot bracket torqued down. [ Music ] Now it is finally time to get this big honkin' coil spring installed. Now that we've got our spring in the last thing we've got to do over here is get this shock installed. Then we can call the lift on the passenger's side finished up. It's important to keep in mind here that we are just doing this for mockup. Once everything goes on we're gonna get the truck back on the ground, make sure everything's fitting right and sitting right. Then we'll go ahead and take it back off, get some paint done, and then do our final install. Looking at our housings you'll notice there really isn't a whole lot of difference between them. They look a little bit different. The ribs are placed differently but what really matters is that the mounting, the flange on the front, and the bolts on the side are in the exact same place and same configuration, which is what's gonna allow us to put this Dana 50 housing into a Dana 44 axle. The real difference comes in when you look at the ring gears. The factory Dana 44 ring gear is eight and a half inches in diameter and it was running a 3.73 gear ratio. That in and of itself is a problem because our new rear axle has a 4.10 ratio. So we've got a 4.10 ratio gear set and a nine inch ring gear compared to the old eight and a half, and that's gonna make it that much easier for this thing to handle more power and turn some bigger tires. In addition to all the actual parts that Torque King was able to give us they also provided a majority of the tools needed to get this stuff installed. Also they gave us all the fluids needed like grease, rtv, and thread locker. Plus all the technical manuals we needed to get things like our backlash and torque specs all done right. It's time to go ahead and get our brand new EBC Brakes on. This is EBC's S-5-K Yellowstuff pad and GD Rotor Kit. You'll notice these rotors are drilled and slotted, and that's gonna help with heat dissipation so that when we are going hard on this thing we don't have to worry about it. I do want to talk about these pads real quick. These pads are a low dust, low noise, high friction compound that's gonna increase our stopping power up to 30 percent. So as long as you follow the proper break-in procedure these things are gonna give you a nice, long life. With the rotor on we'll get our outer bearing installed. We can go ahead and get our spindle nuts installed. We've got our torque wrench set to 20 foot pounds. With that we've got our brake discs buttoned up. Our last step before we can get this thing back on the ground is gonna be to get our steering linkage done. This isn't just any ole steering linkage and it's not just any ole install. This is coming at you with a Summit Tech Tip. Our center link here is way below where it needs to be to connect with this pitman arm. So let's go ahead and bring that up. As we bring that up we'll notice that our wheels would be pulling in way too close together and there is nowhere near enough adjustment in these tie rods to make up for that. That's gonna cause all kinds of weird problems. Mostly bump steer, alignment issues, and all of the tire wear problems that come with alignment issues. This is our solution to all those problems. This is a Super Lift Super Runner steering linkage that we got from Summit Racing. As you can see, the linkages themselves are already a lot beefier than anything that we pulled out. I could try to explain to you guys how this thing works but I think it'd be a lot easier to get it installed and demonstrate it. The first step to getting this installed is to drill a couple of holes in our driver's side axle pivot bracket so that we can get our idler arm mounted. After the idler arm is installed we can go ahead and get our new center link in. [ Music ] From there it's time to get the tie rods in and make a rough adjustment to get our toe at least close to where it needs to be. Now that it's installed these tie rods are much beefier than what we pulled out and it corrected some geometry issues that we would have had if we kept a factory style steering linkage. Now that this is done we're just about ready to get this thing on the ground. We're installing a set of 17 inch Pro Comp wheels that we got from Summit Racing wrapped up with some 35 by 12.5 inch wide Super Swamper SSR's that we got from Interco. [ Music ]
[ impact wrench humming ] [ Music ]
I have been waiting to get these wheels and tires on here, and I think they look awesome. [Chris] They do. We've got to put the motor in next, transmission, all that good stuff. We're well on our way. [Eric] We do still have to get the roll cage painted. Pull the axles and paint those. Unfortunately we're all out of time for today. [Chris] See you next time.