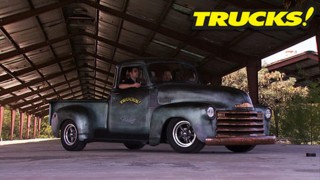
More '49 Chevy 3100 "ClasSix" Episodes

Trucks! Builds

Parts Used In This Episode

Bendtsen's Speed Gems Inc.
216/235/261 Chevy I6 To Chevy V8 Automatic Transmission Adapter Kit
Certified Auto Recycling
Used 8.8 rear axle housing with 3.73 gears, limited slip differential and disc brakes
Chevs of the 40's
Cab Back Panel. Exterior Upper Replacement Panel for 5 Window Cab
Chevs of the 40's
Cobra R Front Brake Upgrade Kit
Chevs of the 40's
Offenhauser Intake
Chevs of the 40's
Rear Corner Cab Glass
Ford Performance Parts
Ford Racing 2003-04 Mustang Cobra Upgraded Whipple Supercharger Kit
Ford Performance Parts
Ford Racing 4.6L DOHC Aluminator Long Block
Jim Weimer Rod Garage
Set of four stamped Mustang II arms. Mustang II spindles. Strut Rod Kit with Hardware. Bushing kit for strut rods. Calipers with rotors, bearings and seals
Kimberly-Clark Professional
Scott Shop Towels part# 75130-Ideal for changing oil, refilling fluids, and general automotive maintenance.
Mickey Thompson
Sportsman S/T Radial 245/60R15
Monster Transmission and Performance
Remanufactured 700R4 Performance Transmission
Pertronix
Pertronix Ignitor
Summit Racing
141 Legend 5, Aluminum, Gunmetal, 15 in. x 7 in., 5 x 4.50 in. Bolt Circle, 3.75 in. Backspace
Summit Racing
Coil-Over Spring, 275 lbs./in. Rate, 10 in. Length, 2.5 in. Diameter, Silver Powdercoated, QA1 Aluma Matic Ride Sensitive Shocks, Coil-Over Shock, Aluminum, Clear Anodized, Street, Front/Rear, Eyelet/Eyelet Mount
Summit Racing
Rack and Pinion, Manual, Cast Aluminum, Chrome finish
Welder Series
Triangulated rear four link kit. C-notch kits and frame bend sections. Rear axle bracket for mounting coil-over shocks
Wheel Works Inc.
The Wheel Fit wheel test fit tool is the only tool in the world that will physically clamp to an actual tire for the purpose of test fitting the assembly to check all clearances BEFORE ordering your wheels or mounting tires
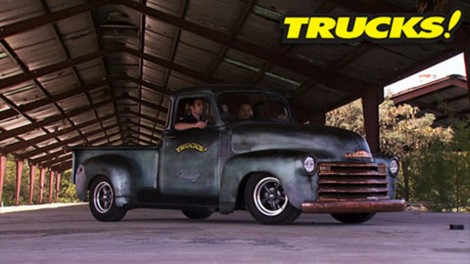
Wheel Works Inc.
The Wheel Fit wheel test fit tool is the only tool in the world that will physically clamp to an actual tire for the purpose of test fitting the assembly to check all clearances BEFORE ordering your wheels or mounting tires

Video Transcript

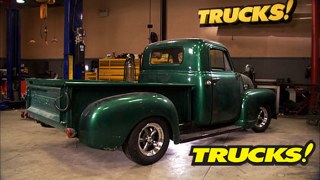
The day has finally come. We're taking our 49 Chevy project class six out on the road to see how our straight six powered vintage looking truck performs. It's all today here on trucks.

Hey guys, welcome to trucks

with days. Like today, it's what we live for to be able to take a finished project like classics here out on the open road where it belongs, see how it performs and to see how it lives up to our goals and compares to the bone stock truck that we started with.

And when we first picked up this 49 for about $6000 well, it ran and it was a driver problem was it was mostly original and we wanted something that was a little bit more modern and a little bit more drivable, but for the price that we paid for this thing, well, we couldn't have asked for a better foundation. Here's what we started with.

We found this old truck in the classifieds, just like anybody else would look for a project. We wanted something that had stock running gear, stock engine, stock transmission, and stock power levels which barely got us past this horse and buggy.

After pulling the engine, we determined it was a 1954 year engine, had the pressurized oiling system and was something worth keeping.

We followed that with removing the stock front suspension

and welding in a Paul Horton's welder series Diy front Subra,

the Horton system is a typical Mustang to set up, however, it ships flat and requires that you weld it up, saving you tons of money

and being on a budget was a precedent. We said right from the start with this project. So combined with JW Rod garages suspension system, we had disc brakes, budget wheels from summit and rack and pinion manual steering system making this front suspension safe and modern.

And that's a theme we followed on the back half of this truck as well. We ended up with the triangulated four link, a pair of coil overs and a junkyard Ford Explorer, rear axle complete with disc brakes. Then it was onto some fifties, custom tricks in the form of French in led headlights and 59 caddy led taillights.

So with the front and rear suspension taken care of the rear axle swapped in and the rest of the drive train figured out

well, that just left us with a rolling chassis with a really ugly green body sitting on top of it

and that was something we were not going to leave alone.

So with that rather solid but boring blank canvas, we knew we had the raw materials to create something really cool. But what we did want to do was throw a whole ton of money just because we wanted to create a project that has a ton of curb appeal. But on a budget and show you guys that you can create a vehicle with massive amounts of character that you can see coming from a mile away.

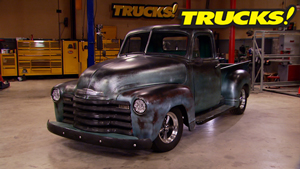
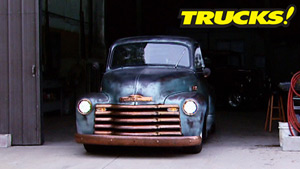
So we took a little inspiration from a real truck in Arizona with actual patina and just kind of copied it

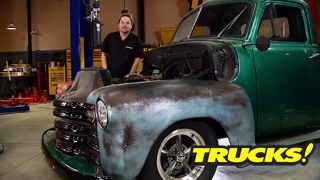
starting out with sanding the base and then applying a layer of sloppy black with a brush followed by a sloppy layer of red oxide with a roller. This creates tons of texture.

And we followed that with our own blend of an aqua color mixed from the dup color paint shop system and sprayed through a $5 pressure sprayer from a hardware store,

throw on some header paint just for a little bit of contrast and texture. And then you're ready to start creating your sun damage, which begins with 400 r sandpaper to get down through the layers quickly. Now, what you're trying to do is recreate sun damage from the top down, which is exactly how our inspiration truck appeared. The top surfaces were deteriorated and faded even down through the layers right to the metal.

Now, there's no real way to even make a mistake with this system.

You have to go by what you think looks right you can check it, step back and look at it. And in the end it's your style and your design that you're creating.

Once I was happy with the fender, we applied it to the rest of the truck and

gave us the appearance. We were looking for all for less than 200 bucks for the entire pay job.

And we found our three window truck for a little bit cheaper and a little easier than you can pick up a five window cab. The

problem was we like the five windows. So it's time for a conversion.

But luckily for us, reproduction sheet metal is readily available and we converted our cab to five windows for a pretty fair price.

But when it came time to install the not so cheap curved glass, we called in the professional.

Now we've installed glass before, but in this case, it wasn't worth the risk. And since Dante is not new,

we let him handle it,

it was worth it.

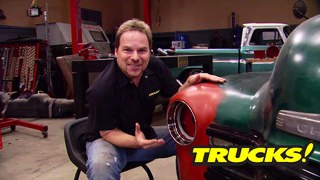
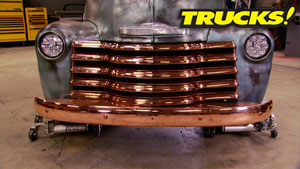
Now, when it came to replacing the grill and other chrome pieces, we wanted to take a different approach. So with the help of our friends at advanced plating, we stop the plating process right at the copper which cuts about two thirds of the cost off of the finishing process and also leaves us with a surface that is beautiful to look at and

also gives us options as far as how it's going to eventually end up.

Now, we can always leave it bright shiny copper and lock it in with some sort of a sealer because it flat out looks cool like it is. But to follow the theme of the rest of the paint job, we're going to let it age naturally and just like the Statue of Liberty, it will take on a patina that's gorgeous.

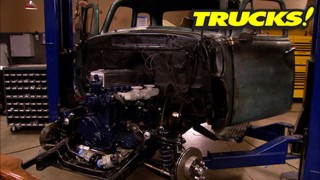
So with the exterior of the truck just about done, we removed a couple of cross members to make room for our new 700 R four automatic overdrive transmission.

An after market cross member holds it in place, custom engine mounts, hold our blue flame six in place. That's the engine that was rebuilt by the guys over on horsepower

TC Pennock mastered the throttle linkage beautifully

and short of an exhaust system.

This thing was ready for the road.

Now, we were really happy with the paint job that ended up on this old pickup, but it's kind of polarizing. You either love it or you hate it. Luckily, for us, the vast majority of people that laid eyes on this old rig,

they love it like we do.

We don't build them to look at them

because until they're out on the road, it's nothing but a pile of parts. So out on the road is exactly where we're taking this thing. Shake it down a little.

Hey, guys, welcome back to trucks. Well, the day is finally here to take our 49 Chevy project classics. Out for its first test drive because like we said, we don't build these trucks to sit around in lawn chairs and look at, we build them to drive them. So let's take our budget classic out for a little spin.

Sounds good.

Now, it's always fun to get a driving impression. The very first time you take a new project out on the road

and what struck us right from the start was how stable and solid this truck felt on the rope.

And despite not having sway bars, front or rear, there was surprisingly little body roll even in some hard corners. Although we weren't exactly setting any speed records or going for an auto cross timing event.

But if you think about it, that's not what this truck is all about. It's about cruising and that it does and does well,

the combination of the 373 rear gears, 700 R four overdrive and the power band of the in-line six. Well, it was the perfect combination for exactly the way we wanted to drive this truck.

Now, Kevin's right. This thing does ride great,

but there's still no shortage of wind noise, buffeting and rattling.

That's just part of the nostalgia of driving a truck that's 60 some years old

now, something that's not that old are these led headlights and taillights which you can clearly see even in the bright of day.

Now, all the copper work on our old 49 started out looking brand new

and now it looks just about right.

And all we had to do was let it sit outside for a little while.

Now, the longer we drove around in this thing, the more the engine broke in and the better it ran

and with a cab full of windows, visibility certainly wasn't a problem.

Now, on this project, we wanted to compromise on dollars spent but not sacrifice on cool factor,

We think we've pretty much hit the nail on the head and we're able to show you guys some great tips on how to modify these advanced design trucks.

Now, part of the reason this vehicle sits in the road so nice is because we didn't go crazy with wheel and entire diameter. Number one, it's more expensive when you go to the larger diameter wheels and you compromise on the amount of sidewalk. We've got 15 inch wheels, lots of side wall with Mickey Thompson radios and it just rides good.

Now, this engine didn't even think about overheating all day long

with its fresh rebuild. We probably more than doubled our top speed capability. When we first picked up our 49 the worn out straight six had us limited to about 45 or maybe 50 miles an hour purely from a lack of power

cruising down the highway at about 70. This thing's barely breaking a sweat.

Now, this truck has come a long way

and we didn't spend typical restoration money getting it to what you see here. A very, very unique and custom truck full of character.

Hey guys, welcome back. Well, our little cruise and our 49 here was big fun and a big thanks to TC Panic at Bay One Customs for helping us get this thing on the road. But it's not the only project we've been working on lately. We've made some progress on a couple of other long term rigs that we've got in the shop. Our super duly the project Rolling Thunder.

We sent out an invitation to some of the best custom shops in the country. The guys that responded and joined us became the all star auto body thrash team.

And together we set the single minded goal of making super duly a solid platform under primer in less than five days. Together, we logged nearly 500 labor hours and accomplished our goal in style.

But the body once again on the frame, we insulated the inside and put a diy bed liner in the bed about another 100 hours of blocking and repriming. And we were ready for a top coat which was Summit Racing's new brand of base coat clear coat systems.

Brandy Borch

and Brian Finch came back to help me put the paint job on the body

which consisted of a two tone gray and blue paint scheme complete with a ghost logo burned into the side.

Now, it's always a thrill to get the painted body back on the chassis and make it look like a truck again. But our work was far from complete.

We still had to make the dodge components to the Ford body, which proved itself an individual and unique challenge.

But everything seemed to line up in the end including the steering shaft which had to be lengthened, somewhat,

slightly modified headlight buckets and a fresh coat of paint on the new inner aprons are the latest projects and get you up to speed on super duly

and speed is the goal of project Rolling Thunder.

But based on the sound of things, our V8 conversion for stage one was short lived on to bigger and better things like making this truck handle more like a mustang.

So we installed an 03 Mustang cobra independent rear suspension.

And since pickup trucks aren't really known for their ultra rigid frame,

well, that part was up to us, but we didn't want to add a bunch of weight in doing so. So we put a bunch of speed holes in our frame stiffening plates before welding them on.

Then it was time to install a six speed

manual transmission behind our all aluminum 32 valve 4.6 L V8.

Then it was time to relocate the front suspension. We use tubular lower arms circle track, upper a arms and more mustang parts in the form of a big brake kit. A Denny's drive shaft connected our 6 ft to our IRS,

a stainless steel 10

from Ricks will hold the fuel

and to protect it. We added a little bit of steel tube work.

Now, the downstream effects of moving the front axle center line forward to five or six inches meant that Kevin had some sheet metal modifications to make,

but it turned out great for this truck looking downright aggressive. Now, some air ducts will try to keep the brakes cool and some heat insulation on the floor of the cap will try to keep us cool from the heat of the exhaust.

You're watching trucks for a DVD copy of this episode, just go to Power block tv.com and order your copy for just 595 plus shipping and handling. Start your own trucks, collection delivered right to your door from the power block.

Hey guys, welcome back to trucks and our little trip back in time.

Well, you know, it's not just street vehicles that we build. We've also made some great improvements on some very capable off road rigs here. Recently,

our Jeep Wrangler Unlimited showed up to the shop nearly stock that didn't last long.

We installed long arms 3.5 inch lift springs

and heavy duty Cro

Molly axle shafts, front and rear

along with air lockers and 456

gears.

Then we removed the stock NP 231 transfer case, split it apart and installed a slip Yoke Eliminator kit for rolling stock. We went with some 30 fives on 17 inch aluminum wheels.

Then to finish up the exterior, we added powder coated bumpers and side steps along with a winch and some fender flares to keep the mud off the paint.

After we installed some seats,

we finish things up with an exhaust system.

Then it was time to get off the pavement a little bit and test out all of our modifications.

One.

Now, we've been itching to get our hands on a Tacoma for quite some time and we found a good one with high miles that needed some regular maintenance, including the timing belt and some other ware items with that stuff out of the way. We also did the common gray wire mod that gave us the option to have a rear locker selectable in two or four wheel drive.

We beat up the rockers with some protection, added some more ponies in the form of a tailpipe turbo system and

it was ready for an off road test.

Nice

for a stock platform with no modifications to the suspension. This truck did great.

Now, we did find room for improvement as well as the ceiling of the rev limiter.

What

the

watch

out, watch out.

Well, today's been a great day and we want to give a big thanks to Ryan Howell for making it easy for us to come out here and have a little fun in our 49 Chevy.

And just because we know the classics is road ready.

Don't even think this truck's going anywhere. We have just begun.

Better go somewhere.

I guess we're stuck here.

If you need a quick, easy and precise way to measure wheel and tire sizing, then the wheel fit measuring system is a must have. This system is versatile enough to measure 14 inch, up to 28 inch wheel diameters from 6.5 inch wide to 16 inch wide wheels and tires and most 456 and eight lug bolt patterns.

And once you've got the correct options figured out for your vehicle, mount your tire onto the bead locks and onto the hub adapter and quite simply

slide your tire into place, read the numbers off the cast sinks and order your wheels and tires with a confident precision fit.

Thanks for watching trucks. If you got any questions over anything you've seen on today's show, check us out on Power block tv.com. See you next time.
Show Full Transcript