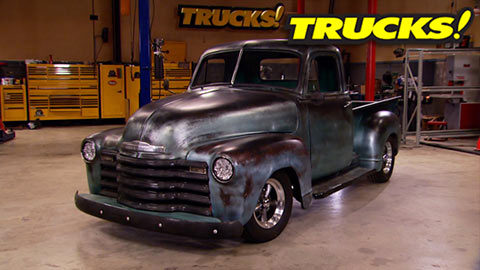
More '49 Chevy 3100 "ClasSix" Episodes

Trucks! Builds

Parts Used In This Episode

Dupli-Color
Dupli-Color Premium Filler Primer
Edge Products
Edge Back-up Camera
Edge Products
Edge Juice with Attitude CS Programmer
Edge Products
Guage Dash Pod
Edge Products
Thermocouple Probe
Auto Body Color & Supply Co.
Clausen Z-GLAS Fiberglass Reinforced Filler
Auto Body Color & Supply Co.
Clausen Z-GLAZE Polyester Glazing Putty
Chevs of the 40's
Back Glass Rubber with Lock Strip
Chevs of the 40's
Cab Back Panel. Exterior Upper Replacement Panel for 5 Window Cab
Chevs of the 40's
Cab Back Panel. Upper Interior Panel for 5 Window Cabs
Chevs of the 40's
Rear Corner Cab Glass
Chevs of the 40's
Rear Corner Glass Rubber
Dynamic Test Systems / (DTS)
Chassis Dyno
Matco Tools
Spot Weld Drill Kit

Video Transcript

Today, we're converting our 1449 Chevy from the standard three window to a deluxe five window cab

and letting a pro show us how to install the tricky and not so cheap curved corner glass without cracking it. It's all today here on trucks.

That's why you hire the pro.

Hey, welcome to trucks. Well, this is the first time in a while that we've had our 49 Chevy project class six back in the shop and this is the first time you guys get a chance to see the completed paint job, the paint job we're calling for

Tina. It's pretty cool. So take a closer look.

Class six is our way of doing a project that's a lot of fun to drive. Has a ton of character and it won't break down on the side of the road and it won't break. The bank

budget was the main agenda from word one, but we didn't compromise on quality or safety.

We used reliable and affordable components to create the new stance. But the icing on the cake is the paint job that looks like a Saturn in the sun for about 30 or 40 years.

So that brings us to the point to where we've got a cool looking paint job and a killer stance. And we are well on our way to having a cool looking street rod that's built on a budget. However, there are some things that we'd still like to change. For instance, I've always sort of had a soft spot for the five window caps. We got a great deal on this one because it's a less expensive and in some circles, less popular three window cap. I like the five windows. But what do you do? Do you start hacking holes and hope? No, there's a plan and thanks to Chev of the forties and Street Rod headquarters, we got the equipment to do it.

So we picked up some brand new sheet metal from them to help get the five window conversion complete. Now, like we've shown you on projects in the past, you don't have to use the entire replacement panel that they send you. Especially considering our 49 doesn't have any rust issues in the cab, at least on the roof anyway. So we're just gonna cut out the sections we need, let the rest hit the recycling pile.

Now, this top piece is the outer skin and what's underneath it is obviously the inner. Now, both of these pieces are reproductions of the factory sheet metal and you can see how it goes together

and whether it's a three window or a five window they both use the same center glass. Speaking of which check this out

and replacing glass in a vehicle from the forties or fifties. Not so much of a big deal. Most of it's flat like this rear glass, you can cut it and trim it down from a larger piece if you have to pretty afford.

However you get into the corner glasses and it's not so simple. You can't really trim this down from a larger piece. But Chev of the forties offers these dot approved laminated safety corner glasses that make this aspect of the five window conversion a piece of cake, especially since they offer weather seals and the bead for the perfect seal. So really and truly, this is an affordable way to get the truck cab that you want without having to buy a whole other truck. All you need is a little bit of sheet metal. Know how.

Now before we started cutting and grinding and making sparks, we decided to remove the bomb shaped fuel tank from behind the seat tanks, Ryan,

you're a real guess

that was awful.

Sometimes removing vintage auto glass while keeping it in good condition can present a challenge.

In our case, we got lucky and all we had to do was remove the hard plastic lock strip and gently pry the supple weather strip and take the glass out. No problems.

There it

goes.

That's a beautiful thing.

Ok. Here's the plan,

what we're gonna do is do the outside of the panel first and step one is eliminating or removing the drip rail. So we have this edge to go by it. That way we can get both sides exactly the same by measuring off of an existing corner. Now, I know you're thinking, hey, what are you doing hacking to do a paint job that you just got finished? Well, we can

this in using materials that we've got left over, even put prime response around it and make it look even more authentic. And we don't have to spend another week's worth of time and $1000 worth of material blending in and clear coating and buffing and all those kinds of things that you would with the high end street rod paint job. And that is the beauty of

finna.

Now, drilling out the spot welds on the drip rail is step one. You can find spot weld cutters in the matco catalog or just about any auto body supply store.

A panel separator knife minimizes the distortion of the panels you're trying to separate.

Now, it's really important that we test fit the panel at this point because we're not installing the whole thing,

but we're just using markers to trace out the outside dimensions. So we don't cut too much of the original panel off.

The outline of the panel is just a rough guide to give you a reference point where you can sneak up on your final fit.

You wanna leave enough metal on your patch and enough to the original metal to where you can refine your cut and gradually adjust it in to where you get a perfect fit.

The larger diameter, four inch cut off wheel gives me a lot more accuracy and control when I'm cutting sheet metal.

Now, the sheet metal on this cab is unbelievably solid.

So all we did was use a flap wheel to clean up the metal edges around it. So you don't burn the paint and contaminate your wells

that

I

think

on the

hill.

Now, what Kevin's done is removed, any overlap of the two panels leaving a 16 inch gap perfect for a butt weld.

The top of the cab corner is stamped for a flange with an overlap. So on the pitch weld for the rear glass and the top, we're gonna use rosette welds

using a 516

thematic punch and a drill bit helps us make the rosette welds and doing this panel one side at a time, lets us keep the cab square and straight. While we make this conversion

cool, we'll prep the insides and

make ready for the welding.

It's gonna look pretty cool.

Hard to see through though.

Yeah, no

need to tint the window man. That metal is in good shape though.

Up next with the outside done, we'll show you how to cut the inside of the cab. And later, Dante helps us with the glass to make our cab of five window fish bowl. Stay tuned.

Hey, welcome back to trucks. We're making great progress on the 3 to 5 window conversion on project class six. Like we showed you we've got the outside panel done and even the inside panel is finished.

Basically

the Chev of the forties, inner and outer panels have served us well. Now all we got to do is scab this one in on the other side, make it where we can actually see through it. But we wanted to remind you also that we removed the fuel tank because let's face it. R and I on a fuel tank is a heck of a lot easier to deal with than skin grab. So be careful at home

now to keep the spot weld cutter from walking around like they have a habit of doing, we went ahead and drilled eight inch pilot holes to make sure that doesn't happen.

Now, the rest of the panel removal involves using the cut off wheel

and we made our cut along the door jam close to the weather stripping. So our repair will be less visible.

Now, the cut closer to the center window will be right next to a factory seam

because it has strength in that area and it will minimize the warpage when welding the new panel in.

And since this is hopefully the last time we see this interior cab race, we went ahead and scuffed off the surface rust we had access to

and hit it with some rust preventing primer.

We don't want our truck rotting from the inside out

now, just to be absolutely sure. We don't have any corrosion or rust issues between the replacement panel and the factory sheet metal.

We applied some steam sealer over top all of the welds and around all of the edges

just for some extra insurance.

Now to prep the interior panel for installation, we're drilling about a half dozen holes for plug or rosette wells

and to make sure we don't have any contamination in those wells. We're grinding away the E coat that surrounds the holes that we drilled.

Now in the areas that we have access, we're using our punch tool again

just because it limits the amount of possible distortion from drilling holes. But if you don't have a punch tool, not the drill, but it'll get the job done.

Now with the panel trimmed to fit and sanded down on the edges, we're going to go ahead and install it and start the welding on the outside of the panel closest to the center window.

That way we can work the area around the window opening and make sure all the contours line up.

We're using a variety of locking pliers to move the metal around and get it to go where we want to.

But a low buck alternative is just to use sheet metal screws to hold everything in place while you're doing the welding,

part of the persuasion process sometimes involves a hammer.

Now, just like with any sheet metal work and like we always tell you move your spot welds around so you don't concentrate the heat in one particular area and cause the sheet metal to war.

All right, with our fifth window fully welded in, we get to grind down the 1000 or so tack welds holding this thing together, then we'll come back, do a little bit of finish work, make sure all the seams are nice and smooth. We should be ready to move on to the next step

up. Next. The pro shows us how to not break the corner glass and later make it more power with minimal effort. Stick around.

Hey, welcome back to trucks. The more I scuff on this thing, the better it looks here it is a five window cab.

Now, after we finish welded both sides inside and out, we picked up some Z glass fiberglass reinforced filler from auto body color and supply blocked that out. We followed it with Clawson's Z glaze blended that in recreating the original contour for a factory look.

Now, we followed the theme. We started with the rest of the truck when we fed

the entire vehicle using duple colors, paint shop system and we reached for some duplicate

primer to cover up the body work. Now, we could go through the same recipe that we showed you

rolling, brushing misting and then sanding and blend this in to where it looks like it was all painted at the same time. But I got to tell you, I'm really digging the primer spots. In fact, I think it looks a little more authentic. So now all we had left to do, put the glass in.

All right, with the metal work body work and paint work completed. The only thing we've got left to do to finish up our five window conversion is install the glass. Now, we've shown you installing

glass using this type of gasket sealed before in the past. Heck, we've even shown you how to cut flat, laminated safety glass, but a lot of people aren't comfortable doing that kind of work and it's right behind rebuilding an automatic transmission or doing electrical wiring on a lot of people's list of things they'd love to avoid. So sometimes it's worth it just to pay a pro to come in and do the job for you that way you make sure it's done right.

You don't risk breaking your curved and not so cheap glass.

So we enlisted the help of Dante, the glass guy who has seen it all when it comes to auto glass.

Now, he's using a very soft and supple rubber weather seal, which is key with a corner glass like this where you're gonna apply a lot of pressure to get the glass in

the rubber has to be movable where it can flex when your glass can't,

otherwise you run the risk of putting too much pressure and breaking the glass.

Now, there's a fine line between applying force and applying pressure.

Dantes is applying pressure with the palm of his hand. So it's evenly spread out for the glass to get the new window properly seated in the channel.

Using a glass cleaner as a lubricant allows Dante to work with the two different materials without binding or pinching. And it evaporates quickly enough where it won't leave a residue behind

the last step and probably the most difficult and sensitive is installing the hard plastic lo

strip.

You have to do this because the lock strip is what holds tension on the weather seal and keeps the glass in

even with the right tools like the log strip tool experience is what's keeping Dante from breaking this glass.

That's why you hire the pro

you're watching trucks for a DVD copy of this episode. Just go to Power Block tv.com and order your copy for just 595 plus shipping and handling. Start your own trucks, collection delivered right to your door from the power block.

Hey guys, welcome back to trucks. We check it out. Edge has loaned us their show truck so we can give you guys a look at some of their cool new stuff. This is the new edge products, juice with attitude in cab controller and it comes with everything you need to connect the controller to your truck's PC M through the OBD two

including a parameter to monitor your EGTS or exhaust gas temperatures. Now, the CS and the CTS controller module both give you the ability to completely change your truck's power levels on the fly.

No more rebooting or shutting the truck down.

Now, the CS which stands for color screen allows you to toggle through your power presets and display options with the buttons on the side

that comes in at a slightly lower price point if you're having to pay closer attention to your budget.

Now, the CTS stands for color touch screen and is obviously a much larger display and it's just plain, easier to see

and it gives you the ability to change all the different parameters and display options simply by touching the screen. But the cool thing about both of these units is that you can change the backgrounds and customize them to suit your own personality. Now, this is easy to do. We use the edges, my style

software and uploaded the trucks logo and made her own background. But if you want something quick edge has got you covered with 10 different custom backgrounds to choose from. Now, it's not just the backgrounds that are customizable. So you want to change the color of the gauge art. Simple enough, just choose the gauge and select from your color palette and you can closely match your new custom background like we did with our trucks. Yellow.

Now, accessories for both of these units include a gauge pod with a texture that perfectly matches the interior of your truck as well as the ability to add on and Daisy chain, different sensors including multiple parameters to give you really precise monitoring and this cool backup camera.

Now, the installation of the CS and CTS monitors are just like any other edge product we've shown you in the past. you've got just a few wires to hook up one to the juice module underneath the hood, one to your OBD two port

and a third to the optional backup camera.

Now, this backup camera is not just a bling accessory. Now, obviously, this is a great tool to help you back your truck up in broad daylight, but even in complete darkness, the camera switches instantly to night vision allowing you to still see as you back up to your trailer. But at the core of it, edge products is all about make it power.

Now, once we got our gigantic crew cab, Chevy rolling on 37 strapped down to our

dyno Jet chassis,

dyno,

we made a few baseline poles.

We took a three run average on our stock tune and ended up with 292 horsepower and 509 ft pounds of torque.

Then we set the edge box to power level one and made another three pulls ending up with 307 horsepower and 528 ft pounds of torque.

Next, we skipped power level two and went straight to the middle setting, coming up with 345 horsepower and 579 ft pounds of torque.

Finally, we turned the wick up a little bit to power level five and came up with a three run average of 388 horsepower and 645 ft pounds of torque. Meaning we picked up 96 horsepower and 136 ft pounds of torque.

Not too shabby for this giant truck on 37 inch tires.

All right, if you guys are wondering why the engine's still running and I'm holding the ignition key in my hand. That's because the edge juice with attitude has a built in turbo timer. That way, the hot turbo doesn't coke the oil in the lines and the oil in the turbo. Once this thing cool down, it'll shut itself off

and there you go.

That's pretty cool.
Show Full Transcript