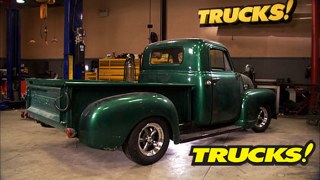
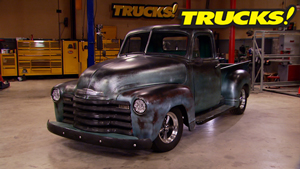
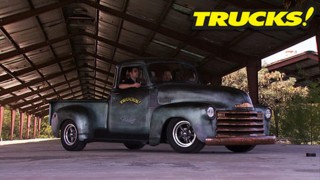
More '49 Chevy 3100 "ClasSix" Episodes
Trucks! Builds
Want more content like this?
Join the PowerNation Email NewsletterParts Used In This Episode
J&W Auto Wreckers
4.0 Intake manifold, Throttle Body, P/S Pump and Bracket.
O'Reilly Auto Parts
Accessory Belt
O'Reilly Auto Parts
Harmonic Balancer Bolt and Washer
O'Reilly Auto Parts
Dupli-Color engine enamel clear
O'Reilly Auto Parts
Timing Cover Gasket Set
O'Reilly Auto Parts
Blue medium nitrile gloves
O'Reilly Auto Parts
Dupli-Color BSP200 Jet Black (2)
O'Reilly Auto Parts
TPS Switch
O'Reilly Auto Parts
Timing Chain
Video Transcript
Today. This is real Patina. This is for
Tina.
We're throwing out the painting rule book to show you how to mimic what takes Mother Nature 50 years to do.
And with just 12 bucks of electronic parts, you can make an air fuel tuner for your map equipped ride. It's all today here on talks.
Yeah, we're done.
Hey, welcome to trucks. Well, there's two words that strike fear into the heart of the average Diy hot rod builder. Those two words are custom paint.
The combination of those two words usually means a boatload of time invested or a ton of money invested or a generous contribution from both of those piles. Either way we're gonna show you today a way to get a custom paid effect without a lot of time, without a lot of money and believe it or not
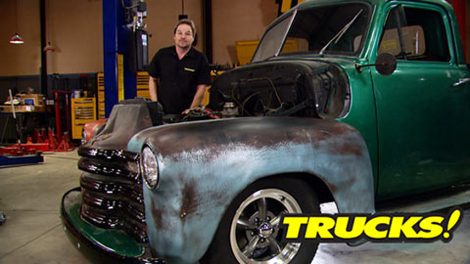
without a lot of skill. Just a little bit of creative imagination. Now, we've shown you before that, the paint on our 49 well, it's just kind of beat. It's chipped up, it's crack, it's fading, it's peeling, it's blistering and we haven't been very careful while we've been working on the rest of the components. So some of this is our fault. But we know we wanna put a paint job on this truck and we want it to look cool. So you got two ways to go, you can go full on restoration, strip it to metal and do all those time consuming expensive steps or you can paint over top of what's here, which is not always the best thing. So, we've got some decisions to make and we're kind of at a crossroads.
Now, if you remember
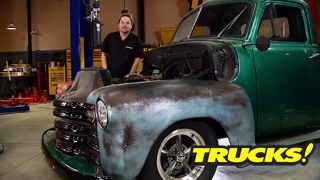
for the show where we frenched our headlights, well, we know that we found layer upon layer of very poorly done body work. And since we don't have the time that it's gonna take to strip this thing down to bare metal and we certainly don't want to put in the money or the resources that it's gonna take to do a high end paint job from the metal op. Well, we've got one choice and that's to work with what we've got. And since this paint job already looks old and weathered, we're just gonna give it a head start. Let me explain.
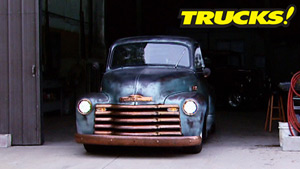
Now, I know you've heard the term patina thrown around in reference to antiques. Well, it's a naturally occurring oxidation that happens on any given surface. If you take a look at the truck we're looking at here. Well, we're New Mexico just by the magic of television. This truck belongs to Steve Silva in Santa Rosa, New Mexico. And it's naturally occurring sun fade. It looks awesome and it's a great,
great part of this hot rod truck. Well, there's a way to create this effect without using 40 years of time that we just don't have, but pay attention to one thing. Look at the horizontal surfaces, the top of the fender and the top of the hood, they're darker. That's because the sun shines down. You've got to pay attention to that when you're creating a patina
look or what we're going to call finna.
Now we're watching our panties all the way through this bill. So we want to use a wallet friendly paint system as well. You've seen to use duplicates
paint shop system on dust Bronco before we're gonna use that same system with a little bit different twist. The paint shop system has a great color selection and everything ships just like you see it and it's ready to shoot. So there's no mixing or ratios or anything like that involved. And the best thing is that they're reasonably priced and available just about anywhere you can buy auto parts. Now, normally we would use a pneumatic paint gun to apply this stuff. But this time, well, it's going to be different.
We are going old school.
No, I'm not kidding. And I know if you've ever seen an old truck or car painted with a roller
and brushes, will it build some serious texture and believe it or not? That's what we're after way different than a conventional paint job where you want it smooth.
Now, before we explain this in detail and we will just like any other paint job, we got some prep work to do.
I'm gonna say right off the bat that this is not a typical paint job, especially since we're masking it before it's even sanded.
And we're using 180 grit sandpaper to prep for a top coat, which is very unusual in that. It's very coarse and way too coarse for a conventional paint job. But for us, we don't want that paint to roll off the fender since it's going to be on so thick applied with a brush
and then a roller.
Now, those of you who paint have probably noticed that I didn't wipe the panel down. I didn't even blow the dust off. That's because we're trying to build texture any way we can get it. And that's why I'm using a random brush pattern.
This is why my wife never lets me paint the house.
Ok. With our black ground coat laid down, we wanna come across that and layer it up with a contrasting color. Undercoats are usually primer. A good primer color is red oxide. We start with the Hunger orange.
Now, one thing you want to make sure of is that you have a repeatable formula for a red primer color. We're using four parts Hugger orange and one part black.
This is just wrong.
One thing the brush did with the black is give us an irregular pattern with the roller. It's regular but it's crazy texture, which is gonna serve us well down the road in the next couple of steps and we're being random. We're leaving, runs in and all kinds of trash.
Now, we like the way Steve Silva's truck looked with a bit of a sea foam hue to it. So we're going to mix up a turquoise starting with silver
for the turquoise color. We're going to use five parts silver, one part blue and one part yellow, which is going to give us an aqua color that looks pretty good, mixed up but not so much on the fender. Now, instead of rolling it or brushing it on, we're going to use an el cheapo aerosol sprayer that you can pick up at just about any hardware store.
One of the best things about the paint we're using is that it's thin enough to spray through an aerosol can.
Now, if you're watching my technique, throw the rule book out, pay no attention to overlap. What we're doing is just giving a Miss coat in a random pattern over top of the other.
And yes, we're using white head or paint, but there's a method to the madness kind of like a reverse guide coat. The white will stick in the low areas that don't quite get sanded off and give a real
pined aged effect just just wait, you'll see it
up next. Get the look of 50 years worth of weathering in just two hours and later. Shoulder your way to a better air fuel mixture. Stay tuned.
Hey, welcome back. Well, if you're just joining us, you're probably wondering to yourself, what the heck have they done? This? Looks terrible. And you're right. It does. But it's a beautiful, kind of a terrible because what we've done is layer up different contrasting colors, using a roller, using a brush, leaving trash going against the grain of every professional painter in the world. Creating this wonderful effect that we're going to sand off and expose the layers that we've created. Now,
we're using a sanding block unlike our hand because now it matters if you sand with your fingers and leave finger groups, well, it doesn't give a natural aged effect. So we're using a soft sander and some 320 grit sandpaper.
And this is where the fun part starts.
Now, this is what 30 to 40 years of Mother Nature beating the heck out of a paint job looks like we're just gonna take some of the styling cues and copy it.
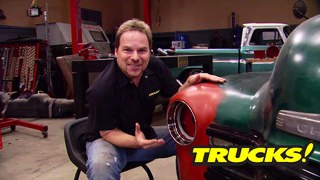
Now, the most noticeable thing on the actual faded fender is the giant sun damage spot on the very top. So we're going to recreate that first.
Now, obviously, we've sped the film up to show you more of the progression of the sanding through the layers rather than the technique because quite frankly, there is no technique.
Now with a 320 grit sandpaper, you're gonna move a lot of paint rather quickly despite the fact that it's in gobs and layers. So you gotta be careful. So you don't burn through completely.
Now, having said that if you do burn through your layers too much, well, you can just put more paint on.
The point is sand until it looks natural.
Now, as our layers get shaved down, you can see the black coming through the brown layer and you can see why we brush it and then rolled over top of that, the layers are exposed. And if you've ever walked through an antique junk yard, well, it kind of looks just like that.
I'm using a little bit of dish soap in with my sanding water to lubricate the sandpaper. This lets the surface get flushed off easier and you can see your progress just a little bit better. Also, your paper doesn't load up as much.
Now, using a coarser grip paper first allows you to create your design just a little bit faster. But a word of caution,
the sanding stretches from the 320 can actually be seen. So once you've recreated your age and you're happy with your shape, move to a finer grip. This will allow a more natural fate between your color transitions.
Now, I've been a professional painter for a long time. I'm not going to tell you how many years. But the point is I like it. I love the work. I love the sense of accomplishment and I love the sense of immediate gratification in a nice shiny paint job. But this, this, this is a whole different school of thought. Creating patina gives you complete artistic freedom and it gives you a chance to inject your own personality and sense of style into a paint job. Heck, you can even pay tribute to an actual antique truck, kind of like we're doing
ok. There are no real rules when it comes to creating a faded effect other than contrasting layers. But check this out. See, my line doesn't go straight across the fender. That's because the fender crowns this way and it crowns this way. So when the sunlight hits it, it's gonna take a piece of the side as well. So we're recreating a natural effect, kind of recreating nature, sort of scary. But man, it's fun
now with the fender dried off and giving it a closer look. We noticed that we send it down through to the original green color of the fender.
Now that's ok because it actually looked natural, but I wanted a complete separation from the original color of the truck. So we dusted on some black duplicate color semi gloss paint and forced to dry with a heat gun to give us a chance to go round to and totally cover up the green,
the white. Well, it just gives us kind of another dimension, a little bit more texture. Just another way to create more age
since the spray campaign is so much thinner than our brushed on black. I'm using 800 grit and just kind of hitting the edges to feather it in to the rest of the paint.
Now using red scuffing pads, you can eliminate any sheen that the finer grit sandpaper puts on a surface.
They'll also let you take care of any random shiny spots on the rest of the fender since shiny means new and we want it to look old.
So after toweling it off and forcing it dry with air, he allows us to give it a final inspection.
Yeah.
Yeah, we're done.
Now, let's take a look at what we started with. Here's our old paint, it's kind of faded. The color is not that great and we got primer spots and chips and all that kind of stuff all over it.
And here is what we ended up with and no joke. We've got two hours, we did the math, two hours in this fender. So you and a couple of buddies between sanding, brushing and rolling, letting it dry overnight, you could get a complete
Bono
paint job done on your project vehicle over the course of a weekend. Now, some people love this. Look. Some people hate it. They think you're trying to cheat and trying to fool people into thinking it's an antique, but you gotta consider no matter how you feel about it. It gives you another alternative as opposed to spending 100 grand on a street rod or spending a few 100 bucks on a cool looking paint job.
I wanna think about it.
After the break, these little parts will mix you up a better air fuel charge for your engine. Stick around.
Hey guys, welcome back to the shop. Now, if you remember the last time we had our 4.6 L stroke Cherokee on horsepower
dyno. Well, we were rather disappointed with the less than stellar rear wheel horsepower numbers. Now, we're gonna excuse some of that or attribute some of that to parasitic drive train losses like our automatic transmission
and our 33 inch tall tires. But we still think we can improve on those low numbers. So we swapped some parts around, wanted to show you what we did
and to help this thing exhale. We started with Edelbrock Tes coated header. Now, these are designed for 91 and up model years. So it did require a slight modification to the down pipe. No big deal though.
Now, we did keep our original fuel rail as well as the 24 pound injector and to get it to work with our new manifold, we simply welded a tab to the original bracket.
Now getting our old style TPS to work with our ho throttle body was a little bit more of a challenge. We used some chrome spacers and the original actuating lever from the old throttle body welded it to the new throttle body shaft.
We wanted to reuse the short original throttle cable. So we made up this bracket that attaches to the side of the manifold and under one of the bolts used to secure the throttle body. Now, we had to relocate the power steering pump with the new intake manifold, but we were able to reuse the original fluid lines
and the replacement pump and bracket came from J and W with the new intake manifold.
And now all we've got left to do to finish up. Our intake swap is get the correct length serpentine belt. We should be back up and running, hopefully making more power and letting our Stroker engine breathe a little bit better.
Now, when we first went over to the horsepower dyno, we ran it as assembled. We didn't have any ability to dial in the air fuel ratio whatsoever. It probably cost us a few ponies. So when we go back over to the
dyno,
we want to make sure we can dial in the tune a little bit, but we don't want to spend a ton of money to do it. So we're gonna show you a way to spend 10 or 15 bucks at the electronic store. So you can make a device to trick the computer dial in the tune.
And what we're going to do is basically make an adjustable map sensor. Now, a map sensor tells the ECU or engine control unit how much pressure is in the intake manifold. And with this device, we're going to be able to alter that signal and full it into richening up or leaning out the air fuel mixture.
Now, to construct this device, you're going to need either a preprinted circuit board or a terminal strip
as well as a 220 ohm resistor, a heat sink toggle switch, a little voltage regulator and a multi term potential
meer
rated at 1000 ohms. So you can make adjustments.
Now, the leg nearest the adjustment screw doesn't get used. Now, if you're worried about specifics, we're gonna have a diagram posted online on the truck's website to help you out
and with the potential
etter soldered in place, go ahead and solder in the 220 ohm resistor.
The designation for our adjustable voltage regulator is LM 317 T.
I've got a little solder bridge right here where I accidentally touched the iron down and the solder flowed between these two traces. But in this case, it doesn't really matter because this trace is unused, just make sure you don't get a solder bridge that's gonna affect your circuit
and with all the components in place, we need to connect a few wires so we can attach our voltage regulator to the vehicle.
Now, if working on this tiny PC board looks a little tedious. Well, you can always use the terminal strip we showed you in the beginning.
Now, when soldering like this, you need to heat up the base metal and the component you're trying to attach and let the solder get drawn into the heat rather than glob the solder on top and try to work it down into the metal.
Now, when reducing voltage, the adjustable voltage regulator is gonna put off a little bit of heat. So to keep that to a minimum, we attach it to a heat sink using a rivet.
Hey, welcome back to trucks. Well, we've got our little map sensor, voltage adjuster finished up, got it mounted in this little plastic case. We even have a toggle switch so we can switch back and forth between the factory five volt setting or the modified signal. And we're gonna make an adjustment just by turning this little screw in the potential
meer.
All right, there's a five volt reference from the computer
switch over to a modified signal,
2.3
with the turn of a dial.
We can fool the computer into richening up the mixture
or leaning it out.
See what the range is.
Yeah, that's plenty.
Now, we can go over seven volts. We'll never even need it that high.
All right. Now, we'll tidy up this wiring, get the box mounted about here on the firewall. We'll have some budget tunable built into our EF I system.
Now, Ryan and I are both a se certified technicians. And while we're up in Harlem paying off this Cherokee, we met Ronnie Daniels, a shop teacher with an interesting hands on approach to teaching class.
Now, this rig is actually an ongoing class project. Everything about it is budget built and most of it is student built.
It started out as an international scout chassis as home built coil overs. Of course, the obligatory winch and it sports V8 Chevrolet power with alternative fuel in the form of propane.
Now to help navigate this rig just about anywhere they want to put, it is full hydro steering front and rear. Now, when it comes to bump stops, the kids got creative and invented their own by stacking valve springs inside the cylinders and man, it works great. We've been working on it for about two years now as a class project. To my knowledge, I think we're if not the first one of the very first rock racing teams to, to be established with a se and uh the automotive program is a program that
usually excels with students demand. Uh
But this just furthers that, that much more.
All right. Now, if you got any questions about Kevin's cool
finna paint job or you just wanna take a closer look at the wire diagram for this thing. Go to power block tv.com and check out the truck's website.
Hey guys, thanks for watching. See you in a week.
Show Full Transcript
Tina.
We're throwing out the painting rule book to show you how to mimic what takes Mother Nature 50 years to do.
And with just 12 bucks of electronic parts, you can make an air fuel tuner for your map equipped ride. It's all today here on talks.
Yeah, we're done.
Hey, welcome to trucks. Well, there's two words that strike fear into the heart of the average Diy hot rod builder. Those two words are custom paint.
The combination of those two words usually means a boatload of time invested or a ton of money invested or a generous contribution from both of those piles. Either way we're gonna show you today a way to get a custom paid effect without a lot of time, without a lot of money and believe it or not
without a lot of skill. Just a little bit of creative imagination. Now, we've shown you before that, the paint on our 49 well, it's just kind of beat. It's chipped up, it's crack, it's fading, it's peeling, it's blistering and we haven't been very careful while we've been working on the rest of the components. So some of this is our fault. But we know we wanna put a paint job on this truck and we want it to look cool. So you got two ways to go, you can go full on restoration, strip it to metal and do all those time consuming expensive steps or you can paint over top of what's here, which is not always the best thing. So, we've got some decisions to make and we're kind of at a crossroads.
Now, if you remember
for the show where we frenched our headlights, well, we know that we found layer upon layer of very poorly done body work. And since we don't have the time that it's gonna take to strip this thing down to bare metal and we certainly don't want to put in the money or the resources that it's gonna take to do a high end paint job from the metal op. Well, we've got one choice and that's to work with what we've got. And since this paint job already looks old and weathered, we're just gonna give it a head start. Let me explain.
Now, I know you've heard the term patina thrown around in reference to antiques. Well, it's a naturally occurring oxidation that happens on any given surface. If you take a look at the truck we're looking at here. Well, we're New Mexico just by the magic of television. This truck belongs to Steve Silva in Santa Rosa, New Mexico. And it's naturally occurring sun fade. It looks awesome and it's a great,
great part of this hot rod truck. Well, there's a way to create this effect without using 40 years of time that we just don't have, but pay attention to one thing. Look at the horizontal surfaces, the top of the fender and the top of the hood, they're darker. That's because the sun shines down. You've got to pay attention to that when you're creating a patina
look or what we're going to call finna.
Now we're watching our panties all the way through this bill. So we want to use a wallet friendly paint system as well. You've seen to use duplicates
paint shop system on dust Bronco before we're gonna use that same system with a little bit different twist. The paint shop system has a great color selection and everything ships just like you see it and it's ready to shoot. So there's no mixing or ratios or anything like that involved. And the best thing is that they're reasonably priced and available just about anywhere you can buy auto parts. Now, normally we would use a pneumatic paint gun to apply this stuff. But this time, well, it's going to be different.
We are going old school.
No, I'm not kidding. And I know if you've ever seen an old truck or car painted with a roller
and brushes, will it build some serious texture and believe it or not? That's what we're after way different than a conventional paint job where you want it smooth.
Now, before we explain this in detail and we will just like any other paint job, we got some prep work to do.
I'm gonna say right off the bat that this is not a typical paint job, especially since we're masking it before it's even sanded.
And we're using 180 grit sandpaper to prep for a top coat, which is very unusual in that. It's very coarse and way too coarse for a conventional paint job. But for us, we don't want that paint to roll off the fender since it's going to be on so thick applied with a brush
and then a roller.
Now, those of you who paint have probably noticed that I didn't wipe the panel down. I didn't even blow the dust off. That's because we're trying to build texture any way we can get it. And that's why I'm using a random brush pattern.
This is why my wife never lets me paint the house.
Ok. With our black ground coat laid down, we wanna come across that and layer it up with a contrasting color. Undercoats are usually primer. A good primer color is red oxide. We start with the Hunger orange.
Now, one thing you want to make sure of is that you have a repeatable formula for a red primer color. We're using four parts Hugger orange and one part black.
This is just wrong.
One thing the brush did with the black is give us an irregular pattern with the roller. It's regular but it's crazy texture, which is gonna serve us well down the road in the next couple of steps and we're being random. We're leaving, runs in and all kinds of trash.
Now, we like the way Steve Silva's truck looked with a bit of a sea foam hue to it. So we're going to mix up a turquoise starting with silver
for the turquoise color. We're going to use five parts silver, one part blue and one part yellow, which is going to give us an aqua color that looks pretty good, mixed up but not so much on the fender. Now, instead of rolling it or brushing it on, we're going to use an el cheapo aerosol sprayer that you can pick up at just about any hardware store.
One of the best things about the paint we're using is that it's thin enough to spray through an aerosol can.
Now, if you're watching my technique, throw the rule book out, pay no attention to overlap. What we're doing is just giving a Miss coat in a random pattern over top of the other.
And yes, we're using white head or paint, but there's a method to the madness kind of like a reverse guide coat. The white will stick in the low areas that don't quite get sanded off and give a real
pined aged effect just just wait, you'll see it
up next. Get the look of 50 years worth of weathering in just two hours and later. Shoulder your way to a better air fuel mixture. Stay tuned.
Hey, welcome back. Well, if you're just joining us, you're probably wondering to yourself, what the heck have they done? This? Looks terrible. And you're right. It does. But it's a beautiful, kind of a terrible because what we've done is layer up different contrasting colors, using a roller, using a brush, leaving trash going against the grain of every professional painter in the world. Creating this wonderful effect that we're going to sand off and expose the layers that we've created. Now,
we're using a sanding block unlike our hand because now it matters if you sand with your fingers and leave finger groups, well, it doesn't give a natural aged effect. So we're using a soft sander and some 320 grit sandpaper.
And this is where the fun part starts.
Now, this is what 30 to 40 years of Mother Nature beating the heck out of a paint job looks like we're just gonna take some of the styling cues and copy it.
Now, the most noticeable thing on the actual faded fender is the giant sun damage spot on the very top. So we're going to recreate that first.
Now, obviously, we've sped the film up to show you more of the progression of the sanding through the layers rather than the technique because quite frankly, there is no technique.
Now with a 320 grit sandpaper, you're gonna move a lot of paint rather quickly despite the fact that it's in gobs and layers. So you gotta be careful. So you don't burn through completely.
Now, having said that if you do burn through your layers too much, well, you can just put more paint on.
The point is sand until it looks natural.
Now, as our layers get shaved down, you can see the black coming through the brown layer and you can see why we brush it and then rolled over top of that, the layers are exposed. And if you've ever walked through an antique junk yard, well, it kind of looks just like that.
I'm using a little bit of dish soap in with my sanding water to lubricate the sandpaper. This lets the surface get flushed off easier and you can see your progress just a little bit better. Also, your paper doesn't load up as much.
Now, using a coarser grip paper first allows you to create your design just a little bit faster. But a word of caution,
the sanding stretches from the 320 can actually be seen. So once you've recreated your age and you're happy with your shape, move to a finer grip. This will allow a more natural fate between your color transitions.
Now, I've been a professional painter for a long time. I'm not going to tell you how many years. But the point is I like it. I love the work. I love the sense of accomplishment and I love the sense of immediate gratification in a nice shiny paint job. But this, this, this is a whole different school of thought. Creating patina gives you complete artistic freedom and it gives you a chance to inject your own personality and sense of style into a paint job. Heck, you can even pay tribute to an actual antique truck, kind of like we're doing
ok. There are no real rules when it comes to creating a faded effect other than contrasting layers. But check this out. See, my line doesn't go straight across the fender. That's because the fender crowns this way and it crowns this way. So when the sunlight hits it, it's gonna take a piece of the side as well. So we're recreating a natural effect, kind of recreating nature, sort of scary. But man, it's fun
now with the fender dried off and giving it a closer look. We noticed that we send it down through to the original green color of the fender.
Now that's ok because it actually looked natural, but I wanted a complete separation from the original color of the truck. So we dusted on some black duplicate color semi gloss paint and forced to dry with a heat gun to give us a chance to go round to and totally cover up the green,
the white. Well, it just gives us kind of another dimension, a little bit more texture. Just another way to create more age
since the spray campaign is so much thinner than our brushed on black. I'm using 800 grit and just kind of hitting the edges to feather it in to the rest of the paint.
Now using red scuffing pads, you can eliminate any sheen that the finer grit sandpaper puts on a surface.
They'll also let you take care of any random shiny spots on the rest of the fender since shiny means new and we want it to look old.
So after toweling it off and forcing it dry with air, he allows us to give it a final inspection.
Yeah.
Yeah, we're done.
Now, let's take a look at what we started with. Here's our old paint, it's kind of faded. The color is not that great and we got primer spots and chips and all that kind of stuff all over it.
And here is what we ended up with and no joke. We've got two hours, we did the math, two hours in this fender. So you and a couple of buddies between sanding, brushing and rolling, letting it dry overnight, you could get a complete
Bono
paint job done on your project vehicle over the course of a weekend. Now, some people love this. Look. Some people hate it. They think you're trying to cheat and trying to fool people into thinking it's an antique, but you gotta consider no matter how you feel about it. It gives you another alternative as opposed to spending 100 grand on a street rod or spending a few 100 bucks on a cool looking paint job.
I wanna think about it.
After the break, these little parts will mix you up a better air fuel charge for your engine. Stick around.
Hey guys, welcome back to the shop. Now, if you remember the last time we had our 4.6 L stroke Cherokee on horsepower
dyno. Well, we were rather disappointed with the less than stellar rear wheel horsepower numbers. Now, we're gonna excuse some of that or attribute some of that to parasitic drive train losses like our automatic transmission
and our 33 inch tall tires. But we still think we can improve on those low numbers. So we swapped some parts around, wanted to show you what we did
and to help this thing exhale. We started with Edelbrock Tes coated header. Now, these are designed for 91 and up model years. So it did require a slight modification to the down pipe. No big deal though.
Now, we did keep our original fuel rail as well as the 24 pound injector and to get it to work with our new manifold, we simply welded a tab to the original bracket.
Now getting our old style TPS to work with our ho throttle body was a little bit more of a challenge. We used some chrome spacers and the original actuating lever from the old throttle body welded it to the new throttle body shaft.
We wanted to reuse the short original throttle cable. So we made up this bracket that attaches to the side of the manifold and under one of the bolts used to secure the throttle body. Now, we had to relocate the power steering pump with the new intake manifold, but we were able to reuse the original fluid lines
and the replacement pump and bracket came from J and W with the new intake manifold.
And now all we've got left to do to finish up. Our intake swap is get the correct length serpentine belt. We should be back up and running, hopefully making more power and letting our Stroker engine breathe a little bit better.
Now, when we first went over to the horsepower dyno, we ran it as assembled. We didn't have any ability to dial in the air fuel ratio whatsoever. It probably cost us a few ponies. So when we go back over to the
dyno,
we want to make sure we can dial in the tune a little bit, but we don't want to spend a ton of money to do it. So we're gonna show you a way to spend 10 or 15 bucks at the electronic store. So you can make a device to trick the computer dial in the tune.
And what we're going to do is basically make an adjustable map sensor. Now, a map sensor tells the ECU or engine control unit how much pressure is in the intake manifold. And with this device, we're going to be able to alter that signal and full it into richening up or leaning out the air fuel mixture.
Now, to construct this device, you're going to need either a preprinted circuit board or a terminal strip
as well as a 220 ohm resistor, a heat sink toggle switch, a little voltage regulator and a multi term potential
meer
rated at 1000 ohms. So you can make adjustments.
Now, the leg nearest the adjustment screw doesn't get used. Now, if you're worried about specifics, we're gonna have a diagram posted online on the truck's website to help you out
and with the potential
etter soldered in place, go ahead and solder in the 220 ohm resistor.
The designation for our adjustable voltage regulator is LM 317 T.
I've got a little solder bridge right here where I accidentally touched the iron down and the solder flowed between these two traces. But in this case, it doesn't really matter because this trace is unused, just make sure you don't get a solder bridge that's gonna affect your circuit
and with all the components in place, we need to connect a few wires so we can attach our voltage regulator to the vehicle.
Now, if working on this tiny PC board looks a little tedious. Well, you can always use the terminal strip we showed you in the beginning.
Now, when soldering like this, you need to heat up the base metal and the component you're trying to attach and let the solder get drawn into the heat rather than glob the solder on top and try to work it down into the metal.
Now, when reducing voltage, the adjustable voltage regulator is gonna put off a little bit of heat. So to keep that to a minimum, we attach it to a heat sink using a rivet.
Hey, welcome back to trucks. Well, we've got our little map sensor, voltage adjuster finished up, got it mounted in this little plastic case. We even have a toggle switch so we can switch back and forth between the factory five volt setting or the modified signal. And we're gonna make an adjustment just by turning this little screw in the potential
meer.
All right, there's a five volt reference from the computer
switch over to a modified signal,
2.3
with the turn of a dial.
We can fool the computer into richening up the mixture
or leaning it out.
See what the range is.
Yeah, that's plenty.
Now, we can go over seven volts. We'll never even need it that high.
All right. Now, we'll tidy up this wiring, get the box mounted about here on the firewall. We'll have some budget tunable built into our EF I system.
Now, Ryan and I are both a se certified technicians. And while we're up in Harlem paying off this Cherokee, we met Ronnie Daniels, a shop teacher with an interesting hands on approach to teaching class.
Now, this rig is actually an ongoing class project. Everything about it is budget built and most of it is student built.
It started out as an international scout chassis as home built coil overs. Of course, the obligatory winch and it sports V8 Chevrolet power with alternative fuel in the form of propane.
Now to help navigate this rig just about anywhere they want to put, it is full hydro steering front and rear. Now, when it comes to bump stops, the kids got creative and invented their own by stacking valve springs inside the cylinders and man, it works great. We've been working on it for about two years now as a class project. To my knowledge, I think we're if not the first one of the very first rock racing teams to, to be established with a se and uh the automotive program is a program that
usually excels with students demand. Uh
But this just furthers that, that much more.
All right. Now, if you got any questions about Kevin's cool
finna paint job or you just wanna take a closer look at the wire diagram for this thing. Go to power block tv.com and check out the truck's website.
Hey guys, thanks for watching. See you in a week.