More Super Dually Episodes

Trucks! Builds

Parts Used In This Episode

Flowmaster
Exhaust, American Thunder, Turbo-Back, Aluminized Steel, Polished Tip, Dodge, Ram 2500 3500 Truck, 5.9L Diesel
Flowmaster
Muffler, Pro Series, 4.0 in. Inlet/4.0 in. Outlet, Steel, Black Aluminized, 24.0 in. Length, Each
Loctite
Threadlocker, 271, Heavy-Duty, Red, 36 ml, Each
Summit Racing
Cleaner, Single Stage, Surface Wash, 1 Qt, Each
Summit Racing
Combo, 1 Gallon Paint, 1 qt. Activator, 1 qt. Reducer, Satin, Hot Rod Black Kit
Summit Racing
Epoxy Hardener, 2-Stage, 1 Quart, Each
Summit Racing
Paint, 2-Stage, Epoxy Primer, Flat, Gray, 1 Gallon, Each
LMC Truck
Fender apron, left hand, Ford truck, Bronco 73-79
LMC Truck
Fender apron, right hand, Ford truck, Bronco 73-79
LMC Truck
Headlight bucket, left hand, Ford truck, Bronco, 78-79
LMC Truck
Headlight bucket, right hand, Ford truck, Bronco, 78-79
Video Transcript

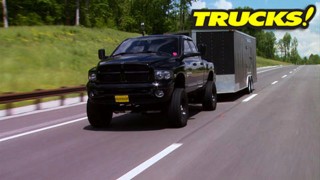
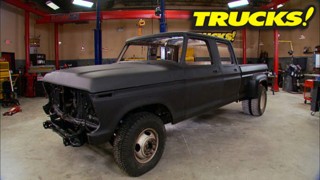
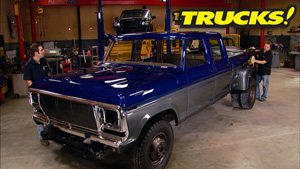
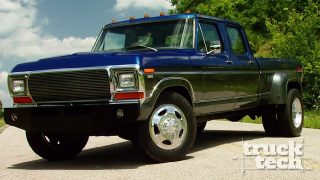
Today, our Ford Dodge hybrid tow rig is getting even closer to reality. We're putting in an extended steering shaft, new headlight buckets paid under the hood and planning out a new exhaust for project super duly. It's all today here on trucks.

Hey guys, welcome to trucks. Well, we've got our little super duly back in the shop. That's because we've made good progress on our other long term projects. Our 49 Chevy class six is just about finished up and rolling thunder is coming along nicely, but we didn't want to get ahead of ourselves because we're

need something to tow it with.

So that's why we made some room for our hybrid for Dodge pickup truck. Now we're gonna get started by trying to hook up our swapped in Dodge steering column,

do something about this mess of wires and see if we can get our Dodge instrument cluster fit into the Ford dash.

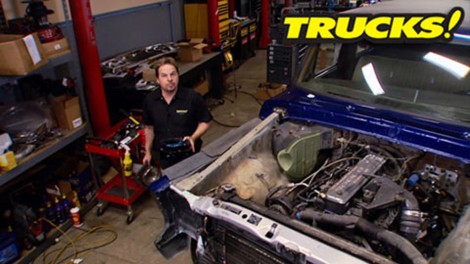
And just because we got a nice slick coat of paint on the outside doesn't mean that we're done with the painting because we want it to look as good when we open the hood as it does with the hood closed So we're gonna replace these nasty hold up, wrinkled aprons with some brand new ones we got from L MC and

our hybrid core support. It needs a bit of primer and a bit of paint. Also, some of the early 79 trucks had the round headlights. As did ours, we wanna convert to the square to the square headlights. So we picked up these buckets from L MC but

because we got a little bit of a mixture here, we're gonna have to do some fabrication.

It's no big deal. We'll show you how.

Wow.

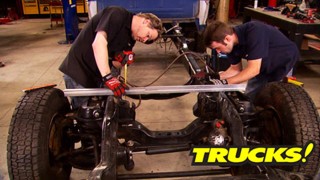
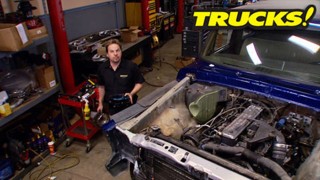
Now, with the dog house out of the way, it's a lot easier to get to these parts. Now, if you remember the steering column that we swapped into this old Ford was the Dodge steering column. We've got it attached to the Dodge steering shaft. We've obviously got the dodge steering box down on the frame. Now, the steering shaft itself is collapsible and that's a safety feature. Should you ever get into a head on collision? That steering shaft will collapse instead of sending it through the cab and turning you into a steering shaft, kebab. So that's definitely a feature we wanna retain. Now, it should be pretty simple. It's gonna come in here lengthen the lower portion of the shaft by about five or six inches should be a piece of cake.

Now, when picking a spot to make the cut on our steering shaft, we couldn't just pick it at random, we had a couple of things to consider. First, we have to leave room for the steering shaft to actually collapse. And second, well, this joint is isolated by rubber to dampen vibrations. We're obviously gonna have to do some welding. So we don't wanna put too much heat, too close to that rubber.

Now, since steering is kind of an important part on a vehicle, but we don't want to skimp on this fix. So we picked up some dom that matches the outside diameter of our steering shaft and then sleeved it with some smaller diameter tubing.

That way we can both plug weld it and perimeter weld it, making this fix stronger than the rest of the steering shaft and something we can feel secure with.

Now, just like a drive shaft, the steering shafts, U joints are indexed

and we want to make sure it goes back together the way it came apart. So we drew a line down the steering shaft so we can make sure it did.

Now, the plug welds are obviously from a mig welder, but we switched over to tig welding to do the rest of it.

And that's for a couple of reasons. One, we want to limit the heat input. Remember, we've got a rubber isolated U joint and two, well, it limits the amount of post weld clean up. We don't have to sand this down to make it look good. A

quick coat of paint will handle that.

Now, we could have ordered up a custom steering shaft, but that would have cost money. This just costs us about 30 minutes of our time and some scrap materials

and don't forget your lock tight on bolts like these,

you're gonna need them.

Cool.

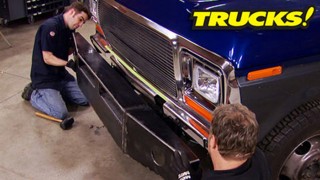
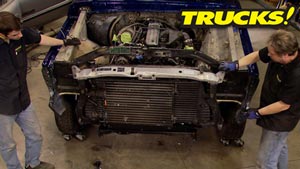
Now, like we told you, we're updating from the rounder, early 78 headlights to the more modern and more visible square headlights and normally this would be just a bolt in thing. We wouldn't waste your time with it on TV. However, with our hybrid core support, it becomes a little bit more of an issue. Check it out. Now, we know our

light buckets in the right place because of the tab on the grill and the bottom bolts locating it. But these two tabs normally bolt into the top of the Ford radiator support, which has changed. So what we're gonna do is get rid of these guys, make a nice top cover plate and bolt it into these two existing bolt holes and try and get a factory look out of it

with the tabs cut off. We're gonna make this really simple just using a simple card stock template.

I'm gonna locate onto the two existing core support bolts,

even though this is simple, it's going to be very effective and do exactly what we want it to do.

But first we'll grind the top of the headlight bucket to bear steel because we're attaching our support plate with rosette welts

now utilizing existing bolts is nothing new. It just makes things easier and it keeps you from guessing where those bolt holes need to be and making sloppy adjustments

with it tightened down. We know exactly where our rosette welts need to be

is

once we know the welds are good, we'll dress them down with a 24 grid disk just to tidy it up and make it look a little more finished.

C

So now our headlight bucket is mounted rock solid with factory fasteners. And more importantly, we can aim it so we can see at night and the bucket itself is removable and it didn't really take us that much longer to do it the right way.

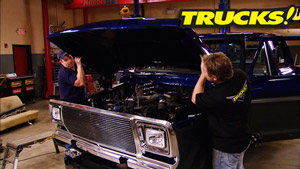
Hey, welcome back to trucks. We're working on projects super duly making sure that when we open up the hood, everything looks as slick, shiny and professional as the rest of the paint shop. Now, we like it. When you guys comment on the shows, we listen to it because it helps us make better shows. One comment that we hear out on the street over and over and over again is that you make it look too easy on TV. Well, we're taking that to heart. We're gonna

slow down and show you the process and show you the problem solving because even if you have all this big bad equipment, you still run into trouble. And I've always said that the biggest difference between a paint gun owner and a painter is the ability to solve the problems that you run into. So we're gonna take a little more time, show you all the steps that it takes to eliminate the problems before they start. And that starts with these panels right here.

These aprons are brand new from L MC and they come with this EDP coating on them. You might be saying to yourself why prep that? It looks like a top coat. Well, a couple of different reasons.

It's very thin.

It's a good primer, but it's a thin primer. Look right here. Even with the scuff pad, I'm burning through the edge and right here this scratch when I go to feather and level that scratch out.

Well, I'm down to bare steel. So don't listen to the internet forms and say you gotta strip all of this to bare metal. You don't,

but you do have to prep it properly and get it ready for a coat of sealer and then paint.

Now these hood hinges are prepped in the media blast cabinet. We've got aluminum oxide beads that profile the metal nicely and strip the paint they're prepped completely. So we don't need the red scuffing pad on these. However, I'm wearing gloves, your bare fingers will leave skin oils and acids on top of this stuff and it'll cause hot spots, fingerprints coming through and it'll make a mess. Your paint could literally bubble and flake off. So whenever you're handling fresh blasted parts or raw steel parts, wear some gloves.

Now, these are new headlight buckets and they consist of e coated metal and raw steel that we use for the top mount of the bucket itself. Now, we need to cover these up with a primer that's compatible to both surfaces and we'll talk more about that later, but check this out

right here is where I marked to drill my holes for the mounting bolts. Now, we used an ink marker for these. We use these a lot in here and I use it a lot

in my shop at home. However, I've learned the hard way that if you prime over top of that, that ink is very strong and it can wick up through your paint. Like I said, I've paid the price for that lesson. So if you're gonna use an ink marker for marking out and templating,

that's fine. You can use it all day long. Just make sure that you get rid of that ink before you go through the painting and priming process.

Now, this is the factory intercooler that's going back in super duly. It's powder coated from the factory. It doesn't look too bad, but it's got a couple of nicks on it. So we're gonna shoot it just for good measure. So it looks nice. However, before you touch it with a scuff pad, remember this thing's been in a diesel truck with over 100,000 and miles on it. It's coated in this schmutz, this diesel fuel stuff that's going to react with your paint. So before you prep, you got to prec clean.

Now, every paint manufacturer known to man has their own version of a pre cleaner. So to sum it and it's a good one, but we're going to use it

in this pump sprayer instead of out of the can. So we don't pour it all over the floor pump sprayer is really nice because you can build pressure. It's non aerosol. So it's environmentally safe and it allows you to do this

and soak that layer of contamination of your parts.

Look at that,

that's diesel fuel. You do not want to put paint over top of that. Look at that.

So what you want to do is repeat that process until your rag is completely clean when you pull it off of there. And then only then are you ready for a scuffing pad?

Now, I've prepped every single piece that we're gonna spray short of the sandblast itself with a red scuffing pad. These are color coded, the red being the most coarse. It's gonna give us the tooth that we want for the primer and then the paint to stick. But there's some other tools that you might want to keep around your paint or your body shop, single edge razor blades. Well, they can really come in handy for detail masking like we're gonna have to do on these ID tags. We wanna preserve this information.

So

we'll just trim the mask and tape around them.

Next time you see these parts,

we'll show you how to put a great paint job right over top.

Oops, I got a holiday.

See, problem. We showed you.

Hey,

welcome back to trucks. We've got all our parts mounted, wiped down, scuffed down tact.

Everything's ready to shoot. Now, let's talk about what we're going to put on top of it

since we've got summit racing's paint system on the body of super duly. We're going to stay with that theme starting off with their Epoxy primer, which is a great ground coat coating for both bare metal and prepped painted parts

on top of that. We're gonna use their hot rod black, which is a true urethane, meaning it's got a catalyst. So it'll be really strong. Plus with the semi flat, it'll have a nice sexy sheet. It look really good.

I've already got my Sealer mixed into the cup.

We're ready to shoot

one more thing.

This,

oh, it's a good dust mask.

It's not paint protection.

Ok. I've got all the parts tacked off. But look at this paint booth. Look at the hose. Look at the filters between Rick and Tim. Strange with search and restore muscle car

messy, Marvins. Sorry guys, you just are using an old tack rag.

Take your air hose off.

Oxy makes a great Sealer. For a couple of different reasons. Not only does it stick extremely well to both painted powder coated and bare steel parts, but it's also got a several day long open window where you don't even have to sand it to top coat.

Now, whenever you're painting a radiator or an AC cooling system like this, don't overcoat it give it a mis coat. You want the paint to stick, you don't want to restrict any kind of an airflow. So use a light touch.

Now, we're getting great coverage with just a single coat with this sealer. So there's no need to double coat. It just adds time to the drying and of the curing process. However, when you're working with bare steel parts like these hood hinges, make sure that you flex the hinges and cover all the bare steel. You've only got one chance to seal and the top coat may not stick to the sandblasted metal.

And as much of a fashion statement as the sexy blue gloves are, they're there for your protection. Just get used to wearing them.

The sealer needs to sit for 30 minutes before we talk code.

That's just about enough time to clean your paint gun and mix your paint, which is a three step system, paint

catalyst and reducer in a 4 to 1 to 1 ratio. It's four parts paint, one part catalyst, one part reducer.

I

guess it's 100% necessary to attack off these parts just because they're under hood parts, brackets and stuff. It's a great habit to get into, to run attack rag over your work pieces

because it gives you one final opportunity to make sure your parts are ready for paint and give it one final inspection.

Now, with this paint, of course, it's black, it covers extremely well, but we're putting two coats on because that's what the P sheet says.

Now, just like with the sealer on the inter cooler and the ac condenser, I'm just painting the hard metal parts and staying off of the fins. You don't want to build a paint up or restrict air flow,

the rest of it two full wet coats

that way it flows out nicely and you get the strength and protection that you need from a two coat catalyze system.

Now, as goofy as the safety gear looks, it allows me to focus on painting and that's what we're doing in the paint booth. Think about it.

Ok. Here's one of those instances where not everything goes. Right.

I'm out of paint

and I'm not done painting

a quick little overmix and we're gonna be fine.

It's fresh enough to where it'll blend back in. But you know, you just got to expect it sometimes.

Hey, guys, welcome back to the shop. Now, this blower cover plate that Kevin was painting turned out great.

The problem is while he was out there making it look good. I was in here making the executive decision that we were gonna ditch this entire Ford HV AC box. So Kevin good operation, but the patient died.

Now, we're going dodge HV AC box for a couple of reasons. One, it's a lot more compact than all this Ford Mess. And two, we're gonna have direct connections to both our AC and our heater lines and more importantly, the wiring harness. So the only challenge we have is making this fit in the Ford firewall. Now, speaking of wiring harness, check this out,

like we told you, we want to keep the steel for dash, but we also want to use the Dodge instrument cluster because the wiring harness plugs right into it. So we've got to come up with a weight for the two to work together.

What we did, we trimmed the bezel portion out of the rest of the Dodge dash and

we can use it come in here and make a flatt filler plate so we can recess the cluster and this trim panel into it. We'll have a little extra real estate over here. Maybe we can put a couple of gauges or a dash V in there. Either way should look pretty sharp for now, we wanna show you something else we wanna add to this Cummins Ford Dodge truck.

Now, on our 97 Dodge,

well,

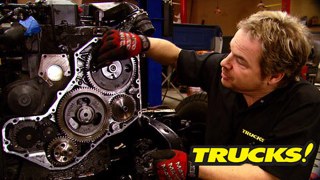
here's all that's left of the factory exhaust system. It's just the down pipe, not even a muffler. Now, it is three inches in diameter. And that sounds like a pretty good size, especially you guys used to gas engine, exhaust system sizes, but diesels flow a lot of air and we plan on making a fair amount of power. So we wanted to upgrade to a four inch system from Floor

Master that we picked up from summit racing. Now, the flange will hook directly to our factory installed turbo but it quickly next up to the full four inch diameter.

Now, for a muffler, we picked up a four inch flow Master Pro series and with its cool shell design, it will keep the heat inside of the exhaust system instead of radiating and heat soaking everything around it.

This pro

muffler will also give us moderate to aggressive sound levels outside of the truck, but it will limit interior resonance. Now, if you've ever spent any real time in a car or pickup truck that has a lot of exhaust drone

that can wear you out, make you tired and drive you crazy. So that's something we want to avoid since we're gonna be spending a lot of time inside this Ford pickup.

And since this four inch aluminized system is completely mandrel bent. It should support multiple power levels including where we are right. Now.

The factory 59 and the 97 pickups is rated at 215 horsepower. And with the mild modifications we've made to the engine so far, we should just be a little bit better than that. Now,

since we're not making a competitive sled puller out of this truck, we're just after a solid but powerful tow rig,

the four inch system should be plenty

now to finish things off. It's got a nice polished five inch tip which makes it almost as big as your teenage neighbor's four cylinder Honda Muffler.

But it should look nice, especially alongside our super slick gray and blue paint job

guys. Thanks for watching trucks. See you next week and check us out on Power Block tv.com.
Show Full Transcript