More Super Dually Episodes

Trucks! Builds

Parts Used In This Episode

Titan Fuel Tanks
52 Gallon Extra heavy duty cross-linked polyethylene fuel tank fits 01-09 crew cab short bed Chevy/GMC pickups.
Alcoa Wheel Products
Revolver Series wheels with easy to clean Dura-Bright technology or premium chrome finish options.
O'Reilly Auto Parts
Motor Mount (2)
O'Reilly Auto Parts
Replacement transmission mount.
O'Reilly Auto Parts
U-Joint
Video Transcript

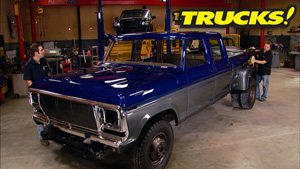
Today, we're back at work on our diesel duly body swap

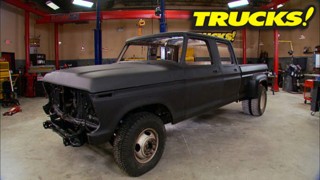
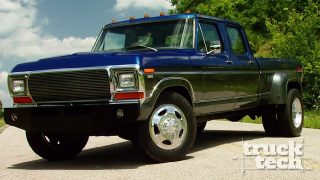
will not our 79 Ford bed and cab on our 97 Dodge frame.

Then we move the engine back just enough to make everything.

It's all today here on trucks.

Hey, welcome to trucks. Well, today we're back on project super duly, which really started out as a discussion between me and Ryan talking about how much we wanted a diesel tow rig to pull our projects around and take them to payoffs and even go get new trucks to work on. But we did not want to spend $50,000 or more buying a brand new one because this is trucks and we can build one and save money doing it. We both really like the styling of these mid

seventies Ford. So this is what started it all off. But as much as we like the look of that old truck, we didn't want to be stuck with seventies era engineering. We wanted more modern suspension steering and brakes. So rather than swap a diesel engine into that old Ford. Well, we thought we'd replace the whole chassis with this one out of a 97 Dodge. It's complete with the Cummins turbo diesel engine and heavy duty manual five speed transmission.

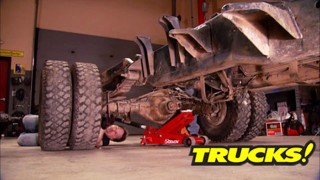
Now, we didn't just randomly grab the first diesel truck frame that we came across at the Recycler. The fact is that we did a bunch of research and found that this 97 Dodge extended cab, long bed frame is less than an inch difference in wheel base than our crew cab short bed for making them perfect for a body swap. We did some upgrades and if you've been watching the shows, you know that we used a day 80 axle along with the duly front hubs, giving us six interchangeable wheels true duly form. Now,

unlike the Ford check, this frame out. Ford is regular C channel and just a straight beam. This one steps down two different times. So we're kind of tied to this upper length right here unless of course we want to channel the bed, but that's gonna sacrifice cargo room and is way too much work for what we want to accomplish. So the bed is tied to sitting down here. So our plan is to center the wheel arches with the axle right here and then build the rest of the truck from the bed forward.

Play a little bit,

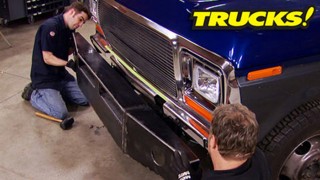
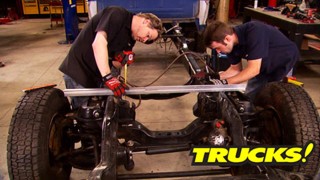
ok. The Ford bed is not gonna bolt onto the Dodge frame. We've got a couple of issues. The first one being this tab right here. We want this cross brace to sit right on the top of the frame rail. So we got some trimming to do right here.

Now, the other problem we have is this front bed mount while it looks ok. Now, once we get that little riser tab cut off the back of the bed and it lowered down, well, this is gonna need to be lowered as well. And since we got it cut off and we're gonna be moving it around anyway. Well, we might as well have it lined up with the existing Ford bed mounting location.

Now mocking up and fitting the body of this truck is actually the fun part because you can't really make a mistake since the chassis is dictating where the bed goes and we're building it from the rear to the front.

Now, a plasma torch will save you some time, but you can achieve the same results with a cut up wheel

and a little martial arts practice too.

Yeah.

Now the plasma cutter leaves a little bit of a rough edge. So we're using a flat wheel to grind down any sharp spots as well as hit the top side of the frame rail because that's where we'll be welding in our new bed mount.

And after taking a quick measurement, all we had to do was trim a little bit off the factory mount and reusing the factory mount. Saves us a whole lot of time and frustration trying to fabricate a new one.

Now, once we had our mountain modified,

all we had to do was flip it around. So it was facing inward as opposed to facing outward on the dodge set up that lined right up with the factory Ford mount

and we just cranked up our welder and burned it in.

All right. Now, we got the bed pretty much where we want it, but we're not gonna bolt it down just yet. We wanna leave it loose to have a little bit of adjust ability. Now we can start working our way forward. Move on to the cab.

Yeah.

Now what we're doing for the cab is essentially the same thing we're doing for the bed. We're gonna utilize an existing portion of the body mount bracket, but this time, it's gonna be in conjunction with the Dodge body mount bushing because you need to isolate the cab from any chassis vibration. Now, we'll cut this bracket off, cut it to length and utilize the existing Ford body mount location.

Now to mount the body to the frame up front, we kind of got lucky. Look at our brackets. The factory Ford cab mount is right above the factory dodge frame mount so we can get creative with the welder and the plasma cutter build a pedestal that utilizes the Ford isolator and will bolt right up. We'll box it and gus it for strength

ready.

Yep.

Hand me that cab

all with the body mount bush in place looks like we need a mount that's only two and a quarter inches tall.

The cab sitting where it's supposed to be. It looks like we've got about six inches between the cab mount and the frame mount.

Ok. We got six inches from the top of the isolator to right there trim that dude build it up.

Now, these mounts are actually from the original Ford chassis, which we cut off before we scrap the frame.

Now, ultimately, this is just a mock up and this mount will be boxed in for strength later on.

All right, grab down here.

Now, using the original bolt locations in the Ford cab is really a shortcut because dropping the bolt through helps us center and locate where the new mounts need to be

up. Next. We're moving our motor mounts back and making a new transmission cross member and later it's you joint replacement, made easy stay tuned.

Uh, no fail. Hey, welcome back to trucks.

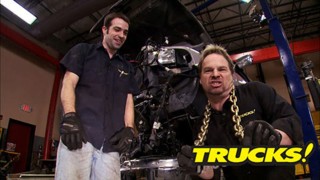
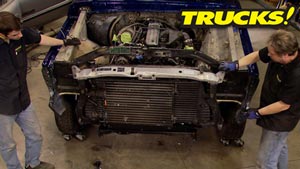
Just like we figured we would, we've got a major clearance issue between the mechanical fan

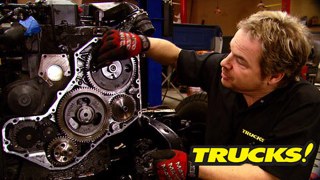
that wire and our radiator core support. And not only that, but we've got half foot between the back of the cylinder head and the firewall. So we've got plenty of room to set the engine back and that'll give us the clearance we need up front, but it'll also ha

help us with the shift or location of our manual transmission.

So if we just set it back a few inches. We still won't have to deal with lengthening or shortening the wiring harness or the fuel lines. And you got to remember on top of the radiator and condenser, we've got a honk and fat in inter cooler to go in front of here. So, set the engine back. It's a must, but don't worry because we got a plan

and here's what we're gonna do. Our truck obviously has a manual transmission, but the trucks that came equipped with automatics have shorter drive shaft due to the differences in overall transmission case length. This one's shorter than the manual transmission version, but just over five inches, we use that measurement to dictate how far we set the engine back once we swap the inputs over. Well, this drive shaft will drop right in

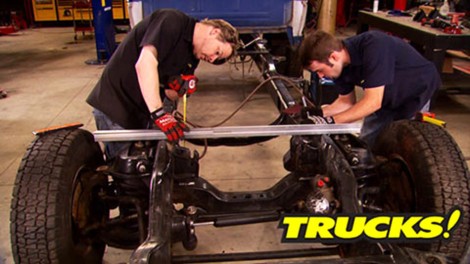
measuring five and an eight inches back from the original engine mounts. We're making another reference mark which will serve as a guide to relocate the engine mounts to their new home.

Now, the right hand frame rail is notched to make room for the air conditioning compressor. Now, since we're moving the engine back, well, that relief has to be moved back as well, which is fairly simple.

Now, following the original notch, we'll just extend it back about six inches box it in and weld it up, which will retain the original frame string

dodge, made sure these mounts weren't gonna budge. We used a plasma cutter cut off wheel and an air hammer to try to remove them and nothing works except for Kevin.

Cool. Is it hot? That wasn't that hard.

I

don't know why it took so long. I don't know.

Now. So we wouldn't lose our mark when we grind this paint away to weld in the mounts and went ahead and scrub the line with a cut off wheel. That way we won't lose track of where we are.

Now, the engine mounds didn't magically change color. We threw them in the bead blaster to get rid of all of the paint because at this stage, a contaminated weld is the last thing that we want.

Now, just like the body mounts, we wanted to utilize as much of the factory dodge hardware as possible.

And now that the cross member sits about five inches too far forward. Well, we had to cut up the factory cross member and use the outer pieces that bolted the frame rail and the intersection that bolster the transmission.

You good. Yep.

Yes. It's all in place.

Once we had the center of the cross member bolted to a new transmission mount we got from o'reilly's. It was just a matter of modifying the ends of the cross member so we could get a nice clean installation.

We connected everything using some eight inch plate.

Once we had one side done, we just had to make sure it was level before we finish it up

one more. Tell me when

that's good.

Now for you guys that drive three quarter and one ton trucks. Well, Alcoa

forged wheels don't need much of an introduction,

but they've developed a new technology called

DRI. It's gonna take the chore at a cleaning intricate wheel designs like this. It's supposed to keep mud and dirt, road grime and brake dust from sticking to the wheel surface. And we're gonna put a set of these in our work truck and put them to the test. They said we'd have a hard time getting anything to stick to the surface to prove it.

Check this out.

Now, hardly any of this permanent marker even sticks to the wheel.

And what does

rubs right off and since di

rights not a coating and is built right into the wheel, well, it's not gonna flake off so your American made alcohol wheels can stay looking this good for a long time

as the transmission yoke spins and tries to turn the drive shaft after the break. It's U joint replacement tips and tricks. And later I'm gonna try this again. Stick around.

Hey, welcome back to trucks. Well, we've got our engine mounds burned in as well as some additional gusts underneath and on the back side. So we're pretty confident that these are gonna hold up that more than 1000 pounds of engine and transmission

over here. We've got a relief cut boxed in. So now we have room for ac pump and the rear cross member is fully assembled. So we're ready to drop in this engine and transmission and we're almost ready to throw in our new drive shaft.

Almost

build on a budget truck projects that save you time and money.

All right. But before we install the new to us, shorter drive shaft, there's a couple of things we need to take care of first off. Like we told you, we gotta swap over the drive shaft input from our old shaft onto the replacement. That way it'll plug right into the back of our NV 4500 manual transmission.

We also wanna throw in a fresh set of U joints because this used drive shaft that we picked up. Well, who knows how many miles are on it or what kind of shape those U joints are in.

Now, a little spray loop can go a long way in helping to remove the stubborn sea clamps that hold the U joint in place

and to dislodge the joint caps. What just takes a few medium blows on the yoke don't hit the seal surface of the input

or the area directly around the U joint cap

and with the cap removed, you can clearly see some contamination in the grease and the needle bearings.

And at this point, it's pretty obvious this drive shaft has seen some miles could use a fresh set of U joints

and to make sure we don't distort the area where the cap slides in.

We use a piece of scrap tubing to drive the cap out.

Now, some U joints are sealed and non serviceable like the factory dodge U joints, but some like this one have a hole drilled intact for a grease fitting. Now, that's a plus because you're gonna get a longer service life. But it's also a potential weak point as the transmission yokes spins and tries to turn the drive shaft, you wanna index the joint. So the hall is under compression.

If you install it like this, as the transmission yoke spins, it's gonna try to pull that hall apart, creating a potential weakness and possibly leaving you stranded on the side of the road

for installation. That same piece of scrap tubing comes in handy. Again, the seat that you joined in the drive shaft yo

and installing the caps onto the cross, you need to make sure the needle bearings don't fall to the bottom of the cap.

Now, in the past, I've used this socket to seat the cap, but I thought a better solution would be to weld a bolt nut and washer together and make my own handy little tool. It's a lot better than tearing up expensive tools

right now. Don't forget you might lose a little bit of grease out of the universal joint during installation. So once you get your Zerk fittings tightened down, go ahead and pump a few shots of grease in them. Be ready for installation.

Hey, welcome. Back to trucks.

I'm gonna try this again.

That's a little better. That's better. Let's get this thing bolted out.

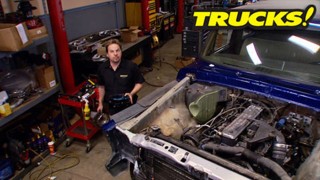
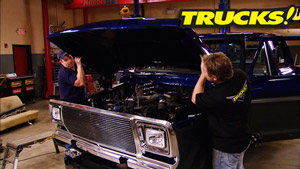
Well, now that engine fits like a glove and we didn't even have to trim any sheet metal in the engine bay to get such a great fit either.

But some parts are gonna go away like this vacuum powered brake booster that came on this old Ford. We're gonna replace it with the Dodge system that gets its pressure from the power steering pump.

And we thought we're gonna have to get rid of this apartment size heater housing. But the good news is it actually fits. And if we clock our turbo down a little more, well, we'll have even more clearance, but here's the most important thing we got today. Look here, we've got room for the radiator and condenser. And since the Ford grill comes out so far, we can even put an inter cooler up here, even room for an upgrade.

Now, there's an added bonus for moving the drive train back about five inches, check out the shift or handle. This thing wound up in the perfect spot. We should have plenty of clearance between it and our center console. We're miles away from the dash now. Speaking of dashes, Kevin and I kicked around the idea of swapping the entire Dodge dash

into this old Ford. But after taking some measurements, well, we realized it was gonna be a ton of work, but we are gonna swap the clusters because after taking them out, well, we realized they're almost identical in size to get them to work. Well, we'll just use the existing dodge wiring, make up a couple of brackets.

This thing ought to sit right in here.

Now, we've showed you Titan extended range fuel tanks before. Well, this is their newest drop in tank for diesel powered long and short bed GM trucks.

This tank bolts into the stock location using nothing more than basic hand tools and although it's a super strong cross linked polyethylene

construction, check it out.

You're not gonna add any unnecessary weight to your rig.

Now, this tank fits 01 to 08

Duramax power GM trucks. But if you got a Ford or a Dodge, Titan's got a tank for you too. So if you need an extended range fuel tank for your truck, this may be the best way to go.

All right. Well, we're pretty happy with the way this Ford body sat down on the Dodge chassis and the next time you see this truck, we're gonna make some more progress on it. Now, if you got any questions about any products we use on today's show. Go to Power Black tv.com. Thanks for watching trucks. See you in a week.
Show Full Transcript