More '79 Ford Bronco "Das Bronco" Episodes

Trucks! Builds

Parts Used In This Episode

ARP
Flexplate bolts, torque convertor bolts.
ATK Performance Engines
Engine block, prep work and final assembly.
Auto Meter
Carbon fiber series, 5" tach, mounting cup, 5" speedometer, volt, oil water, boost, speedo sensor.
B&M Racing
Flexplate.
Cherry Bomb
Cherry bomb vortex.
Chevrolet Performance
Aluminum differential cover.
Double Trouble Hooks
Double trouble tow hooks, available in black or silver-vein.
Flex-a-lite Automotive Division
Flex-A-Fit aluminum radiator, 4110 transmission cooler.
Flitz
Metal polish and micro-fiber cloth.
Flowtech
Exhaust cutout.
Moroso
Front and Mid motor plate.
Mr. Gasket
Crankcase evacuation system.
Painless Performance
12 circuit race kit with 8 switch panel, fuel pump relay, fan relay, split braiding.
Powermaster
-Polished Delco 140A "Bullet" one wire alternator.<br> -XS Torque 200 FT/LB.<br> -168T/153T flywheels.
S&W Race Cars
Ten point roll cage.
Sanderson
One set weld-up, one set ceramic coated assembled.
Summit Racing
Aluminum racing seats, covers, brackets, 5 point harness, and mounting brackets.<br> -5 lb fire system<br> -Black full face G-force.<br> -250 AMP battery disconnect.<br> -March performance aluminum bracket.<br> -March performance pulley and fan.<br> -Water pump pulley.<br> -Black full face G-force.
Video Transcript

Today, we're launching our low buck 79 Bronco to prove just how tough this old battleship really is.

And then later Hall and S 10 is back to get some more go fast goodies as we get it ready for the track. That's all today

here on trucks.

Hey,

welcome to trucks.

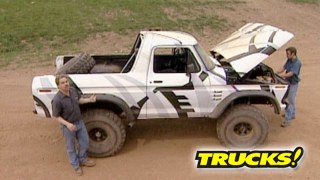
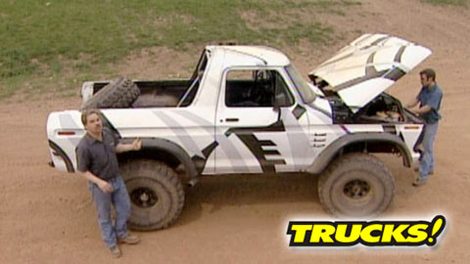
The moment is finally here. We get to test out our full size 79 Bronco and in honor of our military style camouflage paint job, we've officially named this rig Dos

Bronco

and I don't care who you are. This thing looks mean, but it wasn't long ago that it looked a heck of a lot different and was closer to a sad ending in a junkyard than a new beginning out here on the trail. But that's the beauty of these rigs. They're tough and they're worth saving. Just ask the guys at full size bronco.com and the potential for an all around trail truck. Well, it's not out of the reach of the average guy

and even if you want to build an expensive elaborate weekend toy or street truck. Well, these full size Broncos are built on a bulletproof platform that have stood the test of time and they still prove themselves out on the trail. And that is exactly what we're gonna do today. And this is an experiment on how much money we did not spend. But first, let's take a look back at where we began

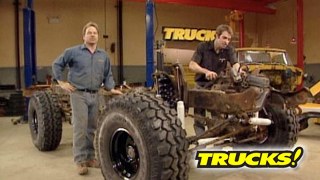
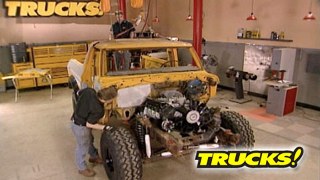
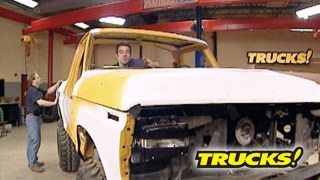
our bronco, like a lot of trucks had seen a hard life as a service vehicle, but it had all the right stuff like heavy duty running gear and suspension. And although it didn't have an engine in it, we got a 460 long block thrown in on the deal. So the potential that we saw with this 79 definitely outweighed the huge amount of work it was gonna take to get it up and running. So with our Bronco and the trailer and a plan in mind, we dragged our new treasure back to the shop and set to work on some of the body, rotten, basic chassis maintenance

and with doss Bronco torn apart new floors in the tub, we decided to focus on the drive train. And with our new short block back from the machine shop, we did a few inexpensive hot rodding tricks to it.

Ryan gasket matched the intake and exhaust and we threw in a hotter Cam Edelbrock aluminum intake and car ror along with stock accessories. Now, the 460 needed a new rear sump pan and some trans dap engine mounts to bolt it in between the rails, but it bolted right up to the new Reman C six.

We threw stock drive shafts back in and rolled the dice on the 203 T case with just a fluid change since it checked out. Ok, with some civil tests.

And we'll know soon enough if this thing has what it takes to get us out of trouble, we're better yet into some trouble. But one of the things that gave this Bronco its most dramatic change over stock, the rough country four inch lift kit,

we decided right from the start to keep this project real and not throw tons of money in a bunch of expensive parts of this Bronco.

The four inch lift gave us the height we wanted without having to go to custom length drive shaft.

And that combined with the bushwhacker flares, gave us enough ground and tire clearance to do some pretty serious wheeling.

So with the body back on the frame, we decided to shape up the sheet metal.

Most of the body work was simple, just some surface rust and road rash,

but the left rear corner was mashed in pretty good. So after a few rounds with Senor Knocker, our stud welding gun and some good old fashioned polyester surface enhancement material. And that stretched out dented up quarter panel was now a distant memory and looking like new again

like we've talked about before.

This cab offers very little protection. So roll cage was definitely in order.

So Ryan went to work designing and building a basic six point cage out of one of five eight's dom steel,

he anchored it down with large foot plates welded to the tub floor and lower a pillars. And that's going to give us plenty of headroom and lots of protection

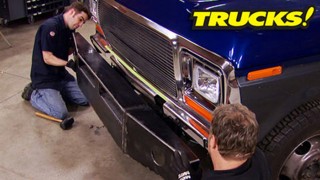
using the same one and five eights inch tube and 1/8 inch plate. He designed bumpers that give us increased strength, steeper approach angles as well as a winch batting surface.

And staying with our low buck theme on D Os Bronco, we found a paint system from duple color that allowed us to do a unique paint job with three different colors and clear coat all with the historical significance for cheap.

We used the lacquer based paint shop system and a design taken from World War One navy ships and laid down a three color camouflage paint scheme and then gave it two coats of clear to keep the tree branches from digging into the color.

We also covered the back of the Bronco in a rubber mat from L MC. Then we put our focus on finding a way to mount the mandatory spare tire in the back.

So here's what we came up with using some leftover tubing from the bumpers. We designed a mount that would distribute the load and be more than strong enough to handle this big heavy swamper. Plus, if we wanna go to a little bit bigger tire in the future, it'll handle that too.

And with this 12,500 pound rated super win sitting on top of Ryan's new bumper, we ought to be able to hang this sucker from a tree. And one last thing before we hit the trail, we're gonna throw in this double trouble recovery hook.

That's why we incorporated a receiver hitch in our rear bumper design.

Ok. So here's what we spent to get to where we are. Now,

here are the big chunks including the Bronco itself for 750 bucks.

The five Super Swampers cost us more than 1200 bucks.

Our super winch was 900

a Reman C six was $650.

But from there on out, everything was 500 bucks or less all the way down to our 460 long block. That was the best deal we got on anything.

It was free.

So all things considered, we've got about $6600 invested in D Os Bronco give or take a few bucks

and that leaves us with just enough gas money to run this thing up and down a few trails.

So let's go see what this big boat will do.

Hang on because Das

Bronco is about to get unleashed.

Don't go anywhere.

Hey, welcome back to trucks. We're here at Woolies off road park, putting Ds Bronco through its paces.

Now, we've got the very best crew always willing to pay the price to get you guys, the best camera angles

we're ready for anything and do. S Bronco is two, a 5500 pound vehicle that can devour Wooly's mud box.

This is the flow through design that we've customized into this into this. Bronco comes through here,

pulls up over here. It cools the transmission housing and then goes out the back. It's ingenious. Now, we knew this. Bronco was not a perfect off road truck yet, especially on non bead lock wheels.

We popped a tire off the damn rim.

Yeah, we did.

You think we brought a spare? I'll get the tire, you get, you get it jacked up.

We wanted to test out the articulation and traction of the

Bronco and Woolies has great trails and obstacles for any level vehicle.

She flexes out pretty good, doesn't it? Yeah, especially the rear axle. It twists up pretty well.

Now, even though the suspension flexed out enough to give us traction most of the time, some locking discs sure would have been nice.

Where are we up to now?

Go climbing

and there's a great big hill and just over the crest of the hill

is a beer joint sitting there.

That's when we're going

well before we get to the beer, we need to see what this thing will do up in incline and we found some pretty gnarly hills

up hills and on tight trails. We were reminded just how big and heavy this full size Bronco really is.

Where did that come from?

But it held its own and clawed its way to the top of everything. We tried.

That car hasn't stuttered once, not once. So we've been up some pretty hardcore angles.

Now, you have to remember that. What we're driving is a slightly beefier version of a stock bronco.

That what we're able to throw at it is a true testament to the ruggedness and versatility of these vehicles. Not that I'm surprised, but I'm pretty happy these uh

the not

an inch and the 40 fours standing up for these 30 sevens in the big block all day long. You forget that this is such a heavy truck.

Do

Bronco had power to burn with the big 46 and never let us down. Well, except for the power steering,

that power steering pump is still completed. It's got, we've done, buried it already.

Having conquered all the major land obstacles. We decided to take our boat to the ocean or at least the closest place we could find in middle Tennessee.

Oh, no.

And just when I started to look for a good winching tree,

Ryan finally found enough traction to get us out of there.

Yes, sir. Thank you very much. So, did Das

Bronco get the job done? You bet your ass it did. But it also showed us where we could make improvements. But that's another show.

When we get back to the shop, we're out of the mud and getting ready for the strip with Hall and S Tan.

Hey, welcome back. Well, D Os Bronco showed its colors and with a pretty much stock drive train, this thing took everything we threw at it and shrugged it off. This thing is a beast and we'll definitely be back for some more upgrades like some bead locks and we'll give you guys a heads up when this project returns because this story is far from over.

But here at the truck shop, we got a lot of unfinished business, especially on our hall and S 10 project. Now this is a pro street truck. So it needs some form of an exhaust system, but we're so far from stock on this truck that we're gonna have to make one. So we're using Magnus's

universal hot rod system with three inch pipe to do it. We're also gonna use these cut out so we can open it up at the track. Now, this Man

Band 304 stainless is beautiful stuff and

the workmanship is pretty outstanding. So we thought it'd be pretty cool to show you guys how this stuff is made.

Everybody wants a performance exhaust that delivers more power and better sound.

And for 25 years, Magda

Flow is designing complete high flow systems.

Their R and D team develops fabricates

and validates everything, even catalytic converters.

We're one of the only manufacturers that can actually bring to market a full catalytic converter line to complement our performance

off

line

compared to the stock GTO cat magna flow cells are bigger with nearly twice the rate of flow

to complement the increased cell rate. We actually also

increase the diameter of the tubing to enhance overall flow.

Not all vehicles need a new converter, but most can use a performance cat back.

We witnessed the build process on a high flow kit for the new 5.7

hemi.

After pulling baseline numbers on the

dyno Jet, the dodge goes on the rack to get prepped for surgery.

Everything from the factory cat's back, its unbolted, cut out or disconnected so it can come out as a unit.

New layout begins with measurement for larger diameter mandrel vent pipe.

Once the best radius and angles are established,

prototype dimensions are laser scanned on a vector device that generates data and transmits it to engineering for full documentation and production programming.

The pipe is clogged and tacked to the resonator and muffler.

The tips are added and everything comes up for final welding

in the factory. Hundreds of fixtures built, everything from sport compact systems to diesels to muffled headers for monster trucks.

All the products are different but they have one thing in common.

This massive outdoor yard was our first clue.

Exhaust veteran. Brian Van Dyke explained

if you put a lifetime warranty on the product, you better be able to back it up. So everything we use is 100% stainless steel internals, externals,

everything on the muffler is 100% stainless, stainless won't rust but it won't add power for that. There's the X pipe,

an X pipe,

you have an exhaust pulse that go fires and goes through this bank. Then a fraction of a second later, you get another pulse that fires through that bank.

You can see through the X pipe have you, as you have the exhaust gasses cross over within the X pipe. It creates a scavenging or vacuum effect in the rear part of the A. It starts to pull the exhaust gasses through.

These guys go through tons of stainless every day.

Muffler making here is mostly automated. Polished flat stock is cut, stamped formed

and spot welded into shells.

The magna flow straight through design uses perforated pipe wrapped in sound absorbing stainless mesh.

Additional acoustical suppression material is added before the internals are inserted into the case.

After the end caps are installed, the assembly is conveyed to a multi station welding cell where computerized robots lap weld the end caps in the vertical seat

back in R and D. The crew finally installs the cat back. It's 20% lighter flows nearly 100% over stock and delivers a deep powerful sound.

The final step power validation,

the

dyno Jet reveals an extra 12 horsepower and 14 ft pounds of torque at the rear wheels

proof. Again, a quality cat back is a great way to add attitude.

Hey Welcome back to trucks. Well, our recycled V8 S 10 project that we have. Aptly named Harlem S 10 is finally starting to look like something. And of course, the uh big 671 blower sticking up over the horizon doesn't hurt things either. But since we're gonna be running 6 to 700 horsepower just on the engine, well, we have to make it safe too

now, like we showed you guys before we're gonna surround ourselves in this roll cage kit we got from S and W race cars comes with all the tubing braces and foot plates you're gonna need

and for the rest of the safety gear. Well, we went for some one stop shopping at summit racing, picked up these Kirky Pro Street aluminum race seats along with these five point harnesses that feature in the nice cam lock disconnect.

And you guys have already seen our main power disconnect switch

and for added measure, we're going to install a five pound fire suppression system that's activated by cable release mounted within reach of the driver

and to top things off, we'll both be wearing shiny new brain buckets

now for our dash. Well, we've done some renovation here too to the point to where this is now, just a shell of what the stock dash used to be.

So we're going to load it up with auto meter, carbon fiber faced gauges,

starting with our monster tack and shift light that mount on top. Now, the rest of the gauges will put inside these 20 gauge sheet metal inserts that will sync the gauges down into and create some mounting tabs to mount them right on top of the dash plate. And our new painless performance switch plate is gonna mount right here where the ac vent used to be. Now between the switch plate and our auto meter gauges, we're gonna have excellent communication with our truck,

but since we've lost all hope of a mechanical fan because of our blower belt. Well, we're gonna rely on this flex, a light aluminum dual fan radiator to keep this bad boy cool because of its low profile design, it'll fit nicely up in our core support

and since this truck will see some street action, we gotta keep the battery charged. So we went to Power Master and got one of their high output alternators mounted it on a nice looking March performance bracket and for a starter. Well, Power Master also sent us one of their high torque units that'll fire this thing up even after a few rips down the track on a hot day.

Now, we are real close to lighting this thing off and lighten up those rear tires so you guys can look for that to happen real soon.

Here's something for you guys that drives CK 1500 series pickups. This is G M's new heavy duty test, aluminum and fin differential cover. It actually doubles fluid capacity allowing the differential to run cooler and therefore letting your rear axle live a longer life. Plus, if you drive a jacked up pickup truck and this thing's visible, you can't deny, it just looks cooler for just over 100 bucks.

You can make one yours.

I know you guys remember our 66 Chevy Long to short bed conversion project. Well, like most of the rest of that truck, the side moldings were nearly perfect but

anodized aluminum moldings over time can take on sort of a chalky look and there's not much you can do about it regardless of the shape and the molding, it can't be polished.

Well, here's a solution to that problem that gives you a cool custom look to boot.

Well, believe it or not, regular household oven cleaner has an active ingredient called sodium hydroxide that will strip the anodized coating off, but leave the raw aluminum undamaged. What you do is use in a well ventilated area,

just spray a bit on

and let it go to work for about 10 minutes.

Now with your molding clean, grab some flits, polish, put it on a wool bonnet about a quarter size. Go to work on the molding.

Oh man.

Now take a microfiber polishing cloth

and rub the residue down

and you can see the finished results immediately, man. That looks just gorgeous and that has saved you from buying a whole new set of moldings. Thanks for watching trucks. See you guys next week.
Show Full Transcript