More '79 Ford Bronco "Das Bronco" Episodes
Trucks! Builds
Want more content like this?
Join the PowerNation Email NewsletterParts Used In This Episode
Dupli-Color
1 quart each silver, red, blue, yellow, orange, case of truck bed coating, charcoal metallic, clear, orange anodize, spray cans.
Dupli-Color
Cast iron manifold paint, block paint, vinyl and fabric dye.
Dupli-Color
Grey primer, Championship white, Jet Black, Mineral Grey, clear coat.
O'Reilly Auto Parts
Filler Primer.
Suprepme Performance
EP 12.5 and wireless control.
Video Transcript
Today, it's part three of our low buck Bronco build up.
We're using three different steps for knocking the dents out of the body and we're making our very own custom roll cage. After that, we're building heavy duty bumpers and getting our Bronco ready for one of the most unique paint jobs you'll ever see.
That's all today here on trucks.
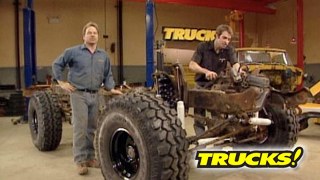
Hey, thanks for watching trucks. Well, our low buck Bronco has come a long, long way since we first started working on it. If you remember, we found it out in the field waist high in weave and spread out over about a half acre, but it was still worth saving and the price is right too.
So we dragged it back here and immediately dug in to see what we needed to do to get this thing back into shape, or at least back on its own legs.
The floors were rusty. The engine was gone,
the steering was shot and the tranny, we had no clue if it was any good.
The drive shafts, they flopped around more than fish out of water.
But we did end up with a free 460 long block is a little extra incentive to haul it away.
So we dug in, repaired some rust holes, refurbished the axles
lifted it four inches, threw on some serious 37 inch swampers and went through the big block tossing in a hotter Canon intake and massage the airways a little to help her breathe.
And since these Broncos are built on the exact same platform as the F 150
there are literally millions of these trucks still around.
So if you're building one of these, the replacement parts it takes to get yours up and running are cheap
and they're only a part store away.
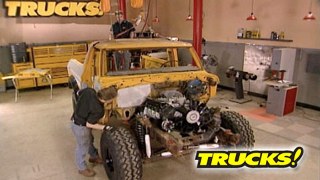
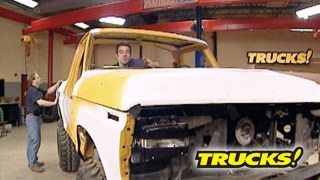
Now, the rusty floors were by far the worst part of this body. A couple of new floor pans later and were good and solid again. Now, the rest of the truck
was actually in pretty good shape except for this corner back here.
Ouch.
So we prepped the rest and we wanted to show you how to get this metal back into shape. Now, one thing you've got going for you when it comes to body work is that this metal wants to go back to the way it was originally stamped. It's called cell memory position.
And rule number one with body work is access. You wanna pull these dents out right here. It's the worst dent. We've got great access.
Well, this is Senior Knocker. It's a slide hammer
that packs a pretty mean wallop and it has a hook on the end. That is perfect for getting in behind areas like our taillight recess where you don't have room to swing a hammer.
Now, this is the work part of body work, sheet metal that's stamped with corners and style lines is much stronger than a flat panel and it shows
you need a bigger hook.
She's coming back
now while Kevin's fighting the good fight back there, I'm gonna give us a little extra security here in the cab just in case this thing gets inverted while we're out wheeling. Now,
instead of buying a custom bent cage, we'll just bend up our own using an engine 581 20 wall dom tubing. We got from our friends at California metal supply
manual tubing benders start out at about $300 or you can sprint for a pneumatic bender like our tube shark. Either way you still need to carefully plan each bend.
Ok. The shape started to come back pretty good and we've done just about all we can do with senior knocker. So I'm gonna take an egg dolly, get it back in behind the panel
and just chase down
my high spot with it.
The dolly is used to support the metal and pinch it between the dolly and the hammer.
Think of it as a small anvil.
Well, it's looking good, but we're not ready for filler yet. We've still got low spots here here and here. Now, one way to get rid of low spots in sheet metal is to drill holes at the lowest point of the dent screw in one of these tips to your slide hammer and then pull the dent out that way. Well, that introduces corrosion because there's holes in the panel bad.
Well, you can get the same results with a stud gun
and no holes in the panel.
The stud gun actually spot welds the pins to the metal, letting you change the shape of the panel without drilling holes in it.
The slide hammer twists and locks onto the pins and by pulling out
it lets you raise low spots. Also, the pins give you a leverage point to work on the surrounding metal.
Now, it may take you a few rounds of hammering to get everything back into shape.
Now, your goal with body filler is to have no more than a quarter of an inch of thickness and this shows us that we are right in the ballpark. We're looking good
after grinding the stud welds off plan on at least two applications of filler.
If you try to overcoat your repair, you lose control of the thickness and it tends to run off onto the floor
cool. Let that set up about 10 minutes and work it down.
Now it's time to rough out your shape using 36 grit paper on a dual action, eight inch sander.
Once you've got it into a basic shape, step up to 80 grit and take over with the long board
with the repair shaped up with 80 grit, a final coat of finishing putty will fill in any pinholes or inconsistencies.
Now, if you guys plan on doing any serious wheeling a roll bar or a cage of some sort is a necessity. These cabs,
they're nothing more than 20 or 22 gauge sheet metal spot welded together. If you get upside down, they're not gonna give you a whole lot of protection.
But there are a few things to remember if you're building your own roll cage. Always remember. Leave yourself plenty of head room. You don't want what's designed to protect you end up giving you a concussion.
Now, if you're not tying your cage directly into the frame, remember to use foot plates large enough to distribute the load
and never, never attempt to build one of these at a plumbing pipe.
Now that is feeling good.
A little bit of elbow grease and polyester surface enhancement material. This sucker is ready for primer
after the break. We're gonna build tough bumpers that won't be tough on your wallet
and we'll show you an inexpensive twist on a traditionally costly paint job. Stick around.
Hey, welcome back to trucks. Now that we got a little protection inside the cab there, let's talk a little bit about protecting the body as well.
The stock rear bumper. Uh it's seen better days. Not to mention it's a light duty bumper at best
the original front bumper.
It's probably still sitting in the field that we dragged this old Bronco out of.
Now, there's no limit when it comes to custom bumpers for your truck. As long as there's no limit to the bottom of your wallet.
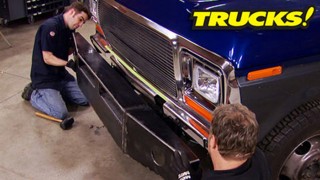
Now, don't get intimidated by the idea of building your own bumpers. If you can weld and hold the tape measure steady, you can save some money and it might be easier than you think.
Now, first figure out what you wanna protect and make some measurements and if it helps, go ahead and put your ideas down on paper.
Now, I went ahead and added these braces in this cross member, not only to give me a flat surface to work off of, but it also ties the front frame rails together.
Looks are secondary. When it comes to designing a bumper, you want to make sure that it protects the body doesn't interfere with the pro
angles and is made from strong enough material to more than make up for the factory bumper being gone.
Yeah, we're good.
Now with our bumper frame done, we're gonna finish it off. Use an eight inch plate on either side of our winch mount,
then we'll cut the tube ends off, flush
them and fill in these gaps with more eight inch plate for a nice finished look
with the bumper off. There's access to every joint so we can get good strong welds, which is especially important here since we'll be mounting a heavy duty winch on top of it.
Now, we told you we're gonna do a cool paint job on this Bronco and one with a little bit of historical significance. And on top of that, we're gonna show you how to do it without spending a ton of cash.
A
modern professional painting system can cost you hundreds, even thousands of dollars for all the materials it's gonna take to lay down a nice custom paint job. You got special primers base coats to consider different hardeners, clear coats. A bunch of different reducer selection. So it gets very
complicated. At the same time as it gets very expensive, you have expensive equipment that you need to use to shoot this stuff properly. And by the time you factor in all the safety gear, it takes to be safe while you're using a catalyze system where you sunk a ton of money into your project. Probably more than we've sunk in that whole Bronco project.
Lacquer paints used to be a lot more popular partly because they were a lot cheaper to use. Lacquer's roots can be traced back thousands of years and Lacquer is what most of the major auto manufacturers used to use in the assembly plants. Now, due to the huge amount of solvent that's engineered into the Lacquer paint itself, tighter epa regulations force Lacquers out of the auto manufacturers by the late 19 seventies. Now, don't get me wrong. I'm not bashing lacquer most your pure of snow that some of the most beautiful paint jobs you've ever seen are the hand rub lacquer paint job. So it's not bad technology. It's just old technology.
Well, duple color has brought lacquer back and kind
of made it new again with this paint shop system and they've replaced some of the older solvents in it with newer, more environmentally friendly ones. It comes prepackage in a variety of different colors, has its own primer, even its own clear coat. It can be layered up a conventional based clear system or even multi layered like the old lacquer paint jobs back in the day. Another cool thing about this system is that you don't need to go to a conventional professional jobber to buy it. You can buy this system pretty much anywhere else. The duplicate
products are sold now. Is this a replacement for your professional system? No, it's not. But for 19 bucks, a quart, this is gonna allow us to do a cool looking paint job for about 100 and 20 bucks.
Check it out. Look what just showed up. Oh, cool
little guy,
man. What's the load rate on that? 12,000? 500 pounds? That'd be plenty to pull us up out of the mud. They should.
Well, Ryan's got a couple of bumpers to finish up. I've got a little more paint prep to do and you guys unfortunately are gonna have to wait a little longer to see what we're doing with this paint job, but I'll give you a little hint. It may be a little hard to recognize that she comes up over the horizon
up next. Our low Bug Bronco is in the booth getting taped up for a paint job inspired by German U boats.
It's a free history lesson on camouflage and one of the coolest paint schemes ever.
Hey, welcome back. Well, in keeping with our low buck theme on our 79 Bronco, our paint job is no exception. So we're using duple colors, wallet friendly paint shop system, but we're not gonna lay down just a regular paint job on this rig. We've seen some really cool looking military and off road vehicles with camouflage paint jobs on. But a regular run of the mill camel job is not gonna cut it. We're gonna use the very first camouflage paint scheme ever in existence. And the whole reason that the word camouflage is even in the English language
in 1917. During the first world war, the British Navy was taking on huge casualties from German torpedoes. So a lieutenant commander named Norman Wilkinson came up with a new paint scheme for naval vessels. One that depended on distraction rather than blending into the horizon or background.
He called it dazzle painting and it proved very effective in confusing the U boat gunners as they were sighing in their torpedoes. They literally could not tell what they were shooting at.
But by the time the second world war came around, submarines relied on sonar rather than sight and dazzle camouflage was no longer effective,
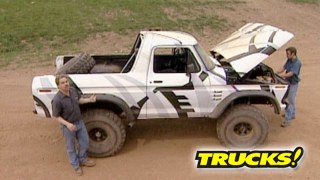
but it had saved a lot of lives for both British and us naval fleets and it just looks cool. So we're gonna use dazzle on our Bronco and I've already got the gray ground coat laid down. So now we can start taping out our design.
The cow.
What I'm doing here is a technique that the airbrush guys use. It's called positive masking where a ground coat is taped off and it's going to end up looking like the very last coat that we put on. This technique saves you a lot of time and a lot of intricate masking in spring.
OK. With the first tape b done, we can start spraying the second color
and get out of my boot.
The fun part of dazzle or any camouflage is that there are no hard rules and you can do your own design.
It's fine if things change a little along the way,
just chalk it up to creative freedom.
Yeah.
Yeah.
Loosely following the guide on the wall,
the black graphics are outlined with masking tape
then filled in like before
finally, with the previous two color schemes laid out in mask,
the whole truck gets a couple of coats of white
which even though it's the last color to go on will actually look like the first one sprayed.
All we gotta do is take off our tape, throw down a couple of coats of clear. We're ready.
The paint shop, clear coat is easy to spray and two coats will give us good tree branch protection.
Taking a few lessons from some of the airbrush gurus. You can learn to think backwards and plan your paint jobs in your mind before you even have a paint gun in your hand.
When we come back, it's a quick, easy and cheap way to bring old seats back to life and make them look brand new again.
Hey, welcome back. Well, check out the dazzle camouflage paint job,
not bad for less than 200 bucks. And that includes two extra coats of clear for protection and gloss.
And we also use some adupa colors, truck bed coating on our bumpers as well as some interior panels for corrosion protection and a good rugged look. Now for the floors, we wanted something that was not only good looking but something that was easy to clean just in case we give it a mud shower. So we went to L MC and got some of their heavy duty rubber mat.
So you're not gonna see this thing out on the trail without a spare tire while we don't have a mount made up for it yet. Next time you see this thing
we'll come up with something.
Well, one thing we have figured out is that the original seats that came in our 79 Bronco. Well, they're nearly destroyed and even if we decided to go ahead and put new seat foam and seat covers in. Well, it's a low back bucket design with almost no bolster. However, we ended up with a pair of these in with the deal. It's a nice high back leather seat with nice bolsters. Now, they're kind of dirty and the color doesn't match, but we've got a fix for that
and that will get us one step closer to getting that Bronco out and playing with it.
Now, I know a lot of you guys are tired of blown out gaskets because your header bolts have backed out. Well, stage eight has come out with these locking fasteners that put a stop to that.
All you do is install their header bolt
slip over one of the provided retainers
and lock it all in with the eclipse
and now the bulk can't back out.
Now, they also offer locking fasteners for plenty of other applications like oil pans or starters.
The stage eight line of locking fasteners start about 20 bucks a set.
Well, here's something that's only gonna cost you about six bucks in a few minutes of your time. We told you we had a quick and easy fix for these leather seats, changing the color and cleaning them up. The first thing you wanna do is clean them off real well with a glass cleaner
next you want to rub over the whole surface of your upholstery with the red scuffing pad, this is going to lift up the grain of the leather and the plastic.
Now you wanna wipe everything down with Acetone, not paint thinner but Acetone, which is a much stronger solvent and will actually expand the pores of the leather and plastic
and with the surface clean and the pores opened up, it will really lock the color in
after you're finished with your first coat. Give it about 10 minutes to dry and then throw another one on it
so you can get vinyl and fabric dye at almost any auto parts store in pretty much any color.
Now, the dye looks great, but it's a little too shiny. So to give it a more natural leather look, you can take a gray scuff pad which is a finer grit
and just gently rub on the surface
kind of give it an aged look and
that natural look of leather.
Thanks for watching trucks. See you guys next week.
Show Full Transcript
We're using three different steps for knocking the dents out of the body and we're making our very own custom roll cage. After that, we're building heavy duty bumpers and getting our Bronco ready for one of the most unique paint jobs you'll ever see.
That's all today here on trucks.
Hey, thanks for watching trucks. Well, our low buck Bronco has come a long, long way since we first started working on it. If you remember, we found it out in the field waist high in weave and spread out over about a half acre, but it was still worth saving and the price is right too.
So we dragged it back here and immediately dug in to see what we needed to do to get this thing back into shape, or at least back on its own legs.
The floors were rusty. The engine was gone,
the steering was shot and the tranny, we had no clue if it was any good.
The drive shafts, they flopped around more than fish out of water.
But we did end up with a free 460 long block is a little extra incentive to haul it away.
So we dug in, repaired some rust holes, refurbished the axles
lifted it four inches, threw on some serious 37 inch swampers and went through the big block tossing in a hotter Canon intake and massage the airways a little to help her breathe.
And since these Broncos are built on the exact same platform as the F 150
there are literally millions of these trucks still around.
So if you're building one of these, the replacement parts it takes to get yours up and running are cheap
and they're only a part store away.
Now, the rusty floors were by far the worst part of this body. A couple of new floor pans later and were good and solid again. Now, the rest of the truck
was actually in pretty good shape except for this corner back here.
Ouch.
So we prepped the rest and we wanted to show you how to get this metal back into shape. Now, one thing you've got going for you when it comes to body work is that this metal wants to go back to the way it was originally stamped. It's called cell memory position.
And rule number one with body work is access. You wanna pull these dents out right here. It's the worst dent. We've got great access.
Well, this is Senior Knocker. It's a slide hammer
that packs a pretty mean wallop and it has a hook on the end. That is perfect for getting in behind areas like our taillight recess where you don't have room to swing a hammer.
Now, this is the work part of body work, sheet metal that's stamped with corners and style lines is much stronger than a flat panel and it shows
you need a bigger hook.
She's coming back
now while Kevin's fighting the good fight back there, I'm gonna give us a little extra security here in the cab just in case this thing gets inverted while we're out wheeling. Now,
instead of buying a custom bent cage, we'll just bend up our own using an engine 581 20 wall dom tubing. We got from our friends at California metal supply
manual tubing benders start out at about $300 or you can sprint for a pneumatic bender like our tube shark. Either way you still need to carefully plan each bend.
Ok. The shape started to come back pretty good and we've done just about all we can do with senior knocker. So I'm gonna take an egg dolly, get it back in behind the panel
and just chase down
my high spot with it.
The dolly is used to support the metal and pinch it between the dolly and the hammer.
Think of it as a small anvil.
Well, it's looking good, but we're not ready for filler yet. We've still got low spots here here and here. Now, one way to get rid of low spots in sheet metal is to drill holes at the lowest point of the dent screw in one of these tips to your slide hammer and then pull the dent out that way. Well, that introduces corrosion because there's holes in the panel bad.
Well, you can get the same results with a stud gun
and no holes in the panel.
The stud gun actually spot welds the pins to the metal, letting you change the shape of the panel without drilling holes in it.
The slide hammer twists and locks onto the pins and by pulling out
it lets you raise low spots. Also, the pins give you a leverage point to work on the surrounding metal.
Now, it may take you a few rounds of hammering to get everything back into shape.
Now, your goal with body filler is to have no more than a quarter of an inch of thickness and this shows us that we are right in the ballpark. We're looking good
after grinding the stud welds off plan on at least two applications of filler.
If you try to overcoat your repair, you lose control of the thickness and it tends to run off onto the floor
cool. Let that set up about 10 minutes and work it down.
Now it's time to rough out your shape using 36 grit paper on a dual action, eight inch sander.
Once you've got it into a basic shape, step up to 80 grit and take over with the long board
with the repair shaped up with 80 grit, a final coat of finishing putty will fill in any pinholes or inconsistencies.
Now, if you guys plan on doing any serious wheeling a roll bar or a cage of some sort is a necessity. These cabs,
they're nothing more than 20 or 22 gauge sheet metal spot welded together. If you get upside down, they're not gonna give you a whole lot of protection.
But there are a few things to remember if you're building your own roll cage. Always remember. Leave yourself plenty of head room. You don't want what's designed to protect you end up giving you a concussion.
Now, if you're not tying your cage directly into the frame, remember to use foot plates large enough to distribute the load
and never, never attempt to build one of these at a plumbing pipe.
Now that is feeling good.
A little bit of elbow grease and polyester surface enhancement material. This sucker is ready for primer
after the break. We're gonna build tough bumpers that won't be tough on your wallet
and we'll show you an inexpensive twist on a traditionally costly paint job. Stick around.
Hey, welcome back to trucks. Now that we got a little protection inside the cab there, let's talk a little bit about protecting the body as well.
The stock rear bumper. Uh it's seen better days. Not to mention it's a light duty bumper at best
the original front bumper.
It's probably still sitting in the field that we dragged this old Bronco out of.
Now, there's no limit when it comes to custom bumpers for your truck. As long as there's no limit to the bottom of your wallet.
Now, don't get intimidated by the idea of building your own bumpers. If you can weld and hold the tape measure steady, you can save some money and it might be easier than you think.
Now, first figure out what you wanna protect and make some measurements and if it helps, go ahead and put your ideas down on paper.
Now, I went ahead and added these braces in this cross member, not only to give me a flat surface to work off of, but it also ties the front frame rails together.
Looks are secondary. When it comes to designing a bumper, you want to make sure that it protects the body doesn't interfere with the pro
angles and is made from strong enough material to more than make up for the factory bumper being gone.
Yeah, we're good.
Now with our bumper frame done, we're gonna finish it off. Use an eight inch plate on either side of our winch mount,
then we'll cut the tube ends off, flush
them and fill in these gaps with more eight inch plate for a nice finished look
with the bumper off. There's access to every joint so we can get good strong welds, which is especially important here since we'll be mounting a heavy duty winch on top of it.
Now, we told you we're gonna do a cool paint job on this Bronco and one with a little bit of historical significance. And on top of that, we're gonna show you how to do it without spending a ton of cash.
A
modern professional painting system can cost you hundreds, even thousands of dollars for all the materials it's gonna take to lay down a nice custom paint job. You got special primers base coats to consider different hardeners, clear coats. A bunch of different reducer selection. So it gets very
complicated. At the same time as it gets very expensive, you have expensive equipment that you need to use to shoot this stuff properly. And by the time you factor in all the safety gear, it takes to be safe while you're using a catalyze system where you sunk a ton of money into your project. Probably more than we've sunk in that whole Bronco project.
Lacquer paints used to be a lot more popular partly because they were a lot cheaper to use. Lacquer's roots can be traced back thousands of years and Lacquer is what most of the major auto manufacturers used to use in the assembly plants. Now, due to the huge amount of solvent that's engineered into the Lacquer paint itself, tighter epa regulations force Lacquers out of the auto manufacturers by the late 19 seventies. Now, don't get me wrong. I'm not bashing lacquer most your pure of snow that some of the most beautiful paint jobs you've ever seen are the hand rub lacquer paint job. So it's not bad technology. It's just old technology.
Well, duple color has brought lacquer back and kind
of made it new again with this paint shop system and they've replaced some of the older solvents in it with newer, more environmentally friendly ones. It comes prepackage in a variety of different colors, has its own primer, even its own clear coat. It can be layered up a conventional based clear system or even multi layered like the old lacquer paint jobs back in the day. Another cool thing about this system is that you don't need to go to a conventional professional jobber to buy it. You can buy this system pretty much anywhere else. The duplicate
products are sold now. Is this a replacement for your professional system? No, it's not. But for 19 bucks, a quart, this is gonna allow us to do a cool looking paint job for about 100 and 20 bucks.
Check it out. Look what just showed up. Oh, cool
little guy,
man. What's the load rate on that? 12,000? 500 pounds? That'd be plenty to pull us up out of the mud. They should.
Well, Ryan's got a couple of bumpers to finish up. I've got a little more paint prep to do and you guys unfortunately are gonna have to wait a little longer to see what we're doing with this paint job, but I'll give you a little hint. It may be a little hard to recognize that she comes up over the horizon
up next. Our low Bug Bronco is in the booth getting taped up for a paint job inspired by German U boats.
It's a free history lesson on camouflage and one of the coolest paint schemes ever.
Hey, welcome back. Well, in keeping with our low buck theme on our 79 Bronco, our paint job is no exception. So we're using duple colors, wallet friendly paint shop system, but we're not gonna lay down just a regular paint job on this rig. We've seen some really cool looking military and off road vehicles with camouflage paint jobs on. But a regular run of the mill camel job is not gonna cut it. We're gonna use the very first camouflage paint scheme ever in existence. And the whole reason that the word camouflage is even in the English language
in 1917. During the first world war, the British Navy was taking on huge casualties from German torpedoes. So a lieutenant commander named Norman Wilkinson came up with a new paint scheme for naval vessels. One that depended on distraction rather than blending into the horizon or background.
He called it dazzle painting and it proved very effective in confusing the U boat gunners as they were sighing in their torpedoes. They literally could not tell what they were shooting at.
But by the time the second world war came around, submarines relied on sonar rather than sight and dazzle camouflage was no longer effective,
but it had saved a lot of lives for both British and us naval fleets and it just looks cool. So we're gonna use dazzle on our Bronco and I've already got the gray ground coat laid down. So now we can start taping out our design.
The cow.
What I'm doing here is a technique that the airbrush guys use. It's called positive masking where a ground coat is taped off and it's going to end up looking like the very last coat that we put on. This technique saves you a lot of time and a lot of intricate masking in spring.
OK. With the first tape b done, we can start spraying the second color
and get out of my boot.
The fun part of dazzle or any camouflage is that there are no hard rules and you can do your own design.
It's fine if things change a little along the way,
just chalk it up to creative freedom.
Yeah.
Yeah.
Loosely following the guide on the wall,
the black graphics are outlined with masking tape
then filled in like before
finally, with the previous two color schemes laid out in mask,
the whole truck gets a couple of coats of white
which even though it's the last color to go on will actually look like the first one sprayed.
All we gotta do is take off our tape, throw down a couple of coats of clear. We're ready.
The paint shop, clear coat is easy to spray and two coats will give us good tree branch protection.
Taking a few lessons from some of the airbrush gurus. You can learn to think backwards and plan your paint jobs in your mind before you even have a paint gun in your hand.
When we come back, it's a quick, easy and cheap way to bring old seats back to life and make them look brand new again.
Hey, welcome back. Well, check out the dazzle camouflage paint job,
not bad for less than 200 bucks. And that includes two extra coats of clear for protection and gloss.
And we also use some adupa colors, truck bed coating on our bumpers as well as some interior panels for corrosion protection and a good rugged look. Now for the floors, we wanted something that was not only good looking but something that was easy to clean just in case we give it a mud shower. So we went to L MC and got some of their heavy duty rubber mat.
So you're not gonna see this thing out on the trail without a spare tire while we don't have a mount made up for it yet. Next time you see this thing
we'll come up with something.
Well, one thing we have figured out is that the original seats that came in our 79 Bronco. Well, they're nearly destroyed and even if we decided to go ahead and put new seat foam and seat covers in. Well, it's a low back bucket design with almost no bolster. However, we ended up with a pair of these in with the deal. It's a nice high back leather seat with nice bolsters. Now, they're kind of dirty and the color doesn't match, but we've got a fix for that
and that will get us one step closer to getting that Bronco out and playing with it.
Now, I know a lot of you guys are tired of blown out gaskets because your header bolts have backed out. Well, stage eight has come out with these locking fasteners that put a stop to that.
All you do is install their header bolt
slip over one of the provided retainers
and lock it all in with the eclipse
and now the bulk can't back out.
Now, they also offer locking fasteners for plenty of other applications like oil pans or starters.
The stage eight line of locking fasteners start about 20 bucks a set.
Well, here's something that's only gonna cost you about six bucks in a few minutes of your time. We told you we had a quick and easy fix for these leather seats, changing the color and cleaning them up. The first thing you wanna do is clean them off real well with a glass cleaner
next you want to rub over the whole surface of your upholstery with the red scuffing pad, this is going to lift up the grain of the leather and the plastic.
Now you wanna wipe everything down with Acetone, not paint thinner but Acetone, which is a much stronger solvent and will actually expand the pores of the leather and plastic
and with the surface clean and the pores opened up, it will really lock the color in
after you're finished with your first coat. Give it about 10 minutes to dry and then throw another one on it
so you can get vinyl and fabric dye at almost any auto parts store in pretty much any color.
Now, the dye looks great, but it's a little too shiny. So to give it a more natural leather look, you can take a gray scuff pad which is a finer grit
and just gently rub on the surface
kind of give it an aged look and
that natural look of leather.
Thanks for watching trucks. See you guys next week.