
Video Transcript
[Mike] You're watching Powernation!
[Mike] Today on Music City Trucks we get our F-250 in the shop and we give it some help to haul our fleet of trailers. [Anthony] We upgrade the towing capabilities by installing our gooseneck receiver hitch that has minimal drilling and bolts into the factory frame with ease. [Mike] Then give our rear end a lift by adding an onboard air suspension setup. We'll show you a few different air systems that fit your application before filling our bags. [Anthony] Plus upgrade our stopping power with a heavy duty brake kit. So stick around. [ Music ] [Mike] Alright, go ahead. That'll work. Welcome to Music City Trucks. Well here at Powernation we've got a few different types of trailers that we haul around all our project vehicles with. Our latest tow rig, it's not up to par to handle these different types of trailers. [Anthony] One of the things it's lacking is a receiver hitch for these gooseneck trailers you see behind us. We're gonna add a couple more goodies that's gonna make this thing a great tow pig. [Mike] Let's get it in the shop. [ Music ] [ diesel engine rumbling ]
[Anthony] Alright, home sweet home. [Mike] Let's get this on the lift. You're good over here. [Anthony] Let's start ripping into her. Gotta watch these mirrors. We're good. [Mike] That looks pretty good. [Anthony] I'm gonna run over, grab the door, get some tools. [Mike] Sounds good.
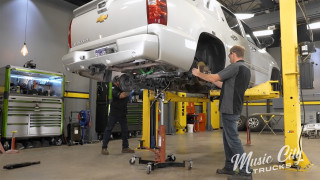
So yeah we just got finished with a Chevrolet. So now for your Ford guys we got our Ford F-250. This is a diesel flavor. Like we were saying, we're gonna put a gooseneck hitch on this thing. So let's show you what we're working with. To maximize the towing capabilities of our Ford back there we're gonna install this gooseneck hitch we got from B-and-W. This thing is a hundred percent American made and it comes with a lifetime warranty. This thing's pretty neat to install because you don't have to take the bed off. That's good for you guys at home. You can put it all from the bottom there. Also the way this thing works here we've got our ball. It drops in. When you need to tow something you take it out and you can have the full landscape of your bed. There's nothing obstructing it. You get different accessories to go in here as well to use. If you want to throw your wife in the back and have the ball and the chain! So enough about that. Now we've got to get the spare tire out, cut the hole in the bed, and get this thing installed. [ Music ] [ metal clanging ] [ Music ] Oh yeah, that'll work. [Anthony] Now that Mike's got our spare tire out I'm gonna go ahead and drill our four inch hole here for our ball receiver. Now Ford makes these trucks real easy cause they've already got a mark here center punched and ready to rock 'n roll since they offer a fifth wheel gooseneck package from the factory. Let's go ahead and get this thing drilled. [ hole saw buzzing ] That looks good! Let's get this thing up in the air and get this bracket on it. [ lift – mechanical humming ] [ Music ]
Safety first. [Mike] Next up we've got to lower our exhaust pipe here to give us a little bit more clearance. [ impact driver vibrating ]
[Anthony] I got you on the inside here. [Mike] I'll grab the brackets. [ impact driver vibrating ]
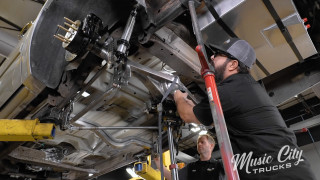
[Anthony] So we got these new brackets for these hangers. It allows us to drop this exhaust down and get it where we want it. Go ahead and get that installed. Go ahead and pull it down a little bit more for me Mike. [ impact driver vibrating ] [Mike] Let's get these bottom ones started before you hammer that second one home. [Anthony] I guess I'm not even close. [ Music ]
[Mike] Something like that. [ Music ] [ impact driver humming ]
[ impact driver humming ]
Flip that around and grab that one there. [ Music ] [Anthony] You can do it! [Mike] The ratcheting wrench doesn't want to ratchet. [Anthony] There it is. [Mike] Okay, onto the next step. [Anthony] Coming up, with the holes in the bed we'll show you how easy it is to install a gooseneck trailer hitch to give your tow pig more versatility when hauling your projects.
[Anthony] Next thing up we've got to take these two connectors out and flip them underneath this bracket. There's just a little push on the top and then you pull it out. Get the Christmas trees out, which like to fight. Flip them right here just like so. Flip your connector and plug it back in. Do the same on this other black that's right over here. It helps squeezing these little Christmas trees when you're trying to get them out. [ Music ] [Mike] Get these plates in here. [ metal clanging ] [Anthony] I am in place there Mike. [Mike] Got that one. [Anthony] Got one more. [Mike] I'll hold these and you get those started. [ Music ] Snug them up so they don't fall off and we'll tighten them later once all the bolts are in place. Snug! Alright let's get the other side. Driver's side! B and W. [Anthony] Not like A and W. [Mike] I was thinking more like the car company. [Anthony] Bavarian Motor Works? [Mike] Really expensive at first and then depreciates in value really quick. [Anthony] A little tighter on this side isn't it? [Mike] Yeah you've got that big harness to deal with. [Anthony] I'm gonna back that bolt out just a skoosh. One side on! [Mike] Now for the crossmembers. [Anthony] Next up we're gonna get our crossmembers in place. There's four of these total with two different ones per side. It's a good idea to label them "A" and "B" before you get them in there so you're not wrestling them in there and they're the wrong ones. You're gonna use your black flange bolts with the Loctite already installed. That way it makes it nice and easy. [ Music ]
Now we're gonna keep everything nice and loose. So that way when we go to final tighten everything it's not locked into place. Now we're gonna install this bracket, which is the exact opposite of the other side, making this the "A" bracket. [ Music ] Two more to go. [ Music ]
Everything's loose. Leave that alone. It's on to the next. Up next we've got our crossmember bracket. Go ahead and slide it up in our carriage bolts here. It's a little tricky. Once that's in we'll put a couple of nuts on it to hold it in place. [Mike] Ah, snuck in here. [ Music ]
Those started. Now I need those big boys. Bolts to line everything up. [ Music ]
[ impact driver vibrating ] [ Music ] Bingo! Now we'll take these back out. [ impact drill vibrating ] [ Music ]
There it goes. Now our big bolts again. [ Music ]
[ impact driver vibrating ]
Good from my point of view. How about yours? [ impact driver vibrating ] [Anthony] Next up, let's get this bracket in place.
[ metal clanging ] [Anthony] There we go. [ Music ]
Now that we got that bracket in here go with these last couple of bolts in there. Now B and W recommends that you use some kind of lifting device to get this thing in here. They even sell one. If you have an extra set of hands you can do it that way too. Couple more washers. [ Music ]
This kit actually went together really easily and it's very well thought out, engineered, and I'm pretty happy with it. So far so good. Get those tightened up and we'll be good to go. [ Music ]
[Mike] Next up is the bolts on the outside. With that hardware on those side brackets there that wraps up all the bolts installed. Now you've just got to go through and tighten everything. Now they have a very specific sequence on how to tighten that thing. You've got to get that center piece in between the frame rails parallel and up flush with the bed. Then you go through and tighten everything in a certain order. [Anthony] After that we're gonna drill a couple of eleven-sixteenths holes for our safety chain and we'll be good to go. [Mike] This thing was pretty easy to install. [Anthony] And it really is a well engineered piece of equipment. As a welder fabricator that really makes me happy cause it makes our job easier. [Mike] Let's get things torqued up and move it on down the road. Up next, when adding more weight to your towing capacity it's a good idea to add some lift to your rear to make sure your loads are level when hauling down the highway. We'll give you some tips on picking the right air suspension for your tow rig.
[ impact driver vibrating ] [Anthony] Hey guys. As you can see, we got our B and W receiver all installed and it went in without a hitch. We also installed our safety U-chain hook points and we got the ball in the truck. Now there's a couple other things we've got to do back here to help level our load. [Mike] The last time we had our truck out pulling one of our project vehicles I noticed how much the back end of the truck was really sagging. So to bring that truck up, make it level, make it more stable to drive when it's loaded we're gonna add a set of air springs to the back. I called up Summit Racing and they sent us these kits from Air Lift company. It's kind of a good, better, best scenario here that I want to show you on these offerings. The first one, this good kit. This air bag offers 5,000 pounds of leveling capability. It's got the brackets, everything you need. Then a better option we have that same size bag but internally there's a jounce bumper to make it a little bit more stable. Then a best option here is a 7,500 pound spring. You can see the difference there between the two. So it's gonna give you a little bit more leveling capability and also a lot beefier bracket setup. Once again they're bolt in. No drilling needed. Then to air up those bags you need a compressor and a management system. So we also have a good, better, best scenario. The first one here, this is our air compressor. You have to mount that on the frame somewhere but then you have to run a gauge inside the cab, wire it up, have an air line also that runs to that to monitor that system pressure. It does a single output to those bags. A better setup is this one here. This is their Wirelessone kit. So this has an easy mount bracket to go on the frame rail and it's more controlled electronically. You have a remote control and an app on your phone that you can manage it. This one has a single output to both bags as well. Their Wirelessair system here, more of a best option that they offer, has that same compressor, same electronic management there that you can have your phone with an app but it also has two outputs to each bag. So you can manage those air bags independently if you had an uneven load right there. So we're gonna go with this setup here for the compressor and then this 7,500 pound bag for our truck. Let's get it installed. [ impact driver vibrating ] We'll start by removing the factory bump stop and the retaining bolts. [ impact driver vibrating ] [ Music ]
Then we'll install the upper frame bracket. [ Music ]
Hey Anthony. [Anthony] What do you got there? [Mike] This is the next bracket to go on. It goes on the back side of the frame rail but it's right here. I know you already torqued those. [Anthony] And they weren't easy. [Mike] We're gonna take them back out. Just the nuts though. [Anthony] I don't think that's gonna be a big deal. Let me grab a ratchet. You good? [ impact driver vibrating ] [ Music ] [ metal clanging ] [ Music ] [Mike] One down. [Anthony] Nice work. You want to grab the torque wrench? [Mike] It wants us to leave it loose at this point. [Anthony] I'm gonna give you the honors on that one. [Mike] Perfect. So we've got all the brackets already installed onto the bags here in the kit. Now I'm just gonna set it on the frame rail here. [Anthony] Four hands seems to be better than two in this circumstance. [Mike] And these bolts specify. Go to the back side of the brake line there, snug that bracket. Then gotta make sure it's hugging that factory U-bolt for the leaf springs there. Looks like that's it. We'll get the next pieces there. [Anthony] In order to get us to sit nice and tight to the leaf spring we're gonna go ahead and install this U-bolt into the uppermost hole. Put a couple of lock nuts with a washer on it and tighten it down. [ impact driver vibrating ]
Now that we got our bag assembly in here. We got our U-bolt through the lower. It's held to the axle. We're gonna go ahead and have Mike jack it up over there and we'll get this in place. [ Music ]
Can you go a little quicker? [Mike] Yes, yes, yes! [Anthony] Getting there! [Mike] I think that's about it right there. Lifting the truck up. [ Music ]
[Anthony] Got one. [ Music ] [Mike] You got any more? [ Music ] [Anthony] Get those tightened up and then we'll be good to go on this side. [ Music ] I'm good over here Mike. [Mike] Let me get this one. [ Music ]
[Anthony] You ready? Alright. [Mike] Beautiful. [ Music ] One to go. [Anthony] Good? [Mike] Yep. One more bracket here on the bottom. Get this on and get the hardware started. Then when we get the other side installed we can put it back on the ground and tighten this up. That'll hold that on that axle. [Anthony] When towing it's a good idea to upgrade your brakes to handle the heat when hauling heavy loads.
[Mike] Welcome back! We got the bags mounted up on the chassis. The next step is this compressor right here. We mounted it right here to the frame rail. Then I've got the wires going up ready to terminate at the fuse box. Anthony what are you doing? [Anthony] Well I'm just routing some old blow tubes back to the bags. That way we can actually fill them with some air. One cool thing about the air lift kit is they send you a couple of T-fittings here along with some air line that's terminated with some Schrader valves on it. What that's gonna allow us to do. In case our compressor ever goes out or anything like that we can run a Schrader valve and we're gonna put it back here behind the fuel door. That's gonna allow us to pump it up with a bicycle pump or a compressor if you got it off another truck. It'll get us going down the road. The only thing I've got left to do over here is get these lines to the other side, get them hooked up, and we'll be good to go. [ Music ] Got the line to the bag. Now there's one thing you want to pay attention to when cutting these plastic air lines and that is you've got to make a straight cut on it. Whether you're using the air line cutters or a razor blade just make sure it's nice and square. We are good to go. One side down, one to go. We're almost there. [Mike] So we got our wires run underneath the hood here from the compressor, power and ground, and they also have a pink wire in this harness too that you can hook up to a switched 12-volt source. So whenever the key is on it's gonna send power to the compressor and wake it up. We're gonna omit that one because this thing has a little bit of cool technology where it's called wake on motion. An algorithm there so whenever the vehicle moves that lets it start up. So we're gonna utilize that technology on this kit right here and see how it works. I've got power going on. There's our ground, and she should be ready to program with our little remote but we've got one more thing we're gonna do on this truck today. Let's get to it. [Anthony] Now that we got our truck upgraded with our new gooseneck hitch along with our air bags we wanted to make one more upgrade and that's our brakes. For that we hit up Powerstop and they sent over their Z-36 truck and tow upgrade kit. That comes with a zinc plated rotor you see here. Now it's drilled and slotted, and that's gonna help with heat dissipation along with moisture control and it's also gonna help with road debris. They also give you a set of their ceramic pads in the kit that's gonna help get this heavy load under control. [ Music ]
[ torque wrench clicking ] Hey Mike, we're all torqued up back here. This thing about ready to rip? [Mike] With it back on the ground let's see if this thing will air up. [ compressor motor humming ] [ Music ]
Yep, looks good. I don't hear anything leaking. [Anthony] You got about 10 pounds? [Mike] Yeah just to fill it up. [Anthony] I think that's a job well done. Can't wait to go pick up some new projects. [Mike] We've still got a lot to do on this project here but that's all for today. Tune in next time on Music City Trucks.
Show Full Transcript
[Mike] Today on Music City Trucks we get our F-250 in the shop and we give it some help to haul our fleet of trailers. [Anthony] We upgrade the towing capabilities by installing our gooseneck receiver hitch that has minimal drilling and bolts into the factory frame with ease. [Mike] Then give our rear end a lift by adding an onboard air suspension setup. We'll show you a few different air systems that fit your application before filling our bags. [Anthony] Plus upgrade our stopping power with a heavy duty brake kit. So stick around. [ Music ] [Mike] Alright, go ahead. That'll work. Welcome to Music City Trucks. Well here at Powernation we've got a few different types of trailers that we haul around all our project vehicles with. Our latest tow rig, it's not up to par to handle these different types of trailers. [Anthony] One of the things it's lacking is a receiver hitch for these gooseneck trailers you see behind us. We're gonna add a couple more goodies that's gonna make this thing a great tow pig. [Mike] Let's get it in the shop. [ Music ] [ diesel engine rumbling ]
[Anthony] Alright, home sweet home. [Mike] Let's get this on the lift. You're good over here. [Anthony] Let's start ripping into her. Gotta watch these mirrors. We're good. [Mike] That looks pretty good. [Anthony] I'm gonna run over, grab the door, get some tools. [Mike] Sounds good.
So yeah we just got finished with a Chevrolet. So now for your Ford guys we got our Ford F-250. This is a diesel flavor. Like we were saying, we're gonna put a gooseneck hitch on this thing. So let's show you what we're working with. To maximize the towing capabilities of our Ford back there we're gonna install this gooseneck hitch we got from B-and-W. This thing is a hundred percent American made and it comes with a lifetime warranty. This thing's pretty neat to install because you don't have to take the bed off. That's good for you guys at home. You can put it all from the bottom there. Also the way this thing works here we've got our ball. It drops in. When you need to tow something you take it out and you can have the full landscape of your bed. There's nothing obstructing it. You get different accessories to go in here as well to use. If you want to throw your wife in the back and have the ball and the chain! So enough about that. Now we've got to get the spare tire out, cut the hole in the bed, and get this thing installed. [ Music ] [ metal clanging ] [ Music ] Oh yeah, that'll work. [Anthony] Now that Mike's got our spare tire out I'm gonna go ahead and drill our four inch hole here for our ball receiver. Now Ford makes these trucks real easy cause they've already got a mark here center punched and ready to rock 'n roll since they offer a fifth wheel gooseneck package from the factory. Let's go ahead and get this thing drilled. [ hole saw buzzing ] That looks good! Let's get this thing up in the air and get this bracket on it. [ lift – mechanical humming ] [ Music ]
Safety first. [Mike] Next up we've got to lower our exhaust pipe here to give us a little bit more clearance. [ impact driver vibrating ]
[Anthony] I got you on the inside here. [Mike] I'll grab the brackets. [ impact driver vibrating ]
[Anthony] So we got these new brackets for these hangers. It allows us to drop this exhaust down and get it where we want it. Go ahead and get that installed. Go ahead and pull it down a little bit more for me Mike. [ impact driver vibrating ] [Mike] Let's get these bottom ones started before you hammer that second one home. [Anthony] I guess I'm not even close. [ Music ]
[Mike] Something like that. [ Music ] [ impact driver humming ]
[ impact driver humming ]
Flip that around and grab that one there. [ Music ] [Anthony] You can do it! [Mike] The ratcheting wrench doesn't want to ratchet. [Anthony] There it is. [Mike] Okay, onto the next step. [Anthony] Coming up, with the holes in the bed we'll show you how easy it is to install a gooseneck trailer hitch to give your tow pig more versatility when hauling your projects.
[Anthony] Next thing up we've got to take these two connectors out and flip them underneath this bracket. There's just a little push on the top and then you pull it out. Get the Christmas trees out, which like to fight. Flip them right here just like so. Flip your connector and plug it back in. Do the same on this other black that's right over here. It helps squeezing these little Christmas trees when you're trying to get them out. [ Music ] [Mike] Get these plates in here. [ metal clanging ] [Anthony] I am in place there Mike. [Mike] Got that one. [Anthony] Got one more. [Mike] I'll hold these and you get those started. [ Music ] Snug them up so they don't fall off and we'll tighten them later once all the bolts are in place. Snug! Alright let's get the other side. Driver's side! B and W. [Anthony] Not like A and W. [Mike] I was thinking more like the car company. [Anthony] Bavarian Motor Works? [Mike] Really expensive at first and then depreciates in value really quick. [Anthony] A little tighter on this side isn't it? [Mike] Yeah you've got that big harness to deal with. [Anthony] I'm gonna back that bolt out just a skoosh. One side on! [Mike] Now for the crossmembers. [Anthony] Next up we're gonna get our crossmembers in place. There's four of these total with two different ones per side. It's a good idea to label them "A" and "B" before you get them in there so you're not wrestling them in there and they're the wrong ones. You're gonna use your black flange bolts with the Loctite already installed. That way it makes it nice and easy. [ Music ]
Now we're gonna keep everything nice and loose. So that way when we go to final tighten everything it's not locked into place. Now we're gonna install this bracket, which is the exact opposite of the other side, making this the "A" bracket. [ Music ] Two more to go. [ Music ]
Everything's loose. Leave that alone. It's on to the next. Up next we've got our crossmember bracket. Go ahead and slide it up in our carriage bolts here. It's a little tricky. Once that's in we'll put a couple of nuts on it to hold it in place. [Mike] Ah, snuck in here. [ Music ]
Those started. Now I need those big boys. Bolts to line everything up. [ Music ]
[ impact driver vibrating ] [ Music ] Bingo! Now we'll take these back out. [ impact drill vibrating ] [ Music ]
There it goes. Now our big bolts again. [ Music ]
[ impact driver vibrating ]
Good from my point of view. How about yours? [ impact driver vibrating ] [Anthony] Next up, let's get this bracket in place.
[ metal clanging ] [Anthony] There we go. [ Music ]
Now that we got that bracket in here go with these last couple of bolts in there. Now B and W recommends that you use some kind of lifting device to get this thing in here. They even sell one. If you have an extra set of hands you can do it that way too. Couple more washers. [ Music ]
This kit actually went together really easily and it's very well thought out, engineered, and I'm pretty happy with it. So far so good. Get those tightened up and we'll be good to go. [ Music ]
[Mike] Next up is the bolts on the outside. With that hardware on those side brackets there that wraps up all the bolts installed. Now you've just got to go through and tighten everything. Now they have a very specific sequence on how to tighten that thing. You've got to get that center piece in between the frame rails parallel and up flush with the bed. Then you go through and tighten everything in a certain order. [Anthony] After that we're gonna drill a couple of eleven-sixteenths holes for our safety chain and we'll be good to go. [Mike] This thing was pretty easy to install. [Anthony] And it really is a well engineered piece of equipment. As a welder fabricator that really makes me happy cause it makes our job easier. [Mike] Let's get things torqued up and move it on down the road. Up next, when adding more weight to your towing capacity it's a good idea to add some lift to your rear to make sure your loads are level when hauling down the highway. We'll give you some tips on picking the right air suspension for your tow rig.
[ impact driver vibrating ] [Anthony] Hey guys. As you can see, we got our B and W receiver all installed and it went in without a hitch. We also installed our safety U-chain hook points and we got the ball in the truck. Now there's a couple other things we've got to do back here to help level our load. [Mike] The last time we had our truck out pulling one of our project vehicles I noticed how much the back end of the truck was really sagging. So to bring that truck up, make it level, make it more stable to drive when it's loaded we're gonna add a set of air springs to the back. I called up Summit Racing and they sent us these kits from Air Lift company. It's kind of a good, better, best scenario here that I want to show you on these offerings. The first one, this good kit. This air bag offers 5,000 pounds of leveling capability. It's got the brackets, everything you need. Then a better option we have that same size bag but internally there's a jounce bumper to make it a little bit more stable. Then a best option here is a 7,500 pound spring. You can see the difference there between the two. So it's gonna give you a little bit more leveling capability and also a lot beefier bracket setup. Once again they're bolt in. No drilling needed. Then to air up those bags you need a compressor and a management system. So we also have a good, better, best scenario. The first one here, this is our air compressor. You have to mount that on the frame somewhere but then you have to run a gauge inside the cab, wire it up, have an air line also that runs to that to monitor that system pressure. It does a single output to those bags. A better setup is this one here. This is their Wirelessone kit. So this has an easy mount bracket to go on the frame rail and it's more controlled electronically. You have a remote control and an app on your phone that you can manage it. This one has a single output to both bags as well. Their Wirelessair system here, more of a best option that they offer, has that same compressor, same electronic management there that you can have your phone with an app but it also has two outputs to each bag. So you can manage those air bags independently if you had an uneven load right there. So we're gonna go with this setup here for the compressor and then this 7,500 pound bag for our truck. Let's get it installed. [ impact driver vibrating ] We'll start by removing the factory bump stop and the retaining bolts. [ impact driver vibrating ] [ Music ]
Then we'll install the upper frame bracket. [ Music ]
Hey Anthony. [Anthony] What do you got there? [Mike] This is the next bracket to go on. It goes on the back side of the frame rail but it's right here. I know you already torqued those. [Anthony] And they weren't easy. [Mike] We're gonna take them back out. Just the nuts though. [Anthony] I don't think that's gonna be a big deal. Let me grab a ratchet. You good? [ impact driver vibrating ] [ Music ] [ metal clanging ] [ Music ] [Mike] One down. [Anthony] Nice work. You want to grab the torque wrench? [Mike] It wants us to leave it loose at this point. [Anthony] I'm gonna give you the honors on that one. [Mike] Perfect. So we've got all the brackets already installed onto the bags here in the kit. Now I'm just gonna set it on the frame rail here. [Anthony] Four hands seems to be better than two in this circumstance. [Mike] And these bolts specify. Go to the back side of the brake line there, snug that bracket. Then gotta make sure it's hugging that factory U-bolt for the leaf springs there. Looks like that's it. We'll get the next pieces there. [Anthony] In order to get us to sit nice and tight to the leaf spring we're gonna go ahead and install this U-bolt into the uppermost hole. Put a couple of lock nuts with a washer on it and tighten it down. [ impact driver vibrating ]
Now that we got our bag assembly in here. We got our U-bolt through the lower. It's held to the axle. We're gonna go ahead and have Mike jack it up over there and we'll get this in place. [ Music ]
Can you go a little quicker? [Mike] Yes, yes, yes! [Anthony] Getting there! [Mike] I think that's about it right there. Lifting the truck up. [ Music ]
[Anthony] Got one. [ Music ] [Mike] You got any more? [ Music ] [Anthony] Get those tightened up and then we'll be good to go on this side. [ Music ] I'm good over here Mike. [Mike] Let me get this one. [ Music ]
[Anthony] You ready? Alright. [Mike] Beautiful. [ Music ] One to go. [Anthony] Good? [Mike] Yep. One more bracket here on the bottom. Get this on and get the hardware started. Then when we get the other side installed we can put it back on the ground and tighten this up. That'll hold that on that axle. [Anthony] When towing it's a good idea to upgrade your brakes to handle the heat when hauling heavy loads.
[Mike] Welcome back! We got the bags mounted up on the chassis. The next step is this compressor right here. We mounted it right here to the frame rail. Then I've got the wires going up ready to terminate at the fuse box. Anthony what are you doing? [Anthony] Well I'm just routing some old blow tubes back to the bags. That way we can actually fill them with some air. One cool thing about the air lift kit is they send you a couple of T-fittings here along with some air line that's terminated with some Schrader valves on it. What that's gonna allow us to do. In case our compressor ever goes out or anything like that we can run a Schrader valve and we're gonna put it back here behind the fuel door. That's gonna allow us to pump it up with a bicycle pump or a compressor if you got it off another truck. It'll get us going down the road. The only thing I've got left to do over here is get these lines to the other side, get them hooked up, and we'll be good to go. [ Music ] Got the line to the bag. Now there's one thing you want to pay attention to when cutting these plastic air lines and that is you've got to make a straight cut on it. Whether you're using the air line cutters or a razor blade just make sure it's nice and square. We are good to go. One side down, one to go. We're almost there. [Mike] So we got our wires run underneath the hood here from the compressor, power and ground, and they also have a pink wire in this harness too that you can hook up to a switched 12-volt source. So whenever the key is on it's gonna send power to the compressor and wake it up. We're gonna omit that one because this thing has a little bit of cool technology where it's called wake on motion. An algorithm there so whenever the vehicle moves that lets it start up. So we're gonna utilize that technology on this kit right here and see how it works. I've got power going on. There's our ground, and she should be ready to program with our little remote but we've got one more thing we're gonna do on this truck today. Let's get to it. [Anthony] Now that we got our truck upgraded with our new gooseneck hitch along with our air bags we wanted to make one more upgrade and that's our brakes. For that we hit up Powerstop and they sent over their Z-36 truck and tow upgrade kit. That comes with a zinc plated rotor you see here. Now it's drilled and slotted, and that's gonna help with heat dissipation along with moisture control and it's also gonna help with road debris. They also give you a set of their ceramic pads in the kit that's gonna help get this heavy load under control. [ Music ]
[ torque wrench clicking ] Hey Mike, we're all torqued up back here. This thing about ready to rip? [Mike] With it back on the ground let's see if this thing will air up. [ compressor motor humming ] [ Music ]
Yep, looks good. I don't hear anything leaking. [Anthony] You got about 10 pounds? [Mike] Yeah just to fill it up. [Anthony] I think that's a job well done. Can't wait to go pick up some new projects. [Mike] We've still got a lot to do on this project here but that's all for today. Tune in next time on Music City Trucks.
Music City Trucks Featured Projects
Music City Trucks Builds

Want more content like this?
Join the PowerNation Email NewsletterParts Used In This Episode

Summit Racing
Air Lift Wireless AIr 2nd Generation On-Board Air Compressor EZ Mount System
B&W Trailer Hitches
Turnoverball Gooseneck Hitch Kit



